Voiding and Reauthorizing a Patient Letter
Users can now void patient letters (including signed documents) when they are created in error—such as being attached to the wrong patient. This feature ensures proper audit logging and compliance without removing the letter from the medical record but excludes it from processes such as EHI Exports, CCDAs, and so on as the VOID status is excluded.
What Does Voiding a Letter Do?
Changes the letter’s status to VOID, preventing it from being viewed by users without appropriate role permissions
Leaves the letter visible in the Letter History tab, but grayed out and inaccessible to unauthorized users
Requires a free-text reason to be entered at the time of voiding
Logs the action and user in the audit trail
Excludes the voided letter from patient data compilations such as EHI Patient Exports, CCDAs and Print Management
Allows reauthorization by approved users, restoring its prior metadata (e.g., signed) and setting to a new status of REAUTH
Access Control – “Void Letter” Role Setting
Access is managed via:
Setup > Roles > Practice - General > Letter Setup > Void Letter Role
| Role Access Level | Can Void Letter? | Can View Voided Letter? |
|---|---|---|
| Off | ❌ | ❌ |
| Read | ❌ | ✅ |
| Update | ❌ | ✅ |
| Write | ✅ | ✅ |
How to VOID a Letter
Recommended steps:
Open the patient chart
Go to Letters > History, then open the letter you want to void
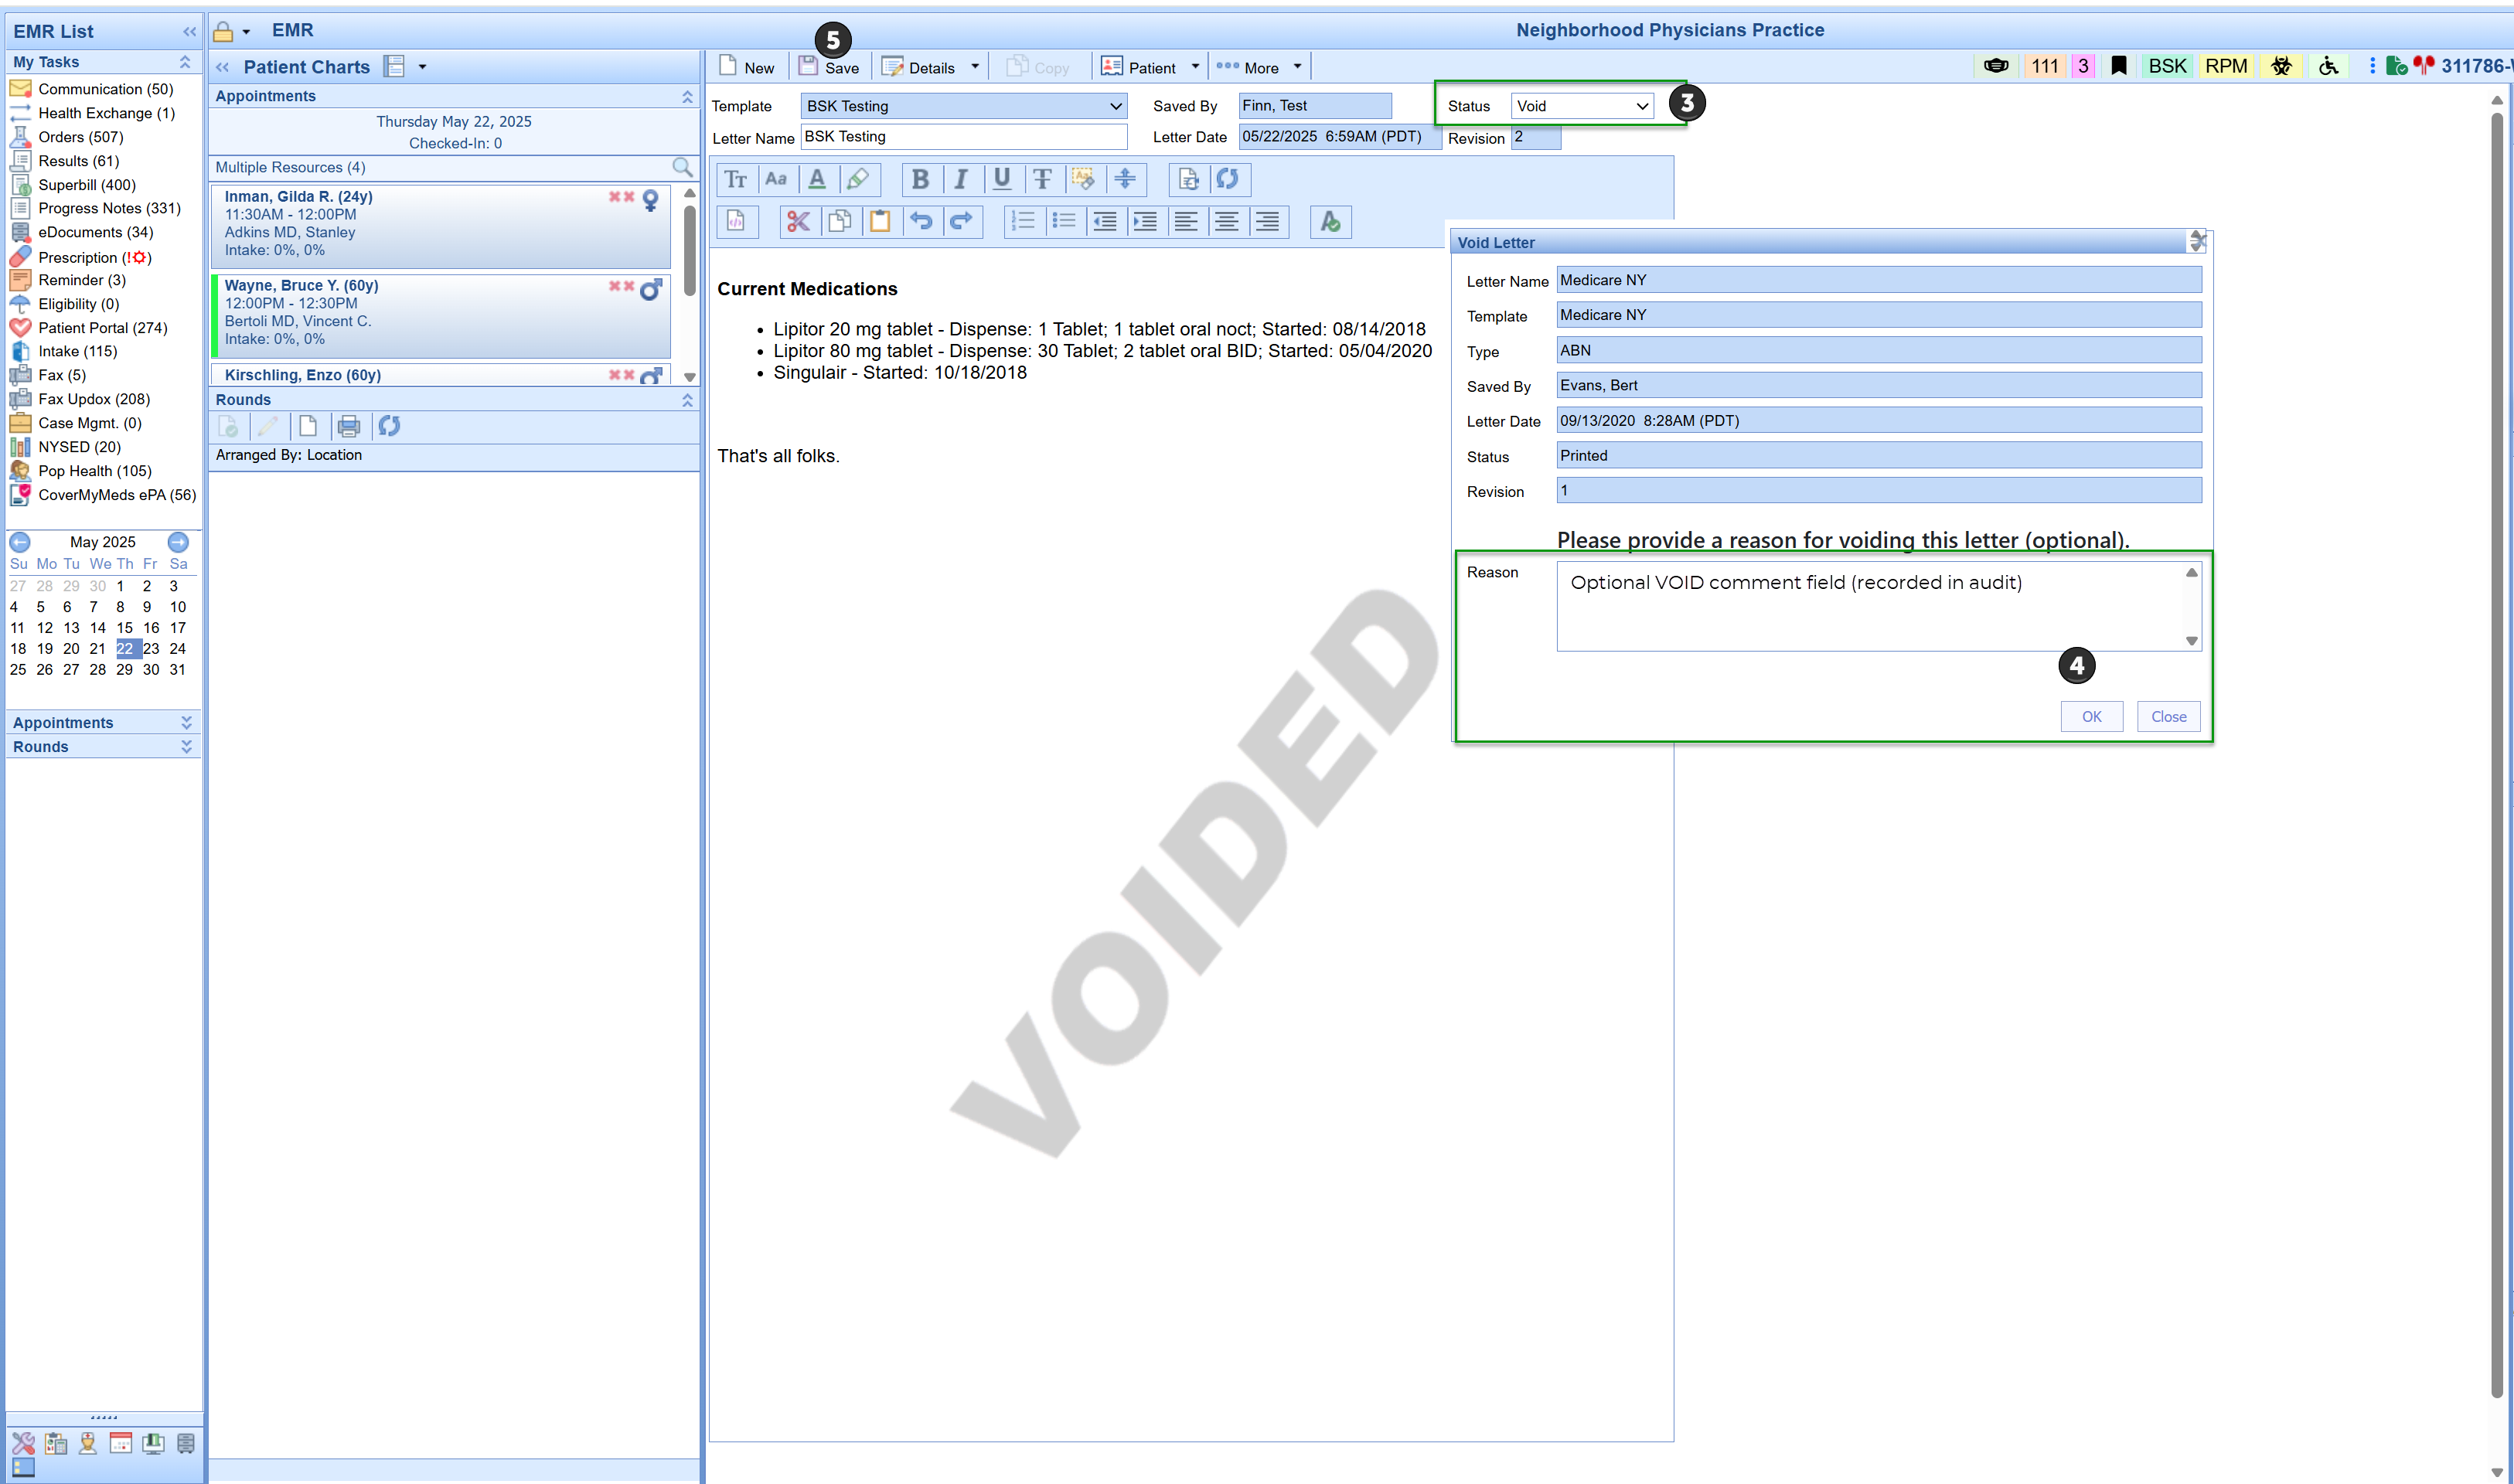
In the top right corner, set the status to VOID
(Optional) Enter a comment explaining the reason (which saves in the audit) and click OK
Click Save

🔔 While you can also right-click a letter in History and select Void, you must still open the letter and manually set the status to VOID and Save for the change to complete. Failing to do so will not apply the void correctly despite the VOIDED watermark display. In such an event, open the letter, set the status, and then save.

How to REAUTHORIZE a Voided Letter
Confirm the letter is currently in VOID status
Open the letter
In the top right corner, change the status to REAUTH
(Optional) Add a comment explaining the re-authorization
Click Save
This restores the original metadata (e.g., signed status) and updates the letter to a new status: Reauth.

Not able to VOID/REAUTHORIZE or see Voided Letters?
If you are unable to void or view voided letters as expected, contact your practice administrator to confirm your role access settings.


