Follow these steps to add a new provider to the Meaningful Use Dashboard:
- Navigate to the Reports Portal.
- Open the MU Dashboard under the Meaningful Use section.

- Click on the New button to add a new provider.

- Setup the provider reporting period using the New Provider screen and Press the OK button to add the provider.
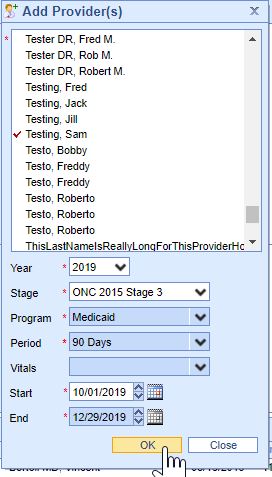
The Stage must be set to ONC 2015 Stage 3 and for 2019 your start date must be greater than or equal to 08/11/2019 as this is when your ONC 2015 Edition CHERT was in place for your practice.
Follow these steps to view a Provider's Promoting Interoperability scores:
- Select a Provider.

- Select a Measure.
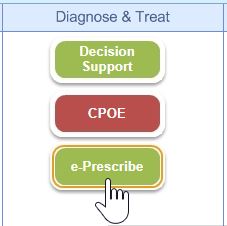
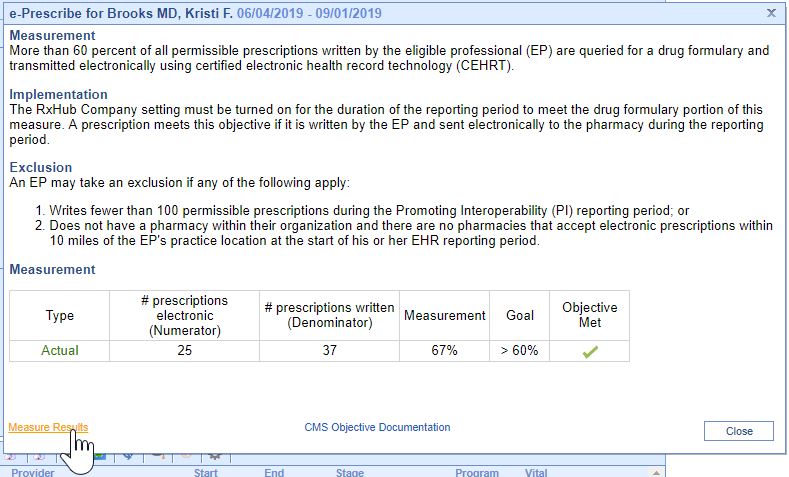
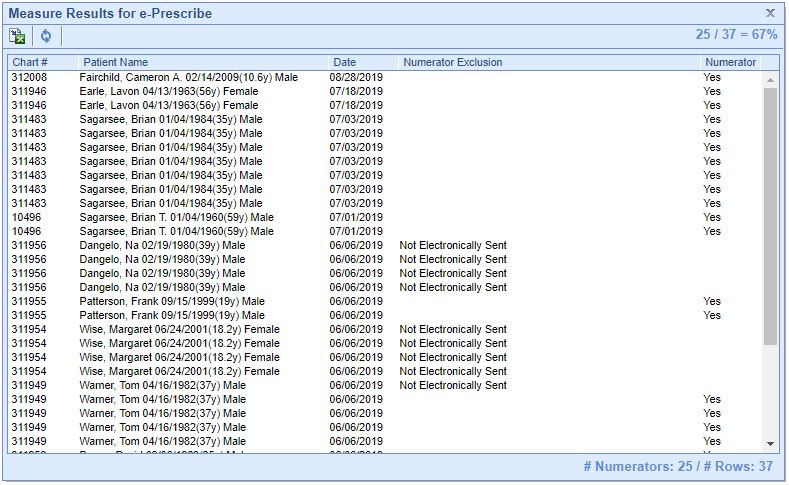
- The current results for the selected measure display. To view patient level measure results, click on the Measure Results link.
- The patient level results display.
To edit a provider's meaningful use reporting period or to remove their reporting period, you must delete them.
Follow these steps to delete a provider from the MU Dashboard:
- Select the Clinician in the list on the bottom.

- Click on the Delete Provider button to delete the provider.

- Confirm you wish to delete the provider by selecting the Yes button.
The 2019 Physician Fee Schedule (PFS) Final Rule established that in 2019, Medicaid EPs who are returning participants must report on a one year eCQM reporting period, and first-time meaningful users must report on a 90-day eCQM reporting period. EPs are required to report on any six eCQMs related to their scope of practice. In addition, Medicaid EPs are required to report on at least one outcome measure. If no outcome measures are relevant to that EP, they must report on at least one high-priority measure. If there are no outcome or high priority measures relevant to an EP’s scope of practice, they must report on any six relevant measures.
iSalus Healthcare has partnered with Dynamic Health IT’s CQMsolutions tool to calculate eCQMs for our Meaningful Use clinicians. The following eCQMs are supported:
- CMS22v9 - Preventive Care and Screening: Screening for High Blood Pressure and Follow-up Documented
- CMS68v10 - Documentation of Current Medications in the Medical Record
- CMS69v9 - Preventive Care and Screening: Body Mass Index (BMI) Screening and Follow-up Plan
- CMS122v9 - Diabetes: Hemoglobin A1c (HbA1c) Poor Control (> 9%)
- CMS127v9 - Preventive Care and Screening: Pneumococcal Vaccination Status for Older Adults
- CMS138v9 - Preventive Care and Screening: Tobacco Use Screening and Cessation Intervention
- CMS147v10 - Preventive Care and Screening: Influenza Immunization
- CMS156v9 - Use of High-Risk Medications in the Elderly
- CMS165v9 - Controlling High Blood Pressure
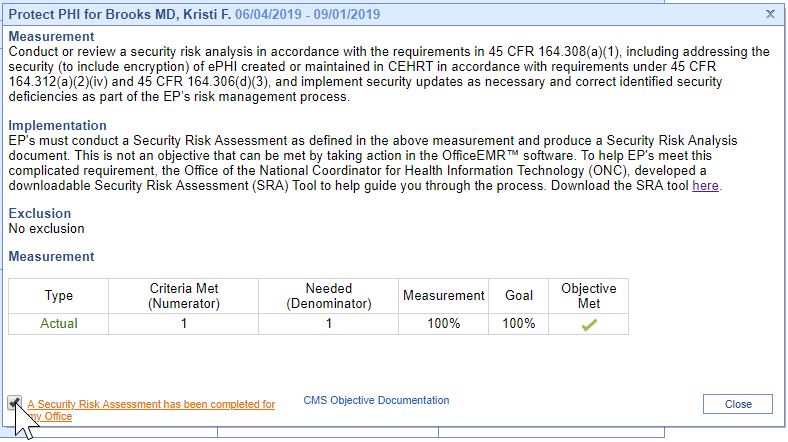
Eligible Provider’s must attest YES to conducting or reviewing a security risk analysis and implementing security updates as necessary and correcting identified security deficiencies.
- Analysis must be conducted when 2015 Edition CEHRT is implemented and during the reporting period year (August 11, 2019 – December 31, 2019 for iSalus' Practices).
- The Office of the National Coordinator for Health Information Technology (ONC) has developed a downloadable Security Risk Assessment (SRA) tool to help guide practices through the process. Access the SRA tool here.
- Select the A Security Risk Assessment has been completed for my Office checkbox upon completion.
This is measure 1 of the 2-part Clinical Decision Support objective. EPs must attest YES to implementing five CDS interventions related to four or more CQMs at a relevant point in patient care for the entire EHR reporting period.
To setup and manage Clinical Decision Support Rules:
- Click on the Reports portal.

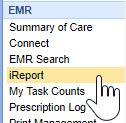
- Select iReport under the EMR section.
- Add the appropriate patient criteria to the report.
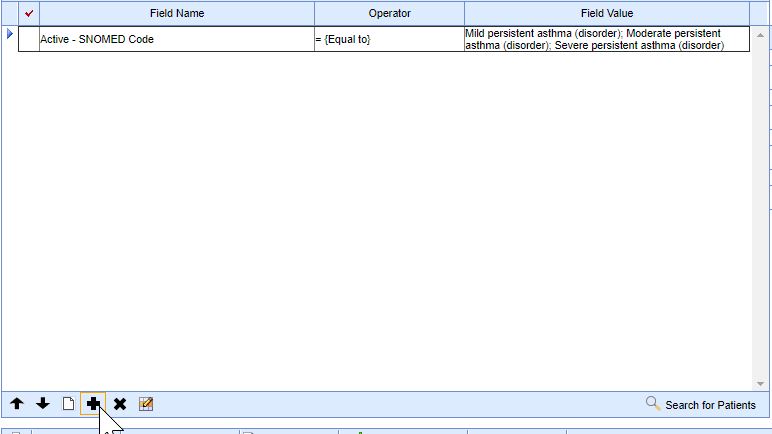
- Press the Save button.

- Select the Decision Support Report Type. Fill in the appropriate information about the decision support alert, ensuring the Enabled checkbox is selected.
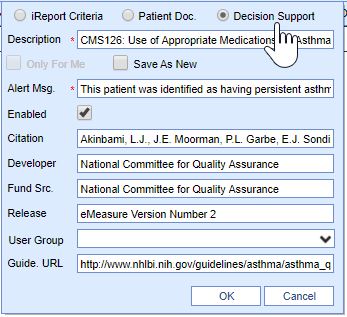
- Press the OK button to save the CDS intervention.

- Press the New button to create a new decision support rule.

This is measure 2 of the 2-part Clinical Decision Support objective. EPs must attest YE to enabling and implementing the functionality for drug-drug and drug-allergy interaction checks for the entire EHR reporting period.
To enable drug intervention alerts:
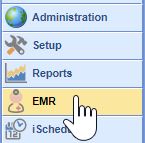
- An Admin User should navigate to the EMR Portal.
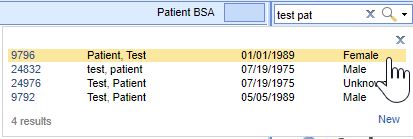
- Open a Patient.
- Click on the Medications/Prescriptions chart tab.
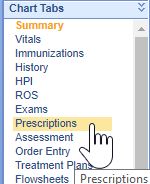
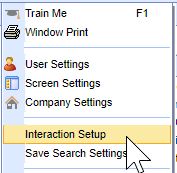
- Right-click on the white area next to the Rx Pad and select Interaction Setup.
- Select the locations to display the interactions on and the Drug Interactions to display in the Drug Interaction Settings screen.
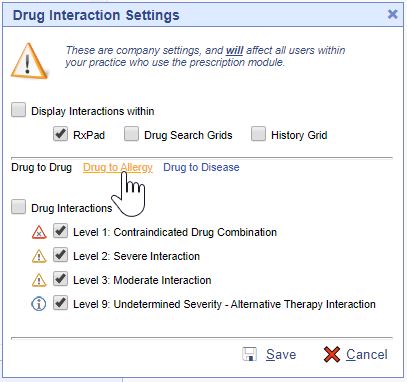
- Press the Save button to save your changes.

These settings must be turned on for the duration of the MU Promoting Interoperability Reporting Period.
Measure Exclusion: Any EP who writes fewer than 100 medication orders during the EHR reporting period.
- Use CPOE for medication, laboratory, and diagnostic imaging orders directly entered by any licensed healthcare professional, credentialed medical assistant, or a medical staff member credentialed to and performing the equivalent duties of a credentialed medical assistant, who can enter orders into the medical record per state, local, and professional guidelines.
- An EP must satisfy all three measures for this objective through a combination of meeting the thresholds and exclusions.
Measure 1 CPOE Medication:
- More than 60 percent of medication orders created by the EP during the EHR reporting period are recorded using computerized provider order entry.
- Measure 1 Exclusion: Any EP who writes fewer than 100 medication orders during the EHR reporting period.
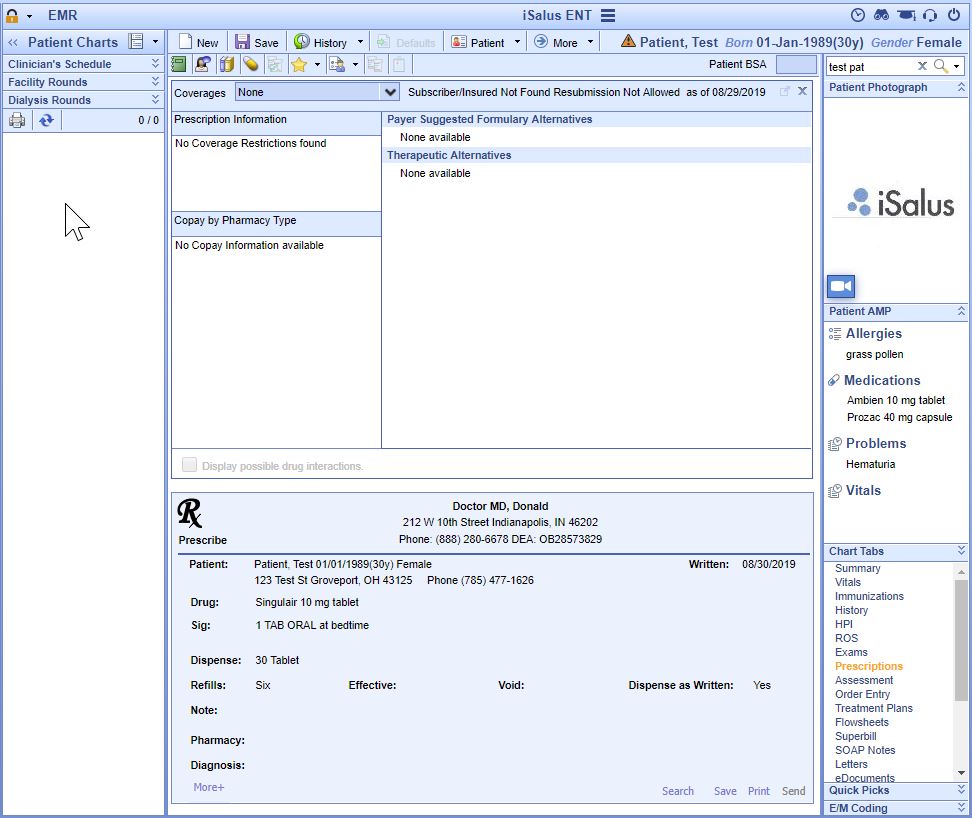
- EPs meet this measure by creating medication orders using the Prescriptions/Medications chart tab within the EMR during the reporting period.
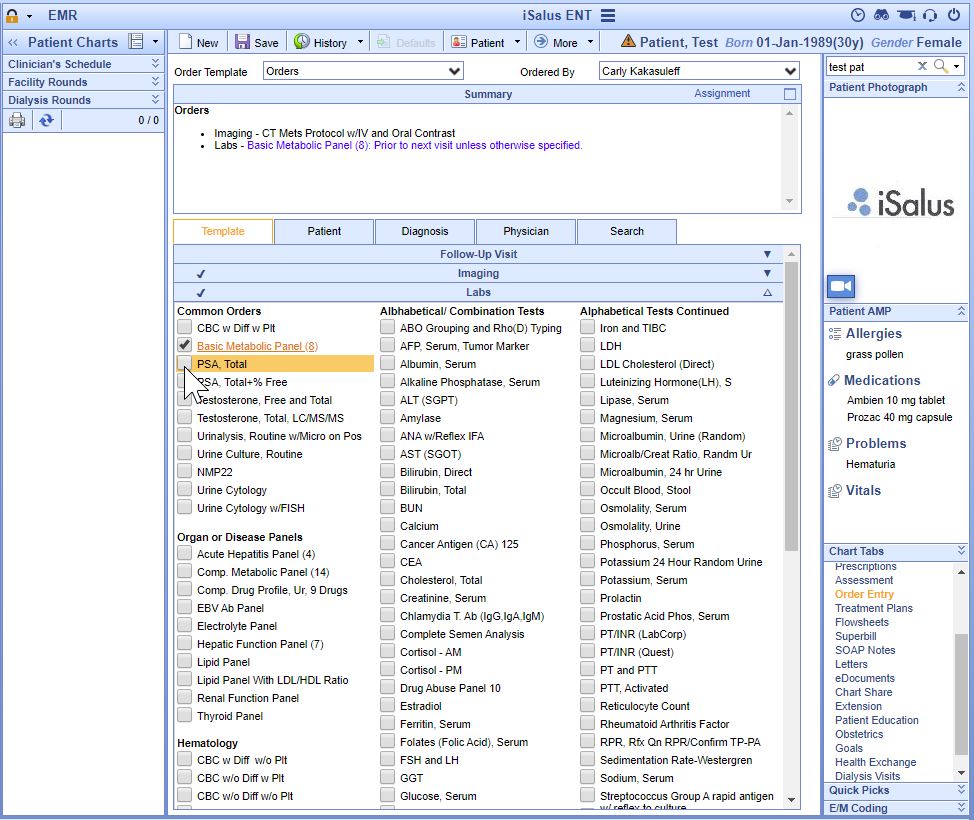
Measure 2 CPOE Laboratory:
- More than 60 percent of laboratory orders created by the EP during the EHR reporting period are recorded using computerized provider order entry.
- Measure 2 Exclusion: Any EP who writes fewer than 100 laboratory orders during the EHR reporting period.
- EPs meet this measure by creating laboratory type orders using the Order Entry chart tab within the EMR during the reporting period.
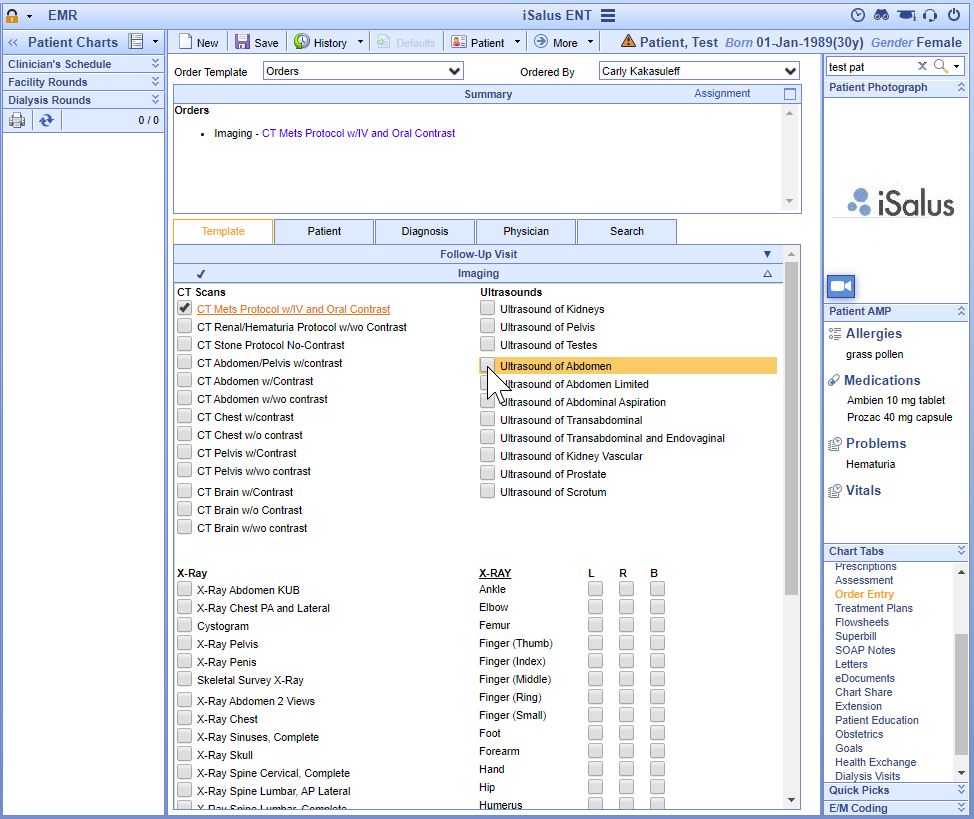
Measure 3 CPOE Diagnostic Imaging:
- More than 60 percent of diagnostic imaging orders created by the EP during the EHR reporting period are recorded using computerized provider order entry.
- Measure 3 Exclusion: Any EP who writes fewer than 100 diagnostic imaging orders during the EHR reporting period.
- EPs meet this measure by creating radiology type orders using the Order Entry chart tab within the EMR during the reporting period.
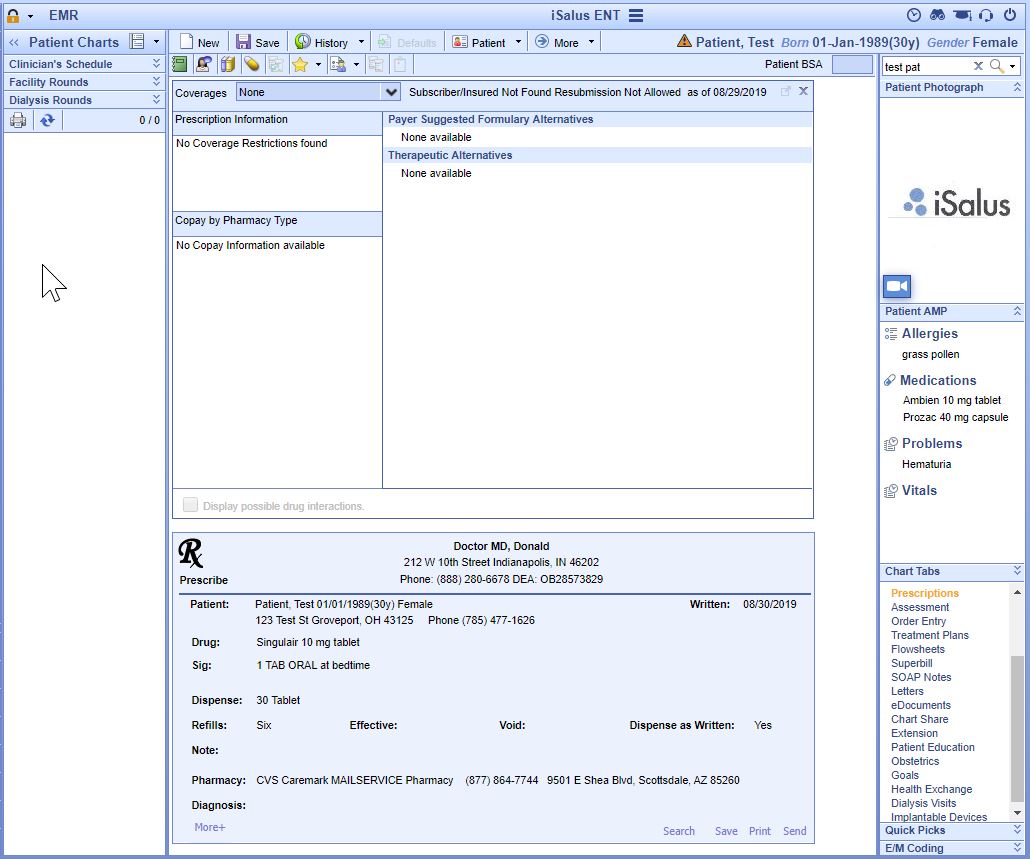
- More than 60 percent of all permissible prescriptions written by the eligible professional (EP) are queried for a drug formulary and transmitted electronically using certified electronic health record technology (CEHRT).
- The practice must have the Company Setting Use RX HUB on for the duration of the reporting period.
- All printed/electronic prescriptions are in the denominator for the clinician.
- Electronic prescriptions written by the clinician make up the numerator, including Electronic Prescriptions for Controlled Substances.
- To register clinicians to electronically prescribe controlled prescriptions, clinicians must complete an Identity Proofing process and obtain a USB token from our partner, IdenTrust. Clinicians can obtain this IGC Basic Assurance Unaffiliated Hardware – EPCS Prescribing token here. Clinicians should then install their certificate using the steps provided from IdenTrust with the token on all computers the clinician plans to prescribe from. Once the certificate has been installed on the computers, please contact iSalus Support to help finalize the EPCS setup.
- EPs meet this measure by creating medication orders that are sent electronically using the Prescriptions/Medications chart tab within the EMR during the reporting period.
This is measure 1 of the 3-part Health Information Exchange Objective, EPs must meet all three measures to satisfy the Meaningful Use Stage 3 Health Exchange Objective.
- For more than 50 percent of transitions of care and referrals, the EP that transitions or refers their patient to another setting of care or provider of care: (1) Creates a summary of care record using CEHRT; and (2) Electronically exchanges the summary of care record.
- An EP may take an exclusion if either or both of the following apply:
- He or she transfers a patient to another setting or refers a patient to another provider fewer than 100 times during the EHR reporting period.
- He or she conducts 50 percent or more of his or her patient encounters in a county that does not have 50 percent or more of its housing units with 4Mbps broadband availability according to the latest information available from the Federal Communications Commission (FCC) on the first day of the EHR reporting period.
- The denominator for this measure is made up of Referral Type Orders placed for the eligible clinician during the reporting period.
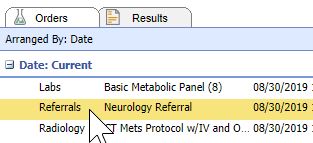
- The numerator is made up of the patient orders from the denominator where a CCDA Referral Note was sent using DIRECT email to the physician receiving the referral.
To send a referral note using DIRECT follow these steps:
- Open Task Communication.

- Click on the New menu.

- Select DIRECT Message.

- Select the user to send the message to, enter a subject and message.
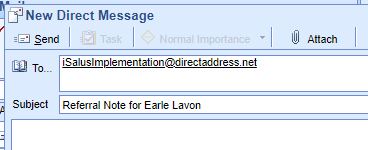
- Click on the Attach button.

- Search for the Patient.

- Select the Transition of Care option, set the Requested Date to the Referral Order Date, and enter a Reason for the Referral.
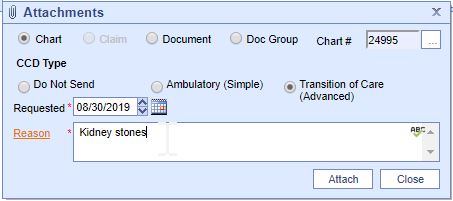
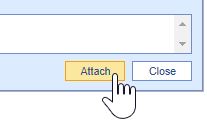
- Press the Attach button.
- Press the Send button.
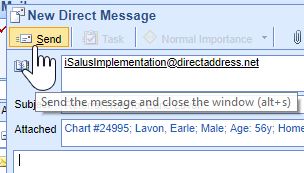
DIRECT emails are managed under the Setup Portal > Contacts.
Beginning in 2019, receipt of DIRECT messages by the receiving party must be confirmed in order for the message to count towards the numerator.
To check receipt of a DIRECT message, follow these steps:
- Open My Task Communication.

- Click on the Sent Items queue.
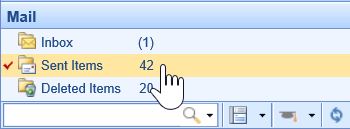
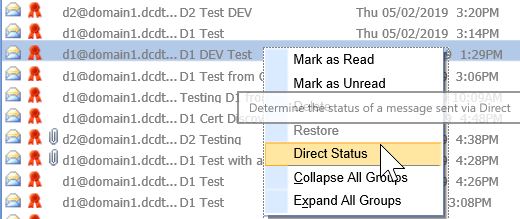
- Find your DIRECT message in the Sent Items Queue. Right-click over the message and select DIRECT Status.
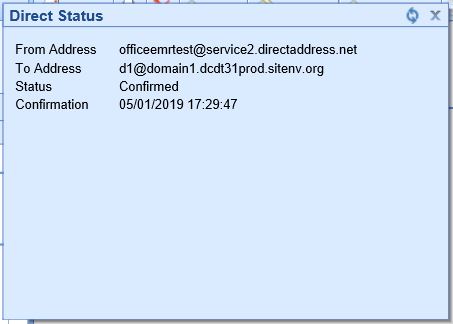
- The status must be either Accepted or Confirmed to count towards the numerator of the Referral Loops - Send Health Information MIPS measure.
This is measure 2 of the 3-part Health Information Exchange Objective, EPs must meet all three measures to satisfy the Meaningful Use Stage 3 Health Exchange Objective.
- For more than 40 percent of transitions or referrals received and patient encounters in which the EP has never before encountered the patient, he/she incorporates into the patient’s EHR an electronic summary of care document.
- An EP may take an exclusion if either or both of the following apply:
- The total transitions or referrals received and patient encounters in which he or she has never before encountered the patient, is fewer than 100 during the EHR reporting period.
- He or she conducts 50 percent or more of his or her patient encounters in a county that does not have 50 percent or more of its housing units with 4Mbps broadband availability according to the latest information available from the FCC on the first day of the EHR reporting period.
Option 1: Import and Attach CCDA Received from External Sources
- Click on the Reports portal.

- Click on the Summary of Care option under the EHR section.

- Click on the Import button.
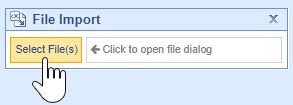
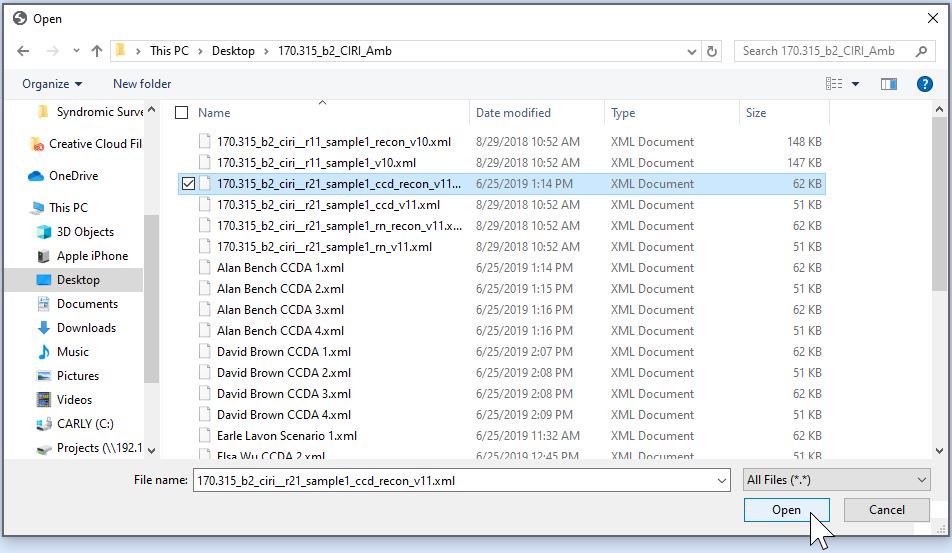
- Navigate to the location of the Summary of Care XML file on your computer, select it and press the Open button.
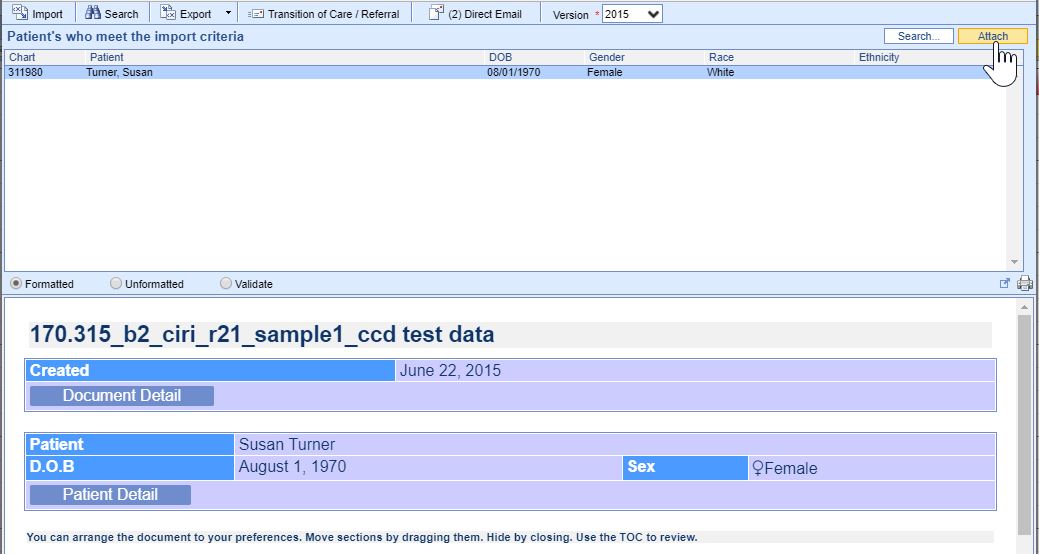
- Patients whose demographic data match the data within the CCDA and the imported Summary of Care and will display. If the correct patient does not display, click on the Search button to either search for or create a new patient. Click on the correct patient’s name and then on the Attach button to incorporate the summary into the patient’s chart.
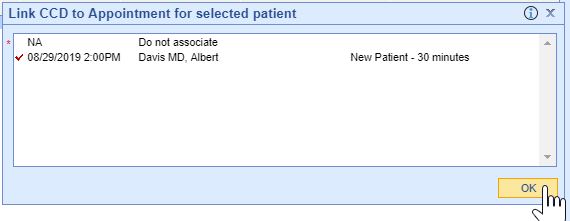
- Summaries must be associated with the patient's new patient encounter to count towards the measure, select the appropriate patient appointment to link the referral summary to, then press the OK button.
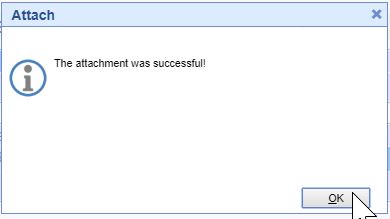
- If the incorporation is successful, you will receive an alert the attachment was successful.
- The summary is now ready for clinical reconciliation. Incorporated summaries will display in the EHR on the Timeline Summary Screen under the Health Exchange section.
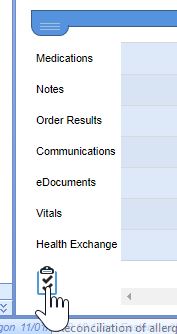
- Click on the Health Exchange Clinical Marker to view the summary.

Option 2: Receive and Incorporate CCDA Received via DIRECT Message
- Open My Task Communication.

- Incoming DIRECT messages display in the user’s Inbox, click on the message to open it.
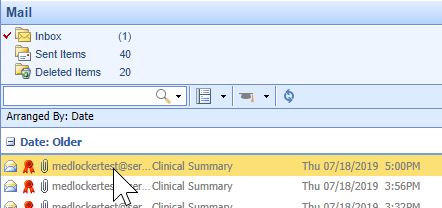
- CCDA documents will display as an XML attachment. Click on the .xml attachment to view the summary.
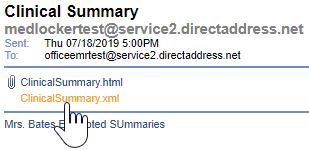
- Patient’s whose demographic data meet the data within the CCDA display at the top. If the correct patient does not display, click on the Search button to either search for or create a new patient. Click on the correct patient’s name and then on the Attach button to incorporate the summary into the patient’s chart.

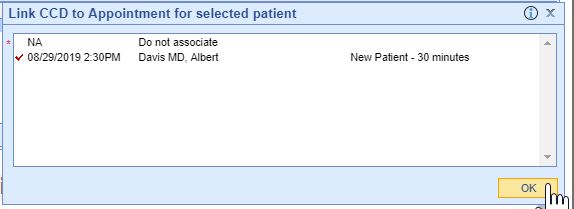
- Summaries need associated with a patient encounter to count towards the EP’s MU measure, select the appropriate patient appointment to link the referral summary to, then press the OK button.
- If the incorporation is successful, you will receive an alert the attachment was successful.

- Incorporated summaries will display in the EHR on the Timeline Summary Screen under the Health Exchange section.
This is measure 3 of the 3-part Health Information Exchange Objective, EPs must meet all three measures to satisfy the Meaningful Use Stage 3 Health Exchange Objective.
- For more than 80 percent of transitions or referrals received and patient encounters in which the EP has never before encountered the patient, he/she performs a clinical information reconciliation. The EP must implement clinical information reconciliation for the following three clinical information sets:
- Medication. Review of the patient’s medication, including the name, dosage, frequency, and route of each medication.
- Medication allergy. Review of the patient’s known medication allergies.
- Current Problem list. Review of the patient’s current and active diagnoses.
- An EP may take an exclusion if the total transitions or referrals received and patient encounters in which he or she has never before encountered the patient, is fewer than 100 during the EHR reporting period.
- See Clinical Reconciliation for instructions on meeting this measure.
This is measure 1 of the 2-part Provide Electronic Access to Health Information Objective, EPs must meet both measures to satisfy the Meaningful Use Stage 3 Objective.
- For more than 80 percent of all unique patients seen by the EP:
- The patient (or the patient-authorized representative) is provided timely access to view online, download, and transmit his or her health information; and
- The provider ensures the patient’s health information is available for the patient (or patient-authorized representative) to access using any application of their choice that is configured to meet the technical specifications of the Application Programming Interface (API) in the provider’s certified electronic health record technology (CEHRT).
Option 1 - Connect Patient with a MyMedicalLocker Account
- From the iScheduler, open the patient or select the Patient's Appointment on the schedule.

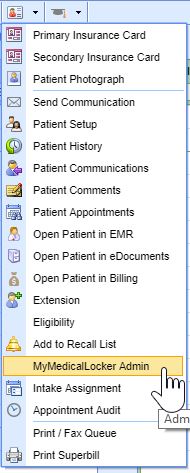
- Click on the Patient Index Card Menu and select the MyMedicalLocker Admin option.
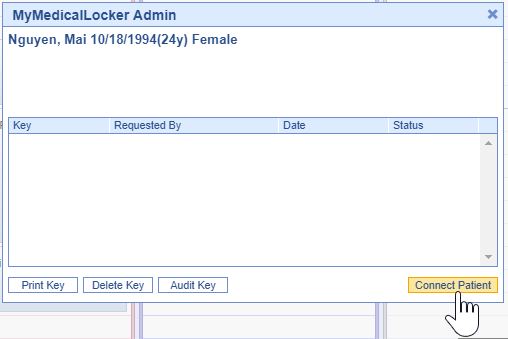
- Click on the Connect Patient button.
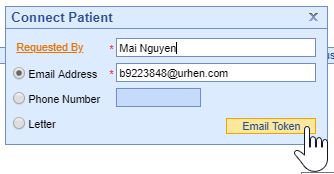
- Enter the Requested by (the patient or a patient authorized representative's name); either their Email Address or Phone Number and press the Email Token button. The patient will be emailed/texted a Token.
- Ask the patient/rep for the token that was emailed or texted to them and enter that in the Connect Patient screen.
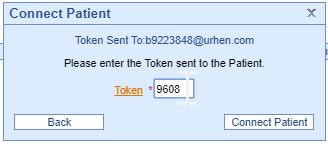
- Press the Connect Patient button.
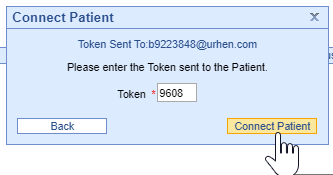
The patient is now setup with a MyMedicalLocker patient portal account that’s connected to your practice. The patient can now login to www.mymedicallocker.com using his/her email/phone number and the token that was sent to them as his/her temporary password.
Option 2: Print a Welcome to MyMedicalLocker Letter at Patient Check-out
This must be done within 48 hours from the patient’s appointment, and this must occur for the first visit and all subsequent visits if the patient is not connected with an account.
- In the iScheduler, right-click over the patient’s appointment and change the appointment status to Checked-Out.
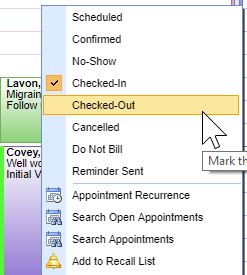
- Click on the Print Queue tab within the Quick Pay screen. If the patient does not already have a MyMedicalLocker connection, a MyMedicalLocker Welcome Letter will display in the print queue.

- Press the Print button and provide the MyMedicalLocker Welcome Letter to the patient.

This is measure 2 of the 2-part Provide Electronic Access to Health Information Objective, EPs must meet both measures to satisfy the Meaningful Use Stage 3 Objective.
- The EP must use clinically relevant information from CEHRT to identify patient-specific educational resources and provide electronic access to those materials to more than 35 percent of unique patients seen by the EP during the EHR reporting period.
To provide patient specific education materials follow these steps:
- Click on the Patient's Appointment in the EMR.
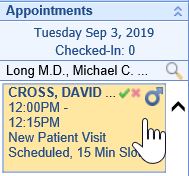
- Click on the Patient Education chart tab.
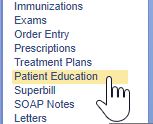
- Patient-specific education materials will display in the lower section. Select the checkbox next to any education you wish to give the patient.

- Use the search field to search for and add new patient education items.

- Press the Save button.

The patient education materials have now been sent electronically to the patient's MyMedicalLocker account. If the patient has not yet connected his/her MML account, the selected materials will be available once the connection is completed.
This is measure 1 of the 3-part Patient Engagement Objective, EPs must meet two of the three measures to satisfy the Meaningful Use Stage 3 Objective.
- More than 5 percent of all unique patients (or their authorized representatives) seen by the eligible professional (EP) actively engage with the EHR made accessible by the EP and either
- View, download, or transmit to a third party their health information; or
- Access their health information through the use of an Application Programming Interface (API) that can be used by applications chosen by the patient and configured to the API in the EP’s CEHRT; or
- A combination of (1) and (2)
Patients can follow these steps to view, download or transmit their electronic health information:
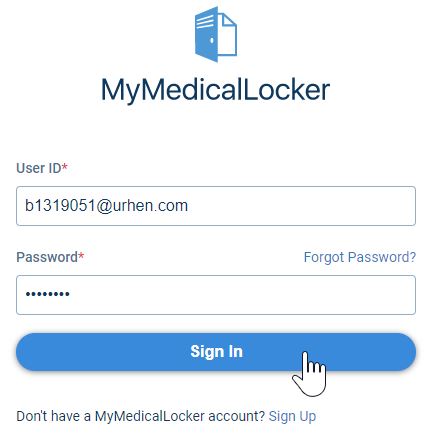
- Login to www.MyMedicalLocker.com.
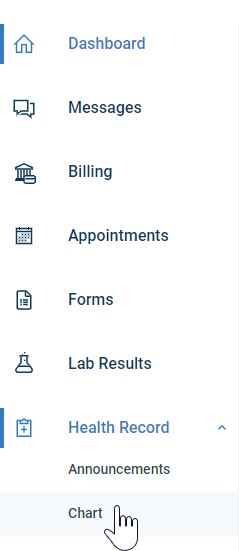
- Click on the Health Record menu and then select Chart.
- Click on a Clinical Summary.

- Click on the Download button to download the summary.

- Click on the Email button to transmit the summary electronically.

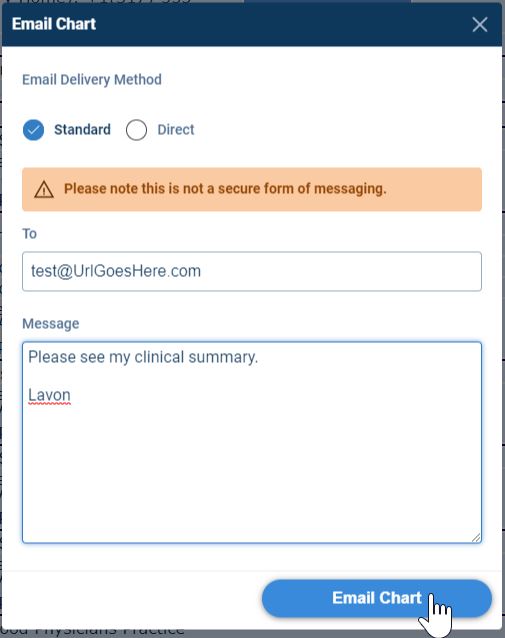
- Enter the email address, a message and press the Email Chart button to transmit the patient's summary electronically.
Patients can follow these steps to access their electronic health information through the use of an Application Programming Interface (API):
- Login to www.MyMedicalLocker.com.

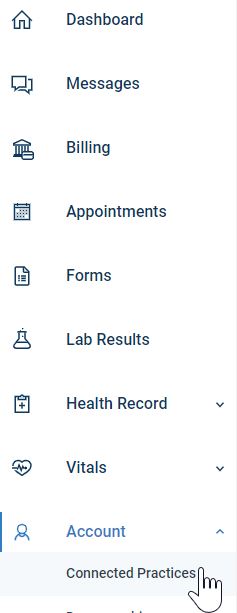
- Click on the Account menu option and select Connected Practices.
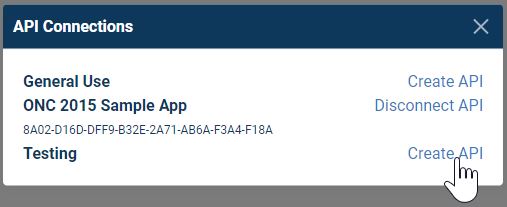
- Click on API Connections.

- A list of Apps connected to iSalus Healthcare displays. Click on Create API next to the App the patient wishes to use.
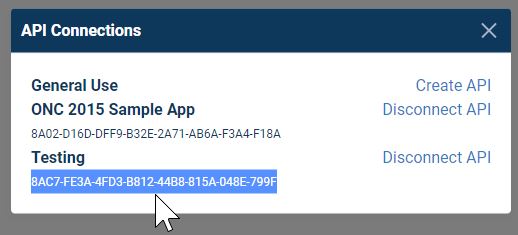
- An API key displays. The user will input this key into the App to obtain access to his/her protected health data.
This is measure 2 of the 3-part Patient Engagement Objective, EPs must meet two of the three measures to satisfy the Meaningful Use Stage 3 Objective.
- For more than 5 percent of all unique patients seen by the EP during the EHR reporting period, a secure message was sent using the electronic messaging function of CEHRT to the patient (or the patient-authorized representative), or in response to a secure message sent by the patient or their authorized representative.
Option 1 - Provider Initiates a Secure Message to the Patient
- Click on the EMR Portal.

- Search for and select the Patient's Chart.

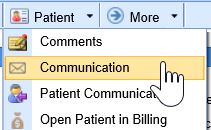
- Click on the Patient Index Card Menu.

- Select Communication.
- Click the To... button.
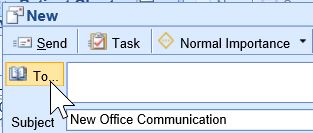
- Select the Patient/Rep to send the message to.
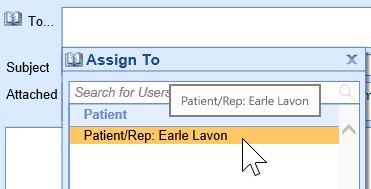
- Press the OK button.

- Enter the Subject and Message.

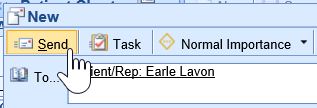
- Press the Send button.
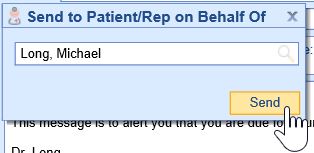
- Select the Provider the message is from and press the Send button.
Option 2 - Provider Responds to a Secure Message from the Patient
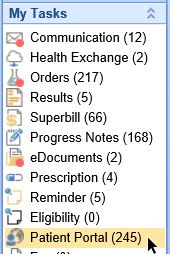
- Click on My Tasks Patient Portal.
- Select the Pending Review queue.

- Open the message.

- Review the message.
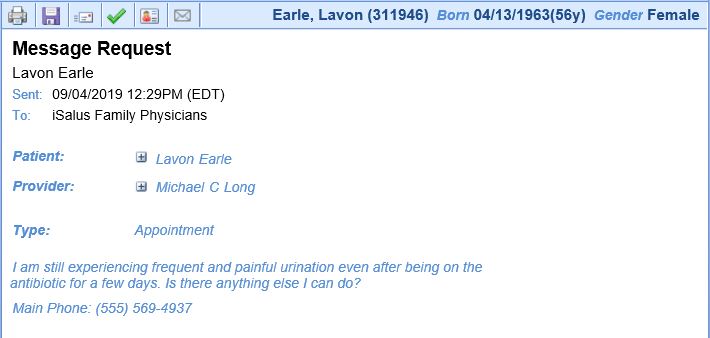
- Type a response to the patient.

- Press the Send button to respond.

- The eligible professional (EP) is in active engagement with a public health agency (PHA) or clinical data registry (CDR) to submit electronic public health data in a meaningful way using certified electronic health record technology (CEHRT), except where prohibited, and in accordance with applicable law and practice.
- An EP must satisfy two measures for this objective. If the EP cannot satisfy at least two measures, they may take exclusions from all measures they cannot meet.
The following public health and clinical data exchange options exist:
- The MIPS eligible clinician is in active engagement with a public health agency to submit immunization data and receive immunization forecasts and histories from the public health immunization registry/immunization information system (IIS). See Immunization Reporting
- The MIPS eligible clinician is in active engagement with a public health agency to submit syndromic surveillance data from a non-urgent care setting. See Syndromic Surveillance Reporting
- The MIPS eligible clinician is in active engagement to submit data to a clinical data registry.
- The MIPS eligible clinician is in active engagement with a public health agency to electronically submit case reporting of reportable conditions.
- The MIPS eligible clinician is in active engagement with a public health agency to submit data to public health registries.


