Practices have 2 choices for reporting immunizations to Immunization Information Systems (IIS) - via interface or via export and upload.
Option 1: Report Immunizations via Interface
iSalus Healthcare currently supports immunization messages in the HL7 v2.5.1 and V2.3.1 message format and via SOAP based web services according to the CDC 1.0 WSDL. Learn more about connecting to a State Immunization Registry.
Once your practice is setup and the EHR is connected with a direct interface to your State Immunization Registry, follow these steps to report your practice's immunizations electronically via interface:
- Click on the Reports portal.

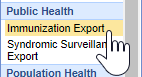
- Click on Immunization Export under the Public Health section.
- Select the Historical check-box to include patient-reported/historical immunizations.

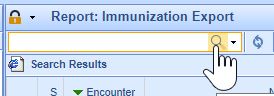
- Click on the Magnifying Glass icon to search for new/updated immunization records not yet sent to the IIS.
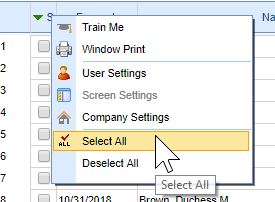
- The patient records will appear in the search results. Select the records you wish to send or right-click on the S column header and click on Select All to select all of the immunization records.
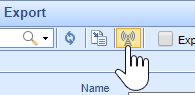
- Press the Send button to submit the immunization records to the IIS.


Select the Exported check-box prior to running your search to include previously exported immunization records (helpful for testing).

Click the Search menu > Advanced Search to perform a more specific, advanced search for Immunization records.

Option 2: Report Immunizations via Export and Upload
If your practice is not connected with your State Immunization Registry via direct EHR interface, follow these steps to extract your Immunization HL7 files to upload to an external website or directory on your computer:
- Click on the Reports portal.
- Click on Immunization Export under the Public Health section.
- Select the Historical check-box to include patient-reported/historical immunizations.
- Click on the Magnifying Glass icon to search for new/updated immunization records not yet exported.
- The patient records will appear in the search results. Select the records you wish to send or right-click on the S column header and click on Select All to select all of the immunization records.
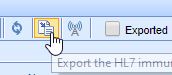
- Click on the Export button.
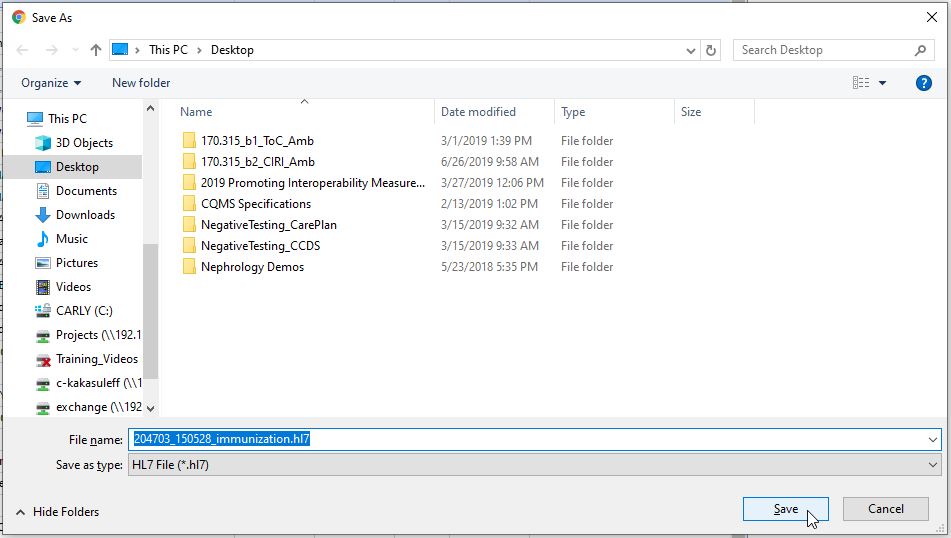
- Select where to save the immunization file, rename the file if desired and press the Save button.


Select the Exported check-box prior to running your search to include previously exported immunization records (helpful for testing).
Click the Search menu > Advanced Search to perform a more specific, advanced search for Immunization records.
