
The Deposit Claim Details screen can be accessed by opening any row from the Deposit Details screen or the Posting screen. This screen can be used to review claim specific payment information, fix issues, as well as make changes to the posting information for the claim.
Fields
Claim Details
The Claim Details section provides the user with basic information about the posting:
- PCN: The unique claim number returned on the remit.
- Claim: The unique claim number in the iSalus system. Clicking the Claim id will open the Edit Claim screen.
- The paper icon allows you to quickly view or create claim comments.
- Payer: The payer on the claim that originated this payment.
- Patient: The patient relevant to the current posting. Clicking the patient id or name will open the Patient Setup screen for the patient.
- The paper icon allows you to quickly view or create claim comments.
- The alert icon, if shown, allows you to see active alerts for this patient.
- Deposit ID: The deposit ID related to this posting. The deposit type is shown next to the ID, and the posting status is shown in parentheses. Clicking the Deposit ID will open the deposit in a new window, in case you need to review information about the deposit to make a determination on resolving claim or procedure errors.
- Claim Billing: Denotes whether the claim was sent Paper or Electronic.
- Claim Level: Once posted, this will reflect the appropriate claim level based on the rules triggered in the automated posting process.
- Claim Status: Once posted, this will reflect the appropriate claim status based on the rules triggered in the automated posting process.
- Modifying the claim status will update the Claim Billing and Claim Level accordingly.
- Sub-Status: This is an optional field -- if desired, a user can select a resulting sub-status that the claim will be set to when posted.
- Remit Status: Auto-populated if an ERA, this remit status will need to be manually selected if an EOB. This will help the rules engine know how to process the posting.
Underneath the Claim Details box, the user will typically have access to additional options for information/action:
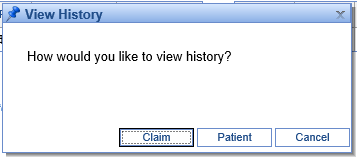
- View History: This will provide an option to view either the Claim or Patient history.
- View ERA Details: Only available on ERA’s, this will show additional information that may not be displayed but was transmitted in the ANSI file.
- Open Human Readable ERA: Only available on ERA's, this will show the ERA in a human readable format for the claim currently open.
- Claim Posting: This will alert the user if the claim is expected to be pay the entire balance or if it may overpay and result in a credit balance.

Underneath the Claim Details table on the right, the amounts already posted from this claim will be shown in this format:

This will include amounts applied from claim errors that have been resolved, as well as what has already been posted from the screen shown (for instance, if this deposit claim has already been posted, it will be the entire amount of the posting). The balance will reflect the current balance of the claim, taking into account any additional patient or insurance payments made against the claim. Here's an example of what this may look like for a posted deposit claim.

Claim Errors

If you are coming to this window from the Posting screen after the Deposit has been sent through the automated posting process, you'll likely want to address any Claim and Procedure errors that arose (you will need to resolve Deposit Errors on the Deposits screen). To do this, you will click the “Resolve” button next to any errors you see on the Deposit Claim Details window.
At that point, you can follow the instructions on the Claim Error Resolution window to resolve the error:

If you would like additional information about resolving a particular error, please see Resolving Errors.
Claim Procedures
You will use the Procedures section to post payments to individual procedure lines for a manual EOB, or to review claims as they're about to be posted.
For posting a payer EOB, please note that:
- Manual entry can be done entirely with the keyboard.
- Tabbing through the payment information will take you to the adjustments.
- In the adjustments section, if you enter adjustment information and keep tabbing, that adjustment will be saved, and it will start a new blank adjustment line.
- If you tab through a blank adjustment line without entering adjustment information, you will get to the next procedure line.
- At any point, the eraser icon under Actions can be used to clear all amounts entered on the given line.
- Once the Allowed amount is entered, the CO-45 will be auto-calculated based on the Charged and Allowed amounts (and if a CO-45 is entered, the Allowed amount is calculated). Please note that a CO-45 will not be auto-calculated for take-backs (negative paid amounts).
- All amounts are saved as soon as they are entered and the user leaves the field – so even if you close the screen, your work is saved.
- Service line adjustments can be entered by using group code "SL."
For reviewing posting data, please note that:
- On ERAs, you will see an 'i' icon to the left of the procedure code, which opens ERA Details. This provides any additional service line information that may have been included in the ANSI data but is not shown on this screen.
- The Posting Balance shows what the balance on this line will be after this deposit claim is posted -- or if the payment has already been posted, it shows the current balance of the line.
Posting/Claim Totals
This section sums what will be posted on the claim as currently entered. Please note that these are not the total amounts for all payments on the claim, but rather a sum total for the current posting.
