An Appointment Type is used to determine what service is being performed during a scheduled visit.
The list of appointment types is customized for your practice. This article will explain how to add new appointment types to the application along with the associated features available.
Add a New Appointment Type
To add a new appointment type to the application, follow these steps:
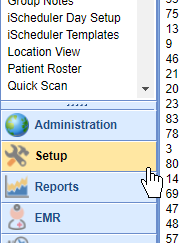
- Open the Setup portal

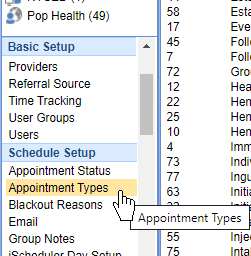
- Select Appointment Types from the setup list under the Schedule Setup section

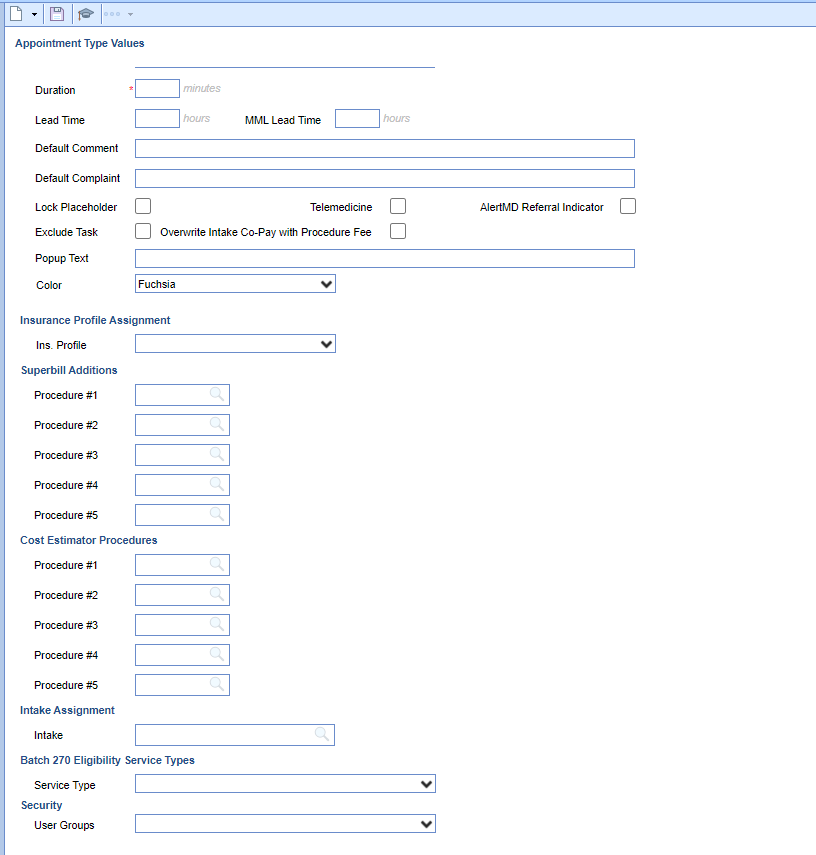
- Enter the Appointment Type Values in the work area

- Click Save

The appointment type has now been added to the system. Please note, the appointment type may not show up in the iScheduler yet. It is usually necessary to associate the new appointment type with a resource.
Appointment Type Values
There are several settings and values related to an appointment type that determine how the applications responds when an appointment is added with this type.
| Value | Example | How it is used |
|---|---|---|
| Name | New Patient Visit | The description of the appointment. This will show up in dropdowns and reports. |
| Duration (Mins) | 30 | The default duration of the appointment. |
| Lead Time (hours) | 2 | Used to determine how far in advance this type of appointment can be scheduled by users of the application. |
| MML Lead Time (hours) | 24 | Used to determine how far in advance this type of appointment can be scheduled by patients in MyMedicalLocker. |
| Default Comment | Be sure to provide new patient packet. | Used to automatically set the Comment field on the appointment edit window. |
| Default Complaint | Used to automatically set the Chief Complaint field on the appointment edit window. | |
| Lock Placeholder | Checked or not Checked | |
| Exclude Task | Checked or not checked | If checked, users will not be prompted to complete a Superbill or SOAP Note for this appointment. |
| Telemedicine | Checked or not checked | If checked, this appointment type will change how the patient appointment is viewed in the patient portal. When selected, these types of appointments will provide details on how to download the AnywhereCare app and what to expect at the time of visit. |
| Checked or not checked | If checked, a user must setup a procedure code in the Superbill Additions section. This is used in the Intelligent Intake process. This option will overwrite the Co-Pay amount with the fee from the selected procedure code. This allows a practice to set a specific payment amount based on the type of visit. | |
| Popup Text | Ensure the patient completes labs prior to appointment. | Used to generate a scheduling alert for the person creating an appointment. Helpful when you want to remind the front desk to take specific actions when scheduling this appointment. |
| Color | Light Red | Used to define how appointments show up on both the EMR and iScheduler. The following settings may be used: |
| Superbill Additions (Provider 1-5) | 81003 | Used to send specific CPT code to the superbill for this type of appointment. |
| Intake | New Patient Intake | Used to auto-assign the appropriate Intelligent Intake template when this appointment is scheduled. |
| Batch 270 Eligibility Service Types | Physician Visit - Sick, Physician Visit - Well | Used when batch eligibility is ran. If the specific options are selected in this list, a Batch Eligibility request will fail if that service type is not active for that patient. |
| Security - User Groups | Surgery Scheduler | Used to limit which users can add or change these types of appointments. Helpful when you need to control how some sensitive types of appointments are scheduled. |


