
The purpose of the ID.me EPCS credential is to ensure an OfficeEMR prescriber is able to electronically send controlled substance (EPCS) prescriptions in the EMR in accordance with DEA 1311 requirements. This document will describe the necessary steps to complete from the provider's perspective.

Process Overview
In order to prescribe electronic controlled substances (EPCS), the following parts must be completed:
- Complete EPCS Enrollment via ID.me
- Add & Enabled the ID.me EPCS Credential
- **Approve ID.me Credentials
** The first prescriber added to any database will be auto-approved. All subsequent providers added to that database must receive approval from a provider with an approved credential.
Prerequisite
Security Screen: Practice - General > Admin > IDme Verify
The above screen will need to be enabled for the role associated with the user setting up Identity Verification. This role will need to have "Write" permissions in order to access the screen described in Step 3 below. For help on modifying roles, see the documentation on Assigning a Screen to a Role.
Steps to Complete
- After logging into OfficeEMR
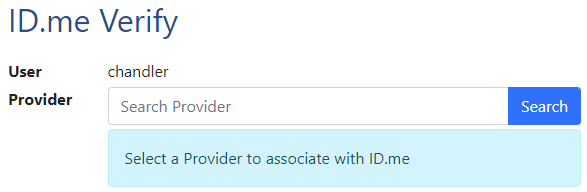
- Navigate to User Setup (Setup > Users or "Current User" from the bottom left of the screen)
- Ensure your name is selected from the left side, then select the checkmark icon from the toolbar
Note: If you are unable to access this button, please see the above Prerequisite section.
- Search & Save the "Prescribing Provider", this is the provider to be credentialed (yourself)
- Select Verify EPCS
"Verify Identity" is for prescribers who do not prescribe EPCS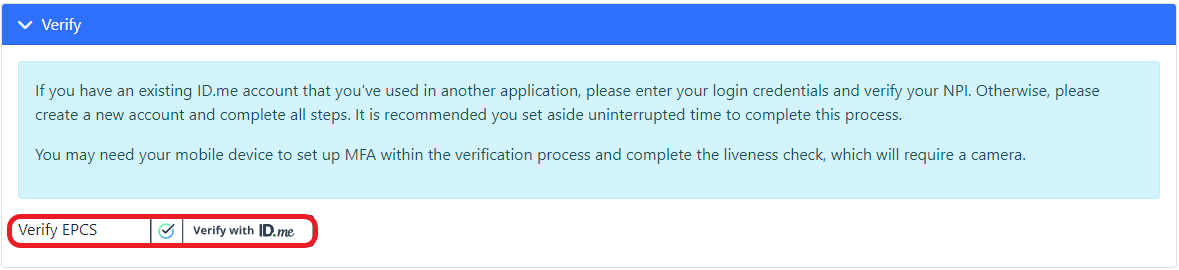
- Create an ID.me account or Login with an existing ID.me account, if logging into an existing account please skip to step 22.


- This CAN NOT be completed by an Administrator on the behalf of a provider.
- You will want to ensure you have set aside uninterrupted time (10-20 minutes) and have your Personal Cell Phone, Drivers License, and NPI easily accessible.
- Existing ID.me accounts may be used to complete the process, just log in with your existing credentials, enter your NPI and allow iSalus to access the data via the prompt. Potential entities you may have already created an account for include (IRS, DMV, Social Security Administration, Former EMR, and more)
- Be sure to contact iSalus Support or your Implementation contact once completed to ensure your credentials will be enabled in the SureScripts network. If you do not notify the team, you will be unable to electronically prescribe from the EMR.
- Enter your PERSONAL EMAIL, create a password, and accept the TOS and Privacy Policy
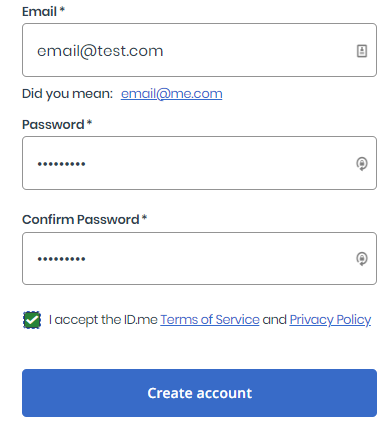

It is in your best interest to use a personal email as opposed to the company email affiliated with your practice. Since this account may be used for personal affairs outside of iSalus, you will want to be in control of the email address you provide.
- Enter the 6-digit code received in your email, then select Continue
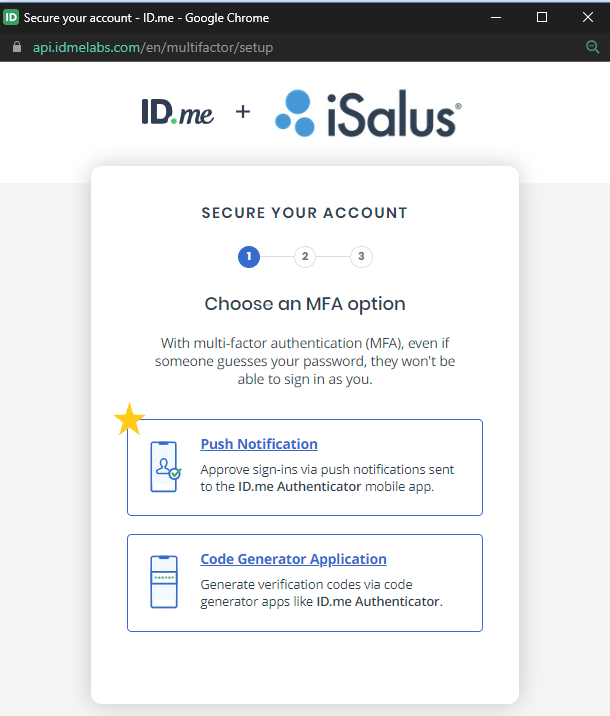
- Select a Multi-Factor Authentication (MFA) method from the available list. The Push Notification is best, but Code Generator Application is also available. The Code Generator option adds more steps to the prescribing workflow but is DEA-compliant.
- Enter the code received via the selected MFA, then select Continue
- You may optionally generate a recovery code that you may access the ID.me in the event you lose access to the device setup for MFA. You will want to keep this code someplace safe, outside of the device you have MFA setup on.
- Choose a Verification Method, typically the license or state ID option will be the easiest to provide.
- Accept the consent for Biometric Data Collection. This is to ensure you are able to complete the "liveness" check after uploading your documents.
- You may either Take a Photo or upload an existing image of your selected document type.
- If uploading documents, you will want to select from your computer's files the Front and Back of the document (unless Passport)
- After selecting Take a Photo, you will be prompted to Enter a Mobile Phone Number and Continue. This phone will receive a link to complete the document upload and "liveness" check.
- Select the link received on your phone, the screen will look like the following in your mobile browser.
- Follow the prompts for taking photos with your phone
- Depending on the document type selected in step 11, you will be asked to upload the Front and Back of the document.
- Review the documents on the page before submitting them for verification. Ensure they are clear and the edges are not cut off.
- After uploading/taking the photo you will need to take a video selfie
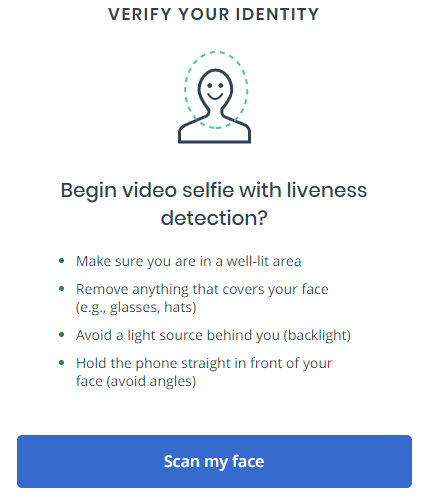
- Ensure you "Allow Access to Camera" within your mobile device's browser when prompted, and complete a scan of your face.
- It is important that when you scan your face it matches the document you have just uploaded. Namely, if you are wearing glasses currently but were not on your driver's license, please remove them.
- Be sure to follow prompts during the scan, there may be warnings such as "Move Closer"
- If the scan is not working for you initially, please try again until after your third attempt.
- Once the Images Submitted message is seen on your phone, navigate back to the computer where you started the process.
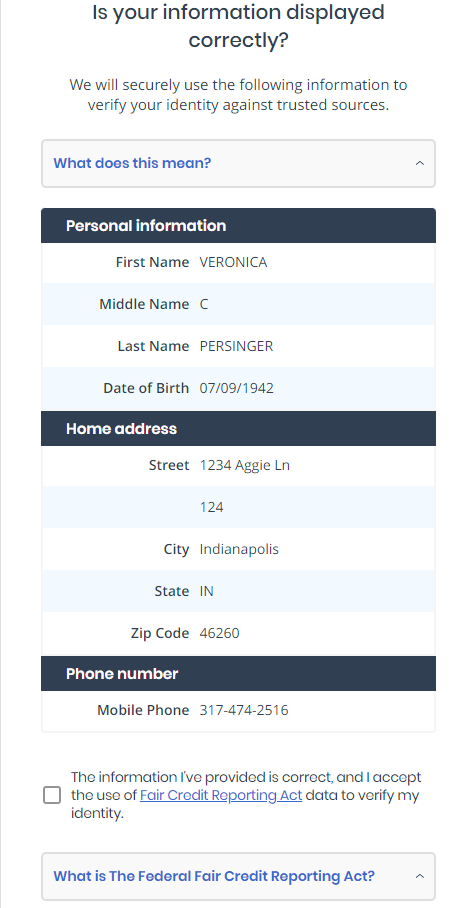
- Enter any remaining fields related to your identity, this may just be your SSN, but you may be prompted for your Current Home Address (if unable to verify the information from the uploaded document)
- Verify the Details seen on the ID.me screen. If correct, select the Checkbox and Yes to continue
- Begin the NPI & DEA check
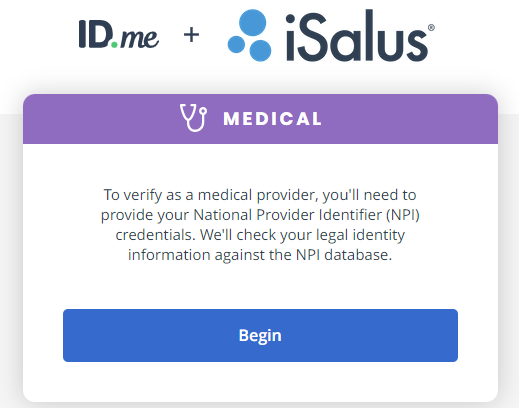
- Enter your NPI. If all information returns correctly (State License Number & Issuing State), select a Provider Type from the provided list. Then select continue.
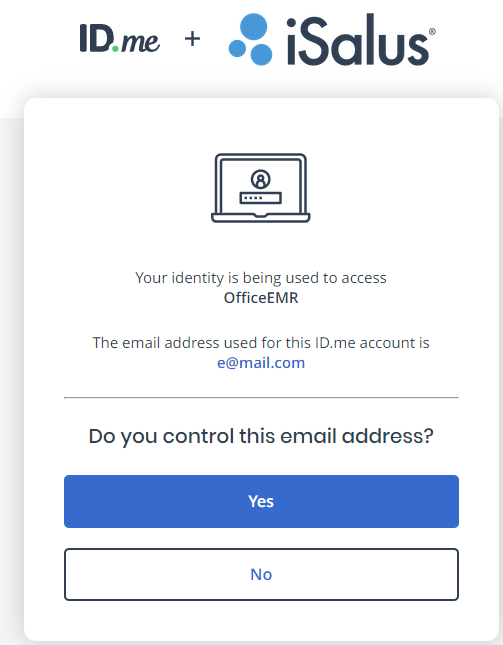
- Allow the information to be shared back to OfficeEMR
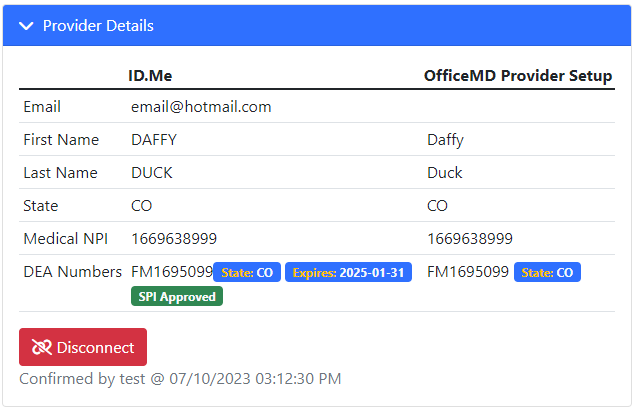
- Confirm the results in the Identity Proofing Screen
- Ensure the NPI & DEA number in the ID.me column matches what is seen in OfficeMD Provider Setup
- The additional details such as email may differ depending on what was provided in the New Provider Packet or Implementation Packet. These may differ but will still allow you to continue.
- After the results are confirmed, you will need to contact iSalus to complete the process if you DO NOT see "SPI Approved" in green as shown below. If you are in Implementation please reach out to your contact on the project. If adding a New Provider via Support please reach out to support@isalushealthcare.com or open a ticket to "Enable ePrescribing for {Doctor Name}".If you are transitioning from IdenTrust to ID.me then you will not likely need iSalus to complete this step for you. It is likely that your SPI was approved before you ePrescribed from iSalus initially.
- Once you have confirmed the ID.me EPCS details as described above, there are two remaining pieces to complete this are:


