This article describes the necessary steps to enable 2FA logins for users in your practice, and the steps for a user to complete the initial setup. This is entirely optional for using OfficeEMR but may be required by your Cybersecurity Insurer or other IT security policy requirements. Two-factor authentication (2FA) is quickly becoming the standard setup for any user needing to log in to a system that contains secure data. The two-factor authentication process requires a user to have a Username, Password, Company, and Token.

Prerequisites
Company Setting: Default 2FA Setting for Users
INFORMATION
Company settings are typically only accessible to Administrators, open the link to learn more about the various options available for this setting as it will directly affect the implementation of 2FA for all users in the practice. This can be rolled out as a requirement for all users or may be enabled individually.
Company settings are typically only accessible to Administrators, open the link to learn more about the various options available for this setting as it will directly affect the implementation of 2FA for all users in the practice. This can be rolled out as a requirement for all users or may be enabled individually.
Security Role: Practice - General > Security > User Two Factor Authentication
USER SELF-SERVICE
If you intend to provide users the ability to self-service their accounts, they will need access to the User Two Factor Authentication setup screen. This may be useful in cases where a user needs to redo their setup because they got a new phone.
If you intend to provide users the ability to self-service their accounts, they will need access to the User Two Factor Authentication setup screen. This may be useful in cases where a user needs to redo their setup because they got a new phone.
NO SELF-SERVICE
It is still possible to remove a user's setup manually as the administrator and force them to set up a new authenticator upon login if desired. This is completed by navigating to Setup > User Setup > Search for {user} > Select Keys icon from toolbar > Modify configuration as desired. If the company setting Default 2FA Setting for Users is set to 2 = Suggest, this will force the user to configure their new cell phone upon login with the 2FA Application.
It is still possible to remove a user's setup manually as the administrator and force them to set up a new authenticator upon login if desired. This is completed by navigating to Setup > User Setup > Search for {user} > Select Keys icon from toolbar > Modify configuration as desired. If the company setting Default 2FA Setting for Users is set to 2 = Suggest, this will force the user to configure their new cell phone upon login with the 2FA Application.
Steps to Complete Initial Setup
- On the login page enter User ID, Password, and Company fields.
- Depending on your practice administrator, there are three possibilities;
- Not Required (normal login process)
- Prompt to set up 2FA upon next login
- Require 2FA setup upon login
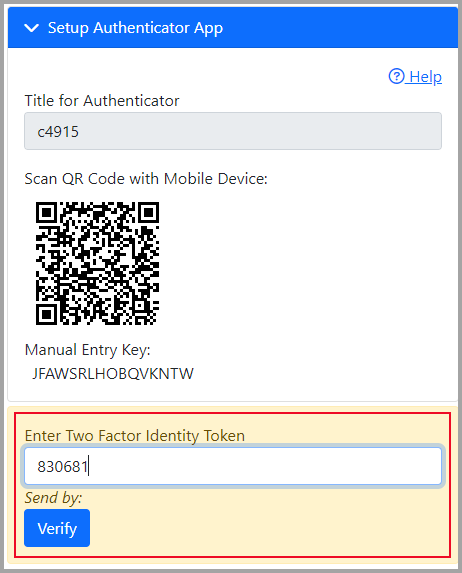
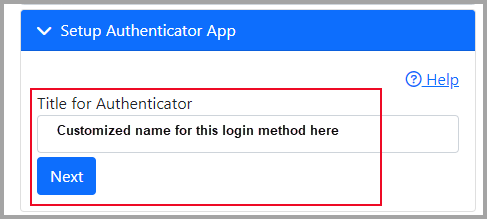
- Enter a Title for Authenticator, by default the database name will be used. However, this is entirely up to the user to customize. If a provider utilizes ID.me for EPCS, they may want to title this something like "Login OfficeEMR", to easily differentiate between the different accounts connected to the same authenticator application. This title will be shown in the mobile app.
- Open or download an Authenticator App of your practice's choice, then scan the QR code or manually enter the key.
Each practice can choose a preferred TOTP Authentication application, but ultimately it will be up to the user to download and associate their account to the specific mobile app. Any TOTP application will work for this process, however, it is recommended to use one of the following: - Enter the 6-digit token from your Authenticator App and hit Enter or click Verify to log in.