A practice may need to import patient payments in mass. This is commonly done when a bank or other third party may be able to provide a file containing patient payment information. For example, when a patient mails in a payment to your bank/lock box or collection company, the bank/collection company may be able to provide a file with these details on a recurring basis.
Generate a Receipt Import Template
The first step to import a receipt is to obtain the Import Specifications/ Import Template. This can be done by taking the following steps:
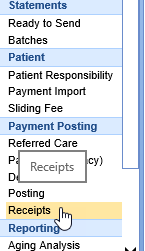
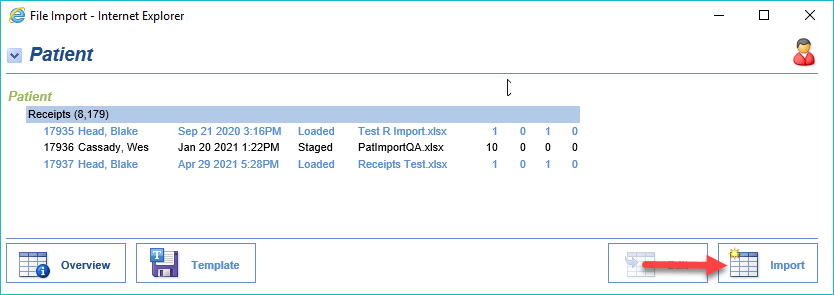
- Navigate to Billing > Receipts
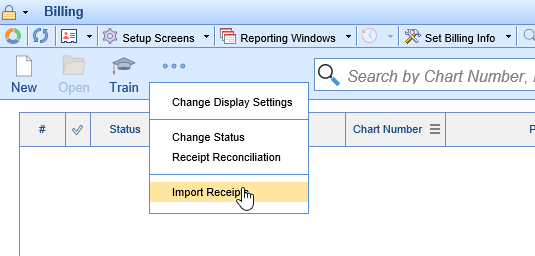
- Click More > Import Receipts
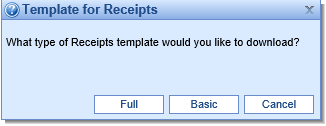
- Click Template > Select the Template Type

- Full: This template includes multiple tabs that define each column for the import.
- Basic: This template only includes the necessary column headers for the import.
- A Microsoft Excel template will be opened on your computer
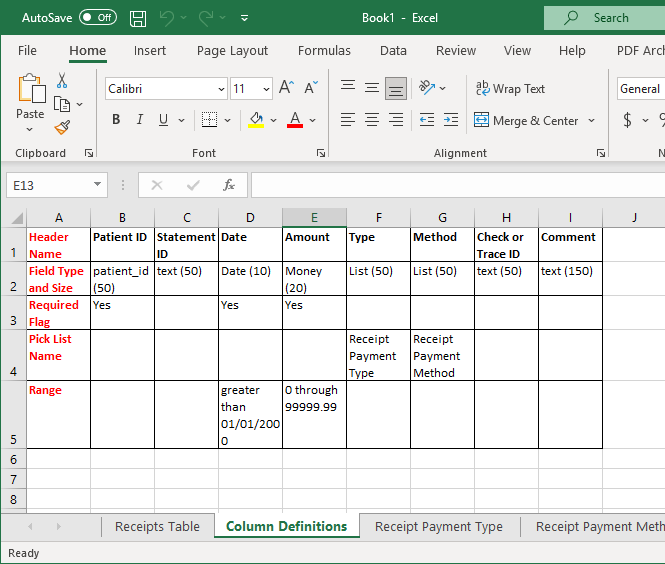


Understand the Receipt Column Definitions
The Import Template provided will ask for the following columns:
- Patient ID: The iSalus patient chart number
- Statement ID: This statement number generated out of our application.
- Date: The date of the receipt. This must be in the format MM/DD/YYYY.
- Amount: The total value of the receipt. This must be in the to be format as ###.##.
- Type: This is the payment type for the receipt (i.e. Co-Pay or General Payment).
- Method: This is the payment method for the receipt (i.e. Check or Cash)
- Check or Trace Number: This field will populate the 'ID #' field on the receipt.
- Comment: This is the comment that will be associated with the claim.
Setup your file to include these options as you see fit.
Import Receipts
To begin the receipt import process, follow the below steps:
- In the Receipts window, click More > Import Receipts.

- Click the Import button.
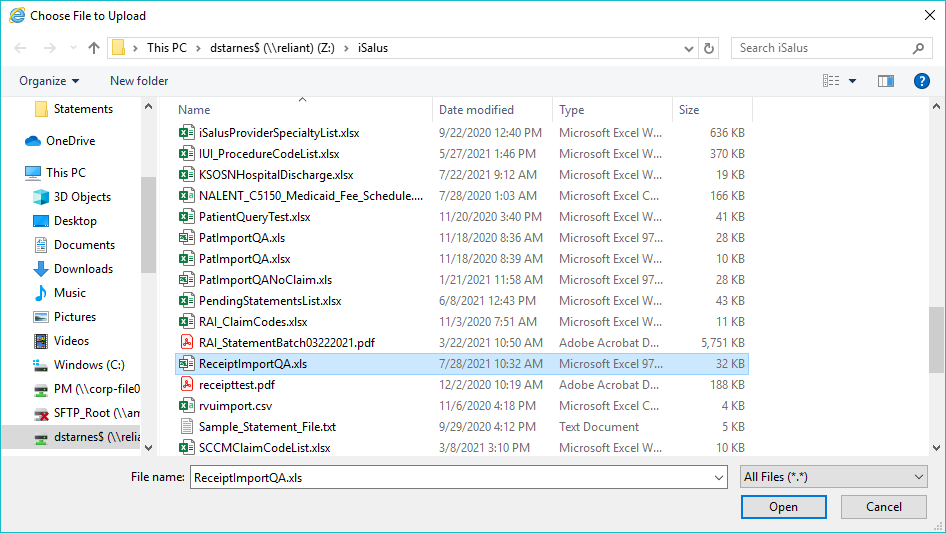
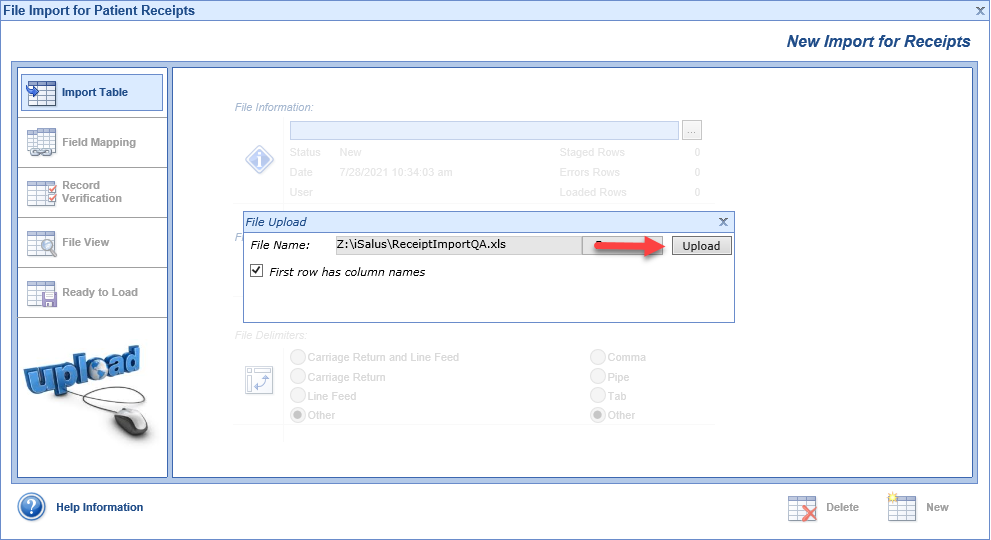
- Click Browse...
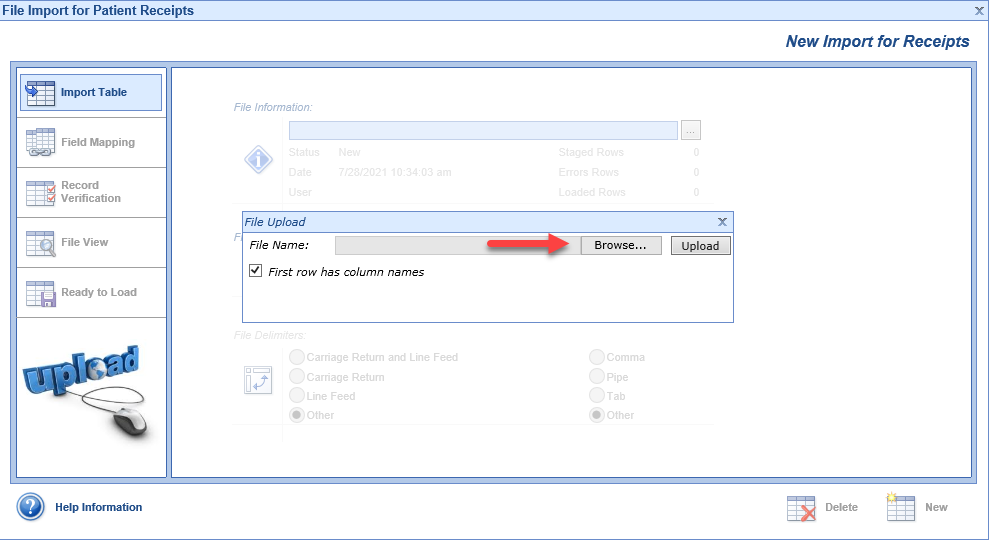
- Select your file and click Open
- Click Upload.
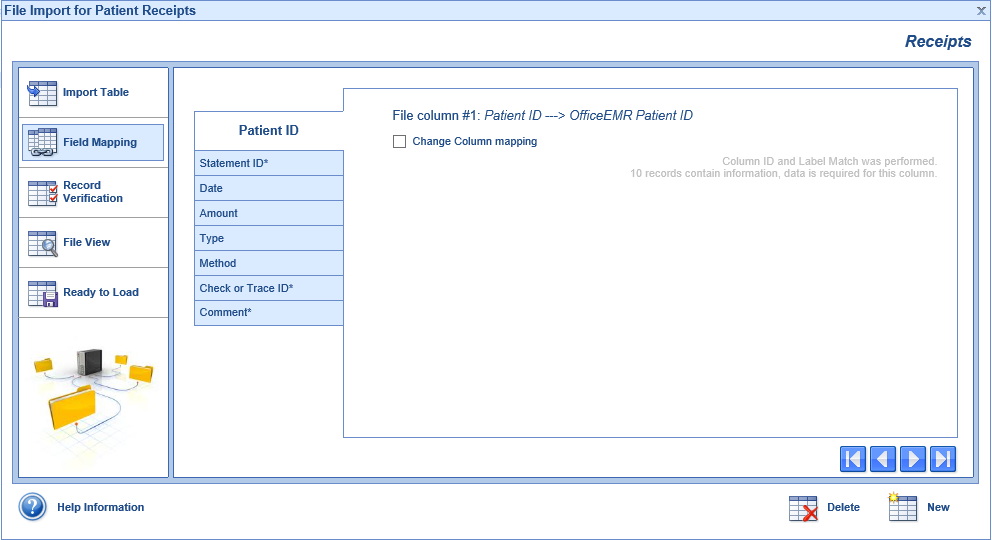
- Click the Field Mapping tab and be sure to match Your Field Values from the import to the correct OfficeEMR Value if necessary.
- Click the Record Verification tab and click the Go button to perform the verification.
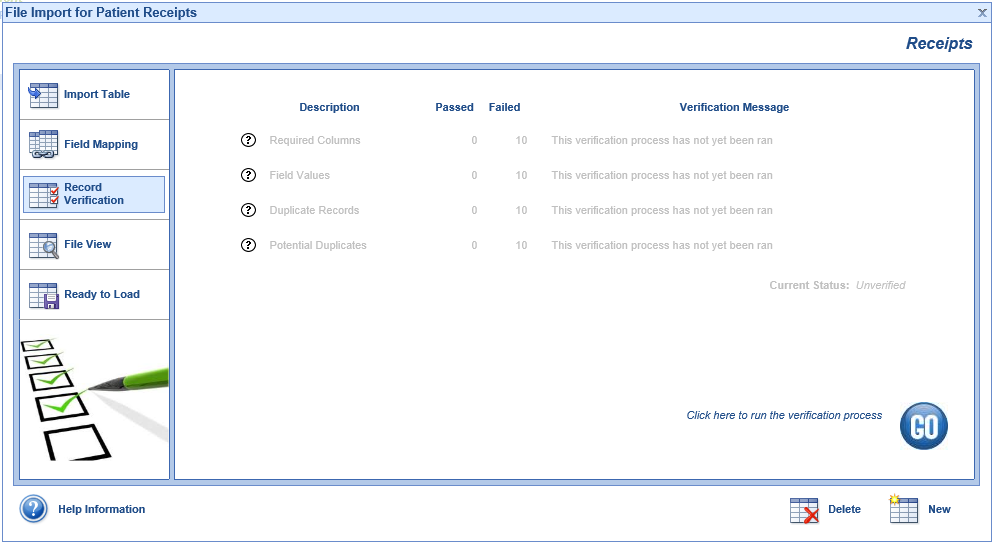
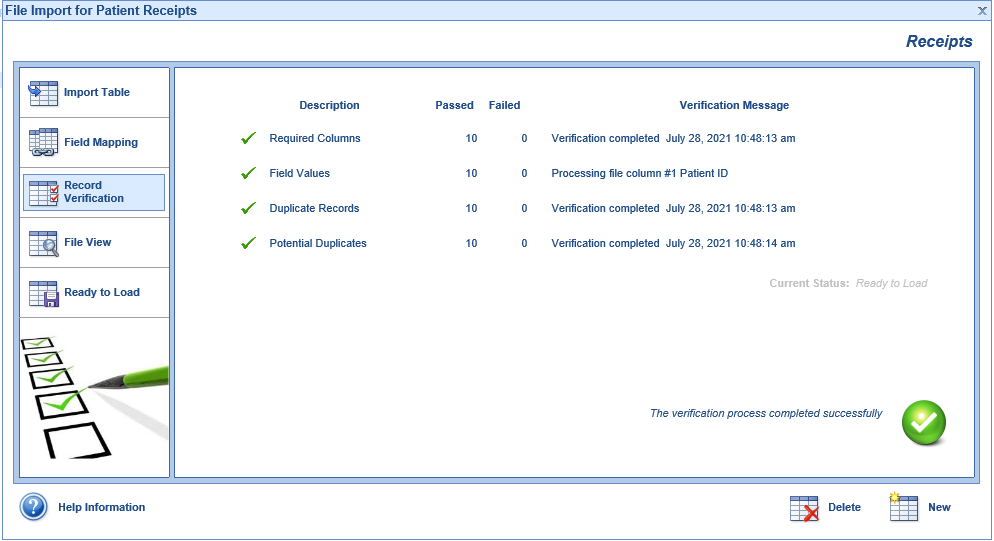
- Review the Verification Results
- If everything passed proceed to step 9.
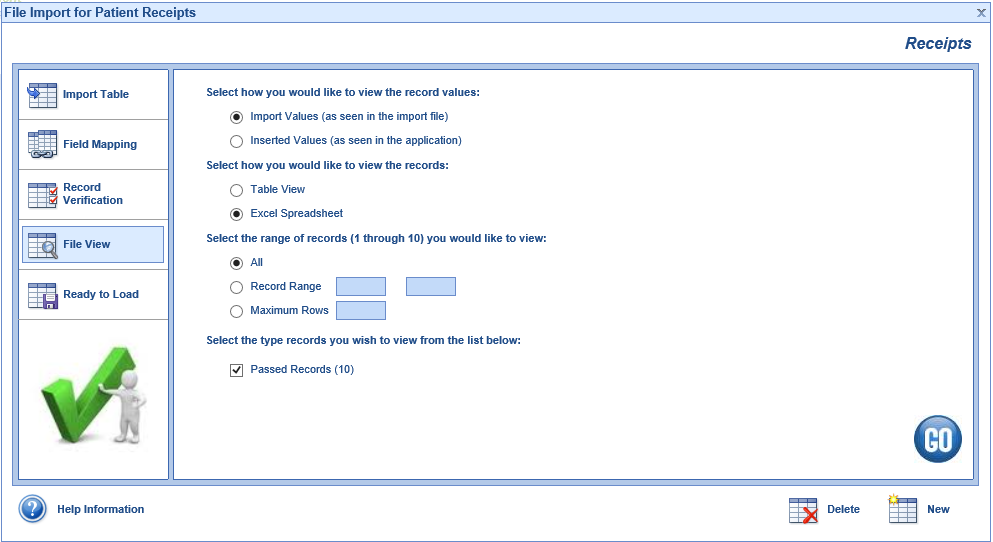
- Otherwise, Click the File View tab and review failed records as necessary.
- If everything passed proceed to step 9.
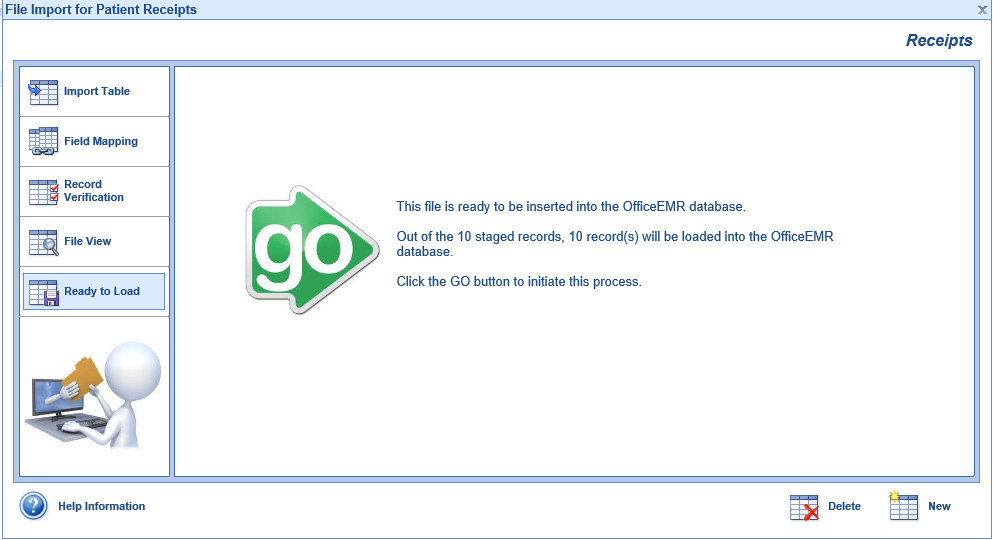
- Click the Ready to Load tab and click Go to import the receipts.
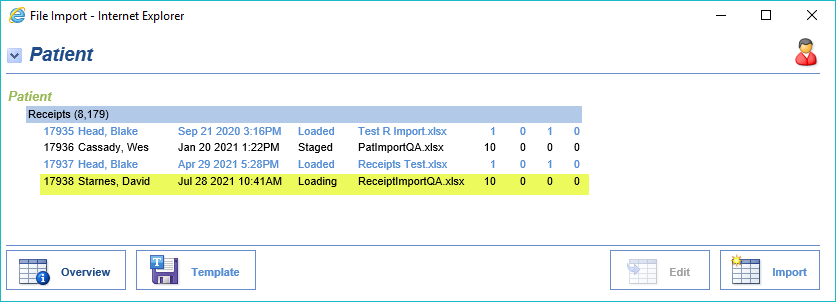
- Monitor progress in the File Import screen.