Intake Assignment
The final location of intake assignments can be found in the patient setup drop-down, this is typically completed from the EMR but is also available from iScheduler for staff members searching for patients in the top right as opposed to having them on the schedule. This is the least common location intakes are assigned from due to their unaffiliated nature to a scheduled appointment. The main difference between this screen and the other two previous assignment screens is the ability to provide forms to a patient with a specific date in mind and not a scheduled appointment.

See the above screenshot and notice the option within the drop-down, titled "Intake Assignment". Once selected the following will be displayed:

Steps to Complete
- From the above Intake Assignment Window, select New in the bottom left-hand corner.
- You will be prompted with the following:
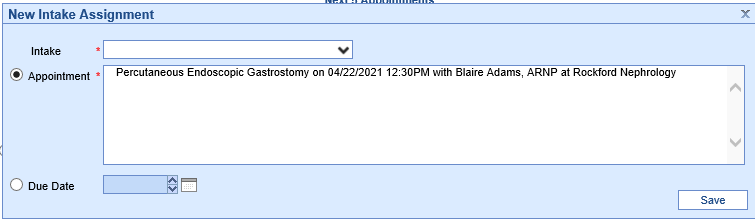
- From here, you will choose from the list of available forms for the intake to be assigned to the patient. You will also need to decide when these forms are to be completed:
- Assign intake by appointment
- Select the Appointment button.
- From the list of appointments select one of the current or future visits > Save
- Assign intake by the due date
- Select the Due Date button.
- Use the date control or type the desired due date > Save
- Assign intake by appointment
- After saving the new intake for the patient they can either fill this out in the office or at home by logging into their MML account.
- If they are filling the forms out in the office you will need to select the intake from the "Active List"
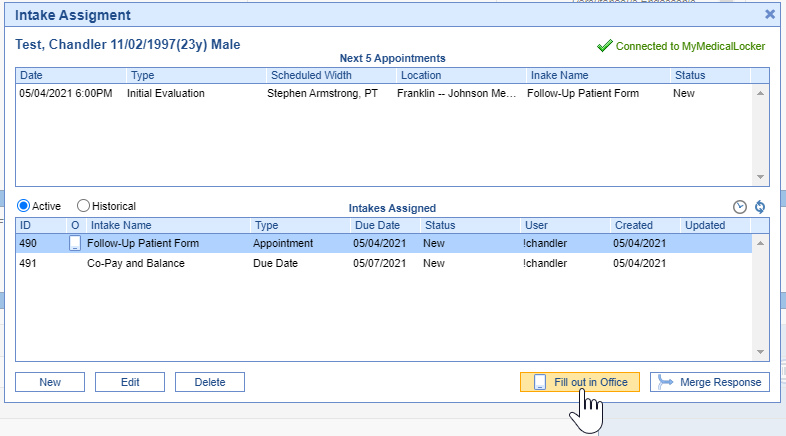
- After this item is highlighted, select Fill Out In Office
- You will then need to initiate the form on the iPad.


