
The Payment Plan screen can be found in the Billing portal under the Payment Posting category on the navigation bar. This screen by default will display payment plans that exist currently and are in a Past Due status. In addition, the screen allows you to perform a variety of other tasks including creating, searching, reporting, making changes, and opening existing payment plans.
You can sort your columns by clicking the 3 lines to the right of the column name and selecting your sorting parameter.
Fields
- Checkbox: This box will be used to mark the payment plan(s) as part of the selection.
- ID: The payment plan ID#.
- Status: The current status of the payment plan.
- Patient Chart Number: The patient ID/chart number connected to the payment plan.
- Patient Name: The patient name connected to the payment plan.
- Installment Total: The total number of installments of the payment plan.
- Installment Comment: The payment plan comments.
- Plan Total: The total amount of the payment plan.
- Total Payments: The total amount collected on the payment plan.
- Remaining Total: The total unpaid amount of the payment plan (Plan Total minus Total Payments).
- Installments: The installment amount for each payment on the payment plan.
- Due Date: The next installment due date for the payment plan.
- Last Payment: The date of the last payment made on the payment plan.
- Payment Due: Shows if a payment is due on the payment plan.
- Credit Card: Shows if a credit card is on file for the payment plan.
Advanced Search
The Advanced Search button allows for additional search parameters for the currently exiting payment plans. By clicking the Advanced Search button, a panel with search criteria will be displayed on the left-hand side of the screen. Select the criteria that are pertinent, then click the Search button on the panel.

Buttons at the top of the screen
- New:
- The New button will allow you to create a new payment plan for a patient.
- Click New and you will be prompted to search and select a patient.
- The "New Payment Plan" window will be opened and the necessary details can be entered to generate a payment plan.
- The New button will allow you to create a new payment plan for a patient.
- Open button:
- The Open button will open the Payment Plan Details screen in a pop-up window for the payment plan selected in the Results Grid.
- The Open button will open the Payment Plan Details screen in a pop-up window for the payment plan selected in the Results Grid.
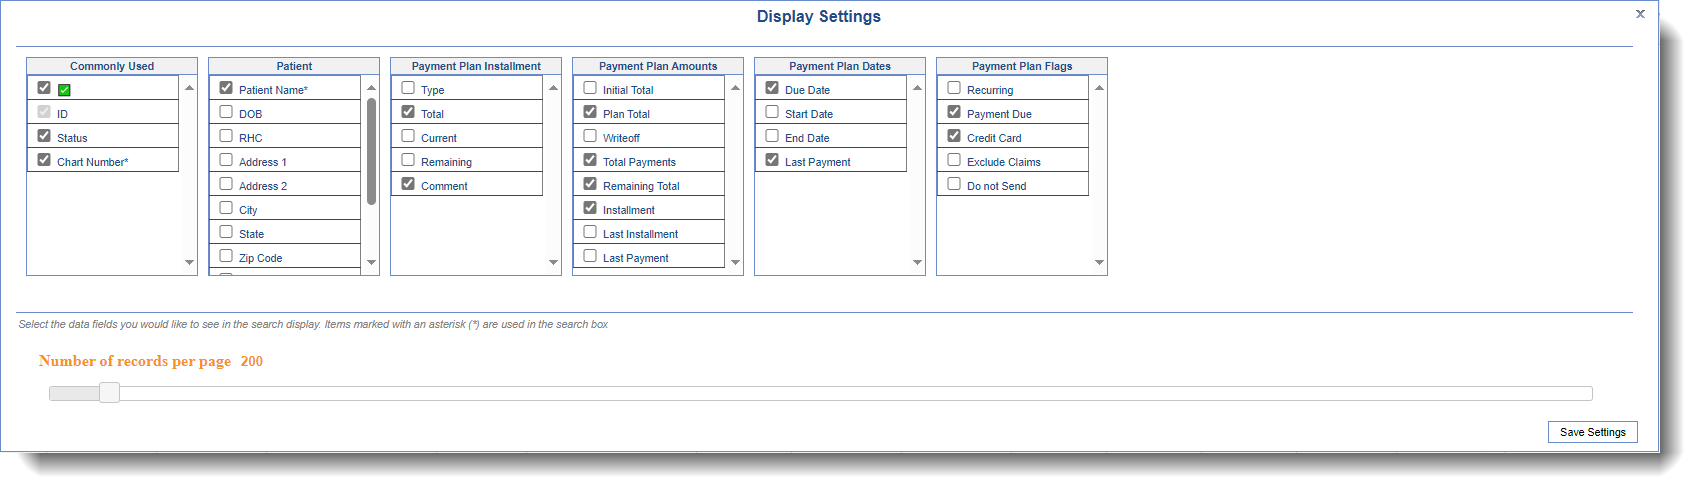
- More > Change Display Settings:
- The Change Display settings option allows a user to determine exactly which data points are displayed in the Results Grid. You can also determine the Maximum number of rows that are returned.
- The Change Display settings option allows a user to determine exactly which data points are displayed in the Results Grid. You can also determine the Maximum number of rows that are returned.
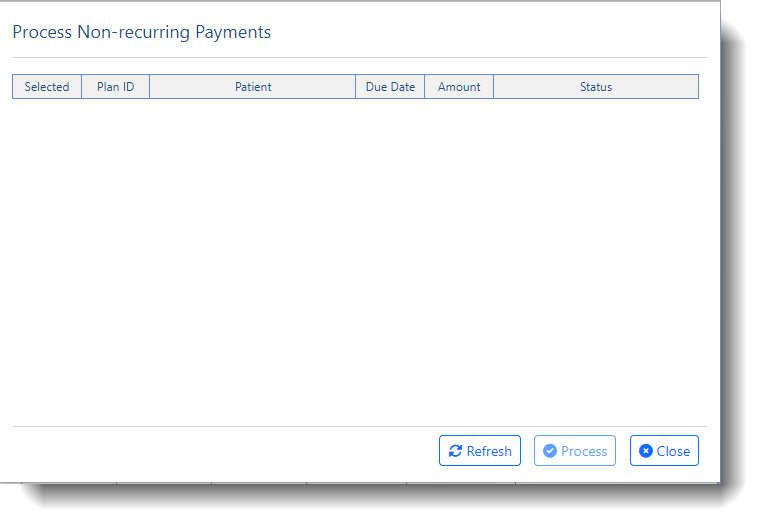
- More > Process Non-Recurring Payments:
- The Process Non-Recurring Payments option will open a window that lets a user process a payment for the next installment amount on the selected payment plans. This is typically utilized for non-recurring payment plans and requires the payment plan to have a credit card on file.
- The Process Non-Recurring Payments option will open a window that lets a user process a payment for the next installment amount on the selected payment plans. This is typically utilized for non-recurring payment plans and requires the payment plan to have a credit card on file.
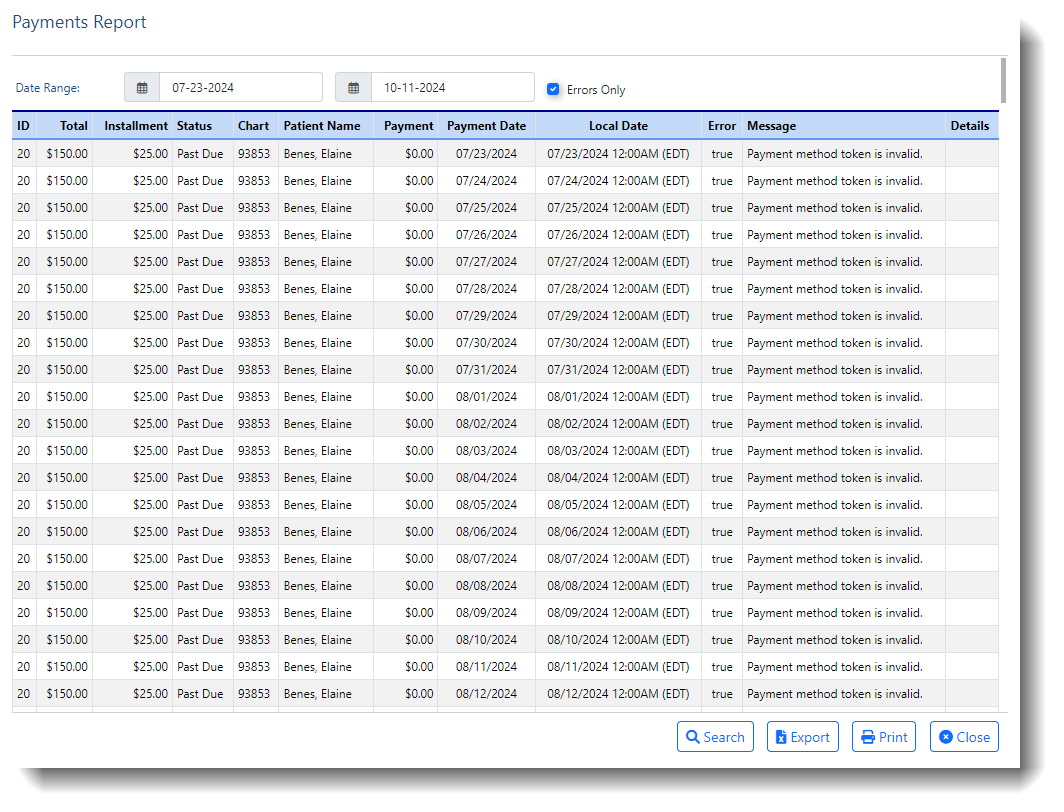
- More > Payment Plan Payments Report:
- The Payment Plan Payments Report option will allow the user to run a report on installment payments that have been processed via the nightly recurring payment process or the non-recurring payment processing of the payment plans for a specific date range. By default this will display the failed processed payments (Errors Only checkbox to the right of the date range).
- The Payment Plan Payments Report option will allow the user to run a report on installment payments that have been processed via the nightly recurring payment process or the non-recurring payment processing of the payment plans for a specific date range. By default this will display the failed processed payments (Errors Only checkbox to the right of the date range).


Gear Icon
The ‘Gear’ icon located in the upper right-hand corner provides access to some basic settings and options. 
- Security: This option will open the ‘Role Setup’ screen which is where you can determine who has access to the windows.
- Screen: This option is not used here.
- Company: This option is not used here.
- User: This option will provide access to User Settings related to Payment Plans. Currently, there are none.
- Setup: This option will open the Company Settings for Payment Plan screen which is where you can update the payment plan rules.
- Print: This option is not used here.
- Audit: This option is not used here.
- Refresh: This option will refresh the window.
- Close: This option will close the menu.
