Follow the manual claim submission process to get an EDI Extract.
*NOTE: Please make sure that you are turning off the auto claim submission.
Step one:
After you have processed your batch, locate it in the Claim Submission History.
Once you have found your batch in the submission history, follow the instructions below to obtain the EDI extract.
*NOTE: Best practice is to reach out to the payor directly to determine the appropriate headers and footers required for submission in the file. Note also the risk of duplicate ERA and ERA created deposits once Change Healthcare recovers.
Step two:
Locate the batch.

Click on the batch to open.

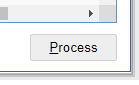
Click on Process

Make sure you check the box for Print EDI input file

Click OK.
This box will open. Please note to make sure you click the box to add the header.


7. Click on export.

8. Save the file to a folder.

9. Now you have the file available for import to upload to another site. Open up the site and import the file.

