Practices will need to create the flags they want to make available for staff to assign to patient charts (keeping in mind that practices want to avoid an excessive number of flags, which can diminish the practical utility and benefit of flags in the system).
Creating Patient Flags for your practice:
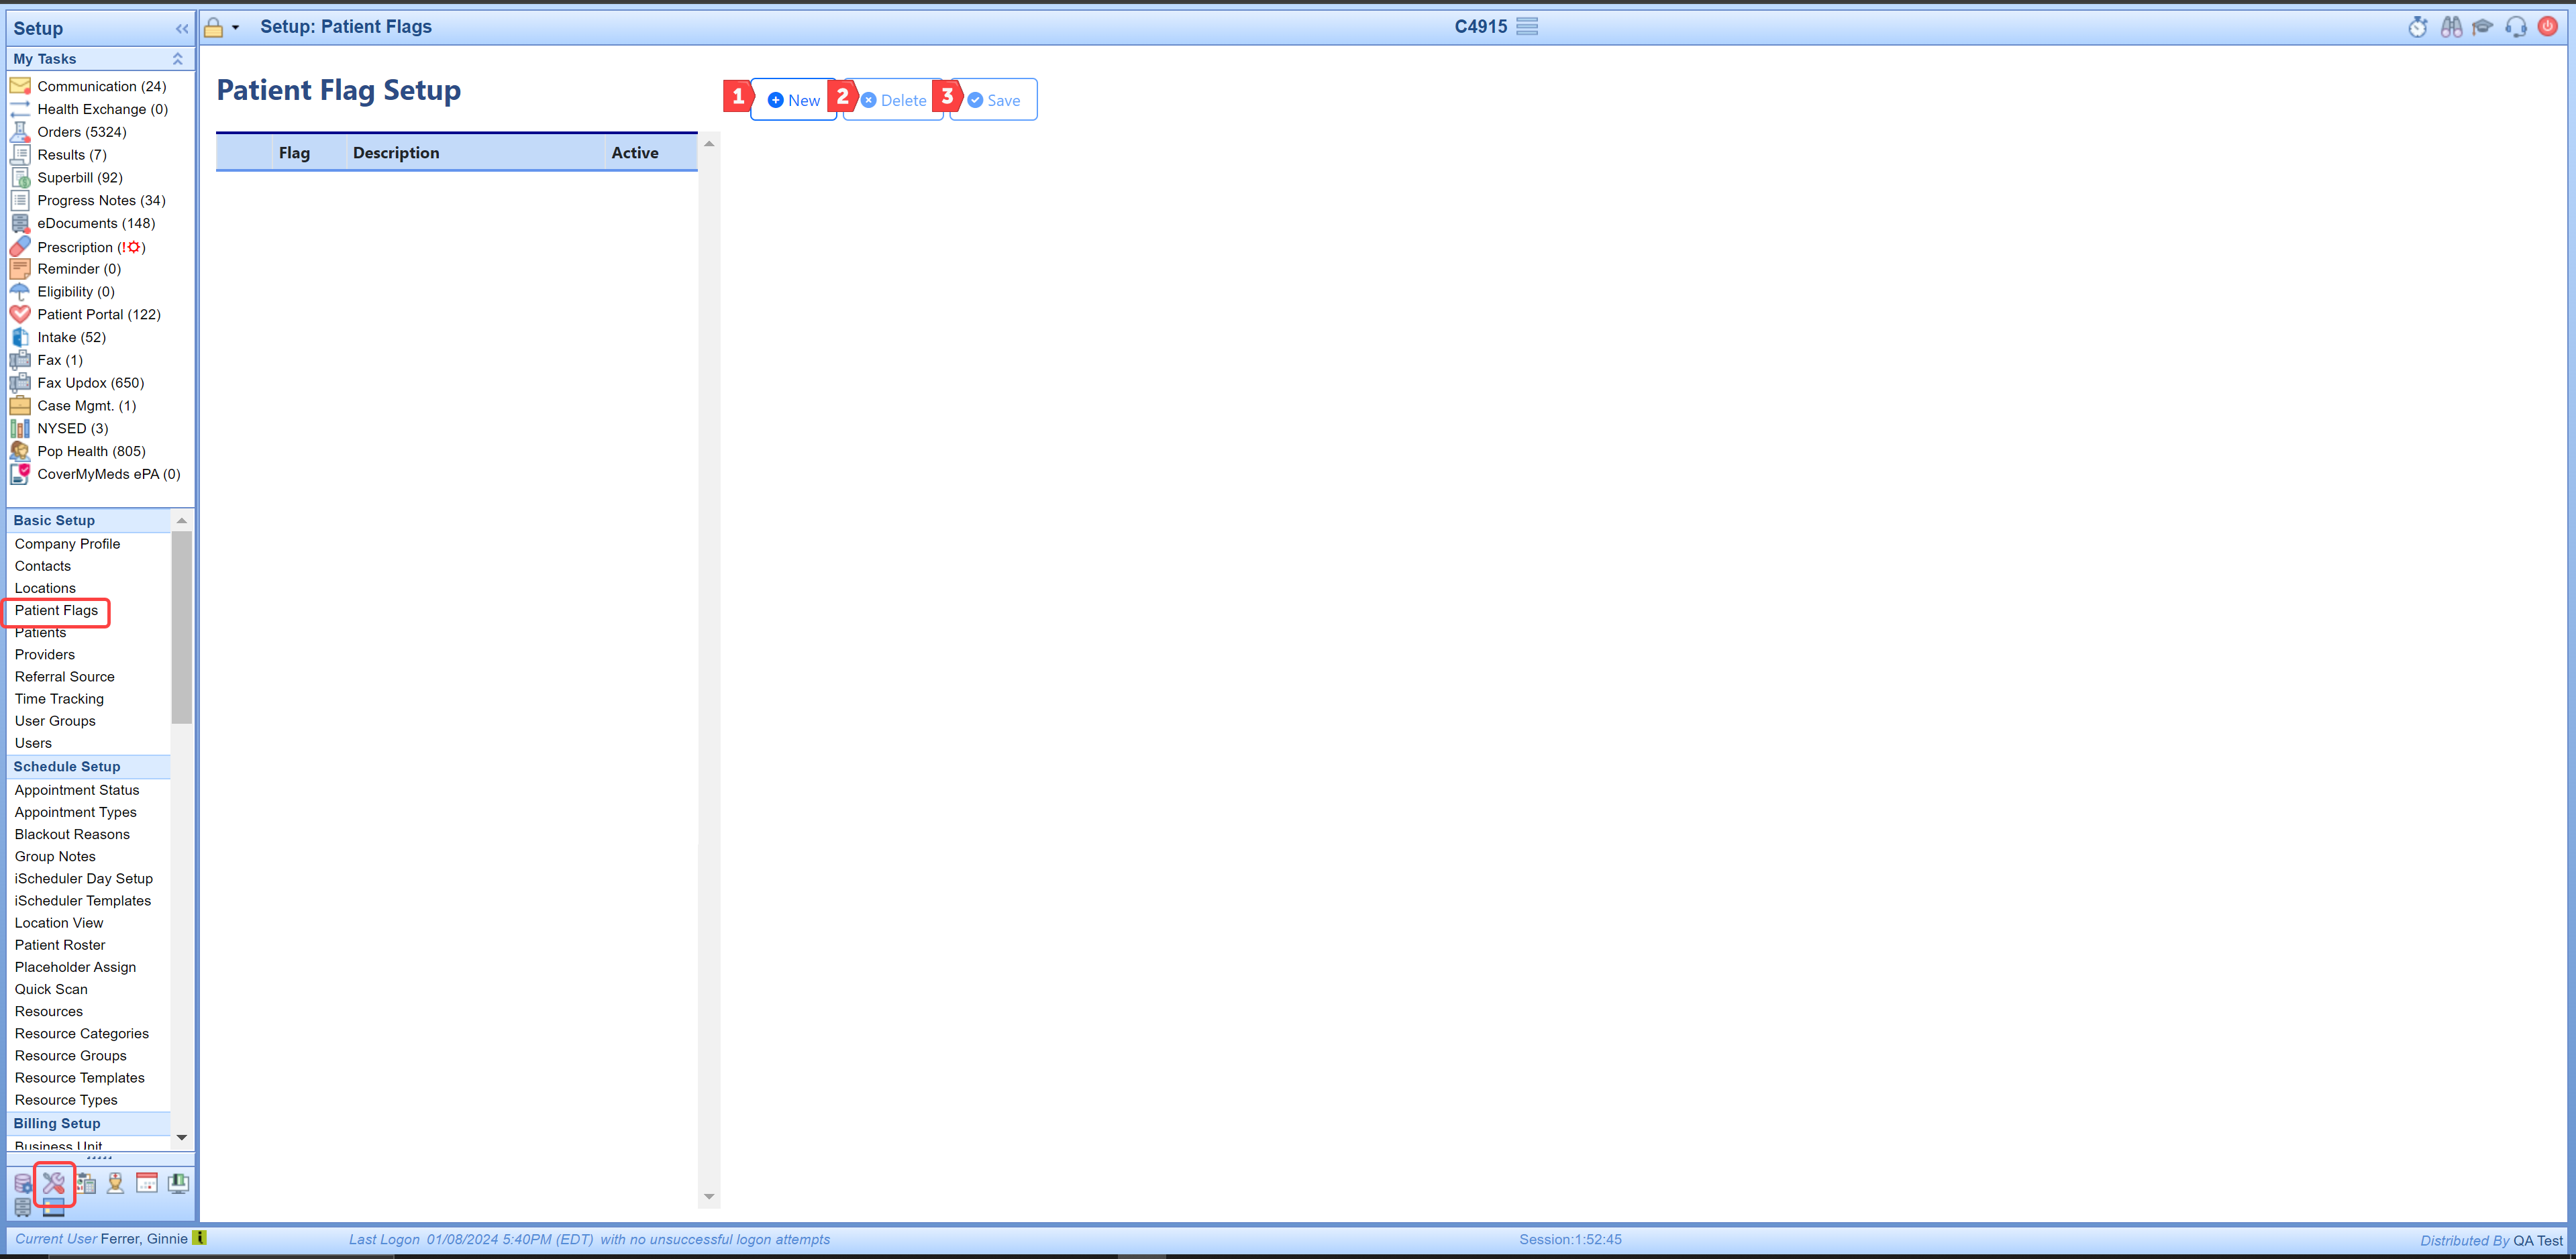
Go to Setup > Basic Setup > Patient Flags to view existing flags, both active and inactive. For practices that have never used patient flags before, you will see the Patient Flag Setup screen has no existing Patient Flags. You will see 3 buttons:
- New button: this button allows you to create a new Patient Flag.
- Delete button: this button allows you to delete a Patient Flag (but delete is limited to Patient Flags that are not assigned to any patients). Note: In the case where a flag is assigned but no longer needed, you would see step 6 below to inactivate the flag.
- Save button: this button saves new entries and any changes made to existing patient flags.

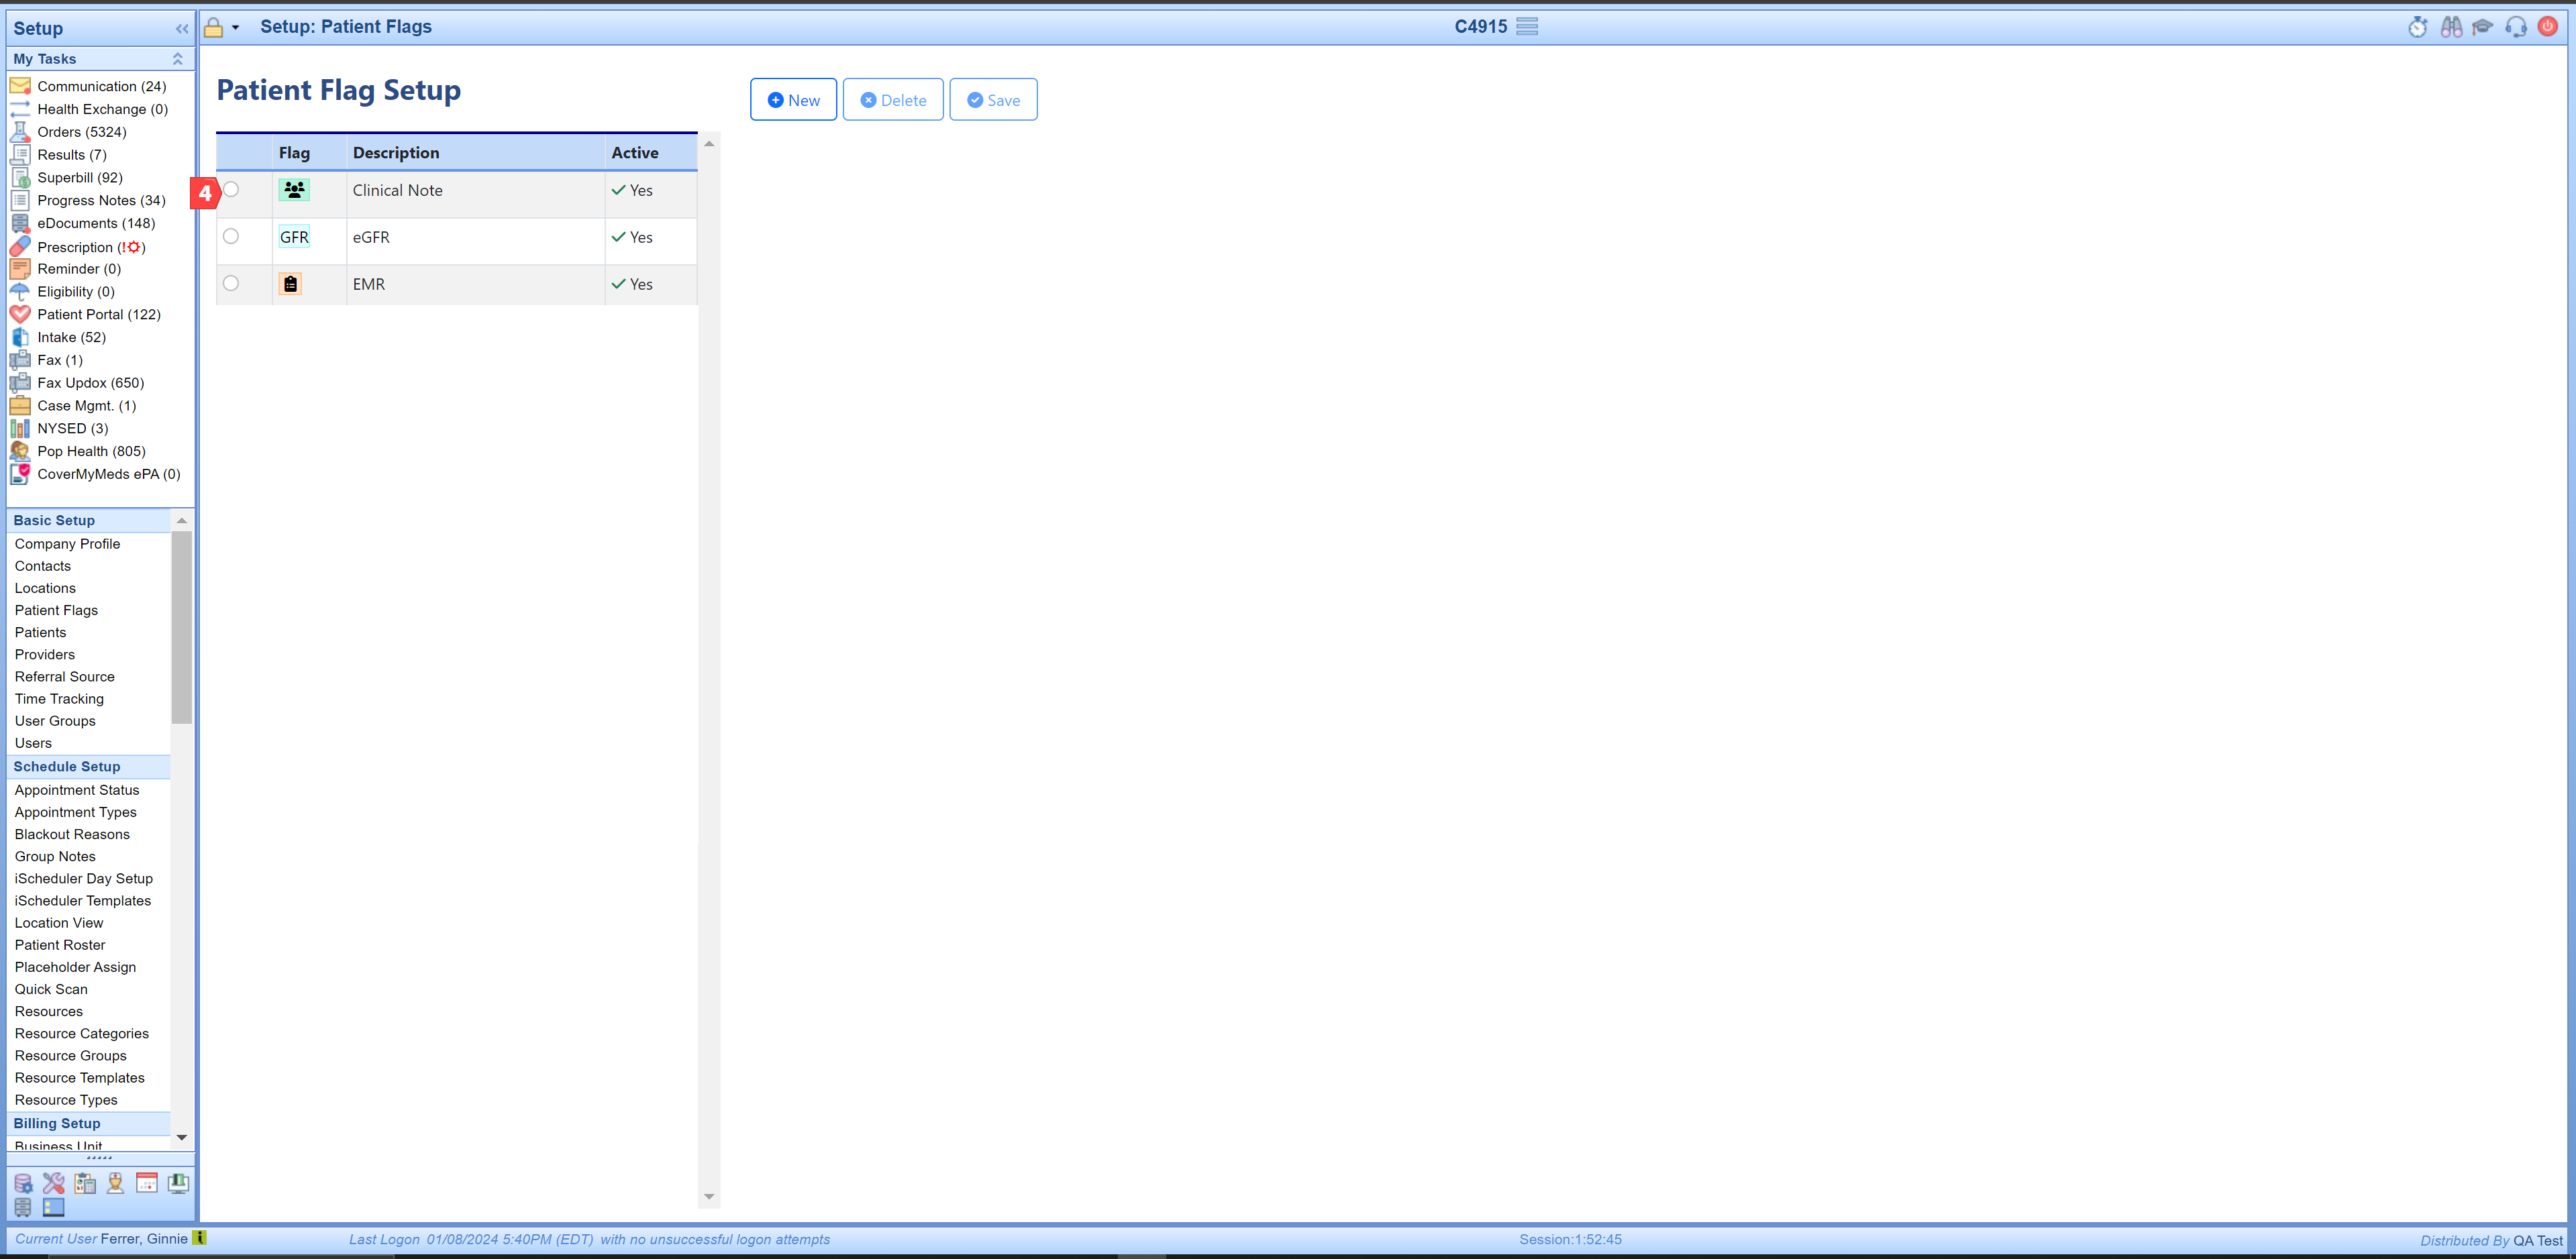
- Existing Patient Flag List: This is your list of existing Patient Flags. Note: To edit an existing Patient Flag, you would just select the flag you want to edit in this list of flags and go to Flag Setup Section to make edits.

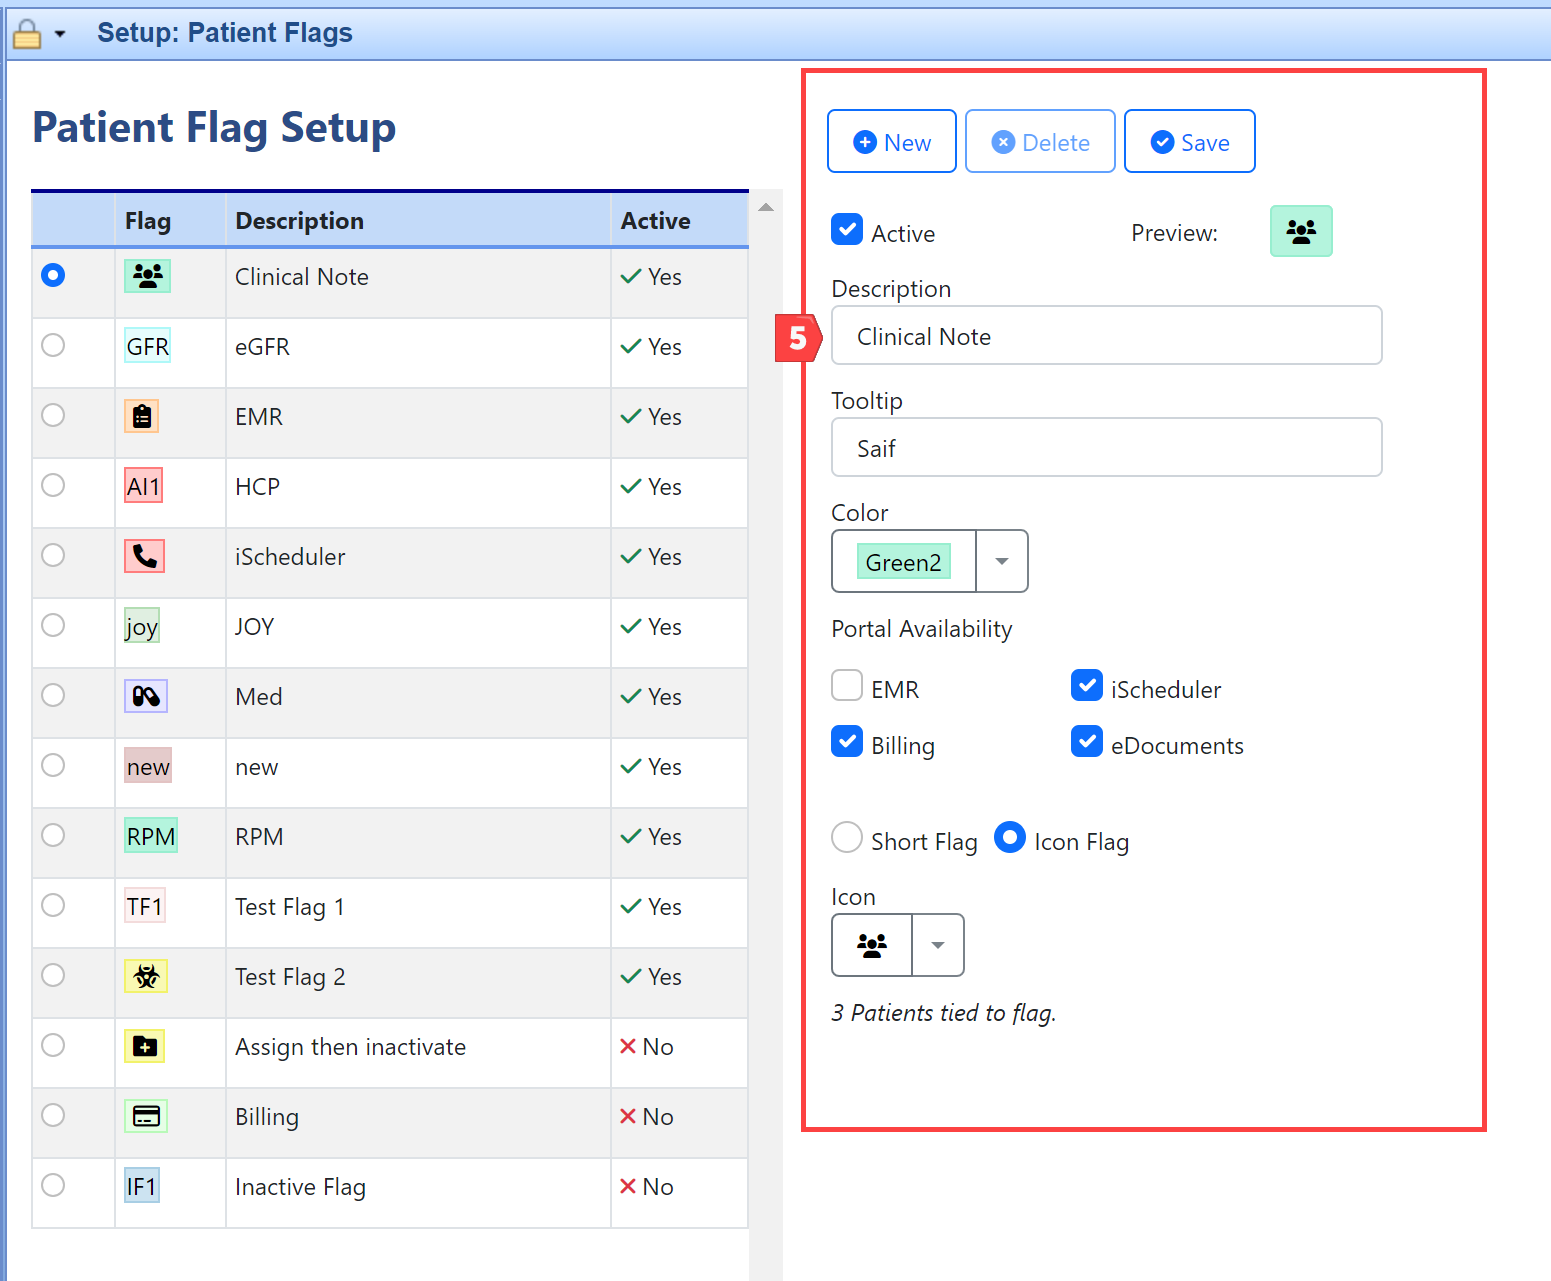
- Flag Setup Section: You will see the flag parameters that are currently set up load in the Flag Setup Section. To update/edit an existing flag just make desired changes and then click on your Save button at the top of the screen. The changes made are automatically displayed across all patients where the flag is currently assigned.

Setup Fields Defined:
- Active Checkbox: By default, all new flags created will automatically be set to Active. When a flag is check marked as ‘Active’ it will display in the patient header. When Active is not check marked then the flag is considered Inactive, and it will not display in the patient header.
- Description: The practice can input the desired Description for any flag created. By default, Patient Flags are displayed in the patient header in alphabetical order based on this description. Note: Users can override this Patient Flag order as outlined in User Ability to Set Custom Order for Patient Flag Display.
- Tooltip: The tooltip is displayed when hovering over the flags displayed in the patient header, providing the practice with a way to share brief notes about the flag (e.g., RPM flag tooltip: Active RPM Patient, or an alternate XRP flag tooltip: Canceled or Not Eligible for RPM)
- Color: The practice can choose a color for their new Patient Flag from the list of available flag colors
- Portal Availability: When creating a new patient flag, the default display is across OfficeEMR (all portals). However, practice can opt to set up flags to display in one or more portals to improve the usefulness of flags displayed in any given area.
- Flag Type: For maximum flexibility, practice can choose between creating a new Icon Flag or a Short-name Flag.
a) When choosing the Icon Flag, the practice user would select the Icon Flag radio button, and then use the drop-down menu to choose from the list of available icons to use for their new icon flag.
b) When choosing the Short-name Flag, the practice user would select the Short Flag radio button, and then populate the desired 3-letter-acronym to use for their new icon flag (e.g., RPM or CCM).
Important note: When designing new flags, ensure that either the Icon Flag + Selected Color combination or the Short Flag Description + Selected Color combination is distinct and hasn't been used previously. A preview of existing flags is available on the Patient Flag Setup screen to assist in this process. For example, having two flags with 'RPM' as the Short Flag Description and both in Green2 color is not considered distinct. However, if you create two 'RPM' flags, one in green and the other in red, this results in unique combinations. The specific use case for each can be detailed in the tool-tip. For example, the tool-tip for the Green RPM flag could read "Active RPM Patient," while the Red RPM flag's tool-tip might state "Not Eligible or Patient Declined RPM."


