The Announcements section of MyMedicalLocker (aka the Patient Portal), allows practices to create custom messages that will display to patients when they log in to their MyMedicalLocker account. This article will explain how to create the announcements and will demonstrate how these messages will display to the patients.
Steps to create a MyMedicalLocker Announcement
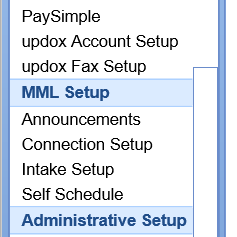
- Navigate to the Setup portal

- Select Announcements under the MML Setup category.
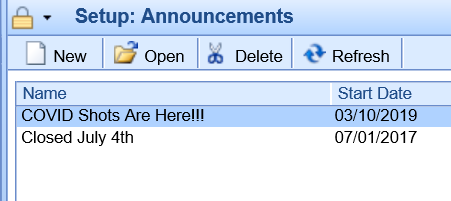
- Click the New button to create an announcement. You can also select an existing message from the list to change it as you see fit.
- Enter the announcement details.

- Click OK to save the announcement.


Announcement Details
- Message Name: This is a short title for the message. This will be the first thing patients see when they log in.
- Start Date: The date the message will begin appearing.
- End Date: The date the message will stop appearing.
- Employer: For practices that utilize our 'Employer Module' or 'Self Scheduling' feature, you may be required to select a group.
- Announcement: The text of the announcement.
Patient View of MyMedicalLocker Announcements
Upon logging into MyMedicalLocker, Announcements that are relative to the patient will display in the lower left-hand corner of the screen under the Announcements section. Notice, that the 'Message Name' displays first. It is also helpful to realize, that more than one announcement can be available at any given time.
Clicking on the 'Announcements' header will reveal the full Announcement details screen.

