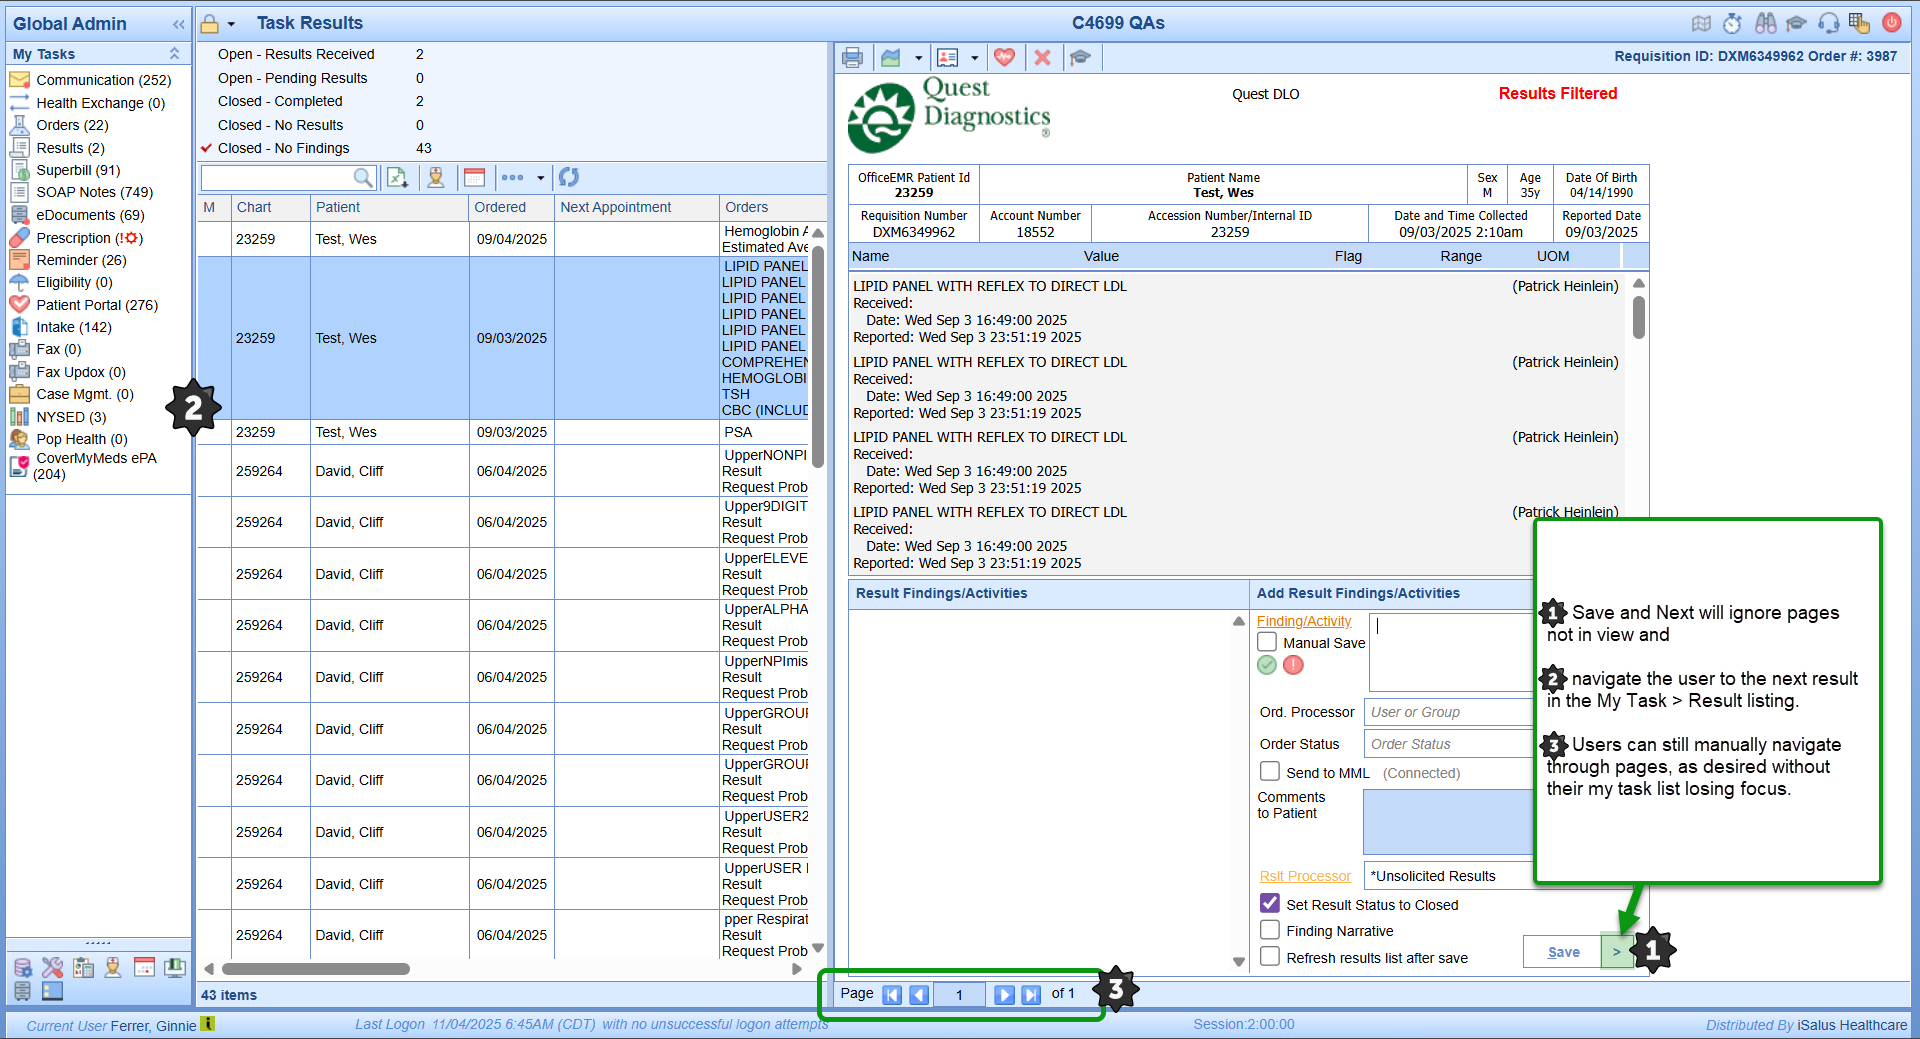
Save & Next no longer navigates the user through pages within the result in view but instead moves the user through the Task Results list in the left viewing pane.
Navigating Task Results with Save & Next
As of our 25.146 release (11/20/2025) the Save & Next button was updated to:
- Save the current result Findings & Activities
- Navigate to the next result in the Task Results listing to display the next result for processing
- Users can still view pages associated to the result in view using the manual navigation buttons (which doesn't affect the focus in the Task Results list)
Single Click Result Processing
The Single Click Result Processing feature introduced to streamline Result Findings and Activities workflow, allowing users to move through results more efficiently with fewer clicks, whether or not Single Click Auto Save is enabled.
For users with Single Click Auto Save & Next enabled, Normal and Abnormal results can still be processed automatically in one click, with the option to temporarily pause automation using the Manually Save checkbox when adjustments are needed.
When working from My Tasks > Results, completed findings continue to display the familiar check-mark indicator as users advance through results and pages. This update refines the user experience, maintaining existing functionality while reducing steps for faster, more consistent result processing.
User Settings to turn on Single Click Result Processing:
1. Determine if you want to set up this new functionality for Normal, Abnormal, or both types of results.
2. Access your user settings one of two ways:
a. User settings through the User Setup screen as outlined here:
i. Then search for and set up the following related user settings, as desired:

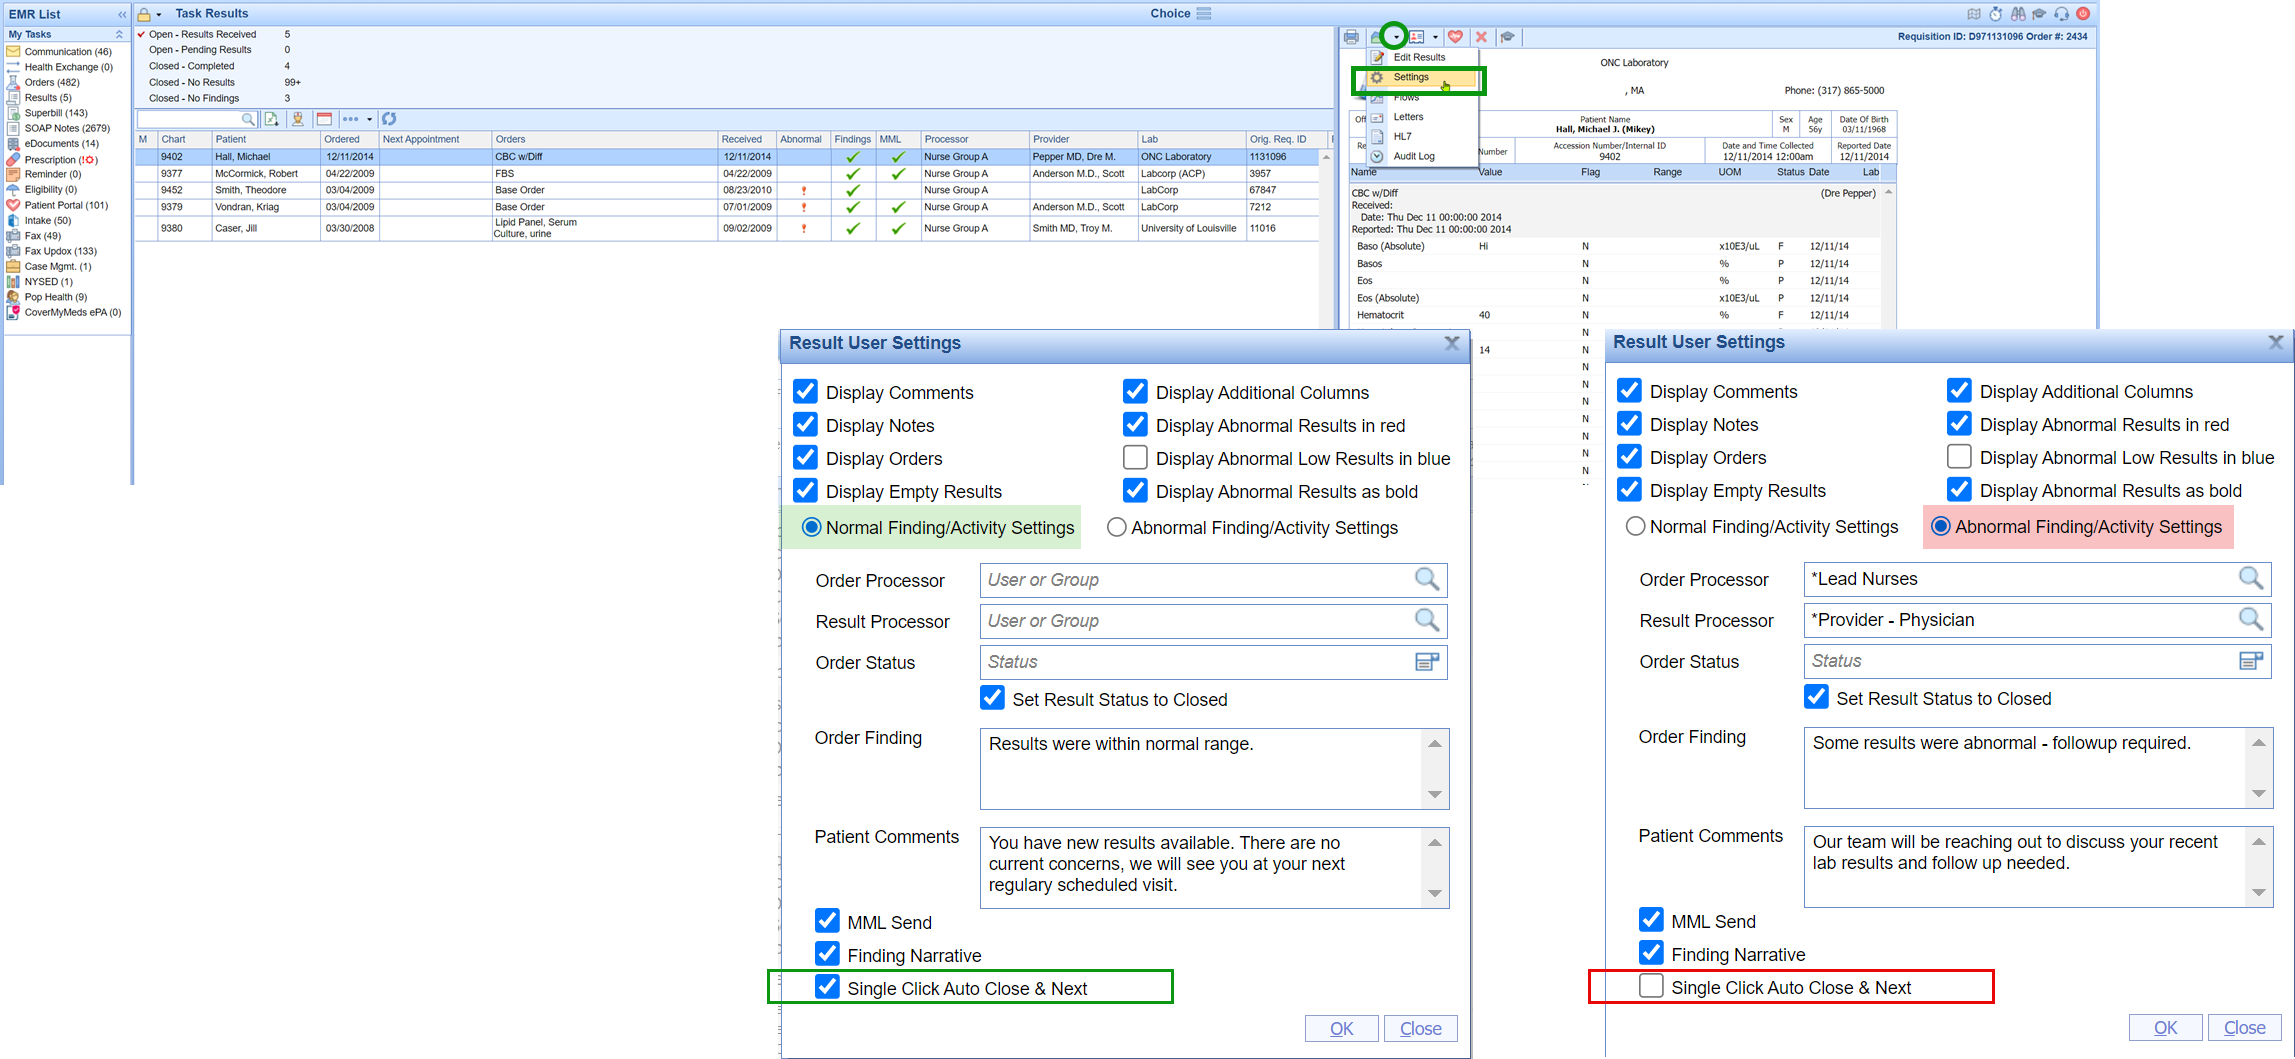
b. User settings in the Result User Settings window from any lab result requisition view:
Open any Result requisition, click on the Result Option menu item drop down arrow and choose 'Settings'. In the Result User Settings screen you will notice that there is a new 'Single Click Auto Close & Next setting checkbox associated with Normal Finding/Activity Settings and Abnormal Finding/Activity Settings. Users can choose to turn on this new single click functionality for one, both, or none (based on their personal needs).
Notice in the example below, this user only set up Single Click Result Processing for the Normal Findings/Activity Settings default...

3. Once you have chosen to turn on either of the user settings shown in step 2 above, you will need to follow the Single Click Result Processing Workflow noted in the next section.
Single Click Result Processing Workflow:
Single Click Result Processing, once turned on by a user, works the same regardless of where the user opens the Result Requisition and accesses their Green Checkmark icon for Normal findings or the Red Exclamation icon for Abnormal findings. At any time the user needs to pause the automated processing that occurs with Single Click Result Processing, they will just need to click to check mark the Manual Save checkbox.
Processing a lab with Single Click Result Processing turned on for your user account:
1. Access the Result Requisition.
2. Review the result data to determine your findings, most importantly, know if you need to override your Normal or Abnormal Defaults.
3. Once you know the Normal/Abnormal finding, you have two processing options: unchecked manual for auto-processing OR override auto-processing by checking ‘Manual Save’ in those cases where you want to add additional content to your Result Findings:
a. Green Checkmark for Normal Findings.
b. Red Exclamation icon for Abnormal Findings.

Note: The Manually Save option only appears when the Single Click Auto Save & Next feature is enabled. Users who enable the feature for only one result type (Normal or Abnormal) should be mindful of which will auto-process.
In case of accidental processing, users can easily access the result, engage the "Manually Save" checkbox, then input the updated Findings/Activities, and then use the save button to complete the update.
