One of the options for exporting Summary of Care files is to schedule an extract. This is especially helpful for individuals that need to download the CCDA files to send to a SINGLE third party. If the intention is for multiple vendors to receive your CCDAs it may be better for you to establish a CCDA Interface via Iguana. Once an extract has been scheduled, the data will be exported to your computer in the destination that you choose. In order to do this, a tool must be installed on your computer that coordinates this. This guide will explain how to schedule an extract and how to install the tool
Install the TPS Receiver
Obtain the necessary files
- Contact iSalus Healthcare to receive access to the necessary files
- Copy and Paste these files on your computer. It is best to add these files to the same location that you plan on having the files extracted to. In the example below, I have added the files to my C drive in a folder labeled, iSalus_Extract

Run the Install
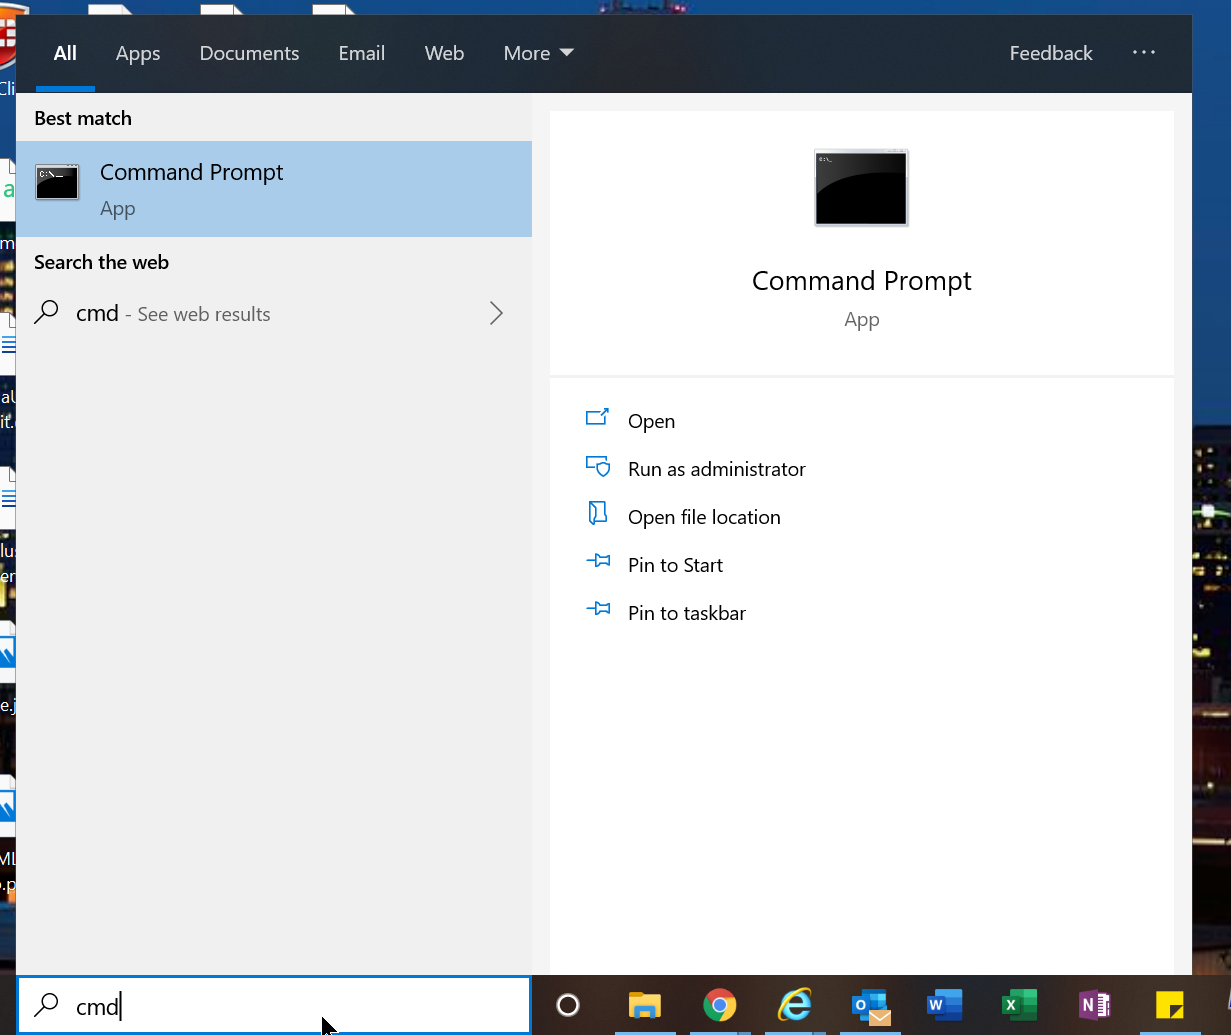
- On your computer, click 'Start'
- Search for 'cmd' and select 'Command Prompt' when it appears
- Select 'Run as Administrator'. THIS STEP IS CRITICAL.
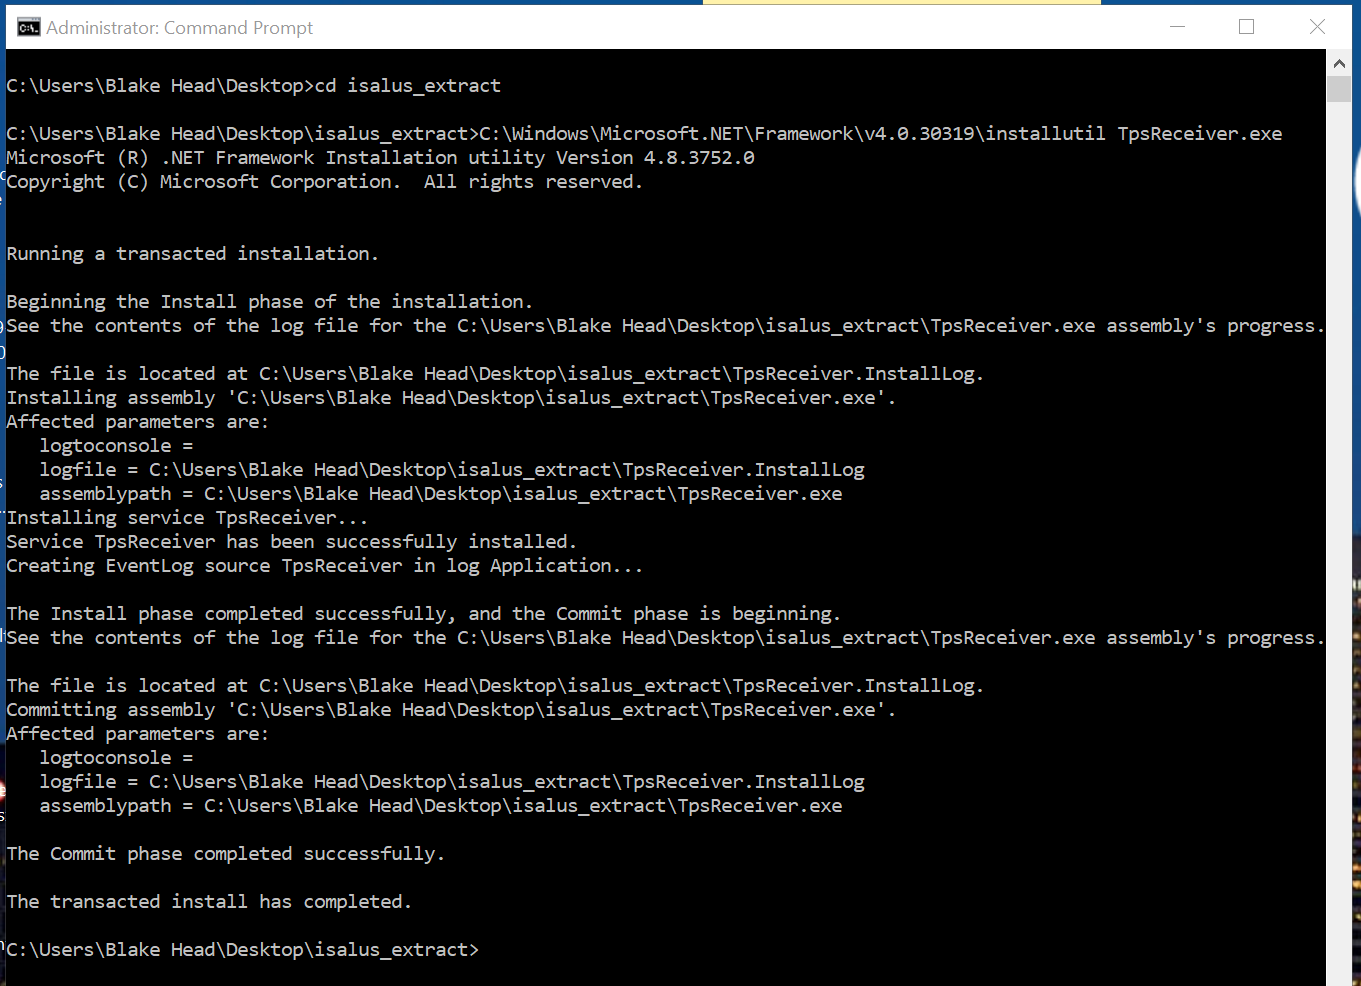
- In the Command Prompt window, you need to navigate to the folder that you saved the files.
- Usually the command prompt will open with your C drive selected.
- To change your directory type 'cd [enter your path here]'. For example, cd desktop\isalus_extract
- Click Enter. You should now be in that folder.
- Then, type the install command:
- C:\Windows\Microsoft.NET\Framework\v4.0.30319\installutil TpsReceiver.exe
- Click Enter. The tool will be installed.
- You want to make sure that the very last line says 'The transacted install has completed.'


Configure the TpsReceiver.config File
- Open the folder where you saved the files
- Open the file labeled 'TpsReceiver.exe.config' with a text editor like Notepad
- The following 'value' fields need to be updated:
- <add key="UserID" value="iSalusUserIDHere" />: Change this to be the User ID that has access to the Data Export window.
- <add key="Password" value="iSalusPasswordHere" />: Set the password for the User ID that you choose above
- <add key="Company" value="iSalusDatabasIDHere" />: Set the database ID to be the database that you use to log into. Please note, this must be the actual database ID. This might look like 'C9999'. It is unlikely to be a word. If you do not know what this is, follow these steps:
- Click 'Current User' at the bottom of any screen to open User Settings.
- Select the 'User' tab on the right
- The value is stored in the 'Company' field
- <add key="Folder1" value="c:\\TPS\client_hl7" />: Change this to be the file path that you want to save the data. For example, I added a new sub-directory inside of my isalus_extract folder labeled 'Files'. Therefore, my path is 'C:\Users\Blake Head\Desktop\isalus_extract\Files'
- Save the file
Best Practice: Create a new user in your system that only has access to the Data Export tools and use this User ID and Password.
Start the Service
- On you computer, search for 'Services' and open that tool.
- In the list, look for 'TpsReceiver' and select it
- Click 'Start'. The tool will now be running.

Schedule an Extract
To schedule an extract, follow these steps:
- Navigate to Reports > Summary of Care
- Click the down arrow next to 'Export' then 'Schedule'
- Click 'Add' to create a new schedule
- Enter the details accordingly:
- Export Type: You can choose an entire population or just a single provider.
- Appointment From and To: This finds patients for a specific provider by appointment date.
- Schedule Setup: Select either a specific date or a recurring pattern. You will also need to select a time. The time is important because the PC/Server will need to be available at this time.
- Click Apply to save changes.

Accessing the Data
Now that the tool is configured, the tool will check for data every 5 minutes and download it to your computer at the scheduled time. The files should be downloaded to the folder that you setup in the prior steps.
