The Batches screen can be found in the Billing portal under the Statement category on the navigation bar. This screen, by default, will display all batches that have been prepared and are ready to be submitted and batches that have not been completely printed. This screen can be used for reviewing statement batches, submitting statement batches, and viewing statement batch history. If there are any pending batches that are currently in the process of being built the Statement Status screen will automatically open when you load the Batches screen.
Fields
Checkbox: This box will be used to mark the batch(es) as part of the selection.
Statement ID: The unique id of the batch.
Status: The current status of the batch.
Prepared: The date the statement batch was created.
Submitted: The date the statements were submitted or printed.
Statement Count: The number of statements in the batch.
Warning Count: The number of statements with warnings in the batch.
Print Completed: The print status of the batch.
Balance: The total balance of the statements in the batch.
Letter Search: The range of patient last names that statements in the batch were produced for.
Advanced Search Fields
- Statement ID: Enter the ID for the batch.
- Submission ID: Enter the Submission ID for the batch.
- Type: Select the Type of batch
- Status: Select the Status of the batch.
- Warnings: Select the Warning status of the batch.
- Prepared: Enter the date range for the Date Prepared.
- Due: Enter the date range for the Due Date.
- Submitted: Enter the date range for the Date Submitted.
- Statement Count: Enter the range for total Statement Count.
- Warning Count: Enter the range for total Warning Count.
- Balance: Enter the range for statement batch total Balance.
- Envelope: Select the Envelope type for the batch.
- Vendor: Select the Batch Vendor.
- File Status: Select the File Status.
- Letter Search: Select the Letter that you are looking for the batch to contain.
- Letter Range: Select the specific Letter Range for the batch.
- Claims List: Enter a List of Claim IDs.
- Claim ID: Enter a single Claim ID.
- Chart Number: Enter the Chart Number for the patient.
- Resp. Party List: Enter a List of Responsible Parties.
- Resp. Party ID: Enter a specific Responsible Party.
Buttons at the top of the screen
- New: There is not a function for this button on this screen. It will always be inactive.
- Open: To open the Batch Details screen double click any data row.
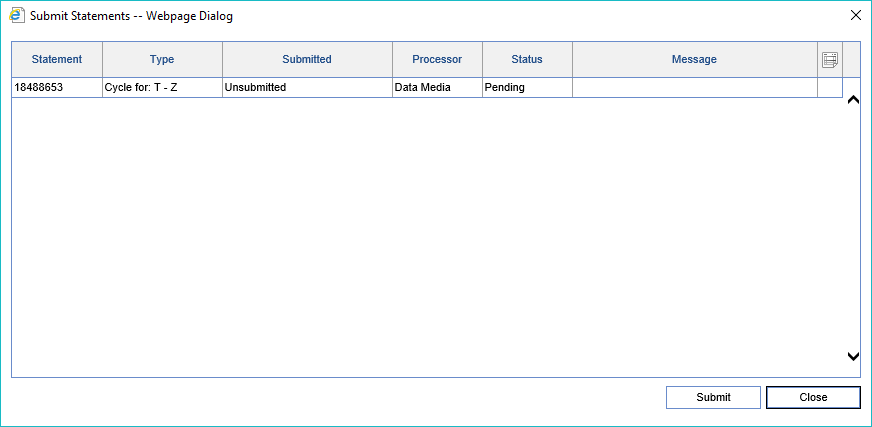
- More > Submit Statements: This button will allow the user to submit the selected batch(es) of statements.
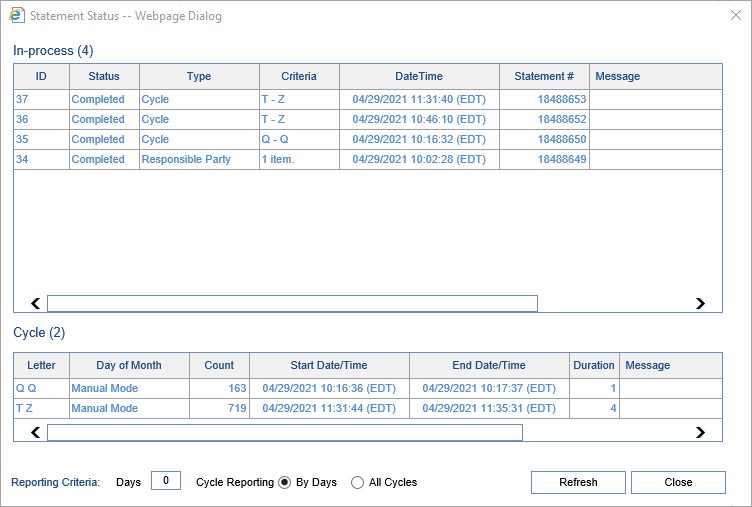
- More > Statement Status: This button will open the Statement Status screen displaying the build batch job statuses of recent statement batches.