Once your practice has been set up to utilize this feature, you can download the connection file and get to work building new Billing Analytics reports. To do this, use the following steps:
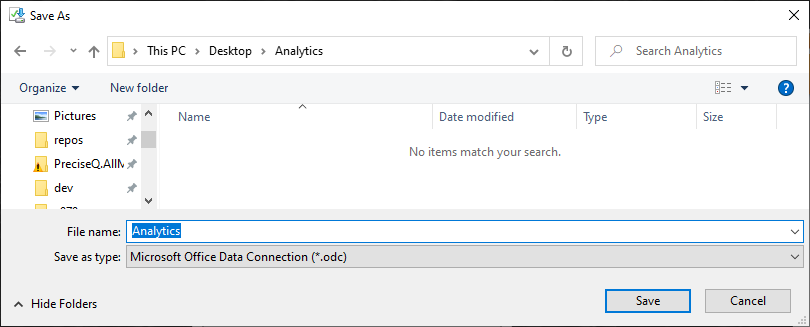
- Create a folder where you would like to store your Analytics reports. In this example, it's a folder on the Desktop called 'Analytics.'
- In iSalus, navigate to Reports.
- Click Billing Analytics (Adv.) if you have both billing analytics models. Otherwise, click Billing Analytics.
- A pop up will appear prompting you to save the report – click the down arrow next to Save, and click Save as:

- In the resulting window, name your file whatever you would like your connection to be called in Excel, then save it to the folder you created in Step 1. In this example, it's called 'Analytics'.
- Navigate to the folder and open the saved file.
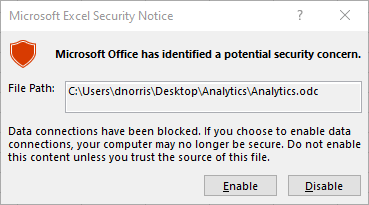
- If you receive the following warning, click Enable:
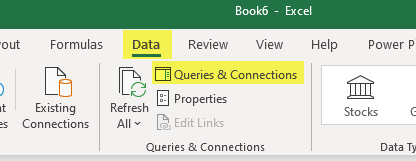
- The Excel worksheet will open with a Pivot Table already started. At the top of the screen, click Data, then Queries and Connections:
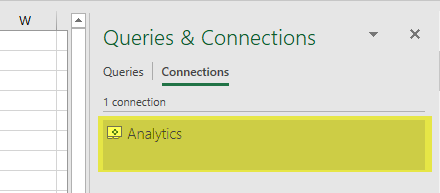
- You will see your saved file name as the name of the connection in the right-hand pane. Double-click this connection:
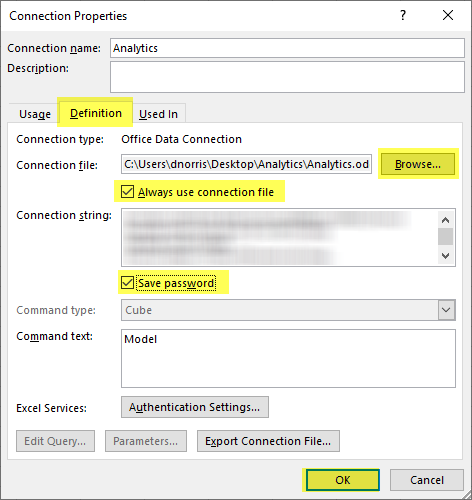
- In the Definition tab of the Connection Properties, ensure that the Always use connection file and Save password boxes are checked (clicking Yes for confirmation), and click OK:
- At this point you can save your report, preferably in the same folder as the connection file. If you ever move the connection file, you may need to modify the Connection file property in the Connection Properties window shown above.


