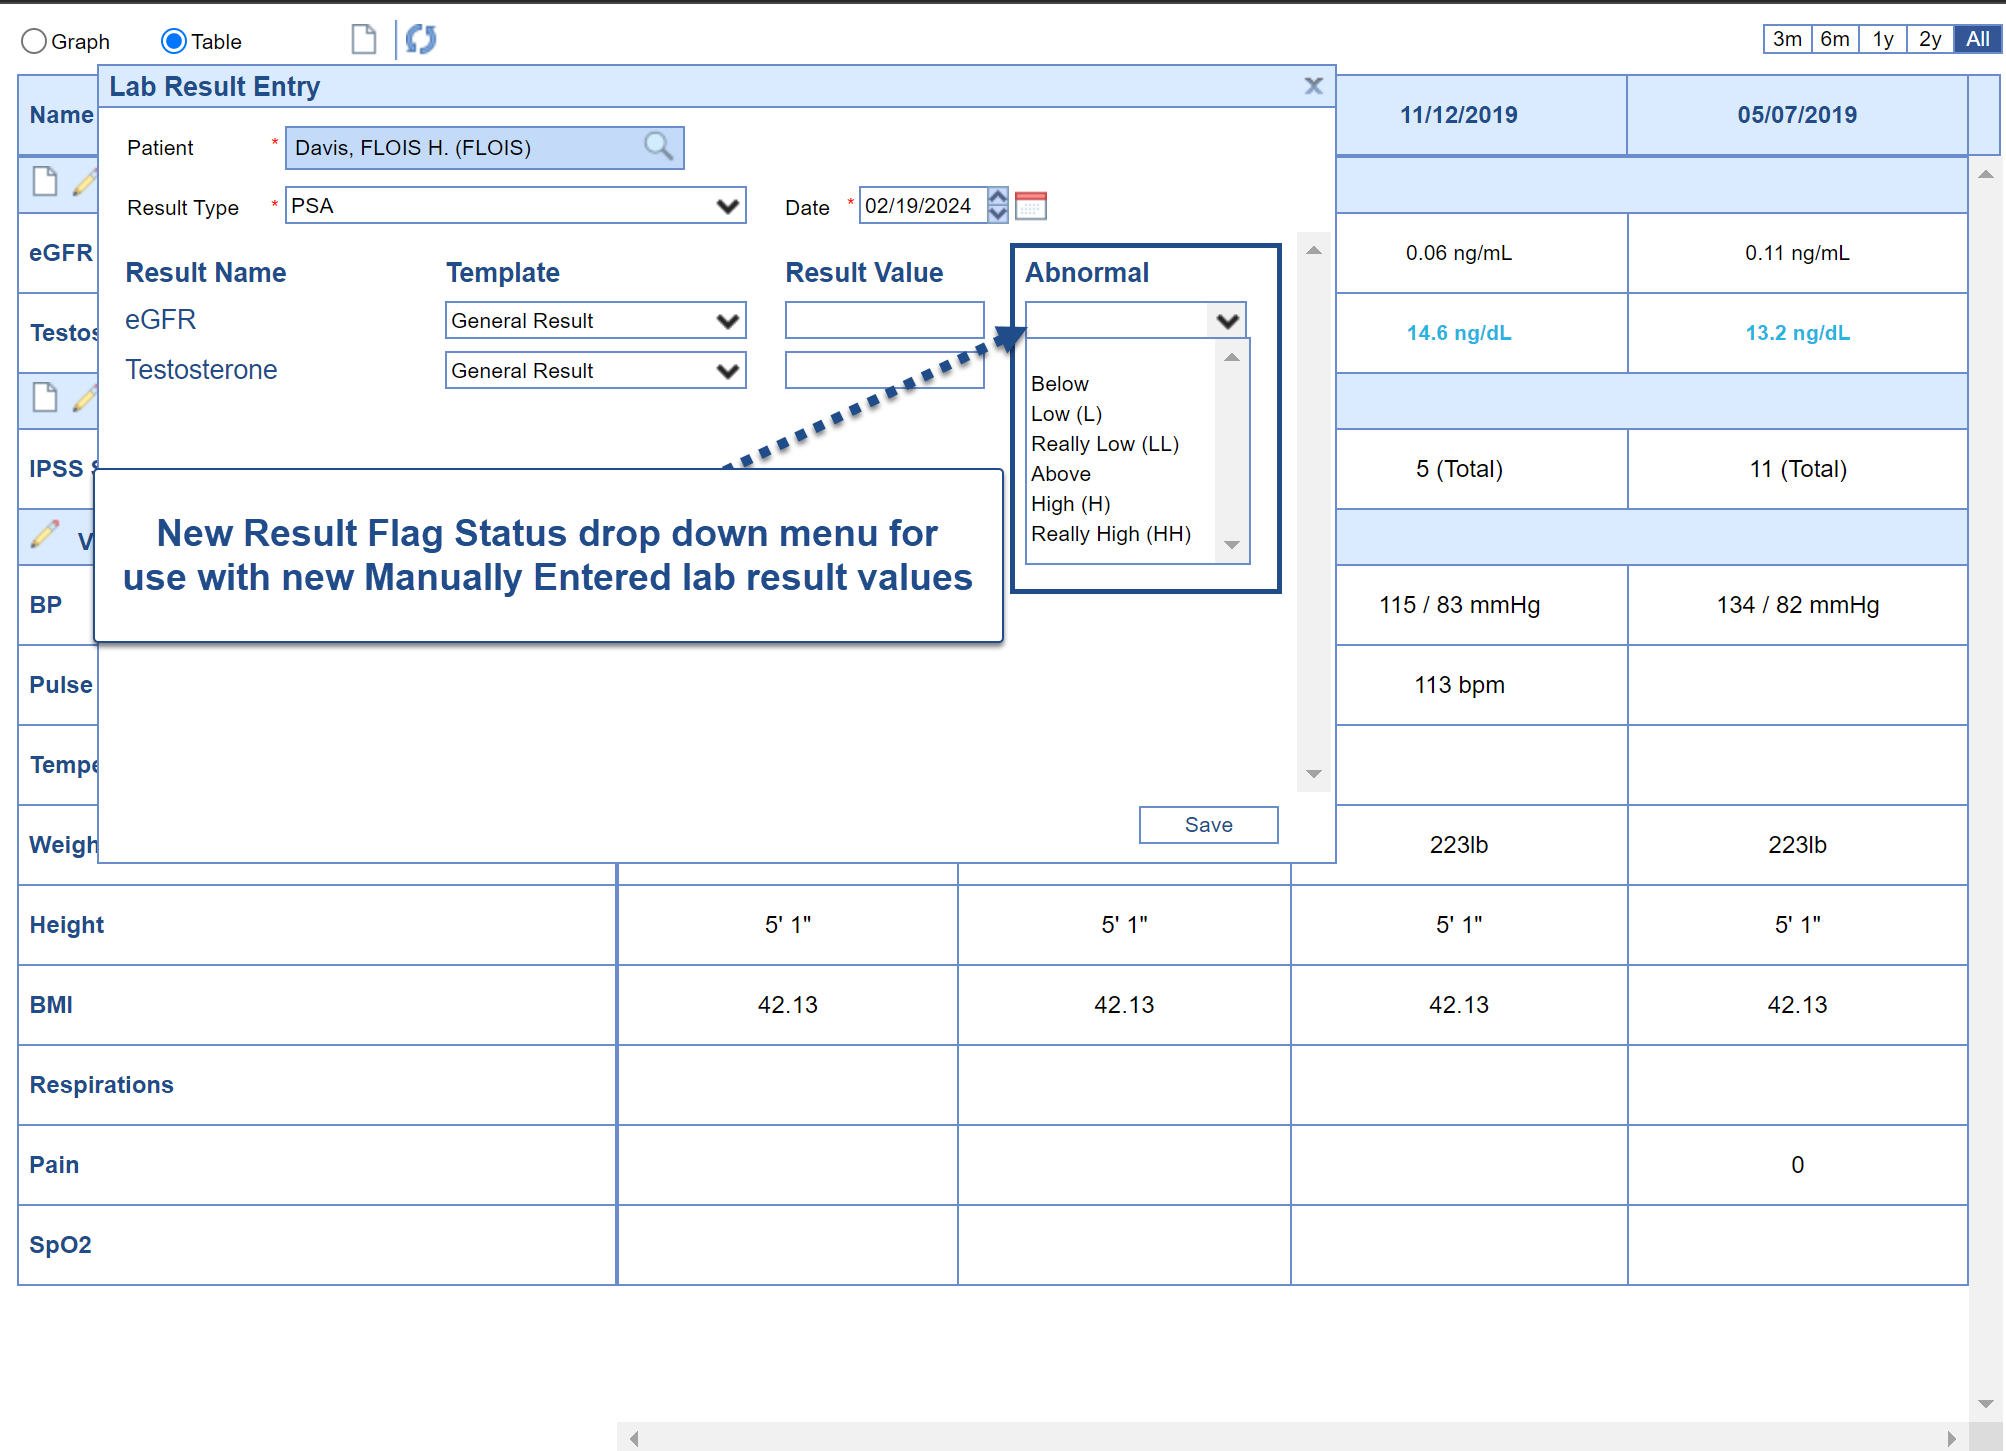
Lab Results may be viewed, graphed, and manually entered with the Vitals Lab Graph screen. A user may enter several labs at a time, or enter one-off results as well.
Note: A user may also set this as the default Vitals Clinical Marker view following these steps: User Setting: Table View
- Open the Vitals Clinical Marker screen from the Summary Timeline in the patient chart.

- Open the Table view in the upper left corner to view this as a flowsheet.

- To add a lab result for a specific lab, click the New icon to the left of the lab group.

- Set the date of the lab result and enter any appropriate values.

- Users can now set a Result Flag Status by choosing a flag from the available list. The default is blank - no flag - which displays in the standard system font as it always has, however, when setting a flag, the color display will follow the formatting as outlined in this article.

- Click Save for your entry in the lower right corner.

- Your data is saved - repeat step #4 above to continue entering labs for this lab group.


