This article describes the functionality of the  feature available within My Tasks > Fax Updox - Inbox. The PDF splitter allows users to organize pages of a received fax and upload individual pages (or groups) to separate patients and folders. This feature removes the need for third-party document management software and reduces the time spent managing the fax inbox. An article for screen definitions is available for further clarification of additional features and pop-out screens.
This feature is only available for Updox eFax clients. If you are not currently signed up for OfficeEMR's integrated eFax service and would like to learn more please visit: https://officeemr.knowledgeowl.com/help/fax. If you wish to sign up for Updox faxing, please open a ticket through support@isalushealthcare.com or the support portal.
Designed Functionality
- Separate pages of received faxes in order to save specific pages for individual patients and eDocument locations.
- Group specific pages of a PDF that can be saved as a single file in eDocuments
- Send a Communication to user/user groups containing an attachment of the split pages
- Audit specific pages of faxes to see the associated activity
- Mark the fax in the inbox as completed from within the PDF Split window

Prerequisites
- (iSalus Support Step) Enable PDF Split Feature via Database SetupContact support to enable this feature. If you are already an Updox Faxing client within iSalus this feature would have been enabled on 3.23.23, however, the next step will still need to be completed.
- Practice eDocuments - Processing - PDF Split Role: Enable Write Access
Steps to Complete
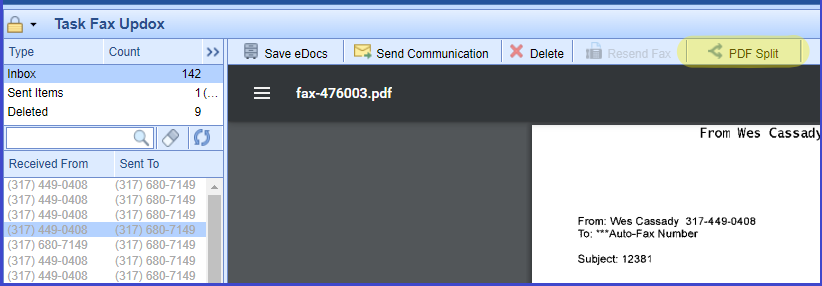
- Within My Tasks - Fax Updox navigate to the Inbox
- Select a fax from the Inbox
- In the Toolbar (right-hand side), select the PDF Split button.

Depending upon the contents of the fax, you may decide to save individual pages to their own files within eDocuments while saving them to separate eDocument Folders. Otherwise, you may want to group multiple pages together to be uploaded as one file and saved to a single eDocument location. If you wish to assign the pages to groups, continue to Step 4. If uploading individual pages, skip to Step 5.
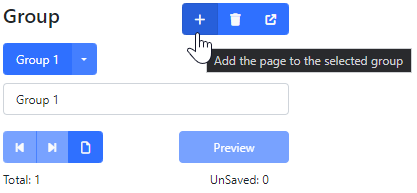
- To assign pages to a group, select the option next to Select Group, [New Group]

- This item has a default description of [New Group], you may rename this group to keep track of what documents are to be added to the Group. This description may be used as the File Name when saving to eDocuments. ex. Radiology, Referral Records
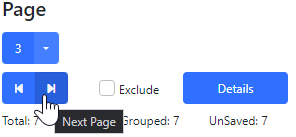
- Using the Page section, you can navigate using the Previous & Next buttons as well as the supplied dropdown. Once you are on a page that fits within the created Group, use the ADD button to assign the page to the Group
- Repeat Steps 4 - 4c until all pages are organized into each "file" you intend to upload.
- Select Preview once completed. This will display all pages associated with the selected group in the viewing pane. Confirm the contents are accurate.


You MUST SELECT PREVIEW in order to upload all pages as opposed to the page currently in focus. Be sure to take note of what is seen next to the audit button. This will show the item in focus; Page: {Page Number} or Preview: {Group Name}
- Select Save eDocs once the appropriate page or group is displayed. Use the navigation buttons or dropdown under the Page section to upload individual pages. If uploading a group, select it from the Group section and Preview it. The current item in context is indicated by the label next to the Audit:

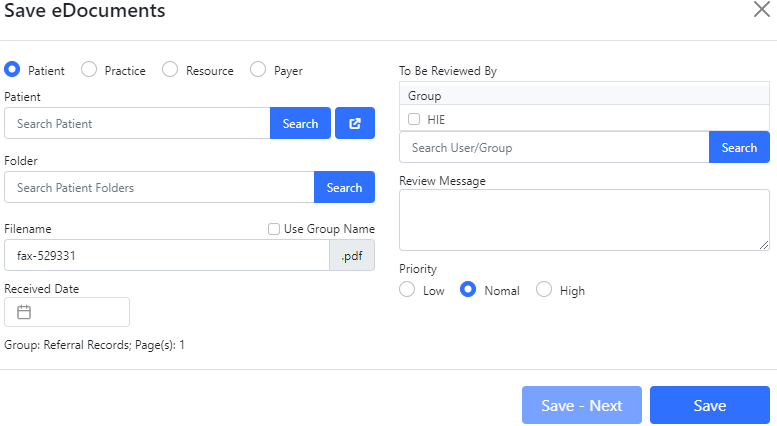
- From the Save eDocuments window:
- Search for the appropriate Patient & Folder
- Set Filename (use group name as filename available via checkbox)
- Set Received Date (if applicable)
- Search & Select User/Group for eDocument Review & add a Review Message w/ priority if desired.
- Save - Next - This option will save & assign the eDocument and navigate to the next unsaved group.
- Once all desired pages/groups are indexed, Mark as Completed. This will add a strikethrough to the fax in the inbox and will be moved to the Fax Updox - Deleted category once refreshed.


