
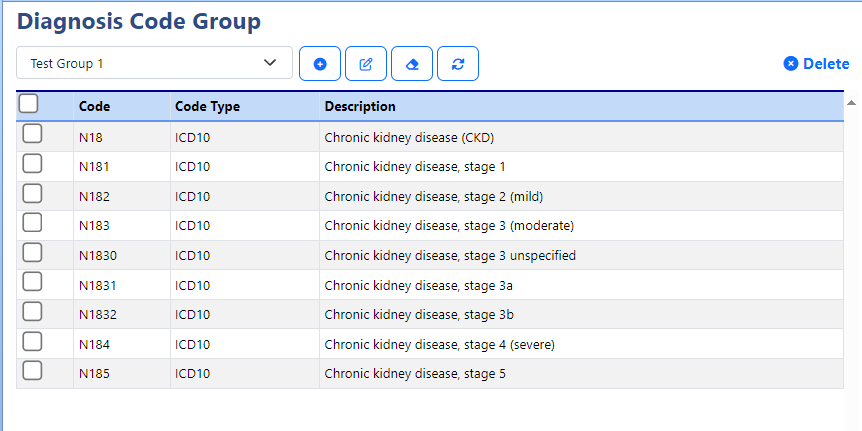
Diagnosis Code Group setup is the screen where a practice can allow a user to group diagnosis codes for additional processing. For example, cancer diagnoses can be entered into a Diagnosis Code Group and then filtered within the Summary of Care Schedule Add/Edit screen to be exported manually so that patients with an active problem list containing a code in the group will be exported.
Workflow
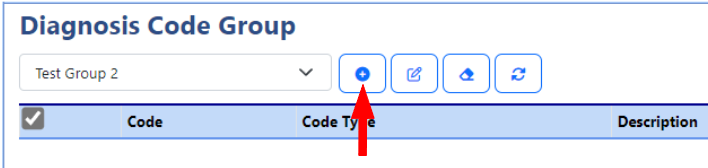
- Open the Setup portal and then select Diagnosis Code Groups under Billing Setup

- Click the Diagnosis Code Group drop-down to view/edit any previously created groups
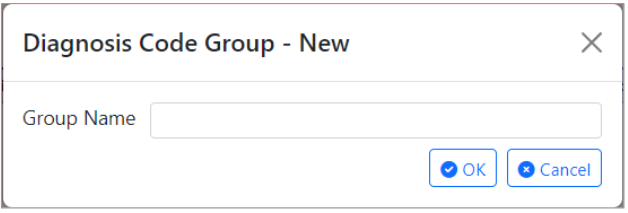
- To create a new Diagnosis Code Group, click the + icon
- Enter your new Group Name and click OK
- Use the search field (top right) to find your codes, and select all the codes to include in the group by checking the box to the left of the codes
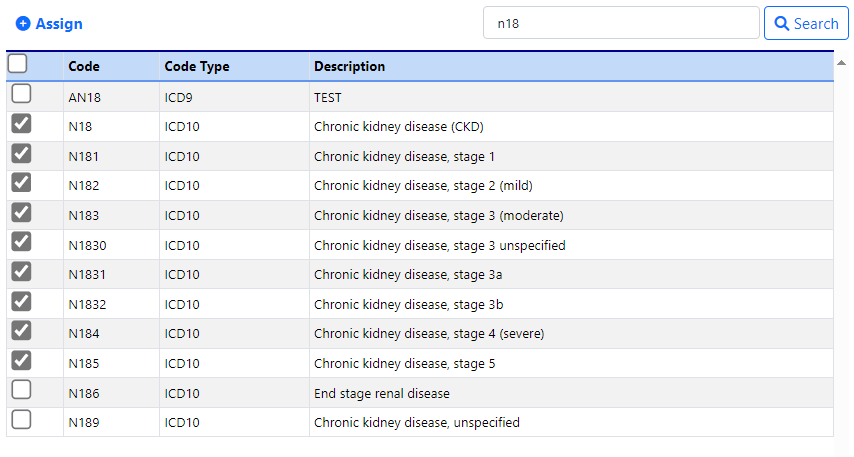
- Click Assign
- This will add the checked codes to your Diagnosis Code Group
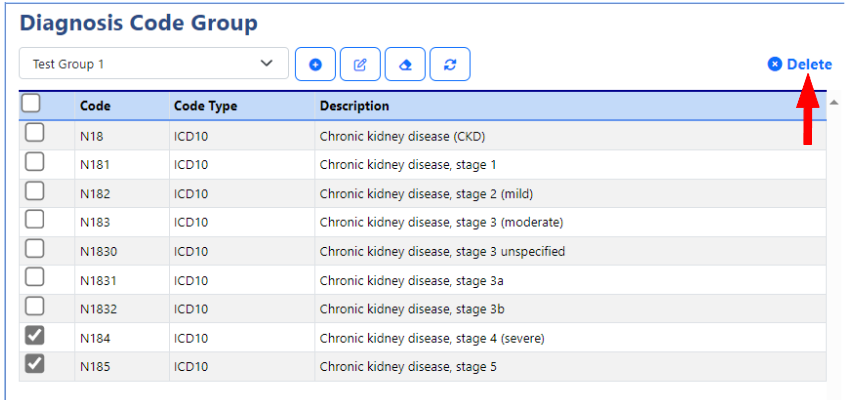
- Optional: To remove a code from the Diagnosis Code Group, simply check the box to the left of the code and click Delete


The Problem List Diagnosis Group allows users to filter by a Procedure Diagnosis Code Group, allowing all active patients with an active problem list containing a code in the group to be exported. For more information on exporting patients within a Diagnosis Code Group from the Summary of Care export, visit our Manual CCDA Exports Help Article.
