Executive Summary
Check In/Out Dashboard |
Check In/Out Dashboard Getting Started & Training |
New Features and Updates
Introducing the New Check In/Out Dashboard
We are pleased to introduce a new streamlined way to process patient check-ins and check-outs at your practice! Our new Check In/Out Dashboard is designed to transform this critical aspect of practice management by centralizing the essential tools needed for efficient patient processing into one user-friendly platform. With extensive filtering options and unparalleled flexibility, our dashboard allows medical staff to customize the software to meet the unique demands of their front-office workflows.
Our new dashboard includes features such as full functionality for assigning, processing, and merging intakes; viewing and processing print queue items; creating and printing receipts; viewing and running eligibility; creating or updating authorizations; multiple category tabs with validation and visual indicator icons; streamlined capture of patient photographs and ID cards through a consolidated process, and much more!
Getting started is easy once your practice administrator has set up the required roles in the setup portal. Once granted access, users can begin using the dashboard by following these steps:
- Access the Dashboard: Go to iScheduler and click the new Check In/Out Dashboard button on the toolbar.

- Configure User Settings: Users will set up their Patient List Filter Settings, Patient View Display Preferences, and their Status Update
- Check In Filter Settings: Determines what patients (appointments) display in the Patient List of the dashboard
- Check In Section Settings: Determines data categories to display when a patient is selected, and allows users to select the dashboard display as List View or Tab View.
- Check In Automated Workflow Settings: Determines what statuses display for the action button and status drop-down list.
 Please review the three video clips on customizing your dashboard by clicking here.
- Start Using the Dashboard: With your settings in place, you are ready to start using the dashboard to process patients. We recommend watching our training video that details all the dashboard components here or reading through the instructions here.


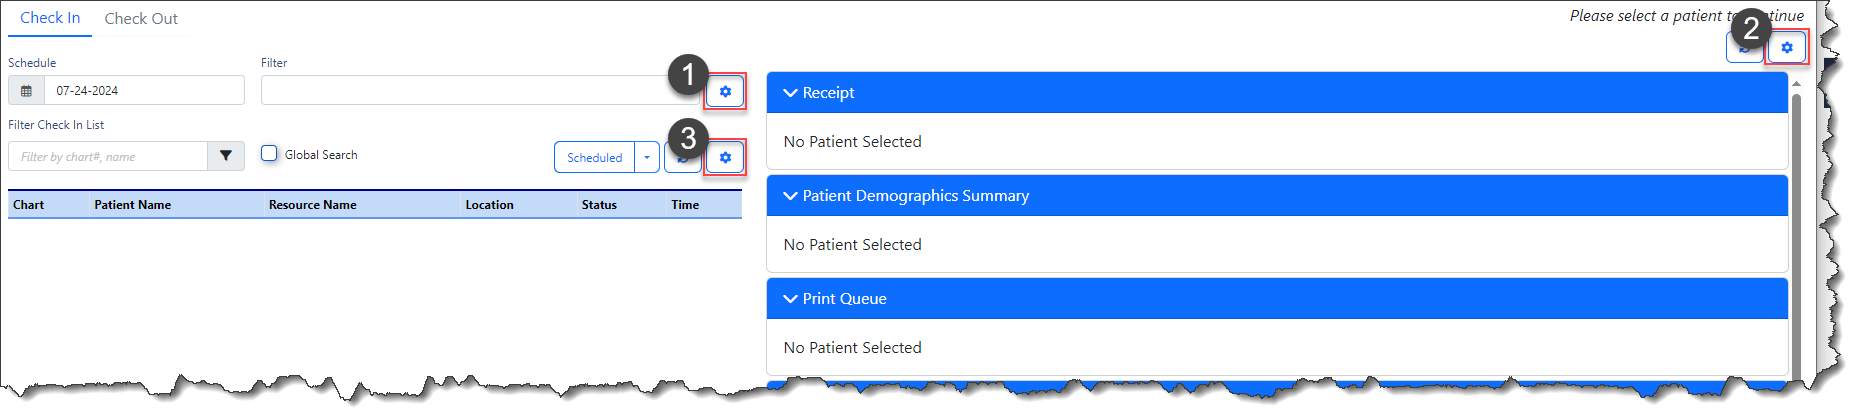
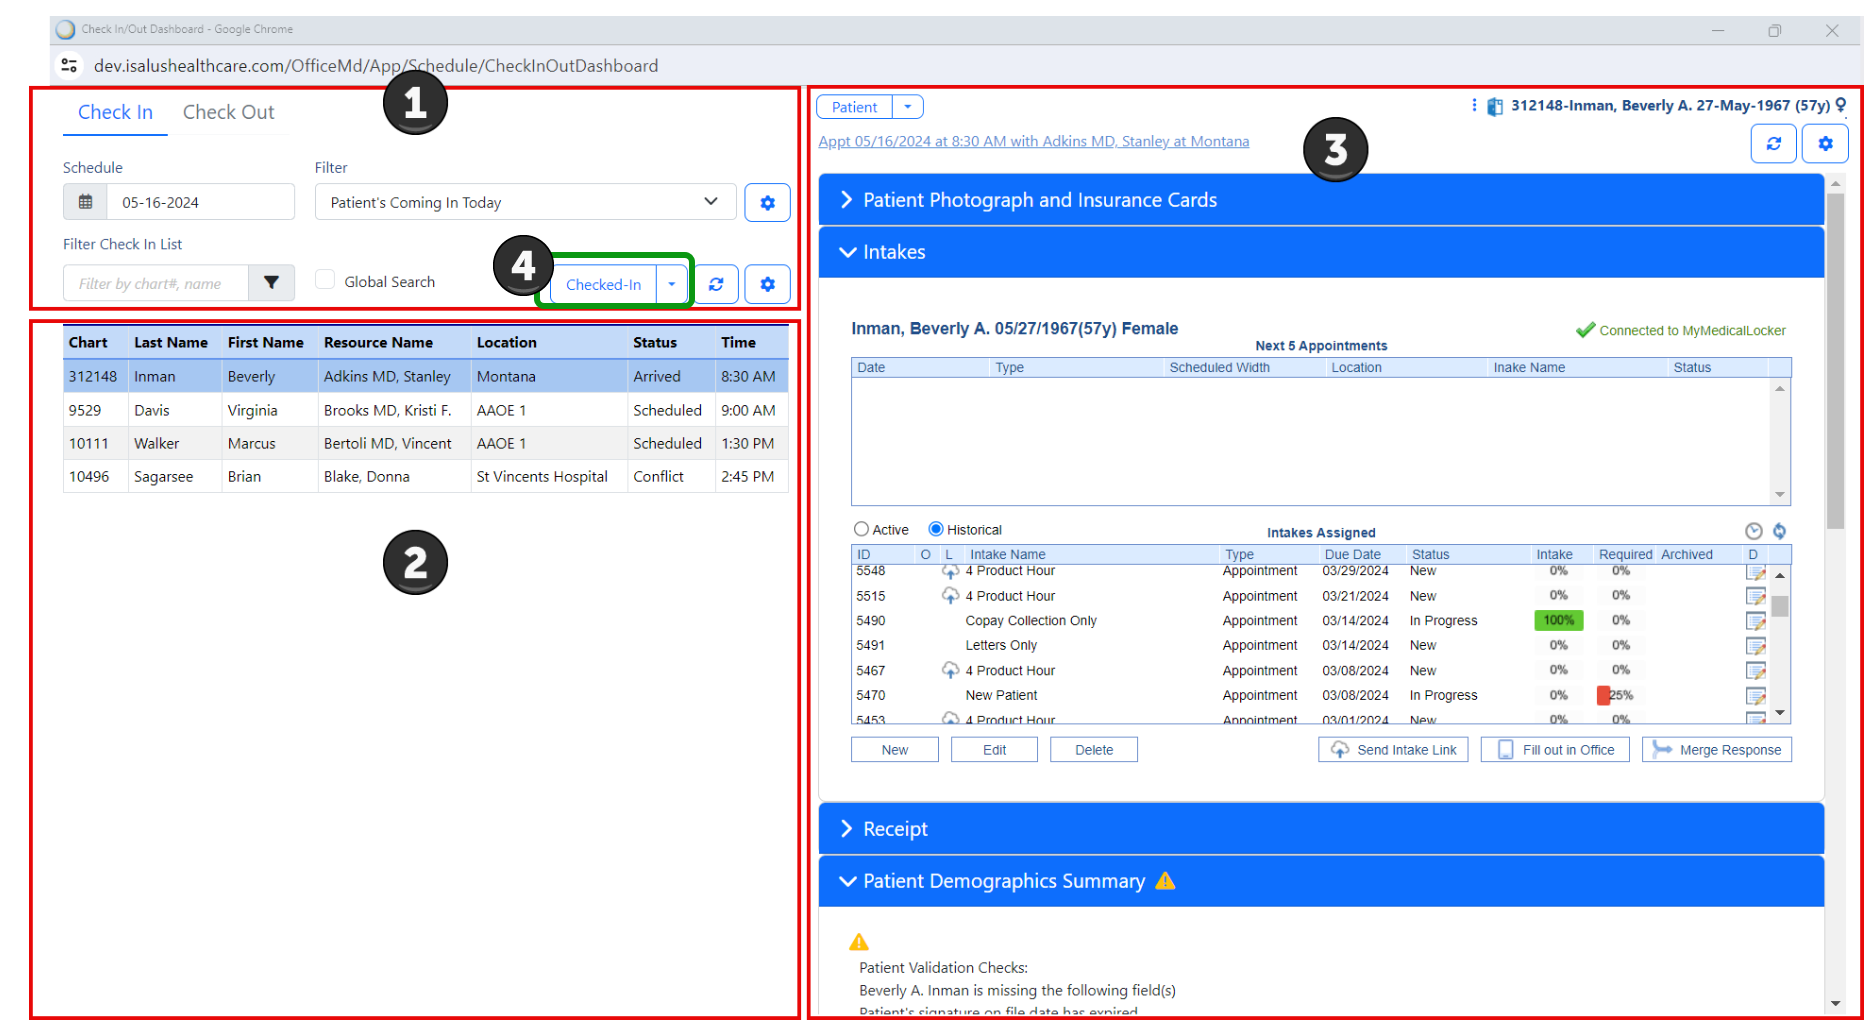
Navigating Your Configured Dashboard is easy:
- Filter Section: Displays the scheduled date and patient list filter. You can navigate to the date and set your desired filter.
- Patient List Section: Your patient list will display patients based on the selected filter.
- Patient View Section: When you select a patient in the Patient List section, this displays the patient's details based on your display settings.
- Appointment Status Button: After updating the patient, access the Appointment Status button to update the patient's appointment status.

As you use the dashboard, you can further customize your Filters, Patient View display settings, and Appointment Status buttons to streamline your patient processing for maximum efficiency. For more information on using our new Check In/Out Dashboard and its required settings, please visit our full feature documentation by clicking here.
Bug Fixes
My Tasks
eDocuments
- B17927 - Option to "Open Patient Billing" Not Working From My Tasks eDocuments: Corrected an issue When opening a patient in billing from My Task > eDocuments, where right-clicking a patient document and selecting the option to "Open Patient Billing" would display an error and the patient would not open. We have updated the logic to allow opening patients and avoid the "Failed to open the requested patient" error.


Reports
Connect
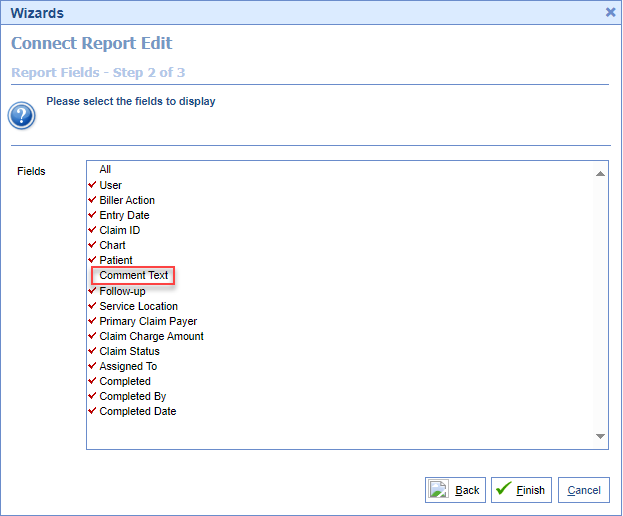
- B18097 - Biller Productivity Connect Rrport Failing to Display Results Due to Comment Text: Corrected an issue within the "Biller Productivity Connect Report" that caused it to fail to display in the UI when the Comment Text field was included but when it was removed from the report, it would display correctly in the UI. We removed carriage returns/line feeds from comments that were causing the issue to ensure it correctly displays in the UI as well as correctly exports to Excel.

iScheduler
Patient Setup
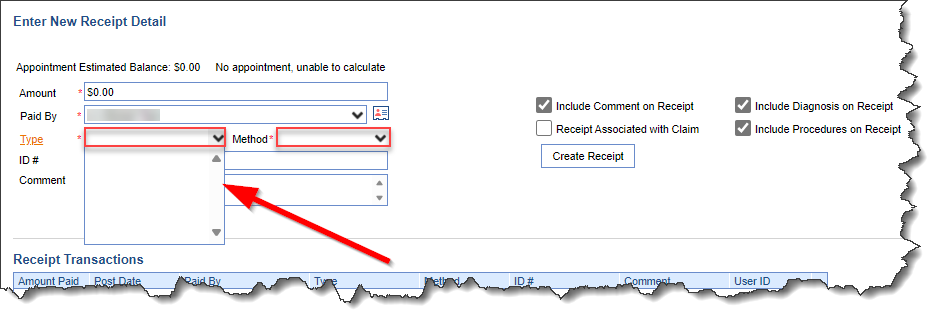
- B17897 - Quick Pay window Failing to Load Payment Type and Method List: Corrected an issue that occurred when opening the Quick Pay window from iScheduler > Patient Setup > Quick Pay, where a timeout for this call could cause the Payment Type and Payment Method lists not to load.

Patient Search
- B17899 - Formatting of DOB on the Patient Search in iScheduler Causes Database to Freeze: Resolved an issue occurring when performing a search for a patient in iScheduler and entering the date in a "2/2/1" format. This was due to an undefined variable creating a loop causing the database to freeze, and forcing the user to wait for the browser to error out before being able to exit the application and log back in.
Billing
Claim Query
- B18099 - Payments/Adjustments Displaying Out-Of-Date Order in Claim History: Resolved an issue within the Claim Query where the claim history shown in the "Patient Transaction History" screen for specific claims caused the payment/adjustments to be displayed in out-of-date order based on the deposit date. We have corrected the logic to ensure payments are always sorted in descending order by deposit date.
