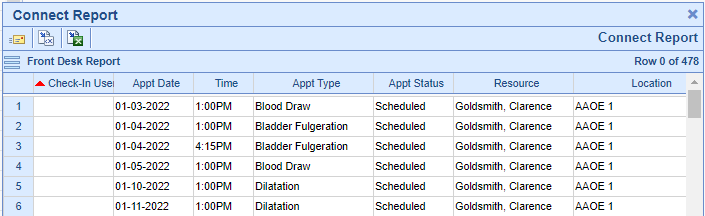
Given a date range, the Front Desk report provides a list of the appointments within that range, showing appointment information, status, paid amount, and if the patient has a MML connection.
- Go to the Reports portal.
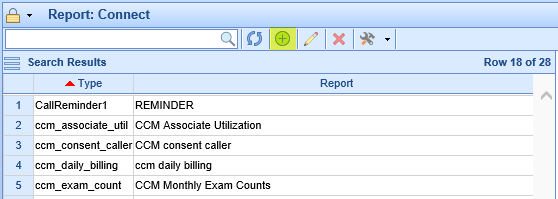
- Under EMR section select Connect.
- Click the icon with a plus sign in the toolbar to create a new Connect report entry.
- When asked to select the Report, scroll under the Appointment header and find Front Desk Report. Then fill out the parameter list as follows:
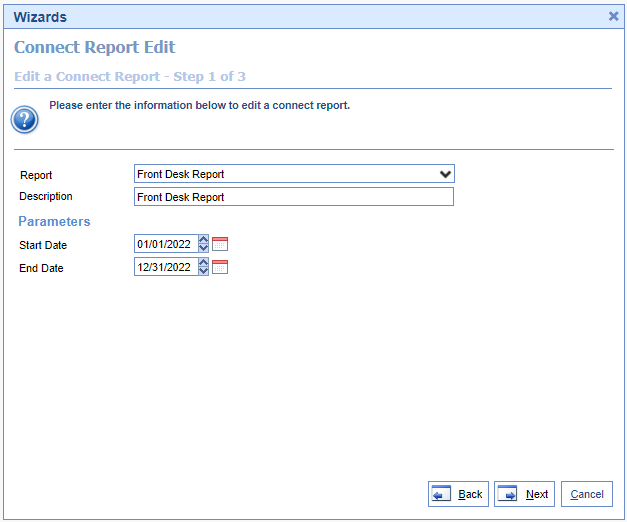
- Start Date: The starting date for the range of appointments the user would like to review..
- End Date: The ending date for the range of appointments the user would like to review.
- Select the desired fields for the report to show, or simply select 'All.' Then hit 'Finish,' then 'Close,' to complete adding the report. The available fields are as follows:
- Appt Date: The appointment date.
- Appt Status: The current status of the appointment.
- Time: The time of the appointment.
- Appt Type: The type assigned to the appointment.
- Chart #: The chart number of the patient.
- Check-In User: The user who has checked-in the appointment.
- Chief Complaint: The chief complaint documented on the appointment.
- Comment: The comment documented on the appointment.
- Location: The appointment scheduled location.
- MML: Returns 'Y' or 'N', denoting whether the patient has been connected to MML.
- Paid: The amount that has been paid towards the appointment.
- Patient: The name of the patient.
- Resource: The resource the appointment is scheduled with.
- Scheduled By: The user who scheduled the appointment.


To run this report, perform the following steps:
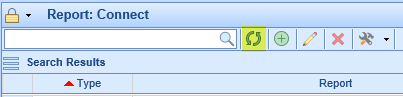
- If you just created the Front Desk Connect report, click the refresh icon on the toolbar:
- Select the created report in the list.
- Click the drop-down next to the hammer and wrench icon on the toolbar. Then click Run Report.

- You should see the results on your screen. If desired, you can click the Excel icon at the top to export these results: