This article describes the functionality of the CoverMyMeds ePA task list. This list is composed of Electronic Prior Authorizations for medications, routed through CoverMyMeds and eventually direct connections to the Payers/PBMs. This document will describe the steps for configuring, accessing, using, and ultimately completing an ePA.
Prerequisites & Configurations
Features
- CoverMyMeds (Legacy SSO)
- CoverMyMeds ePA Integration
Features can only be enabled by an iSalus representative. Please complete the Typeform if you wish to enable this functionality for your practice. Please be aware that some of the settings below may not be visible until the corresponding features are enabled.
Settings
- The settings below are REQUIRED for the Prospective ePA workflow, to begin an ePA with CoverMyMeds, it must first be determined that the prescribed medication requires prior authorization. This is done via the Real-Time Benefit Check (RxBC) functionality on the prescription pad. These settings enable the RxBC to be run when printing/sending/queuing a prescription:
- Company Setting: Run Real-Time Prescription Benefit Check (RxBC) = True/Checked
- User Setting: Run Real-Time Prescription Benefit Check (RxBC) = True/Checked
- The two settings below are optional, but recommended. These dictate the default assignee of the ePA Task Item when prescribing a medication that returns "PA Required". The User or User Group will see the ePA task in their CoverMyMeds ePA task list.
- Company Setting: EPA Processor (optional) = User/User Group
- User Setting: EPA Processor (optional) = User/User Group
Role
- The "My Tasks - CMM ePA" security screen will need to be enabled for the applicable roles. Write access will need to be granted.
- Setup > Roles > Search "CMM ePA"
- Set applicable access
In 2025, we introduced new settings to give practices more flexibility with CoverMyMeds. One setting allows practices to turn off automatic ePA sending so prescribers can decide on a case-by-case basis during prescribing. Another lets practices set a Minimum Prescription Cost to reduce low-dollar ePAs, while still giving prescribers the option to override when needed. For full details, see CoverMyMeds Settings for Customized Workflows.
ePA Process Step by Step
This article describes an expected workflow for the default configuration of the CoverMyMeds ePA process. Given the ePA process is a coordinated effort between the ePA Task assignee/prescriber, and Payer/PBM multiple variations to workflow or process can exist.
- A user with appropriate settings enabled prescribes medication and the Benefit Check is run automatically at the time of print/send/queue. If the RxBC response is "PA Required" there will be an opportunity for the user to assign an ePA task to a user or user group. Utilizing the company and user settings for "EPA Processor", this value can default to a configured user/group.
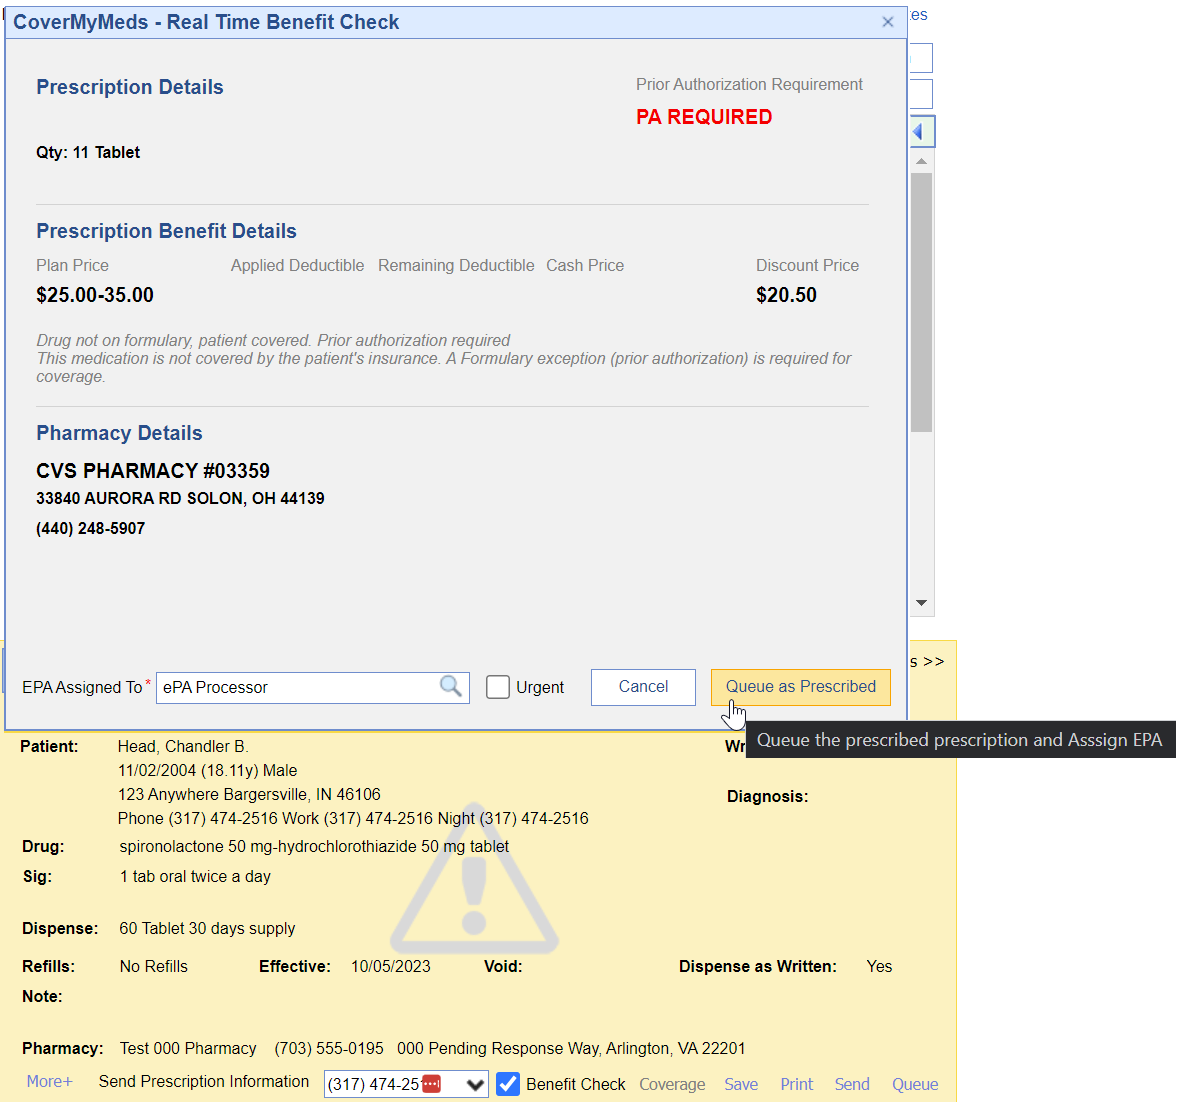
- Once, the "Print/Queue/Send as Prescribed" button is selected, the ePA task is created and is available to the assignee in the My Task List > CoverMyMeds ePA > My Assigned queue in the status of Initiated

- The ePA processor will work their My Assigned list. The first status change will be from Initiated -> Follow Up this will mean there is a question set being presented that needs to be completed in order for the Payer/PBM to adjudicate the request.
Complete the question set and submit the answers. This will change that status from Follow Up -> Submitted- Some cases may require attachments to be included with the ePA submission. In the header of the ePA task there is an icon that will pull up a screen allowing a user to attach either a SOAP Note, Order Result, or eDocument.
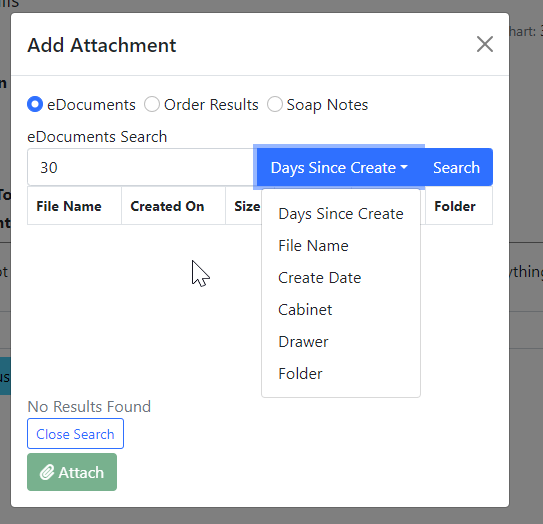
- Some cases may require attachments to be included with the ePA submission. In the header of the ePA task there is an icon that will pull up a screen allowing a user to attach either a SOAP Note, Order Result, or eDocument.
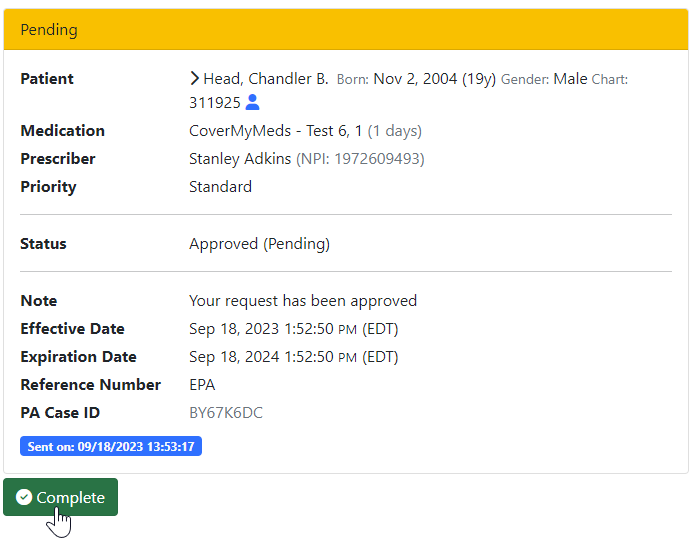
- When the payer responds to the submission the task will either contain the adjudication and may be returned as Denied or Approved. The payer may also ask additional questions after the initial set, in this case, the ePA processor would work to submit the question set again. Otherwise, a user will complete the necessary steps to complete the PA such as calling the patient or communicating with the prescriber to determine an alternative treatment plan. In either case, the user will need to mark any "Pending" ePA as Complete in order to remove it from the My Assigned list and into the Completed category.


Filtering options for working your CoverMyMeds ePA requests:
We have added new advanced filtering capabilities to compliment practice workflows when using CoverMyMeds for ePA processing. This new functionality includes moving expired, cancelled, or cancelling ePA records to new Expired/Cancelled queue. Filtering via the search field allows users to narrow down their ePA records based on Patient, Provider, or Drug. Further data refinement is made possible using the filter icon which allows users to further refine their data view by icon and then constraining data by keying in the desired filter for the remaining data fields (ePA status, date, user). The final filtering enhancement is to allow users to sort data by clicking on the column headers.
If you are not currently set up on CoverMyMeds for electronic prescription prior authorizations, you will need to reach out to have this feature enabled by an iSalus representative. Please complete the Typeform if you wish to enable this functionality for your practice. Please be aware that some of the settings below may not be visible until the corresponding features are enabled.
Additionally, once the feature is enabled for your practice, you will want to start off by reading through this article to get started.
Data Filtering Options:
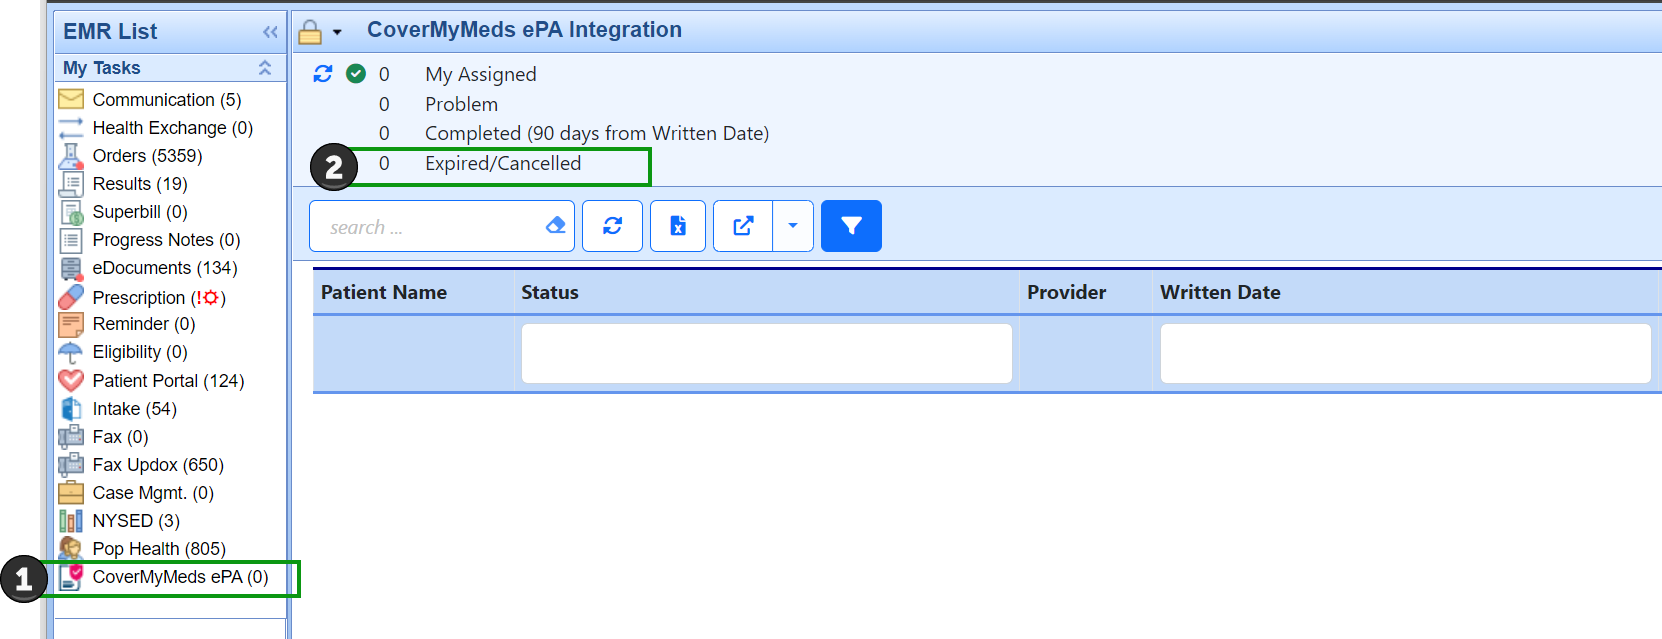
- To reduce volume of records displayed in the CoverMyMeds ePA queue we have added a new Expired/Cancelled queue category where we are automatically moving records in status of expired, cancelled, or cancelling. This helps reduce the volume of records a user has to work through but allows a user to locate and view records in these statuses should that be necessary (by accessing the new queue category).
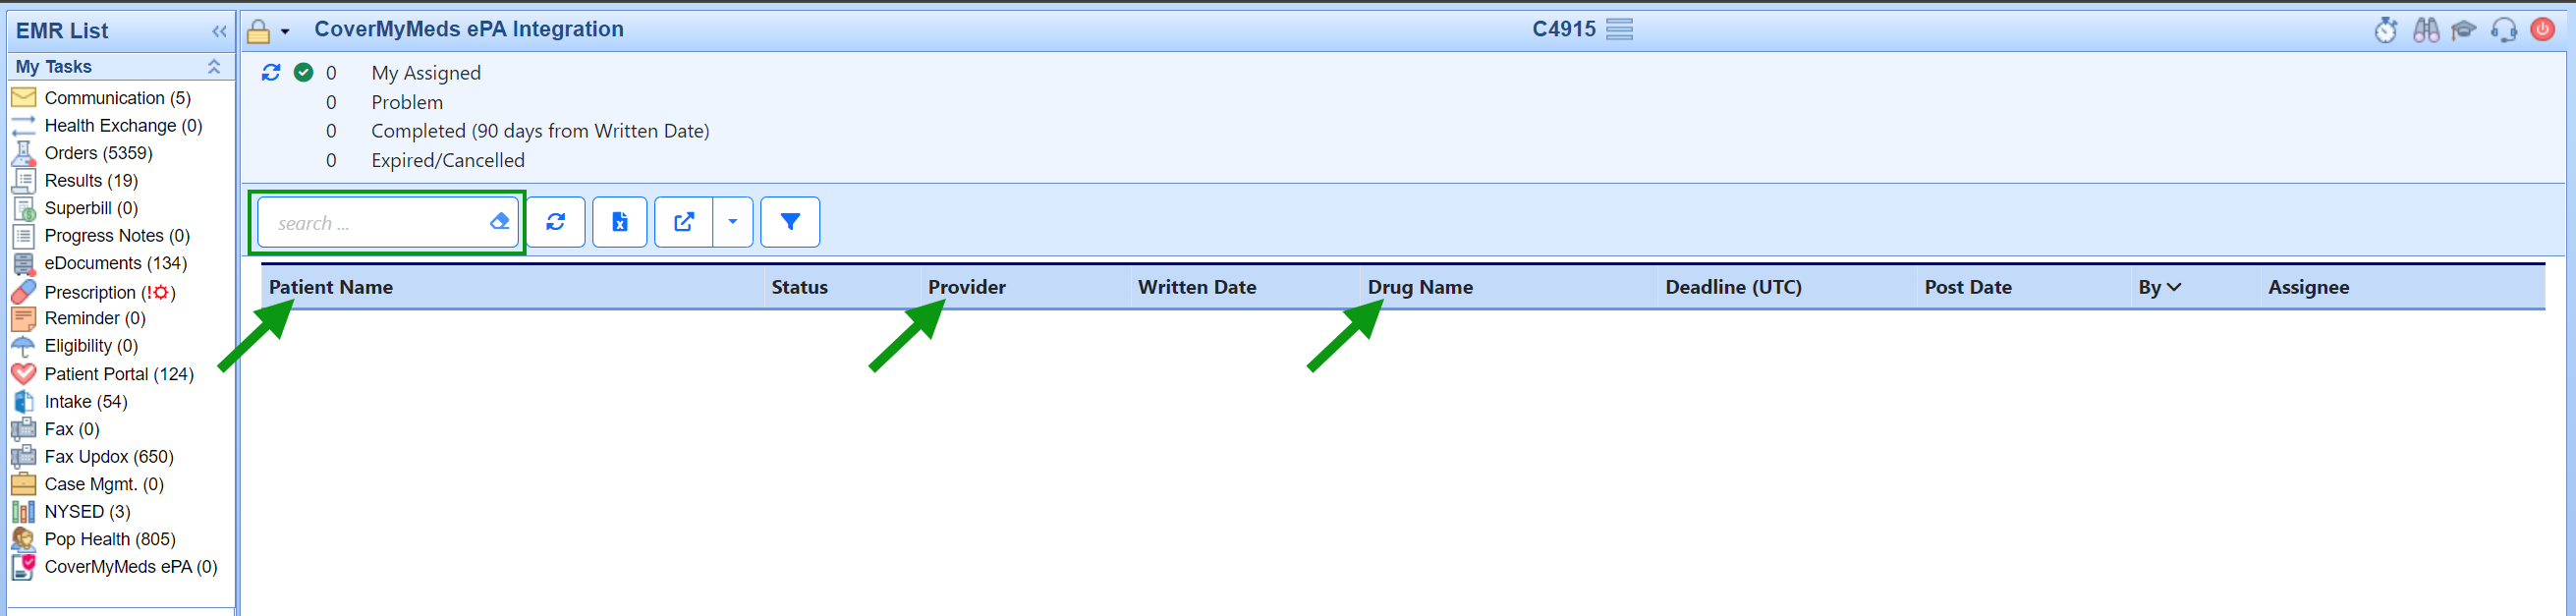
- Filtering via the search field allows users to narrow down their ePA records based user input in the search box related to Patient, Provider, or Drug. Note: The eraser icon in the search box removes the filtering and restores the full list of records.
- Further data refinement is made possible using the filter icon. The filter allows users to further refine their data view by icon and then constraining data by inputting the desired filter for the remaining data fields (ePA status, date, user).

- Clicking on the column headers allows users sort the records displayed in ascending/descending order based on the column header that they click. Note: Once a user has sorted using this method the only way to restore the system default for sorting of these records is to use the Reset Current Window.


Users can combine the data filtering options listed above for the most detailed refinement of data for maximum efficiency as shown in the example below:

⚠️ These settings are Beta-only in the 9/11/2025 Release
CoverMyMeds (CMM) Settings for Electronic Prior Authorizations (ePA)
We have introduced new settings to give practices greater control over how the CMM ePA feature is used. By default, when CMM ePA is enabled, an ePA is automatically generated whenever a benefit check indicates that a prior authorization is required. In some practice settings, however, prescribers may prefer more flexibility. The original configuration settings remain in place and work together with these new options, which are designed to reduce unnecessary ePAs and improve the overall prescribing experience.
1. Company Setting: CMM – Disable Auto-Send EPA
Default (unchecked): All ePAs are auto-sent when required by CoverMyMeds.
When checked: Auto-send is disabled. Providers must manually check/uncheck the Send EPA box when prescribing.
2. Company Setting: CMM – Minimum Prescription Cost to Auto-Send EPA
Practices can enter an even dollar threshold (default = 0).
Prescriptions below the threshold will not auto-send.
Send EPA box will display with red text “Below Minimum Cost.”
Providers may override and send EPA manually.
Example ePA "Below the threshold"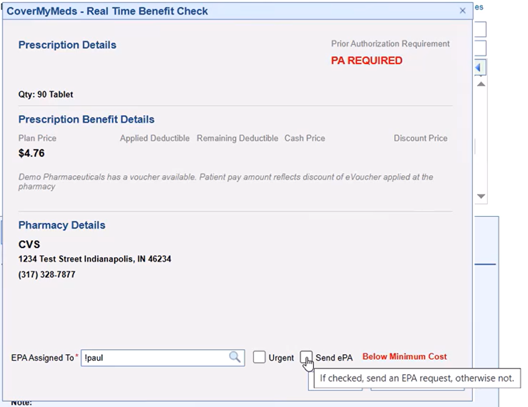
Prescriptions at or above the threshold follow the auto/manual rules of the first setting.

Behavior Summary
Auto-Send ON (default):
Send EPA box is not accessible.
Exception: if cost < minimum threshold, box becomes available for provider override.
Auto-Send Disabled:
Send EPA box is always accessible.
Default checked/unchecked based on minimum cost setting, but provider can override.
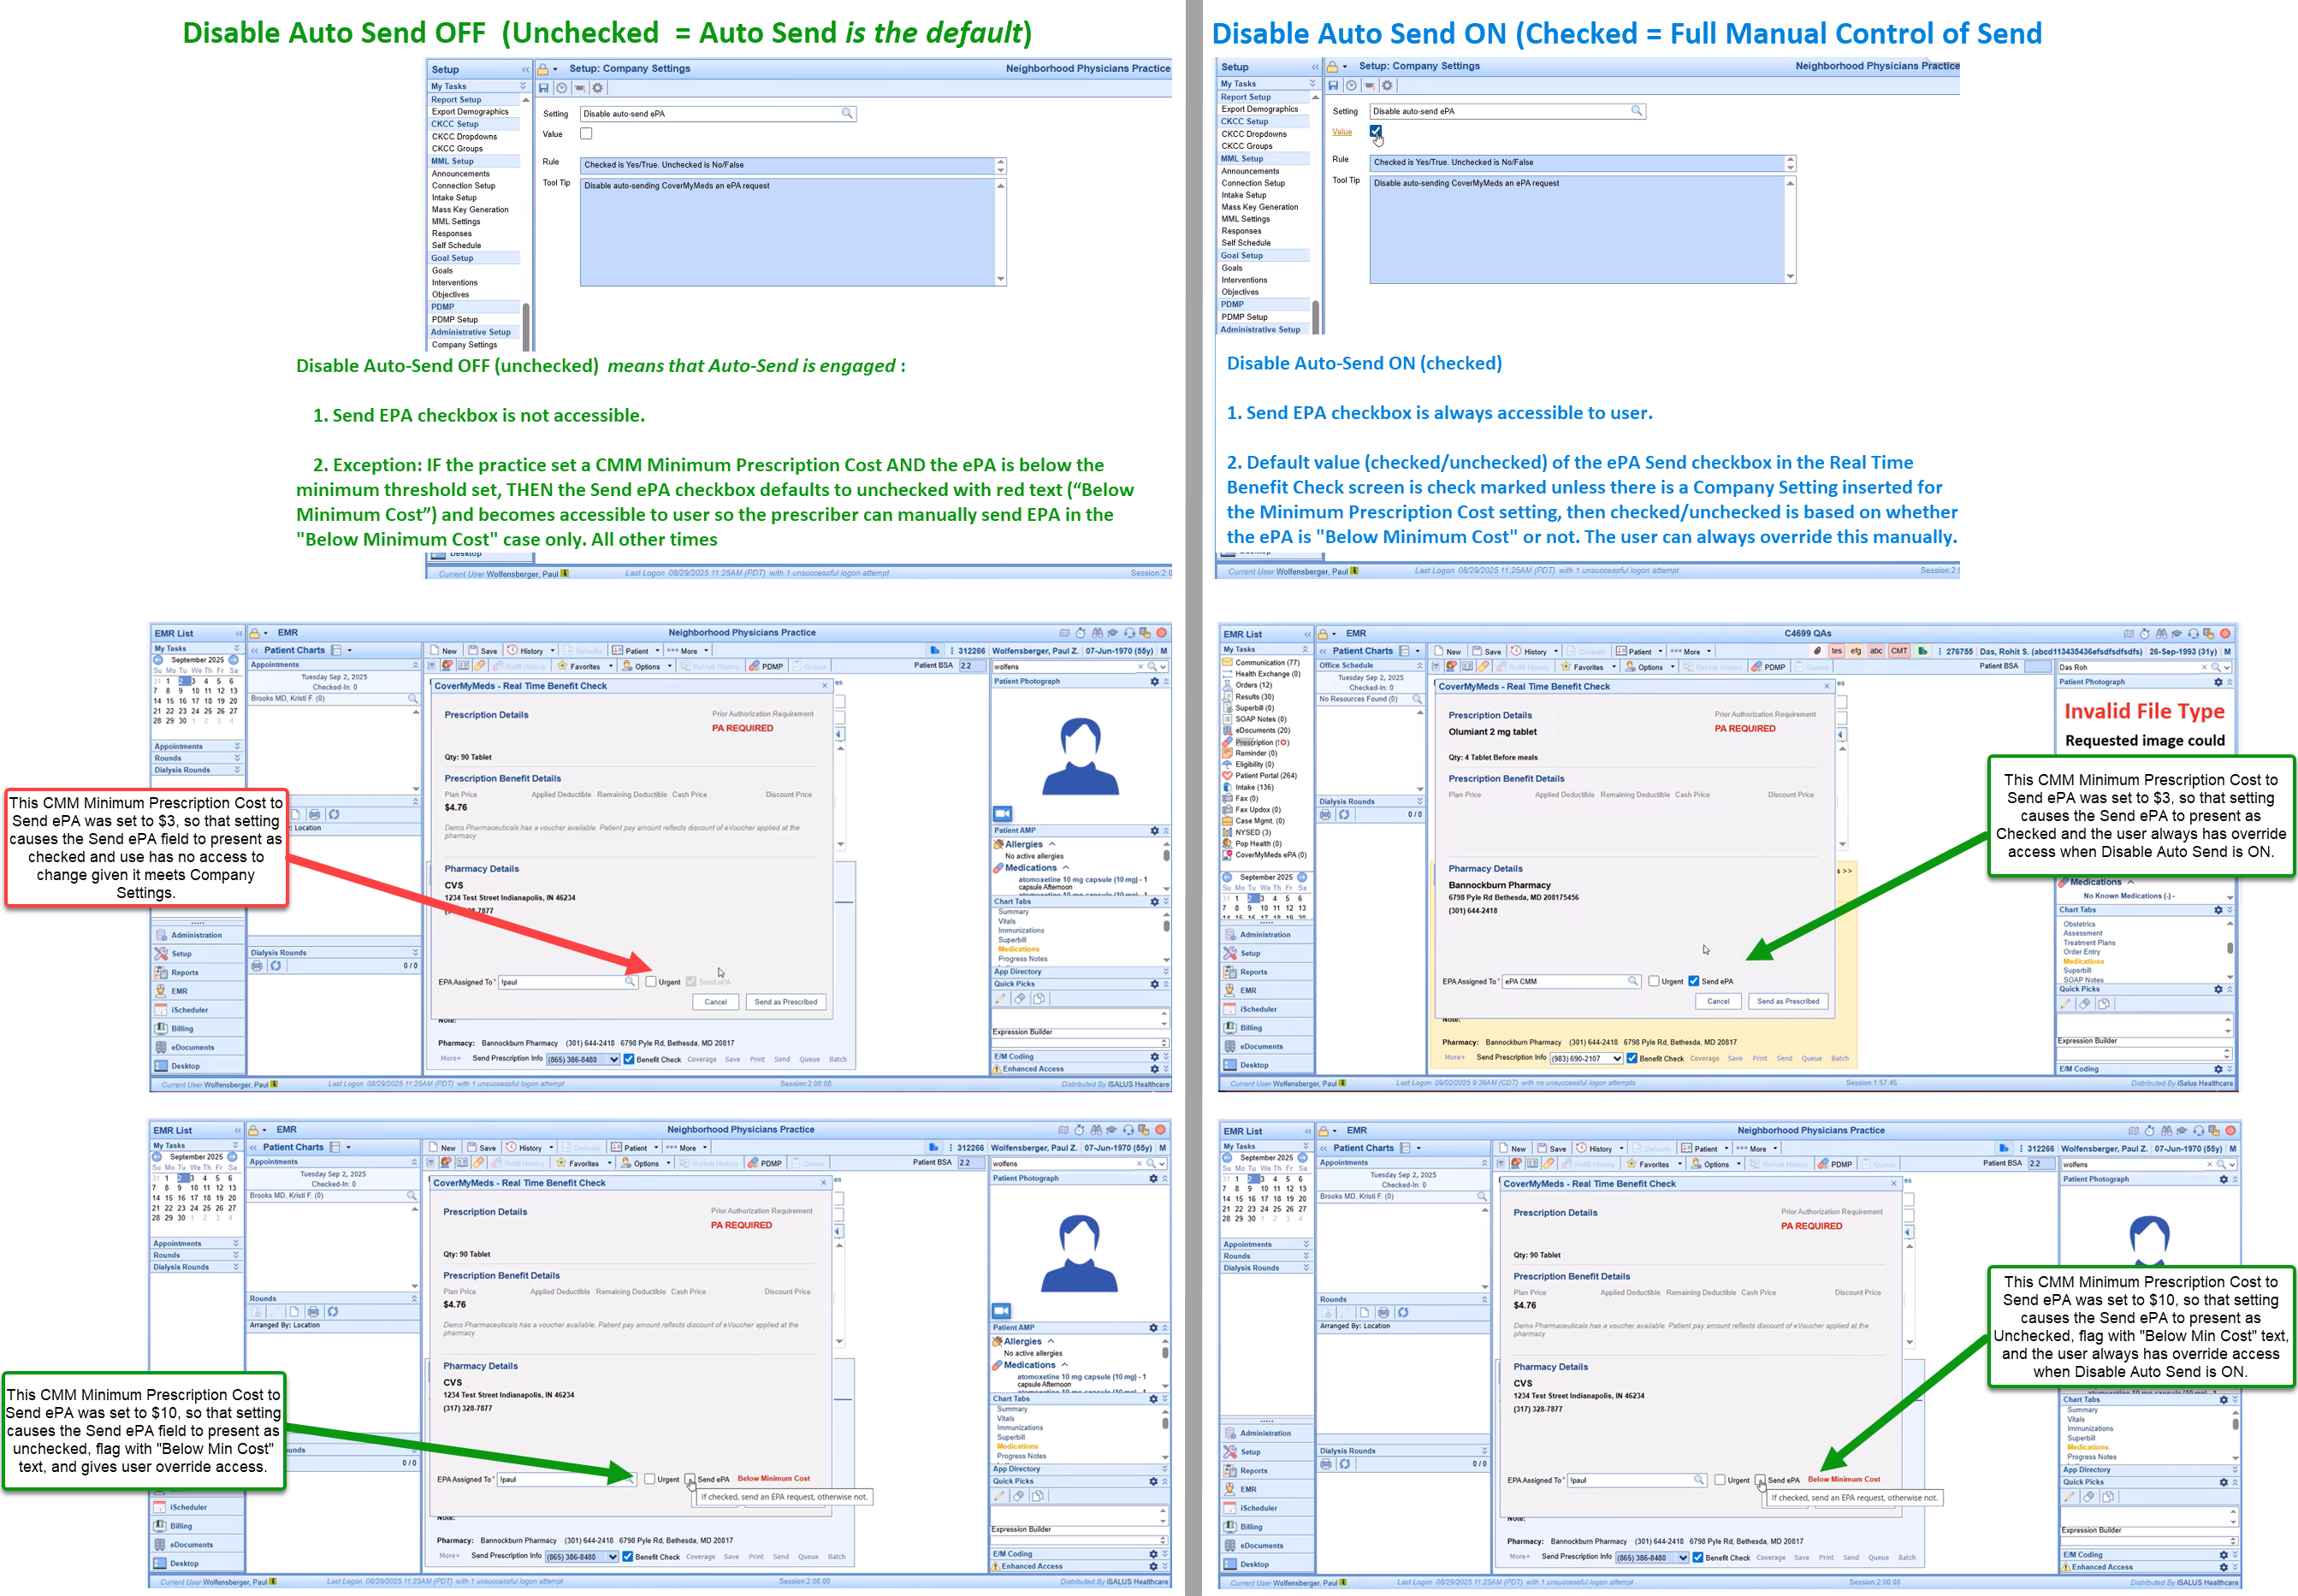
Visual Guide: CMM ePA Settings in Action
The diagram below illustrates how the Disable Auto-Send and Minimum Prescription Cost settings interact, showing what providers will see on screen in each scenario.