The Problems section of the OfficeEMR Mobile patient chart allows a user to easily see all problem list records for a patient as well as add new items to a patient's problem list. The list of problem list items is directly in-sync with the Problem List you see on the desktop.

The Problems window in the OfficeEMR Mobile application will allow a user to quickly view all past problems for a patient.
Steps
- Search for a patient and open that patient's chart: Search for a patient
- The Summary tab will be displayed once the chart is opened.
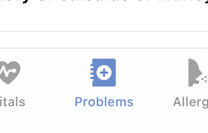
- Tap the Problems icon on the toolbar
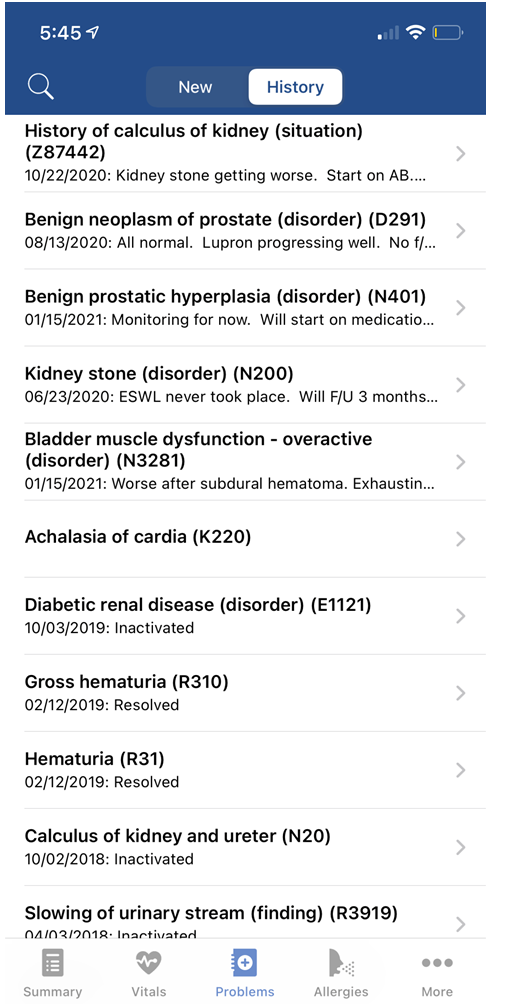
- The Problems search will display by default. Tap the History tab to view active and past problems.

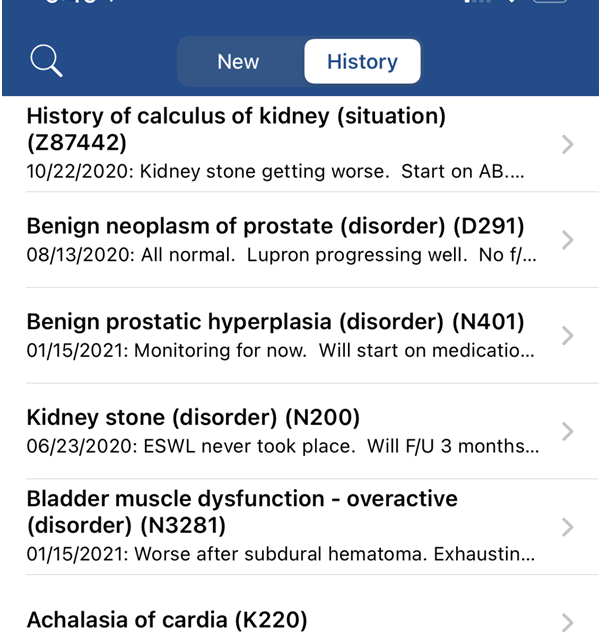
The patient's active and past problems will be displayed. All active problems will be sorted to the top. Each problem will display the description, diagnosis/SNOMED code, status, and the most recent note for that problem.
Users can mark a problem as resolved or inactive by following the steps below. This takes the problem off of the patient's active Problem List.
Steps
- Open the patient's Problem List history: View Problem History
- Tap the active problem that you would like to mark as resolved or inactive.
- Tap the Status field and set the desired value. Click Done.
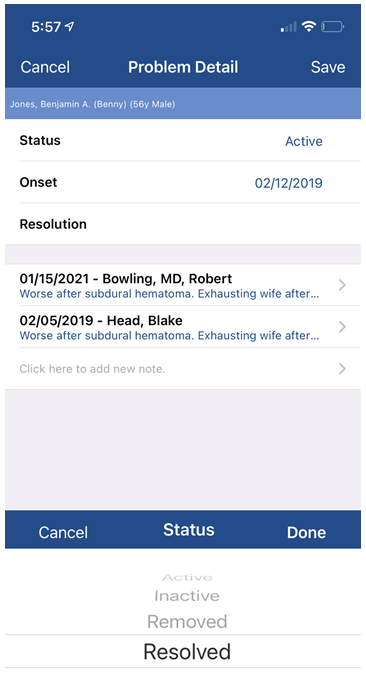
- Click Save. A new comment will be automatically added to the problem stating that the problem was resolved.
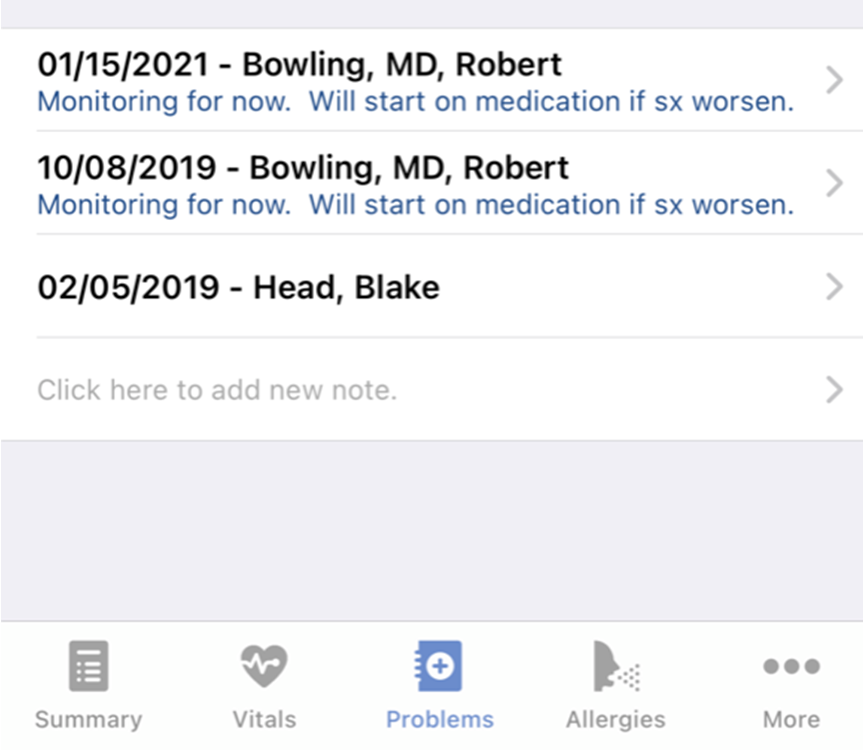
Users can add note to problem to communicate updates on the patient's condition, assessment of the problem, and plans to manage that problem over time.
Steps
- Open the patient's Problem List history: View Problem History
- Tap the active problem that you would like to add a note to.

- You will notice past notes display at the bottom. Tap Click Here to add a new note >.
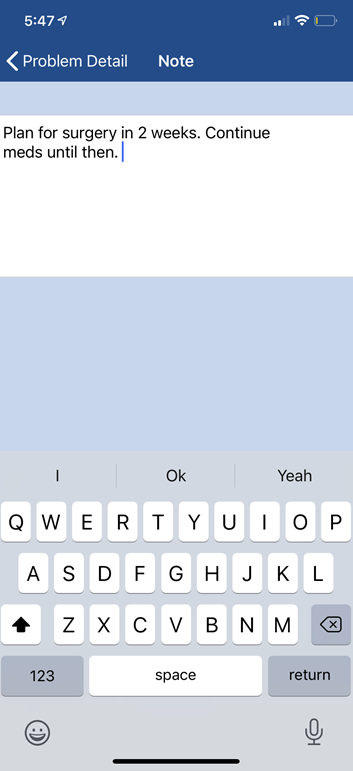
- Enter your note.
- Click < Problem Detail to go back to the problem.
- Click Save.

PRO TIP:
Most modern mobile devices have a speech-to-text option. If your device has this, try tapping that to dictate your note rather than typing.
The Problem window in the OfficeEMR Mobile application will allow a user to add a new problem to the patient' active problem list. This problem is automatically made available in the patient's chart on the desktop version of the application.
Steps
- Search for a patient and open that patient's chart: Search for a patient
- The Summary tab will be displayed once the chart is opened.
- Tap the Problems icon on the toolbar

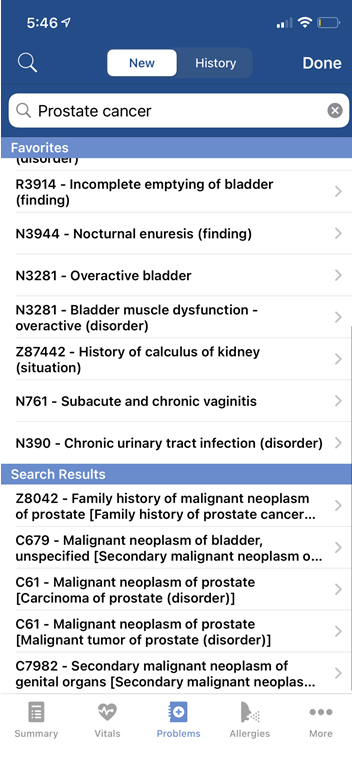
- The Problems search will display by default. The problem search grid will display commonly used problems based on your past usage within the application. If you see what you are looking for, simply tab the problem. Otherwise, start typing in the name of the problem or diagnosis code and click Search.
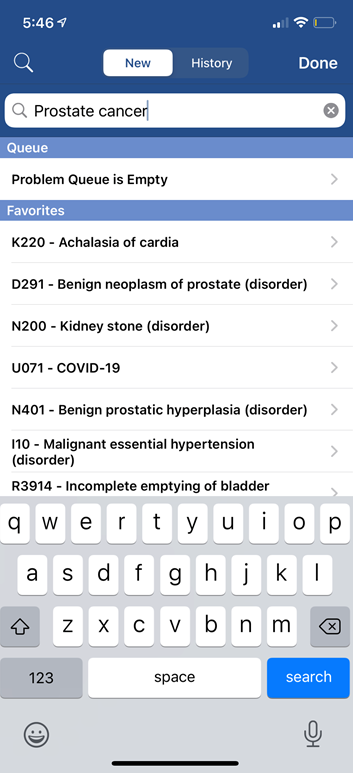
- Tap the desired problem from list.
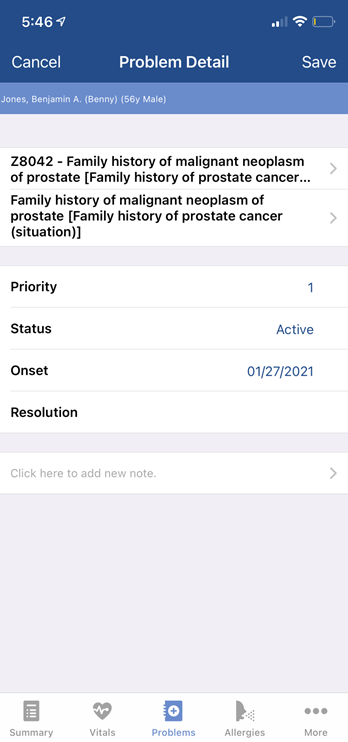
- Enter the details for the problem, including the priority.
- Click Save.
Problem List Details
- Diagnosis: The top control in the list will allow you to search for and select a diagnosis. It will also display the current diagnosis and description of that diagnosis.
- Description: Some users want to modify the name of the problem. By default, the description is the same as the diagnosis description.
- Priority: Allows user to set a priority for this problem.
- Status: Problems are managed via a status.
- Active: considered to be an active issue being treated by the practice or another provider.
- Inactive: considered to be an inactive problem - often used when a patient no longer has a problem, but resolution is not known.
- Removed: when a problem is removed from the problem list - often used when the problem is added by mistake.
- Resolved: when a problem has been treated and is now resolved.
- Onset: Date the problem began.
- Resolution: Date the problem was resolved.
- Notes: Past notes on the problem. Often used to communicate the assessment of the condition and treatment plan. A problem can have many notes that are added over time as the condition changes.


