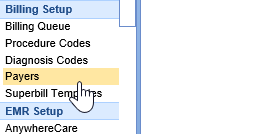
- Go to Setup: Billing Setup: Payers
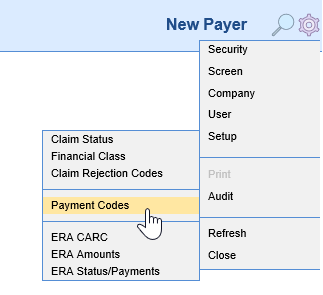
- In the upper right corner, next to the magnifying glass, click on the gear icon to open the Window Settings menu. Go to Setup, then Payment Codes.
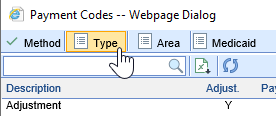
- Select the Payment Type option in the upper left corner.
- When the window first opens, begin working on the right side of the screen. Select the Payment Area, enter a Description of the Payment Type, then check the appropriate boxes.
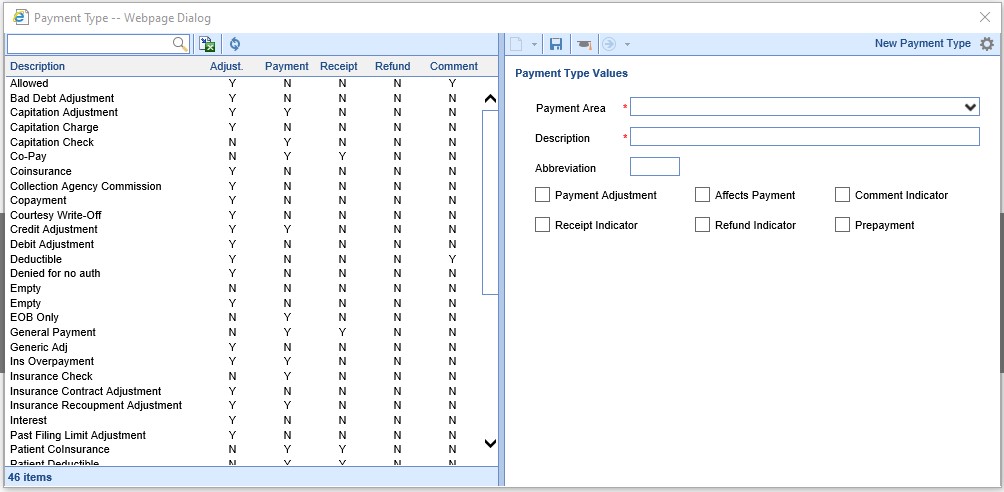
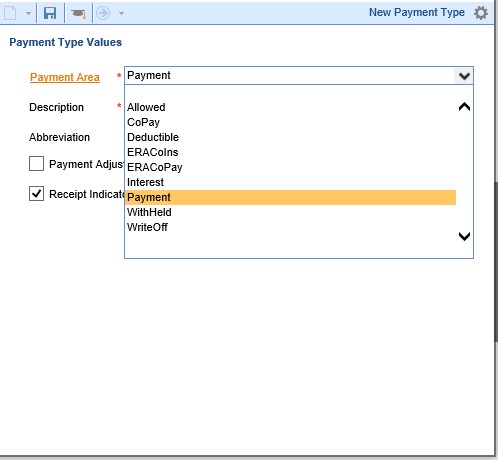
- Payment Area options are:
- Allowed - Used in deposit posting to report an allowed amount on an EOB
- CoPay - Used in Receipts, QuickPay, and Payments to identify the payment as a Copay payment
- Deductible - Used in deposit posting to report a deductible amount on an EOB
- ERACoIns/ERACoPay - Used in deposit posting to report a Co-Insurance or Copay amount on an ERA
- Interest - Used in deposit posting to report an interest amount on an EOB
- Payment - Used in Receipts, QuickPay, Payments, and Deposits to report a general payment amount
- WithHeld - Used in deposit posting to report the amount of a withheld payment
- WriteOff - Used in Receipts, QuickPay, Payments, and Deposits to report an adjustment amount
- If you are adding a Payment Type which should be accessible from the Quick Pay Receipts tab, select Payment. If you are adding a Payment Type to use as an Adjustment Type on claims, select WriteOff.
- When selecting check boxes, a previously created Payment Type can be a guide; this will help your new Payment Type operate the same way as a previously created Type.
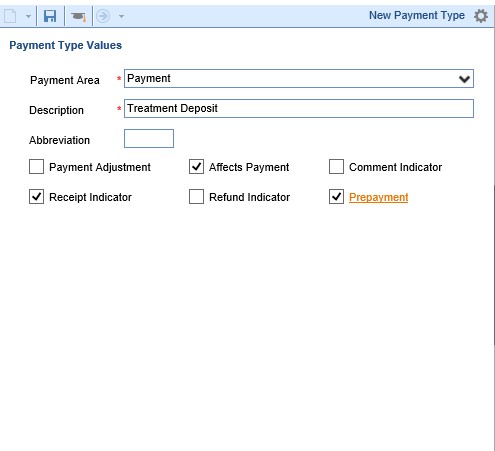
- Checkbox Selection Guidelines:
- Selecting Payment Adjustment will make the Payment Type an Adjustment Type.
- Selecting both Payment Adjustment and Affects Payment will make a Payment Adjustment Type, which affects cash on reports.
- Selecting both Affects Payment and Receipt Indicator will make this a Payment Type available in the Quick Pay Receipts window.
- Adding Prepayment means that if the Payment Type is used on a Receipt, the Receipt will not be automatically reconciled via Receipt Posting.
- Comment Indicator should only be used with Payment Adjustment; a Comment Adjustment will put a comment on a payment line, but it will not affect the claim balance in any way.
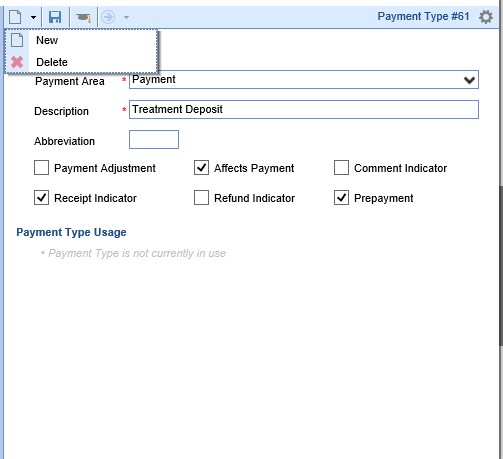
- Click Save when you are done. If you need to create another Payment Type, click the New icon, and repeat as above. There is a Delete option; however, only unused Payment Types may be deleted. The screen will show you if the Payment Type is in use.
- Go to Setup: Billing Setup: Payers

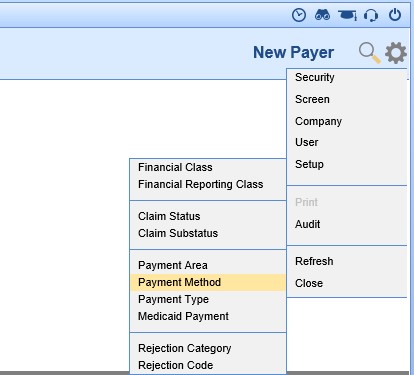
- In the upper right corner, next to the magnifying glass, click on the gear icon to open the Window Settings menu. Go to Setup, then Payment Method. The Payment Method dialog box will open.
- To add a New Payment Method when the window first opens, begin working on the right side of the screen. Select the Payment Area, enter a Description of the Payment Method, then check the appropriate boxes.
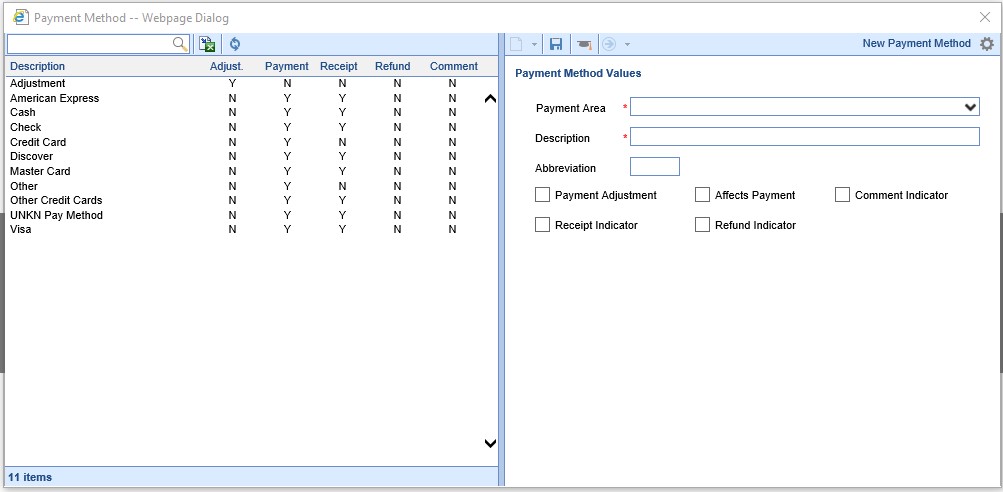
- Payment Area options are: Allowed, CoPay, Deductible, ERACoIns, ERACoPay, Interest, Payment, WithHeld, WriteOff. Payment Types will always have a Payment Area = Payment.
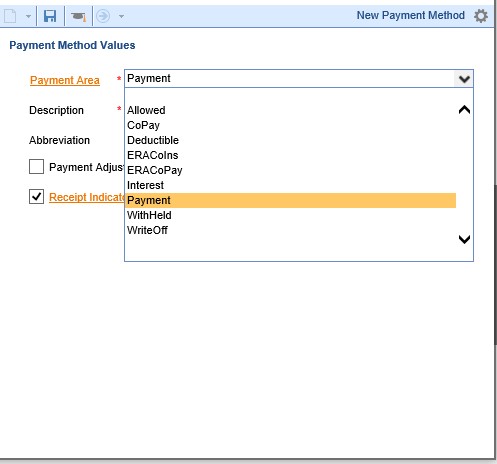
- For the check boxes, there are only two possible options for a Payment Method. Affects Payment should always be checked; Receipt Indicator should be checked if this is a Payment Method which should also be available in the Quick Pay Receipts screen.
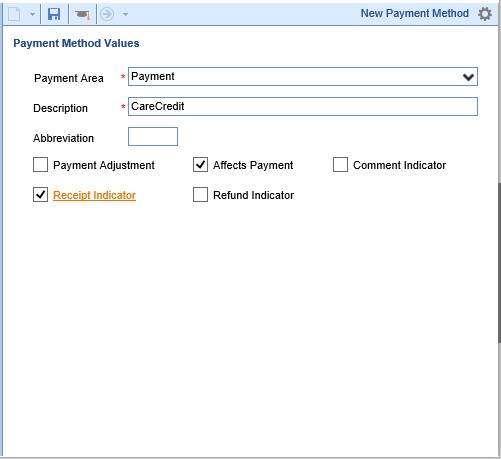
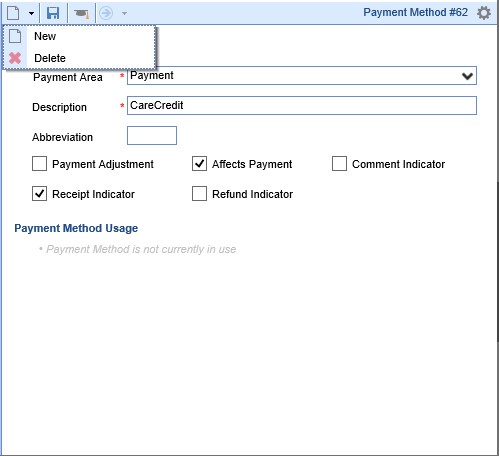
- Click Save when you are done. If you need to create another Payment Method, click the New icon, and repeat as above. There is a Delete option; however, only unused Payment Methods may be deleted. The screen will show you if the Payment Method is in use.
NOTE: Whether or not specific credit cards (American Express, Discover, Master Card, and Visa) are available as Payment Methods is controlled through some Company Settings. They are not turned on and off in the Payment Method window, due to the fact that these Payment Methods also affect Statements.


