
Procedure Codes are numeric or alphanumeric identifiers used for the classification of medical services. These codes are used for billing and tracking purposes. A single operation or treatment may include several procedure codes. The Procedure Code Search screen can be accessed by opening the Setup portal and clicking on Procedure Codes under Billing Setup. A user can then search for a procedure code and open the Procedure Codes Setup screen. The Procedure Codes Setup screen can be used for the following in addition to many other actions:
- Add New Codes
- Setup Fees and Fee Groups
- Update Existing Charges/Fee Amounts
- Insert or Update RVU Values
- Attach NDC Numbers to a Procedure Code
- Update the Sliding Fee Scale
- Maintain the Procedure Code - Do Not Bill Flag
Procedure Code Search Window Buttons
- New: Clicking the New button allows the user to Add New Codes
- More: Clicking the More button gives the user the options to open the Advanced Search Screen or run the Procedure Code Usage Report
- Search (Magnifying Glass): Clicking the Search button opens a search box to allow the user to search for and open a procedure code
Procedure Codes Setup Screen
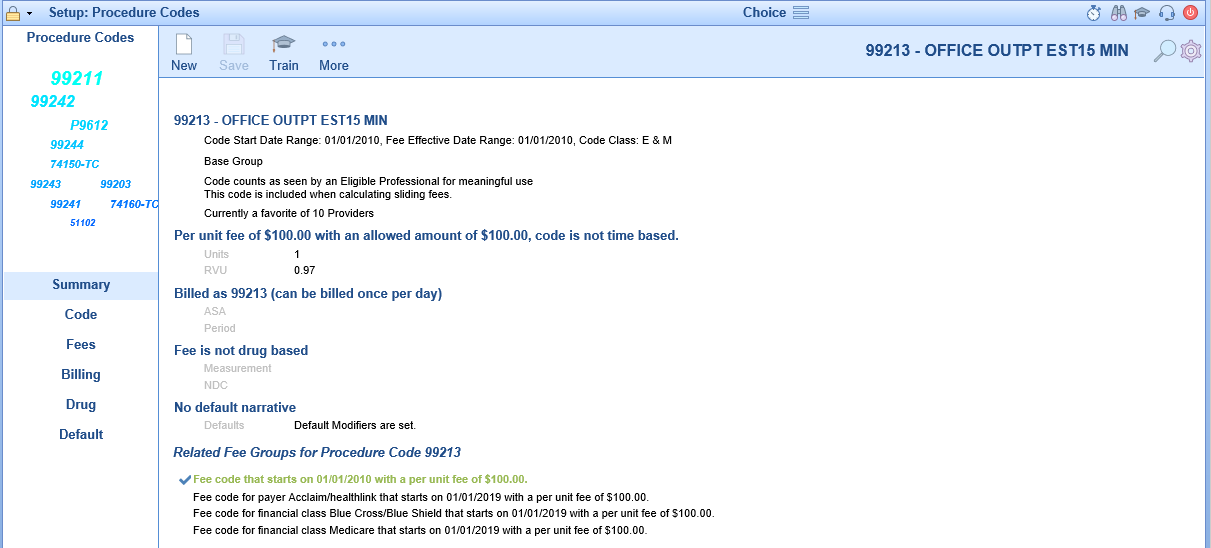
Summary
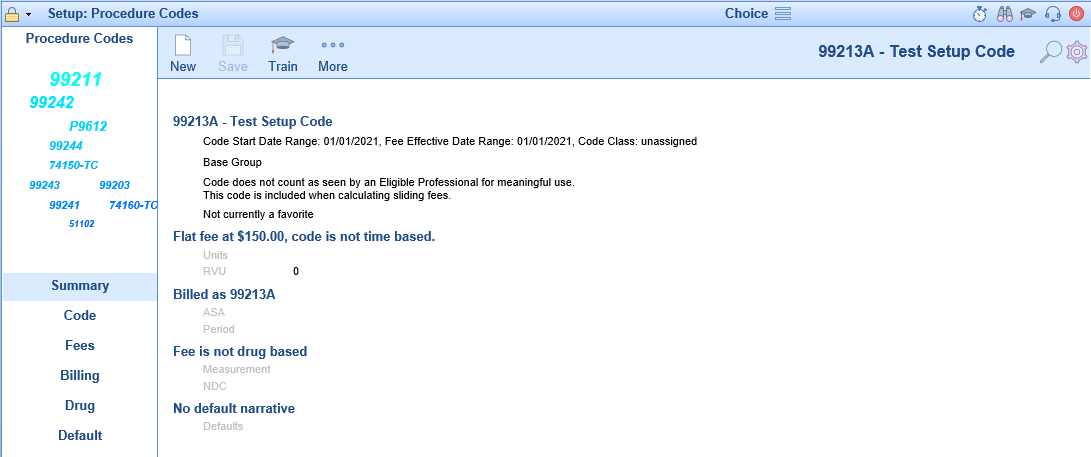
The Procedure Codes Setup Screen opens to the Summary tab. The Summary allows you to see all of the settings quickly that have been configured on the other tabs. You can switch to the other tabs by clicking on the section of the summary you wish to go to or by clicking on the tab name on the left side.
Double clicking on a Related Fee Group activates that group for editing in the other tabs.
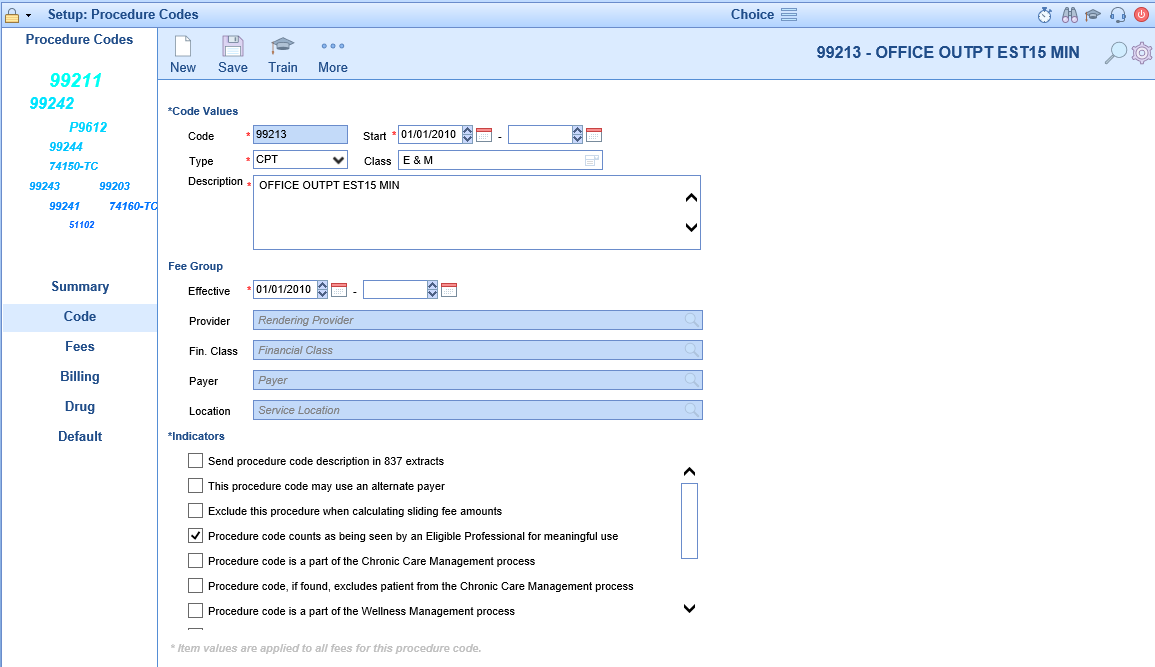
Code
The Code tab allows the user to be able to enter information specific to the code regardless of the payer. This includes effective dates, code group, description, and indicator settings used in the billing and other modules. For more information on modifying the CPT group, click here.

Fees
The Fees tab displays information about the currently selected fee group. (Fee groups are selected on the Summary tab) It is here that you can set the fee values to be used in billing for the selected procedure code.

Billing
The Billing tab allows the user to set the code value that will be sent to the insurance company whenever this procedure code is used. It also allows the user to designate the code to be used only once per day, set as a self pay code, set the global period, and set the billing type of the code whether it be paper or electronic.

Drug
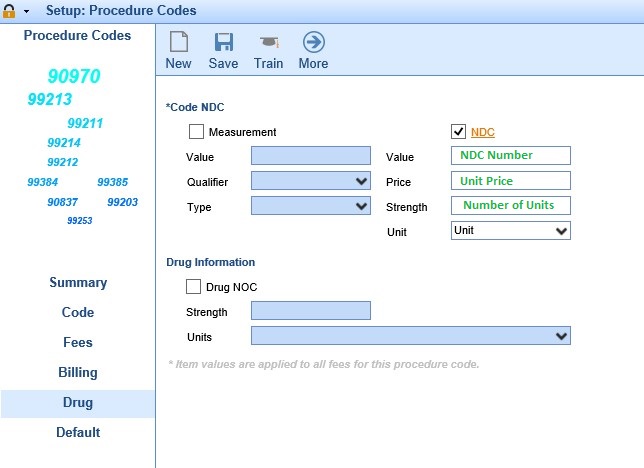
The Drug tab allows the user to enter drug specific information if the necessary for the procedure code.

Default
The Default tab allows the user to enter default values to be used when the procedure code is selected. This includes diagnosis codes and modifiers. In addition users can also setup code limitations and code validations on this screen.

The Advanced Procedures Search screen can be accessed from multiple locations.
- Setup > Procedure Codes > More
- Billing Portal > Setup Screens option on toolbar > Procedure Codes
Fields
- Code: The code value associated with the procedure code.
- Code Type: The code type associated with the procedure code.
- Billing Code: The code that will be used on claims for the associated procedure code.
- Description: The description of the associated procedure code.
- Start Date: The start date associated with the procedure code.
- End Date: The end date associated with the procedure code.
- Financial Class: The financial class of the fee associated with the procedure code.
- Fee: The fee amount assigned to the associated procedure code.
- Provider: Rendering Provider associated with the fee for the procedure code.
- Location: Location associated with the fee for the procedure code.
- Payer: Payer associated with the fee for the procedure code.
Additional Field Options
- Create Date: The creation date of the associated procedure code.
- Created By: The user id that created the associated procedure code.
- Modifier 1: Default modifier 1 to be used when the code is added to a claim.
- Modifier 2: Default modifier 2 to be used when the code is added to a claim.
- Modifier 3: Default modifier 3 to be used when the code is added to a claim.
- Modifier 4: Default modifier 4 to be used when the code is added to a claim.
- Time Based Fee: Indicates if the fee is time based instead of unit based.
- Patient Resp: Indicates the procedure to be billed to patient only.
- NOC: Indicates the procedure as a drug NOC.
- NDC Value: NDC value that is associated with the procedure.
- TOS: Default type of service to be used when the code is added to a claim.
- Units: Default units to be used when the code is added to a claim.
- Gender: The gender requirement for the associated procedure code.
- Prior Auth Code: Indicator that a prior authorization is required for billing the code.
- RVU: RVU amount assigned to the fee of the associated procedure code.
- Allowed Amount: Allowed amount assigned to the fee of the associated procedure code.
- In House Cost: In House Cost amount assigned to the fee of the associated procedure code.
- Tax Amount: The tax amount assigned to the fee of the associated procedure code.
- Fee Start Date: The effective date of the fee for the associated procedure code.
- Fee End Date: The expiration date of the fee for the associated procedure code.
- Accept Assign: The default Accept Assignment indicator for the associated procedure code.
- Do not bill: Indicates if the code is for reporting purposes only and should not bill out with claims.
New Procedure Codes must be periodically entered into the system as the AMA releases new CPT (Procedure) Codes annually. In order to use these new codes, they will need to be added to your Procedure Code table. Annual HCPCS Code updates are entered the same way.
Workflow
- Open the Setup portal and under the Billing Setup section select Procedure Codes.


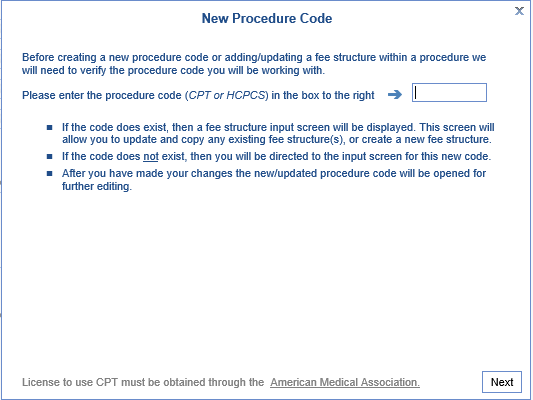
- Click the New button on the toolbar to open the New Procedure Code window. Enter the new Procedure Code in the text box and click Next.
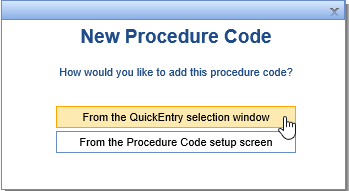
- The next screen will ask whether or not you would like to use the QuickEntry selection window or the Procedure Code setup screen. The QuickEntry selection window is slightly easier to add new codes; you will have access to edit the Procedure Code setup once the code has been added.
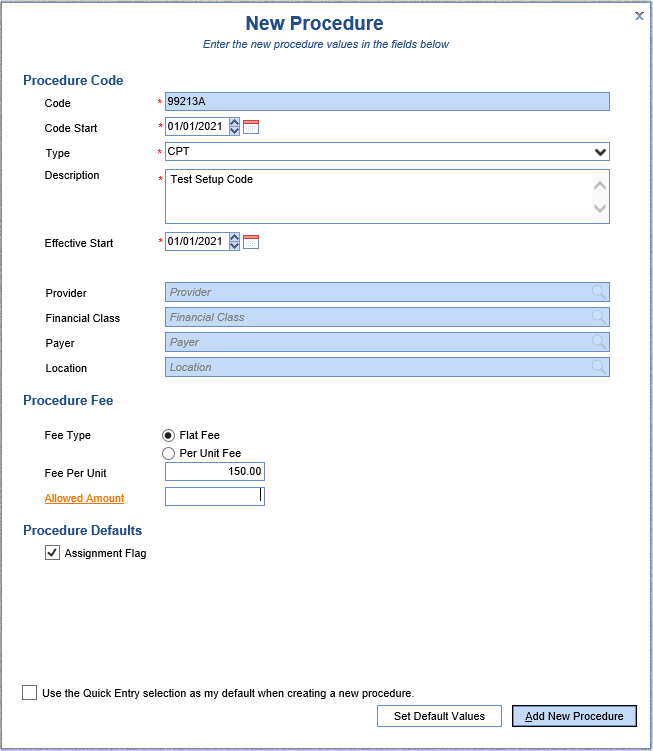
- Enter the data for the new code; you will have a choice of either CPT or HCPCS as the Type. Also, most Procedure Codes use a Per Unit Fee as the Fee Type. Click Add New Procedure.
- Once the code has been added, you will be taken to the Summary page for the new code. If any changes to the other Procedure Code sections need to be made, you would do so at this time.
- Repeat as necessary for all codes to be added.
Any new codes added will need to be added to the Superbill separately.

A Fee Group in the Choice platform is a fee different than the 'base' code. This can be separated by Provider, Service Location, Financial Class, Payer, or a combination of these options. The most common use of Fee Groups in Choice is to set up different fees for Self Pay patients, or to add Allowable Amounts for specific payers. Once a Fee Group is added, the application will automatically use this fee on the claim for any patient who meets the selected criteria.
- Go to Setup: Procedure Codes.


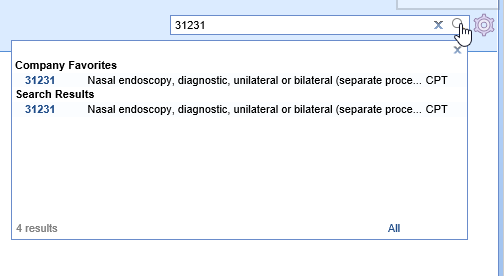
- Click the magnifying glass on the right to search for the existing code to be updated, and select it.
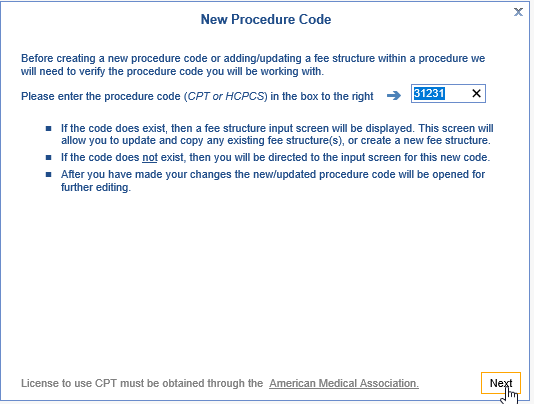
- Click the New button on the toolbar. A window will open. The existing code being updated will be in the box; click Next.
- The second screen will display the existing fee and allowed amount. Click New Fee to continue.
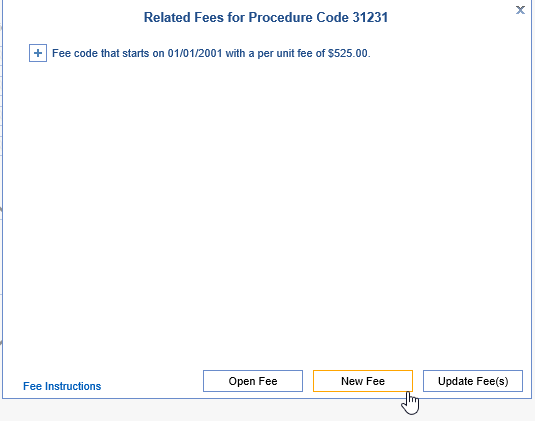
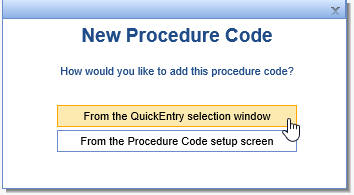
- A box will pop up asking you to choose how you would like to add the code: From the QuickEntry selection window, or From the Procedure Code setup screen. In this circumstance, the QuickEntry selection window is easiest.
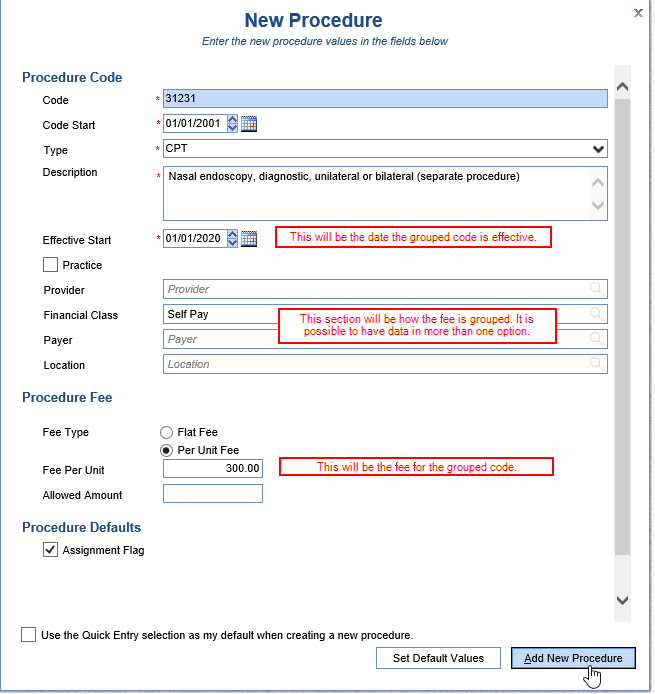
- Enter the required fields, then hit Add New Procedure.
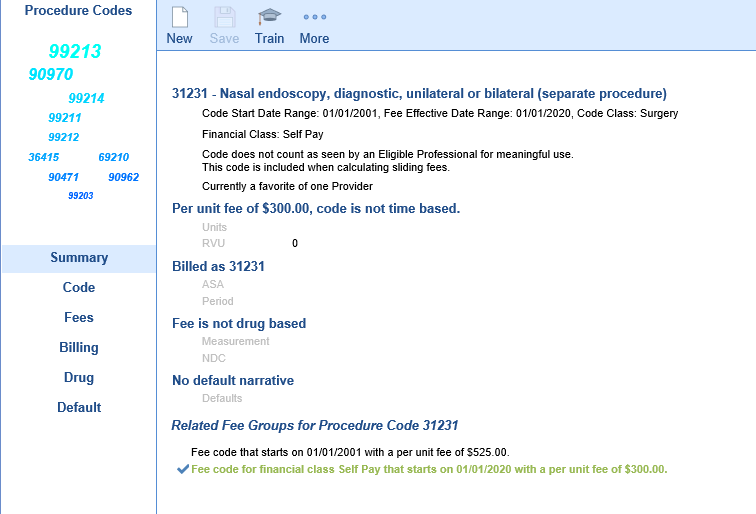
- The new fee will be visible on the Code Summary page.
- Repeat as necessary for all fees to be added.

Many clients update their charges/fees on an annual basis. However, they may still want the option to charge patients the older fee for older dates of service. These are the steps to update those fees without changing the old fee.
- Go to Setup: Procedure Codes.


- Click the magnifying glass on the right to search for the existing code to be updated, and select it.
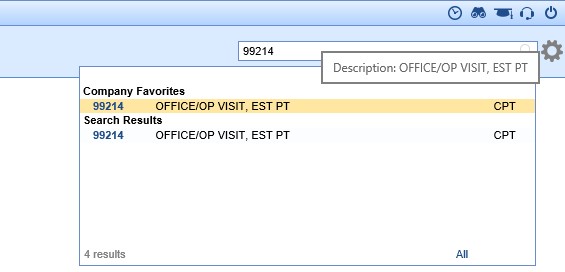
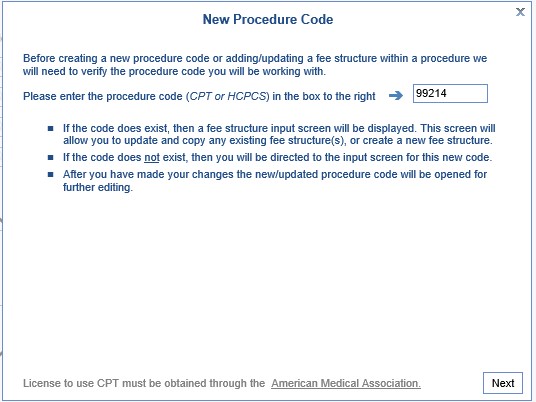
- Click the New button on the toolbar. A window will open. The existing code being updated will be in the box; click Next.
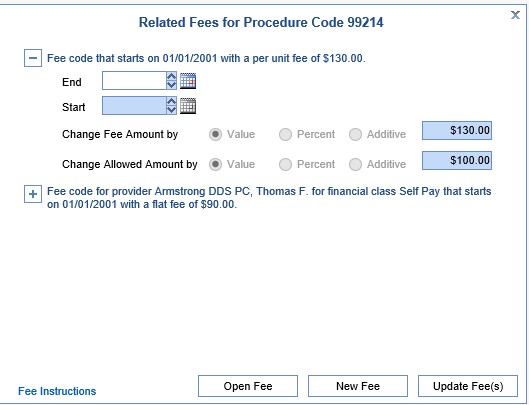
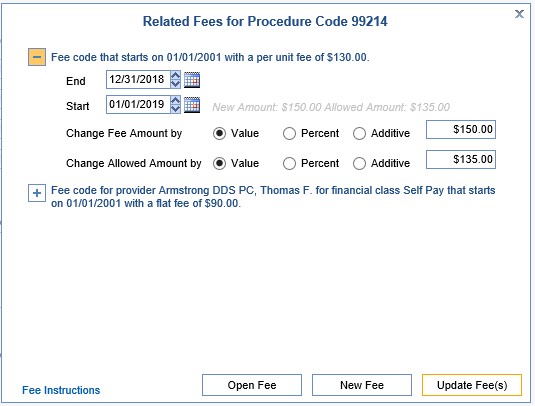
- The second screen will display the existing fee and allowed amount. Click the plus sign to the left of the existing fee code to expand it.
- Enter the expiration date in the End Date field (e.g. 12/31/2018). Enter the new charge effective date in the Start Date field (e.g. 01/01/2019). Leave Value selected and enter the new charge price in the Change Fee Amount field.
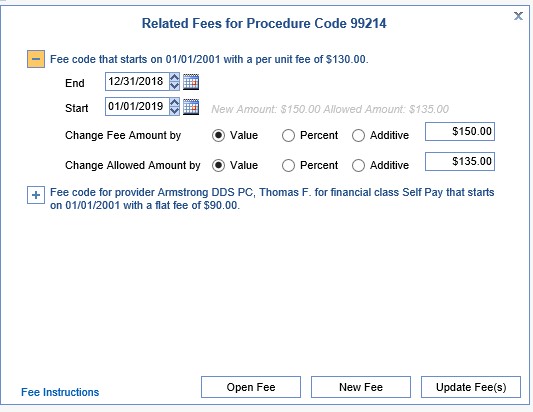
- Click Update Fee(s).
- Repeat as necessary for all codes to be updated.

- Open the Setup Portal in the lower left corner.
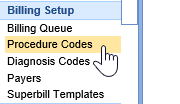
- Open the Procedure Code Setup from the Navigation Pane.
- In the upper right corner, search for the procedure code you wish to update. Click on the code to open it.

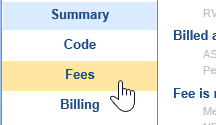
- With the code open, navigate to the Fees setup window.
- Add or update the existing RVU in the RVU field.
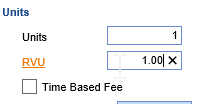
- Click Save in the top toolbar.

The NDC (National Drug Code) is a unique product identifier issued by the FDA for drugs intended for human use. Certain insurance companies require that when a drug is reported on a claim, the NDC information must also be attached to that claim. The NDC must be 11-digits long on a claim; to know how to set this, please see our NDC Formats guide. Within OfficeEMR there are two ways to set up the NDC to transmit electronically on a claim: at the Claim Level or at the Code Level.
Step-by-Step Instructions
- Go to Setup: Procedure Codes and search/open the code.
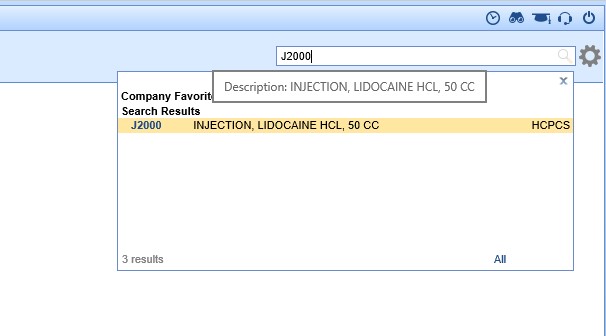

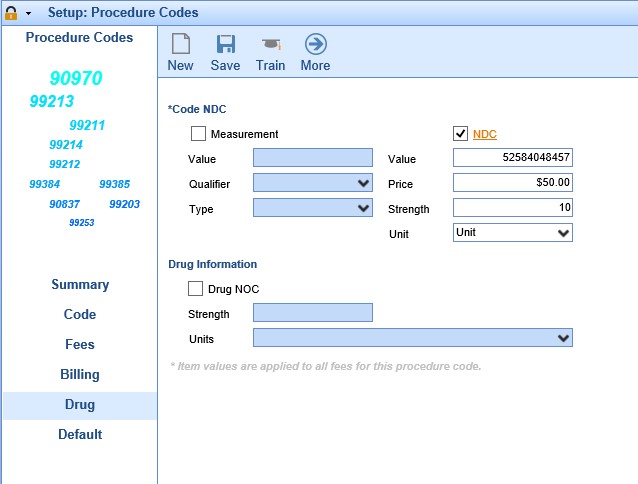
- Go to the Drug tab and check to activate the NDC Section. Select the appropriate unit type from the drop down. Complete all of the fields as indicated, and Save.
- Any claims which were submitted prior to the NDC Number being added to the Procedure Code setup must still have the NDC Number information added to the Claim itself. The Procedure Codes will only be added to claims moving forward.

For clients who use the built-in Sliding Fee Scale functionality, the scales must be updated annually. iSalus will update the master table of standard federal poverty guidelines when they are released. However, clients must add their practice-specific percentage calculations annually as well.
- Within the Billing Module, locate the Tools (wrench and hammer) icon on the toolbar. Click the drop down menu off this icon and select Sliding Fee Schedule.


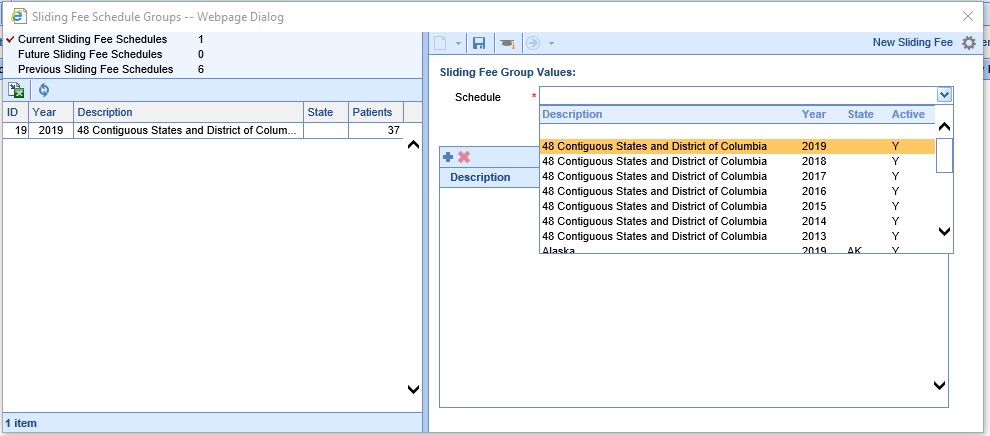
- On the right side of the Sliding Fee Schedule Groups window, select the appropriate year's fee schedule from the drop down list.
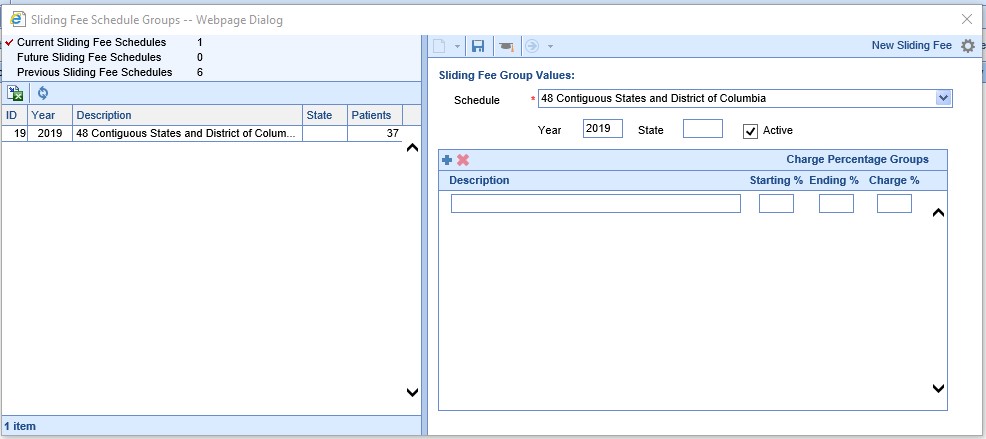
- Click the plus sign below the fee schedule to add Charge Percentage Groups.
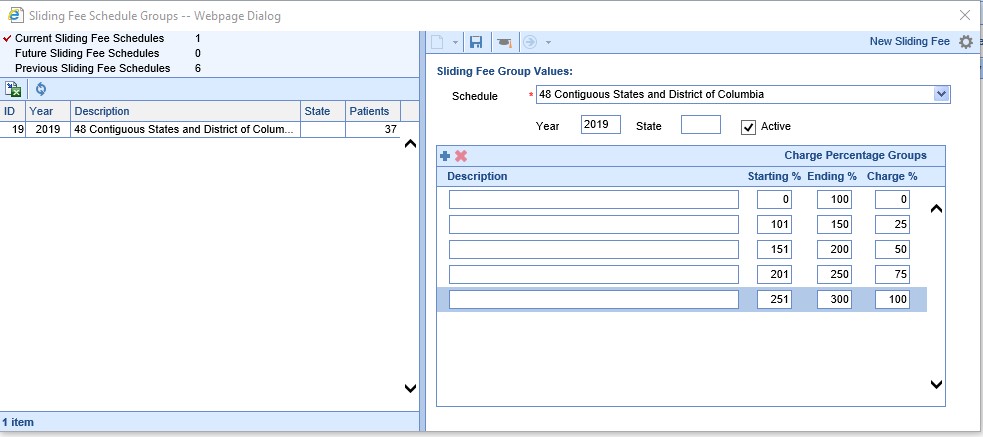
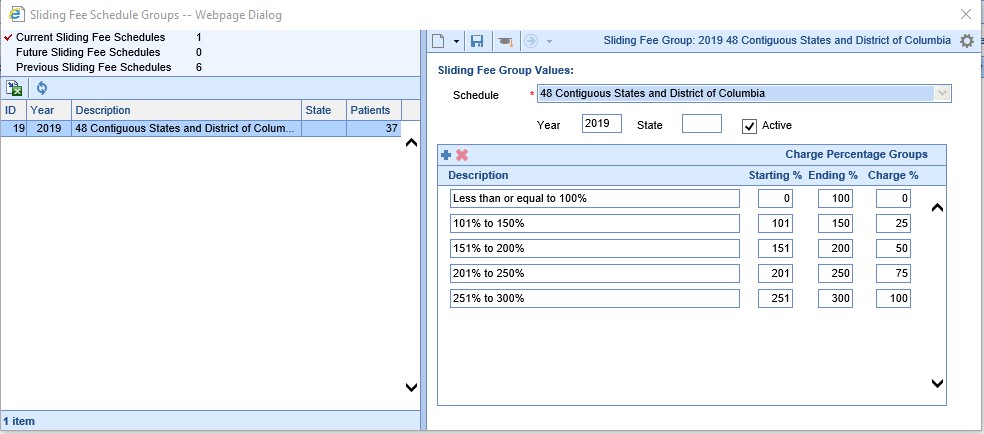
- Enter the Starting % and Ending % (of the poverty guidelines), then the Charge % (how much you will charge for patients who meet that level of the poverty guidelines). Click the plus sign to add additional rows until you are done. You do not have to enter anything in the Description field, it will be filled in when you Save.
- Save.

It's often helpful in reporting to group certain CPT codes -- whether you call this a CPT Group, Code Class, Business Line, etc., it's a way to track a segment of your business separately. Not only will it make these certain codes more visible when users run reports by CPT Group, it also makes it easier to filter these groups in or out of reports in Choice Analytics.
To assign a CPT code to a group, take the following steps:
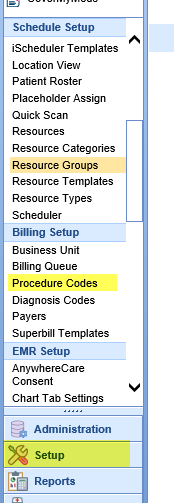
- Click the Setup category in the navigation bar to the bottom left, then under the Billing Setup header click Procedure Codes:
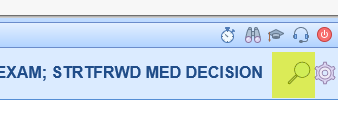
- Click the magnifying glass at the top right of the screen to search for the code you’re interested in changing the group for.
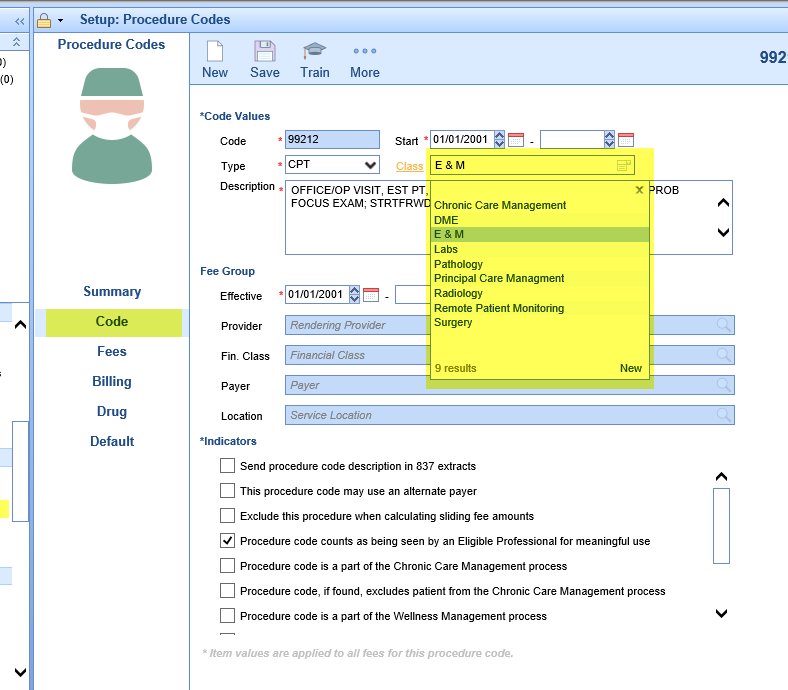
- Once you have the code pulled up, click on the Code category of settings. Then click the drop-down on the Class field to assign the code to a group. Note: if you don't see the desired CPT group in this box, you can click New in the bottom right of the box to add one, or otherwise modify the available code classes.
- Click the Save button to complete your changes. You should see financials immediately reflect your changes in the system's internal reports, and they should be reflected in any Billing Analytics reports the following day.
A new setting has been added into the Procedure Code Setup screen called, 'Do Not Bill.' This setting is designed to be used with Reporting Codes or any other Procedure Codes that the practice would like to record but does not want to go out on a Claim or Statement. To access the new setting:
- Navigate to Setup > Billing Setup > Procedure Codes
- Search for a Procedure Code
- Click on the Fees tab
- Here you can check/uncheck the 'Do Not Bill' box (this setting is configurable by each Fee group.) If the box is checked then the Procedure Code will be displayed with a strikethrough on the Claims screen indicating that the Procedure Code will not be billed.


