In the Billing portal, there is a category for Payment Posting. Within that category is found the Deposits screen and the Posting screen among others. Posting deposits touches on three main parts of the Choice software: the Deposits screen, our posting rules engine, and the Posting screen.
Deposits will be where you create any new deposits (ERA imports, statement payments, manual EOBs, or patient payment batches), as well as enter information for manual EOB’s, fix deposit errors, and send deposits to posting.
Our back-end posting process is fully automated. When something is sent to posting, it is posted automatically based on our rules engine. Once you do the initial Deposit Setup for your practice’s needs, all you’ll need to handle are the errors.
Posting is where you’ll fix any errors that arise in the auto-posting process – this way, you never need to look at claims that don’t need to be touched, reducing errors and saving valuable time.
Training Videos
Overview of the Payment Posting process.
Deposits from a Manager's perspective.
Deposits from a Payment Poster's perspective.

The Deposits screen can be found in the Billing portal under the Payment Posting category on the navigation bar. This screen by default will show you deposits that have not been posted and/or have not been Disbursed. Each line represents a single deposit.
The Deposit screen has three main purposes:
- New Deposits: This is where you will create new deposits, whether you’re manually posting EOB’s, importing ERA’s, importing patient payments, or entering payments patients have made on their statements. Learn more.
- Review and Approve Deposits: This is where you will “Send to Posting” any deposits (including ERA’s) that are ready to go through the system’s automated posting process. Please note that there is a company setting to automatically send all incoming ERA’s to posting, in which case they would skip this part of the process entirely. Learn more.
- Fix Deposit Errors: There are some scenarios that may generate an error when a deposit is received. This screen will help you identify and fix these errors so that the deposit can continue through the process. Learn more.
Fields
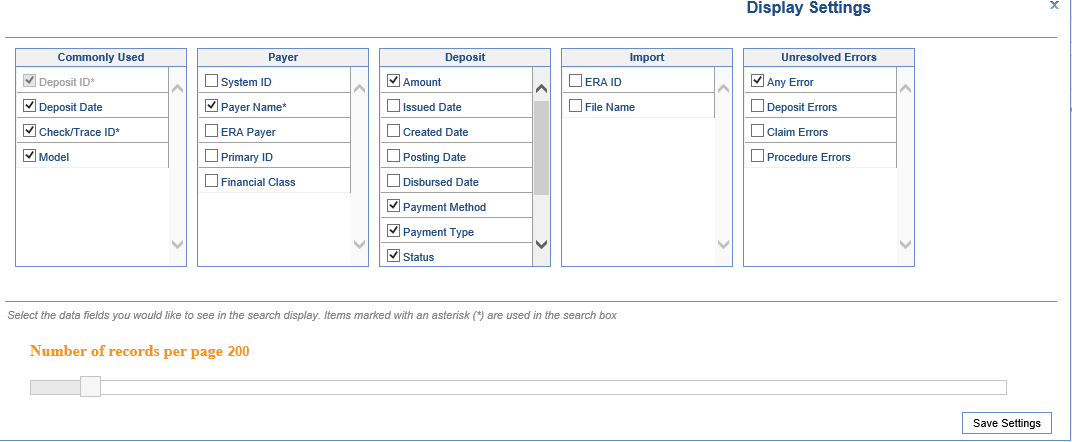
- Deposit ID: The unique id of the deposit.
- Deposit Date: The date the deposit was received into the system.
- Check/Trace ID: The check number or trace id that has been associated with the deposit.
- Model: The model of deposit. (Standard, Converted, Legacy)
- Payer Name: The payer associated with the deposit.
- Amount: The total paid amount of the deposit.
- Payment Method: The payment method associated with the deposit.
- Payment Type: The payment type associated with the deposit.
- Status: The current status of the deposit.
- Posted: The current posting status of the deposit.
- Type: The type of the deposit. EOB, ERA, Import, Statement)
- Any Error: If deposit errors exist on the deposit.
Advanced search fields
The Advanced Search feature allows a user to enter many specific criteria to find the exact deposit or deposits that meet the specified criteria.
- Commonly Used
- Deposit ID: Unique ID assigned to each deposit created
- Deposit Date: Deposit start and end date range
- Check/Trace ID: Check number/trace ID for the deposit
- Model: The financial model of the deposit, with the following potential values:
- Legacy: Indicates a deposit created before the new process, which must be opened from the legacy Payments screen.
- Converted: Indicates an EOB that had already been created but not posted during the payment posting release--thus, it was converted to the new model, but required some manual intervention to post adjustments.
- Standard: Indicates a standard Deposit, created since the new payment posting process was released.
- Payer
- System ID: Unique ID assigned to a payer in the application
- Payer Name: Name of the payer linked to the deposit
- ERA Payer: Name of the payer as displayed on the ERA (may be different than the payer linked to the deposit)
- Primary ID: The ID used to identify the payer with the Clearinghouse.
- Financial Class: The financial class assigned to the payer that is connected to the deposit
- Deposit
- Amount: The total amount of the deposit
- Issued Date: The issue start and end date range
- Created Date: The actual date that the deposit was created in the application
- Payment Method: The payment method assigned to the deposit
- Payment Type: The payment method assigned to the deposit
- Status: The current status of the deposit. Options include New, Ignore, Sent to Posting.
- New: Newly received deposits that have been received. Payments have not yet been posted.
- Ignore (shown in gray): Deposits that will not be sent to posting because they are not needed.
- Sent to Posting (shown in green): Deposits that have had 1 or more of the payments posted to patient accounts.
- Posted: This shows the disbursement status of the deposit, with the following potential values:
- Disbursed: Every deposit claim on the deposit has been successfully posted.
- NOT Disbursed: At least one deposit claim has not yet been disbursed from the deposit.
- Disbursed with Credits: This deposit claim was disbursed, but created credits on at least one deposit claim.
- Deposit is currently being Disbursed: This deposit is in the process of being disbursed.
- Type: This represents the type assigned to the deposit. Options include: ERA, Import, Payer, and Statement.
- Owner: This represents the user assigned to the deposit.
- Import
- ERA ID: The unique ID assigned to an ERA when it is received
- File Name: The file name of an imported ERA
- Unresolved Errors
- Any Error: Deposits may contain many types of errors. If any errors exist at all, this search option will find those deposits. This is the default search used when the deposit window is opened.
- Deposit Errors: If an error exists at the deposit level, this search will be used to find deposits with these types of errors only.
- Claim Errors: If an error exists at the claim level, this search will be used to find deposits with these types of errors only.
- Procedure Errors: If an error exists at the procedure line level, this search will be used to find deposits with these types of errors only.
Buttons at the top of screen
- New
- This option will open the New Deposit window allowing the user to Create a New Deposit.
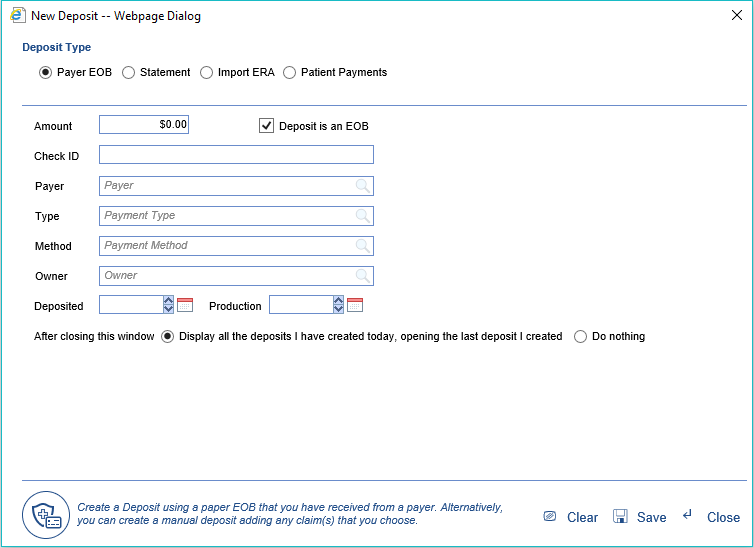
- This option will open the New Deposit window allowing the user to Create a New Deposit.
- Open: This button will open the Deposit Details screen for the selected deposit.
- More > Change Display Settings: This button will allow the user to update the displayed fields on the Deposits screen as well as set the default number of records to display.
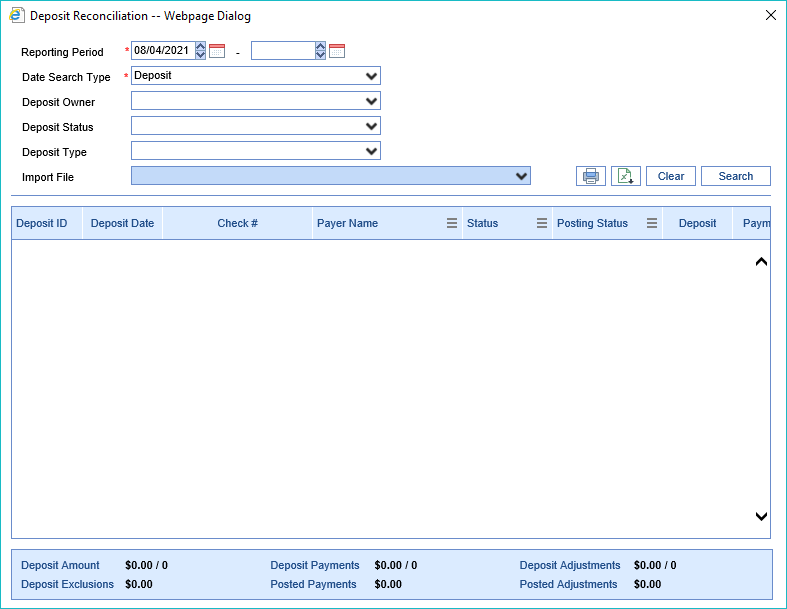
- More > Deposit Reconciliation: This button will allow the user to run a report on deposits based on several dates, deposit owner, deposit status, deposit type, and import file. Totals are listed at the bottom of the report. The report can be printed or exported to Excel.
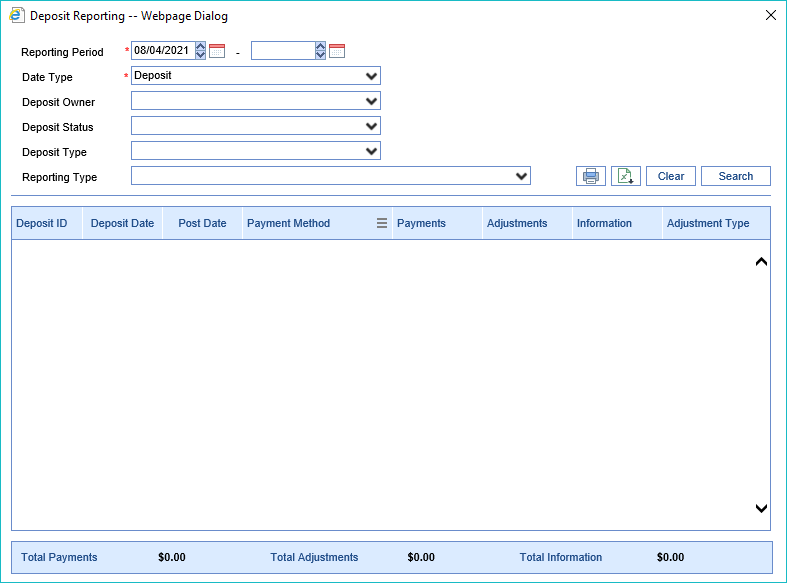
- More > Deposit Reporting: This button will allow the user to run a report based on sever reporting values. Viewing Deposit Reporting
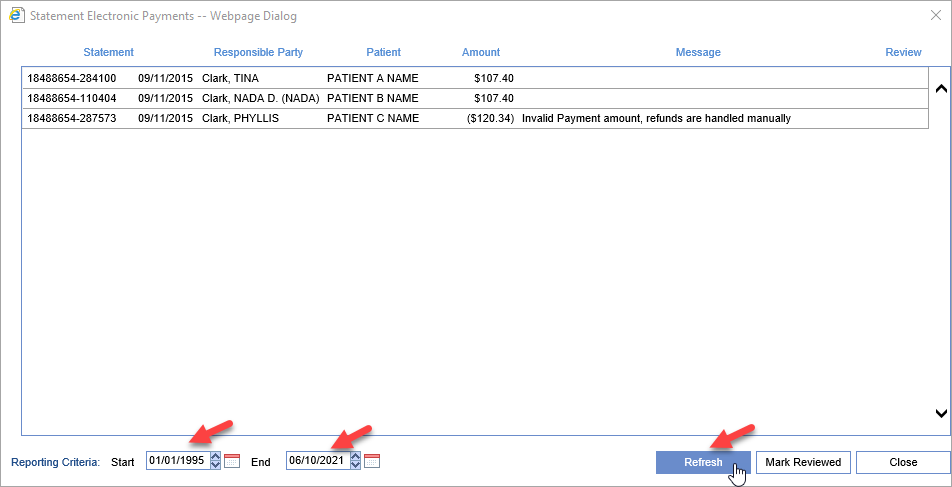
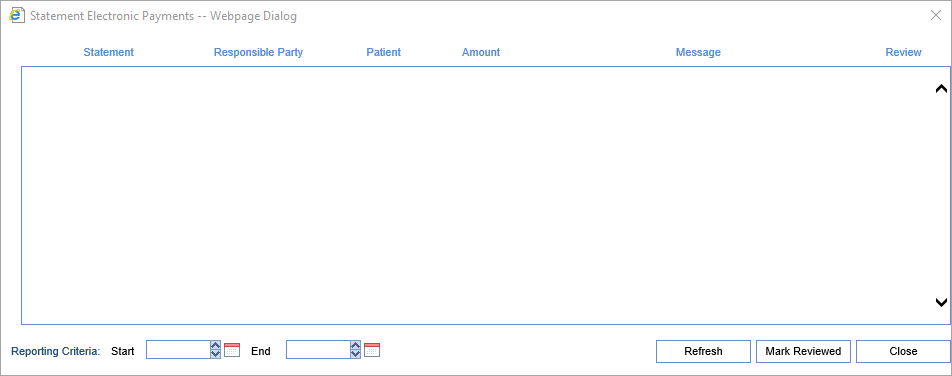
- More > Statement ePayments: This button will allow the user to quickly identify any issues with Statement ePayments received from the Data Media/PaySimple integration.

The Deposit Details Screen can be accessed by opening any row on the Deposits Screen or through Patient History by selecting Deposit from the right-click menu. This screen can be used to fix deposit errors, review payment details, and release the deposit for posting.
Fields
Deposit Details
- ID: The unique ID the application assigns to every deposit.
- Type: The type of deposit created (ERA, EOB, Import, Statement)
- Status: The current status of the deposit. Options include New, Ignore, Sent to Posting.
- New: Newly received deposits. Payments have not yet been posted.
- Ignore: Deposits that will not be sent to posting because they are not needed.
- Sent to Posting: Deposits that have been submitted for posting.
- Owner: The user that created or Sent to Posting depending on current status.
- Deposited (Date): This is the date that the check was deposited into the bank.
- Issued (Date): This is the date the EOB was issued.
- Check #: This is the check number for the deposit.
- Payer: The name of the Payer associated with the deposit.
- Pay Method: The payment method being used for this deposit.
- Pay Type: The type of payment that is being used for the deposit.
- Deposit ($): The total amount for the deposit.
- Payments ($): The sum of all payments assigned to the claims within the deposit. This field is auto-calculated.
- Adjustments ($): The sum of all adjustments that will affect the balance of the claims within the deposit. This field is auto-calculated.
- Exclusions ($): The sum of all payments for excluded claims within the deposit. This field is auto-calculated.
Hovering with your mouse over the Deposit amount or the Payments amount fields will display the balancing pop-up window.
Deposit Actions
- Send to posting: Sends the deposit to the payment posting process. Click here to learn more.
- Ignore: The deposit is removed from most work queues and will not be posted. Click here to learn more.
- Edit: Allows some deposit detail fields to be changed. Click here to learn more.
- Reset/Remove: Allows a user to undo the posting process or delete a deposit entirely. Click here to learn more.
Deposit Errors
When a deposit is created or received from an insurance carrier as an ERA, there is a possibility that some necessary fields may not be set correctly. These errors will need to be resolved.
More information can be found here on resolving posting errors.
Deposit Claims
This is a list of of claims that have been assigned to this deposit. For EOB's, these must be manually added to the deposit via the Attach/Find Claim feature. Once added, a summarized version of the payment records will be displayed.
- Attach/Find a Claim: This allows a user to search for a claim in the deposit and/or add a new claim to the deposit. Learn more here.
- Claim XRef: This is the claim x-ref supplied on the ERA.
- Claim ID: The unique identifier for the claim in the application.
- Charged: The sum of all charges for this claim.
- Paid: The sum of all payments for this claim.
- Allowed (B6): The sum of all allowed amounts for this claim.
- Deductible (PR-1): The sum of the deductible amount for this claim.
- CoIns (PR-2): The sum of the co-insurance amount for this claim.
- CoPay (PR-3): The sum of the co-pay amount for this claim.
- Adjustments: The sum of all adjustments that will affect the balance for this claim.
- Information: The sum of all adjustments that will NOT affect the balance for this claim.
- Action: Actions that can be taken for this claim (View or Edit). Learn more here.
User Settings
- Claim Search Time Period: A user can set the maximum number of days in the past that our application will look when searching for a claim.
- Maximum claims per deposit page: A user can set the maximum number of claims that will be displayed on the deposit before a new page is created.

The Deposit Claim Details screen can be accessed by opening any row from the Deposit Details screen or the Posting screen. This screen can be used to review claim specific payment information, fix issues, as well as make changes to the posting information for the claim.
Fields
Claim Details
The Claim Details section provides the user with basic information about the posting:
- PCN: The unique claim number returned on the remit.
- Claim: The unique claim number in the iSalus system. Clicking the Claim id will open the Edit Claim screen.
- The paper icon allows you to quickly view or create claim comments.
- Payer: The payer on the claim that originated this payment.
- Patient: The patient relevant to the current posting. Clicking the patient id or name will open the Patient Setup screen for the patient.
- The paper icon allows you to quickly view or create claim comments.
- The alert icon, if shown, allows you to see active alerts for this patient.
- Deposit ID: The deposit ID related to this posting. The deposit type is shown next to the ID, and the posting status is shown in parentheses. Clicking the Deposit ID will open the deposit in a new window, in case you need to review information about the deposit to make a determination on resolving claim or procedure errors.
- Claim Billing: Denotes whether the claim was sent Paper or Electronic.
- Claim Level: Once posted, this will reflect the appropriate claim level based on the rules triggered in the automated posting process.
- Claim Status: Once posted, this will reflect the appropriate claim status based on the rules triggered in the automated posting process.
- Modifying the claim status will update the Claim Billing and Claim Level accordingly.
- Sub-Status: This is an optional field -- if desired, a user can select a resulting sub-status that the claim will be set to when posted.
- Remit Status: Auto-populated if an ERA, this remit status will need to be manually selected if an EOB. This will help the rules engine know how to process the posting.
Underneath the Claim Details box, the user will typically have access to additional options for information/action:
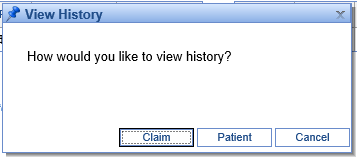
- View History: This will provide an option to view either the Claim or Patient history.
- View ERA Details: Only available on ERA’s, this will show additional information that may not be displayed but was transmitted in the ANSI file.
- Open Human Readable ERA: Only available on ERA's, this will show the ERA in a human readable format for the claim currently open.
- Claim Posting: This will alert the user if the claim is expected to be pay the entire balance or if it may overpay and result in a credit balance.
Underneath the Claim Details table on the right, the amounts already posted from this claim will be shown in this format:

This will include amounts applied from claim errors that have been resolved, as well as what has already been posted from the screen shown (for instance, if this deposit claim has already been posted, it will be the entire amount of the posting). The balance will reflect the current balance of the claim, taking into account any additional patient or insurance payments made against the claim. Here's an example of what this may look like for a posted deposit claim.

Claim Errors

If you are coming to this window from the Posting screen after the Deposit has been sent through the automated posting process, you'll likely want to address any Claim and Procedure errors that arose (you will need to resolve Deposit Errors on the Deposits screen). To do this, you will click the “Resolve” button next to any errors you see on the Deposit Claim Details window.
At that point, you can follow the instructions on the Claim Error Resolution window to resolve the error:

If you would like additional information about resolving a particular error, please see Resolving Errors.
Claim Procedures
You will use the Procedures section to post payments to individual procedure lines for a manual EOB, or to review claims as they're about to be posted.
For posting a payer EOB, please note that:
- Manual entry can be done entirely with the keyboard.
- Tabbing through the payment information will take you to the adjustments.
- In the adjustments section, if you enter adjustment information and keep tabbing, that adjustment will be saved, and it will start a new blank adjustment line.
- If you tab through a blank adjustment line without entering adjustment information, you will get to the next procedure line.
- At any point, the eraser icon under Actions can be used to clear all amounts entered on the given line.
- Once the Allowed amount is entered, the CO-45 will be auto-calculated based on the Charged and Allowed amounts (and if a CO-45 is entered, the Allowed amount is calculated). Please note that a CO-45 will not be auto-calculated for take-backs (negative paid amounts).
- All amounts are saved as soon as they are entered and the user leaves the field – so even if you close the screen, your work is saved.
- Service line adjustments can be entered by using group code "SL."
For reviewing posting data, please note that:
- On ERAs, you will see an 'i' icon to the left of the procedure code, which opens ERA Details. This provides any additional service line information that may have been included in the ANSI data but is not shown on this screen.
- The Posting Balance shows what the balance on this line will be after this deposit claim is posted -- or if the payment has already been posted, it shows the current balance of the line.
Posting/Claim Totals
This section sums what will be posted on the claim as currently entered. Please note that these are not the total amounts for all payments on the claim, but rather a sum total for the current posting.

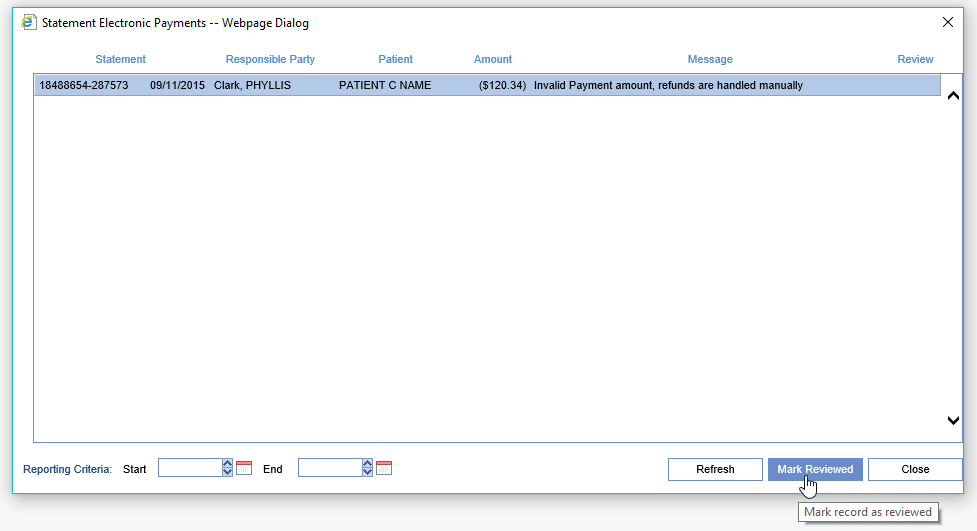
The Statement Electronic Payments screen is found inside the Deposits screen by clicking the More button. This screen is designed to allow the user to search for all statement payments that have been reported by our preferred statement print/mail vendor Data Media Associates. By default this screen will show any payments that were not able to be posted and the reason why. In addition users can put a date range in the Reporting Criteria section and see all payments that were processed automatically as well for that date range. This screen will open automatically when the Deposits screen is first loaded if an unprocessed deposit exists.
For information regarding autoposting of these payments Click Here.
Workflow
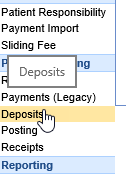
- Open the Deposits screen
- The screen will automatically open if unprocessed payments exists
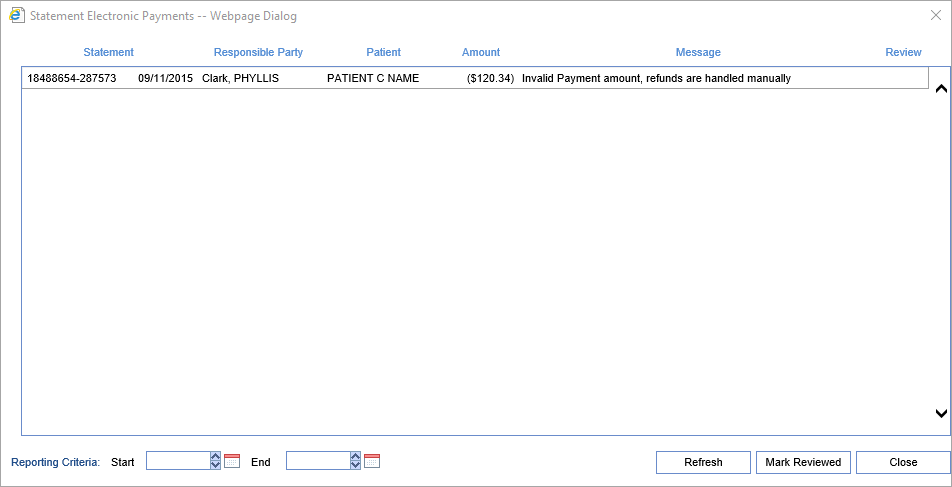
- Once the information on the screen has been processed manually, click to select the record and then click Mark Reviewed
To Report on All Electronic Statement Payments within a Date Range
- Enter your Start and Ending date in Reporting Criteria and Click the Refresh Button
