- Go to the Reports section, then under EMR select Connect.
- Click the icon with a page and plus sign to create a new Connect report entry.
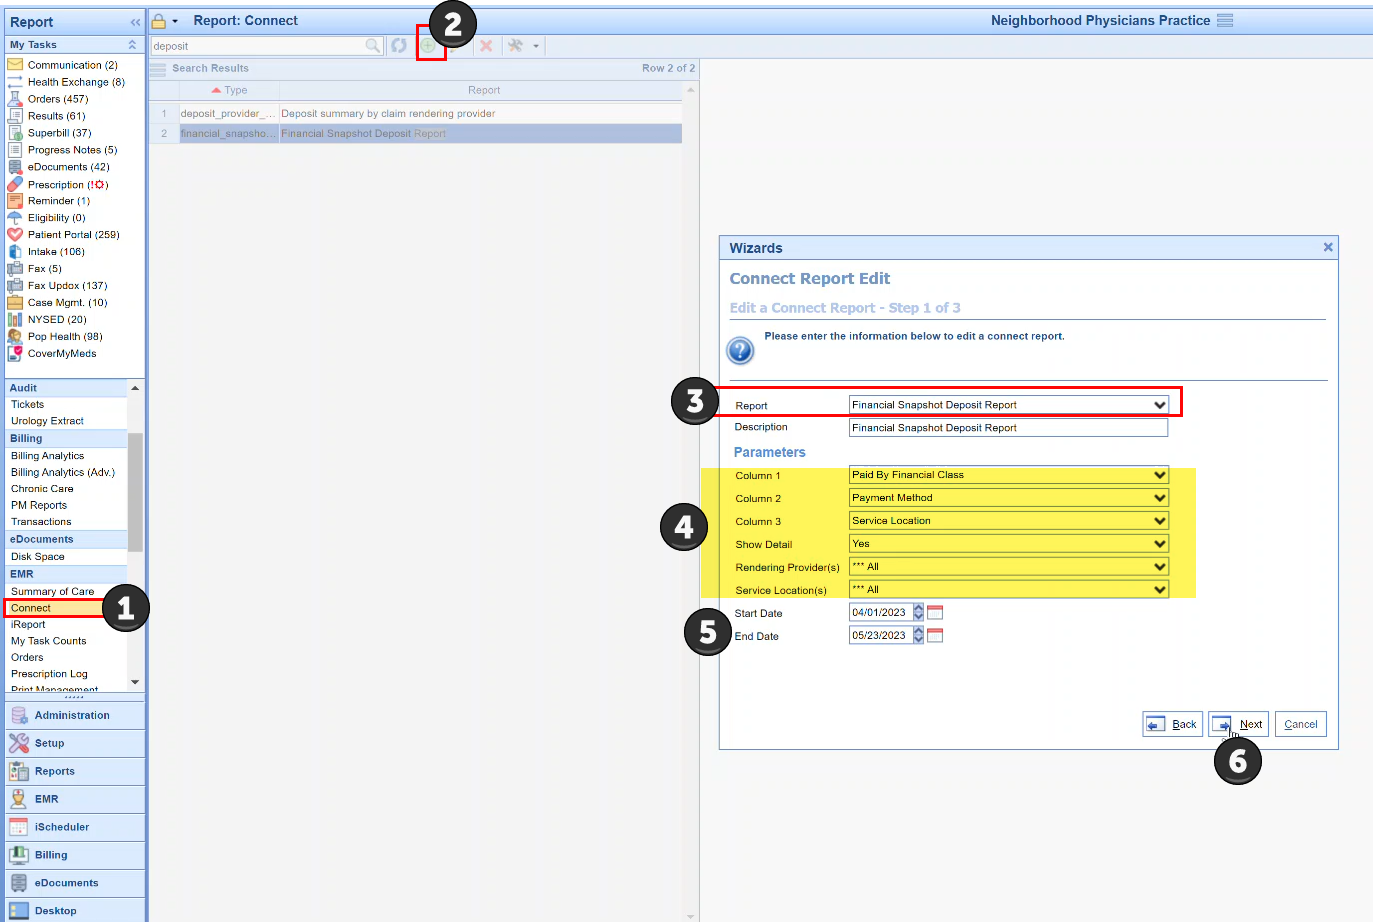
- When asked to select the Report, scroll under the Claim header and find Financial Snapshot Deposit Report. Then fill out the description and parameters as follows:
Description: This is what will be shown in the ‘Report’ column when choosing what to run. Because this is such a customizable report, I’d recommend making this as descriptive as possible. - Columns 1-3: Here you’ll select the fields you’re going to group the report on. If you select Column 1 to be Service Location and Column 2 to be Payment Method and Column 3 to be None, you’ll see all your financials broken out by Service Location and Payment Method. Where the filter doesn't apply to the payment type, you will see that noted on the report export as uncategorized which just means it has no association with the chosen category. This filtering ability is similar to adding Row Groups to pivot tables in Excel. The filter column options are:
- Alternate Provider
- Business Unit (click here for more information on Business Unit)
- Claim Primary Payer
- Claim Primary Financial Class
- Code Class
- Paid By Financial Class
- Patient
- Patient Location
- Payment Method
- Procedure Code
- Procedure with Description
- Referring Provider
- Rendering Provider
- Service Location
- None
- Show Detail: You can choose whether or not to include Detail on the report. If you don’t include detail, the Chart Number, Patient, and Claim ID columns will be blank.
- Rendering Provider(s): You can select which rendering providers you want to include on the report. If All is selected, even with additional selections, all rendering providers will be returned.
- Service Location(s): You can select which service locations you want to include on the report. If All is selected, even with additional selections, all locations will be returned.
- Date Type: You can select Service Date or Post Date. If you choose service date, it will work the same as choosing service date on other reports. If choosing Post Date, it will run Charges by Charge Post Date and Payments/Adjustments by Payment Post Date, showing you all transactions that happened in this time period (whether charges, payments, or adjustments).
- Start Date: The beginning date, of the type selected in (6).
End Date: The end of the reporting window, of the type selected in (6).

Please note that if showing detail, you can choose to return 3 months of data at most. If not showing detail, you can choose whichever time frame you prefer. If the 3-month time frame on detail is exceeded, the report will return with no data.
