To fully prepare your practice for the new Statement process, there are three things you should plan to complete. Please know that these don't need to be completed prior to its release, but it's imperative that you complete all three steps prior to building your first batch of statements:
- Have any/all relevant staff attend one of the upcoming webinars. You can register here.
- Complete statement configuration by walking through the Statements Configuration Guide.
- Review the appropriate guide for running statements for your practice:

- Automatic statements are for practices that want the most efficiency possible and require working with one of our statement printing vendors. For more information, see the Automatic Statements Guide.
- Hybrid statements are for a) practices that want to be efficient but have chosen to print their statements in-house, or b) practices that wish to review statement batches before they are sent out. For more information, see the Hybrid Statements Guide.
- Manual statements are for practices who want to manually step through the statement process. For more information, see the Manual Statements Guide.
Follow these steps to Access the Statement Setup Screen:
- Log in to the software and Open the Billing Portal.
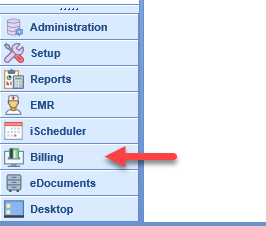
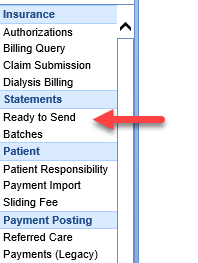
- Click the Ready to Send link under Statements on the navigation bar.
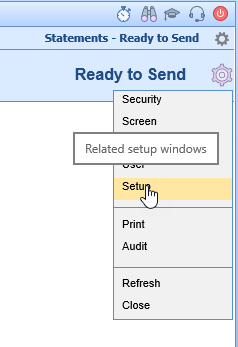
- Click the Gear icon at the top right of the screen and select Setup.
- The Statements Settings Screen appears.
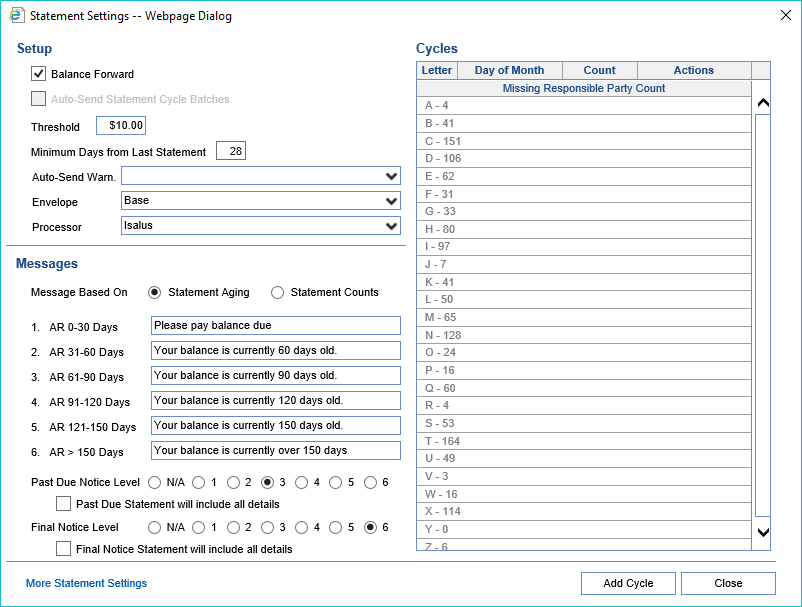
Answer the following questions to help chose how to complete the Statement Setup Screen
Do you want to forward balances from previous statements without showing the detail from those balances, or would you rather full detail be displayed on all statements?
- To hide details that have appeared on previous statements, check the Balance Forward box.
Do you want Statement Batches in a Pending status to automatically be sent at night?
- If so, check the Auto-Send Statement Cycles Batches box.
What should the minimum patient due amount be for a statement to be printed?
- Enter this amount in the Threshold box.
How often do you want a patient to be able to receive a statements?
- Enter the number of days in the Minimum Days from Last Statement box.
Auto-Send Statements will only send Statements without warnings. Do you want statements to still go out even if an account has credits, unapplied receipts, or the responsible party is a minor?
- If you do, click the Auto-Send Warn drop down and select which warnings to ignore and send.
Are you printing statements in-house?
- If you are, select the Envelope type that you will be using so that the address is printed in the correct position.
Who will be printing your statements?
- This value should have been set for you.
- If you are printing your own statements, the Processor should be iSalus.
- If you are using our new recommended print vendor, the Processor should be Data Media.
- If you are using our legacy vendor, the Processor should be RevSpring.
- If you are downloading a file and sending it to an unsupported vendor, the Processor should be RevSpring.
Do you want the "dunning" message to be based on oldest aged item on the statement or by number of statements that a patient has received?
- Select the appropriate radio button for Message Based On.
Would you like custom "dunning" messages to be sent based on message level?
- If so, then they can be entered here in the Messages area.
Would you like a Past Due Notice to be sent to the patient once a patient has already received a specified number of statements?
- If so, then select the radio button for the Past Due Notice Level at which to start sending the Past Due Notice.
Would you like the Past Due Notice to be sent with a statement or in place of the statement?
- If you want both the Past Due Notice and the statement, check the box for Past Due Statement will include all details.
If you want statements automatically batched, how often do you want to send them? Do you want to batch specific letter ranges together?
- Create Cycles based on frequency and letter ranges. For example, you could set up:
- Monthly Statements Batched Weekly - A-E on the 1st, F-K on the 8th, L-S on the 15th, and T-Z on the 22nd.
- Weekly Statements - A-Z on the Monday (or any specified day of the week).
- Daily Statements - A-Z and set the Day of Month to Daily or Daily excluding weekends to batch on each day of the month.
- All of the examples above can also be set to manual batching by setting the Day of Month to Manual Mode.
For additional information about Statement Configuration, see Statement Setup.

Statement Cycles can be setup up so that batches are built automatically on a specified day of the month and then all statements without warnings/issues from those batches are automatically sent to the print vendor. All warnings/issues can then be worked on the Ready to Send screen.

Automatic Statement Batch Setup
Workflow
Batches are built and sent nightly automatically according to the Day of the Month specified for the Cycle. Users will need to review Past Due Warnings on the Ready to Send Screen the day after a batch is created and sent. Using the example Cycles above the following procedures would take place on the 2nd, 9th, 16th, and 23rd of each month.
Review Past Due Warnings
- Open the Ready to Send screen under Statements in the Billing Portal
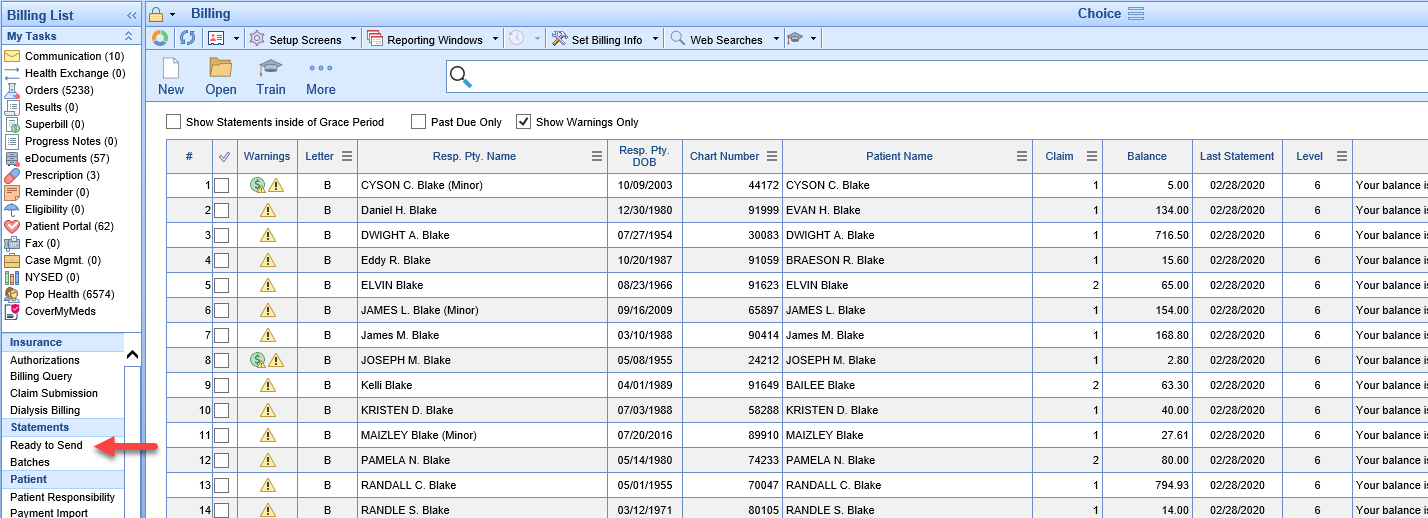
- Select the Past Due Only box in addition to the Show Warnings Only box that should be already selected to show all of the statements from the batch that was auto-sent that had warnings/issues and were excluded
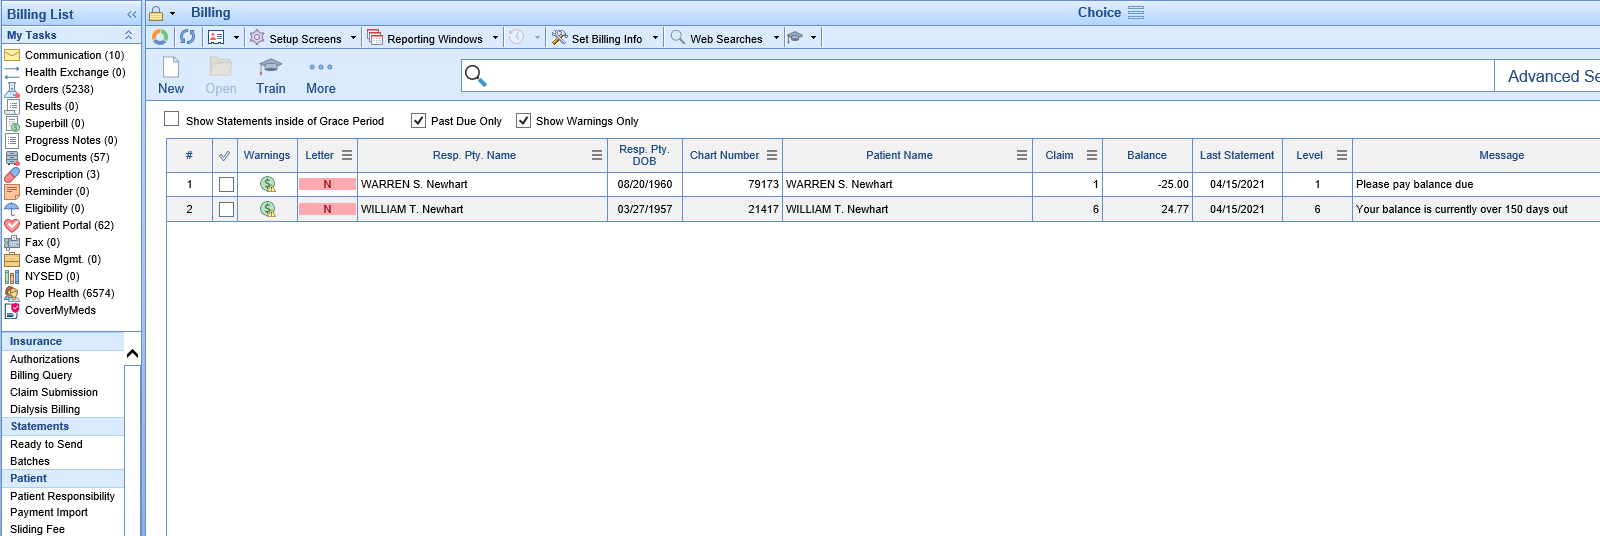
- Double Click to open Statement Details
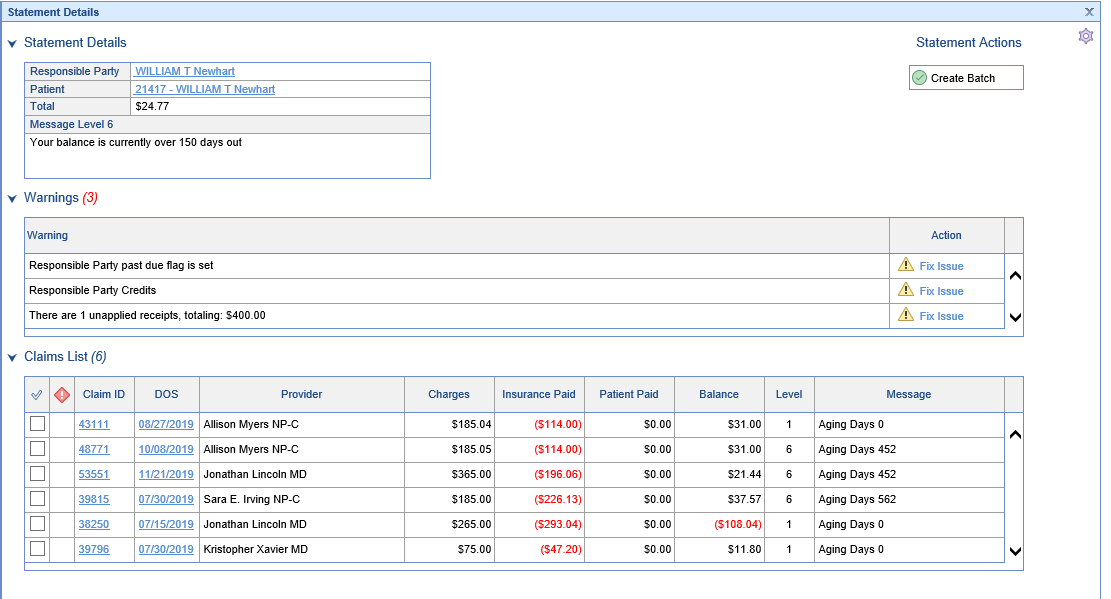
- Fix the Warning(s)/Issue(s) - How to fix Statement Warnings

- Continue until all necessary Warnings/Issues are corrected and close the final Statement Details Screen (any warnings that were left can be corrected or ignored in the batch/submit process)
You can now either be done and the statements will be sent out next month when the cycle processes again or you can batch and submit the corrected statements manually.
To batch and submit manually
- Click the Check mark on the Headings bar to Select All
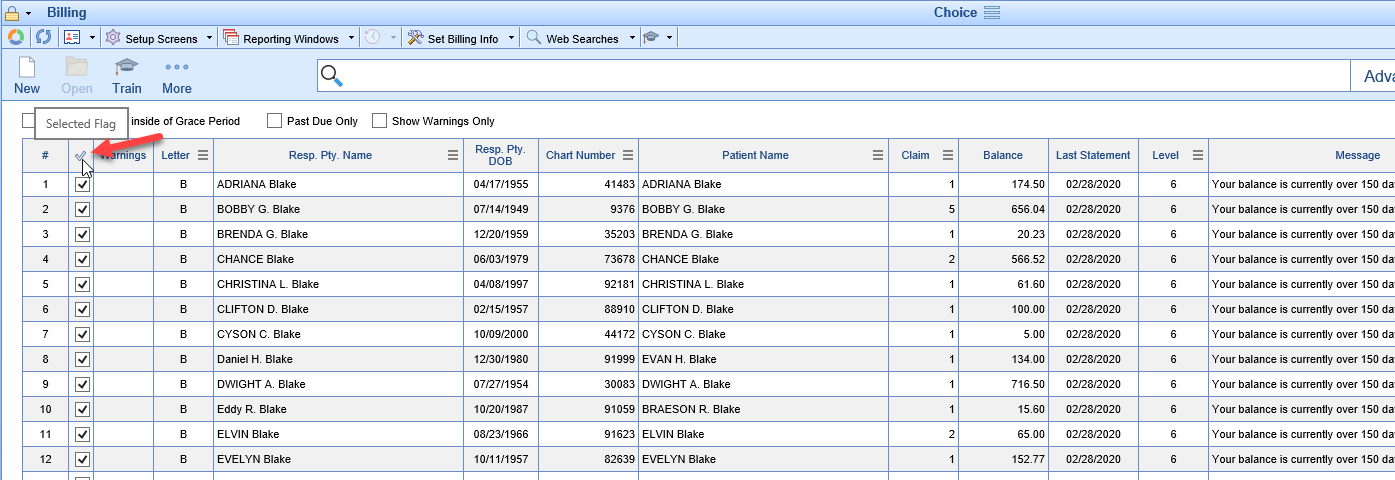
- Click the New button to open the Prepare Batch screen
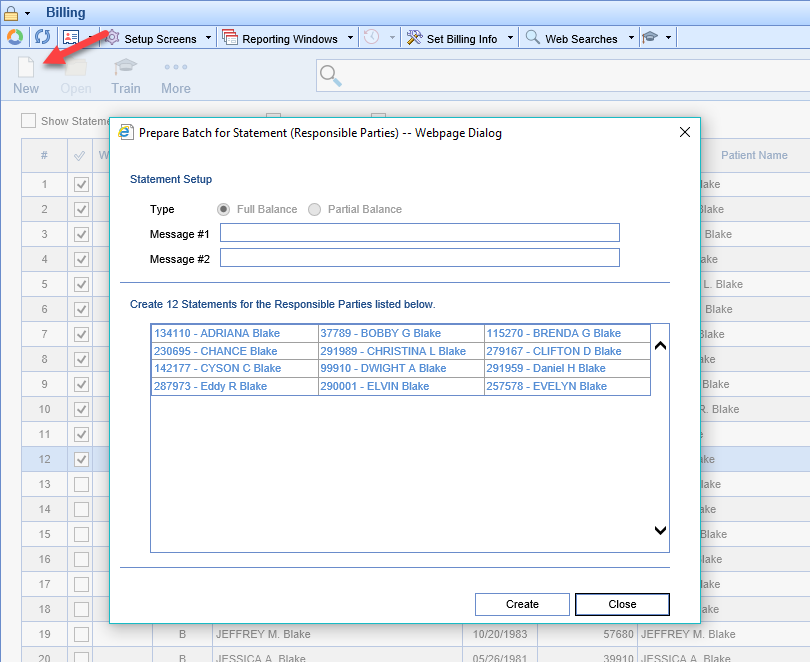
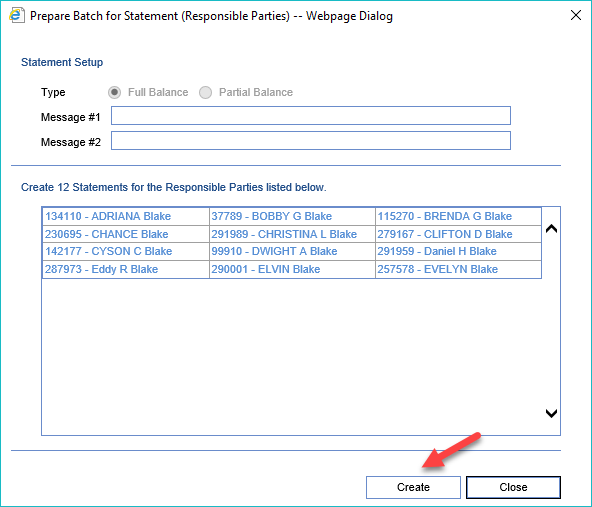
- Click the Create button to create the batch of statement for all of the selected responsible parties
- Open the Batches screen
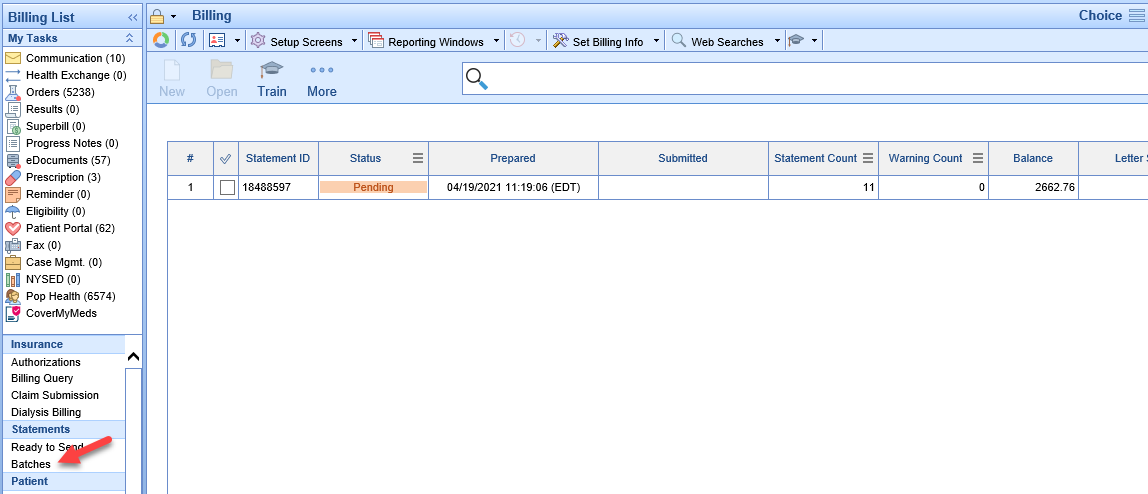
If there are no warnings
- Select the Batch

- Click the More button and select Submit Statements

If there ARE warnings on the batch
- Double Click on the Pending Batch to open Batch Details
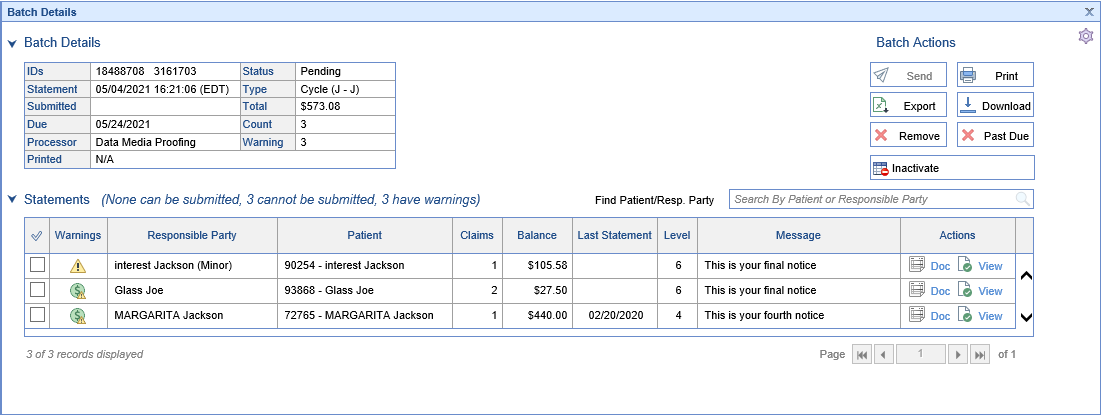
- Double Click on the first row to open Statement Details for the first statement with a warning
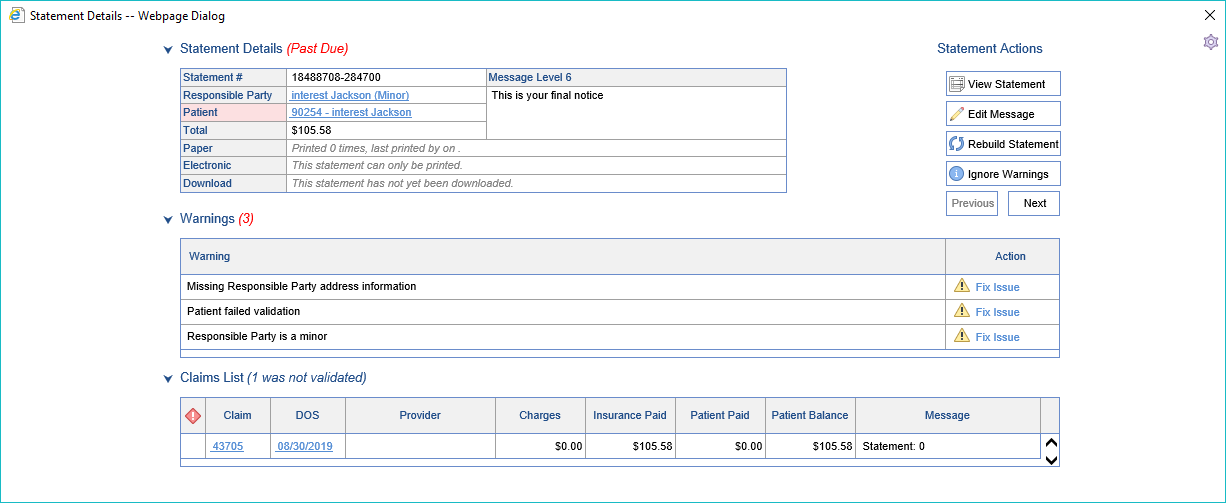
- You may now:
- Fix the necessary Warning(s)/Issue(s) - How to Fix Statement Warnings

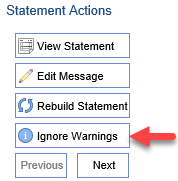
- Click the Ignore Warnings button to Ignore remaining, unfixed warnings and send the statement out as-is
- Fix the necessary Warning(s)/Issue(s) - How to Fix Statement Warnings

Statement Cycles can be setup up so that they build batches automatically on a specified day of the month and then users review the statements that are to be included in the batch prior to them being printed or sent to the print vendor. In this scenario warnings/issues are worked in the Batch Details screen.

Partially Automatic Statement Batch Setup
Workflow
Batches are built nightly automatically according to the Day of the Month specified for the Cycle. Users will need to review the Warnings/Issues in the Batch Details Screen the day after a batch is created and then manually print or submit the batch. Using the example Cycles above the following procedures would take place on the 2nd, 9th, 16th, and 23rd of each month.
Review Statement Warnings within the Batch
- Open the Batches screen under Statements in the Billing Portal
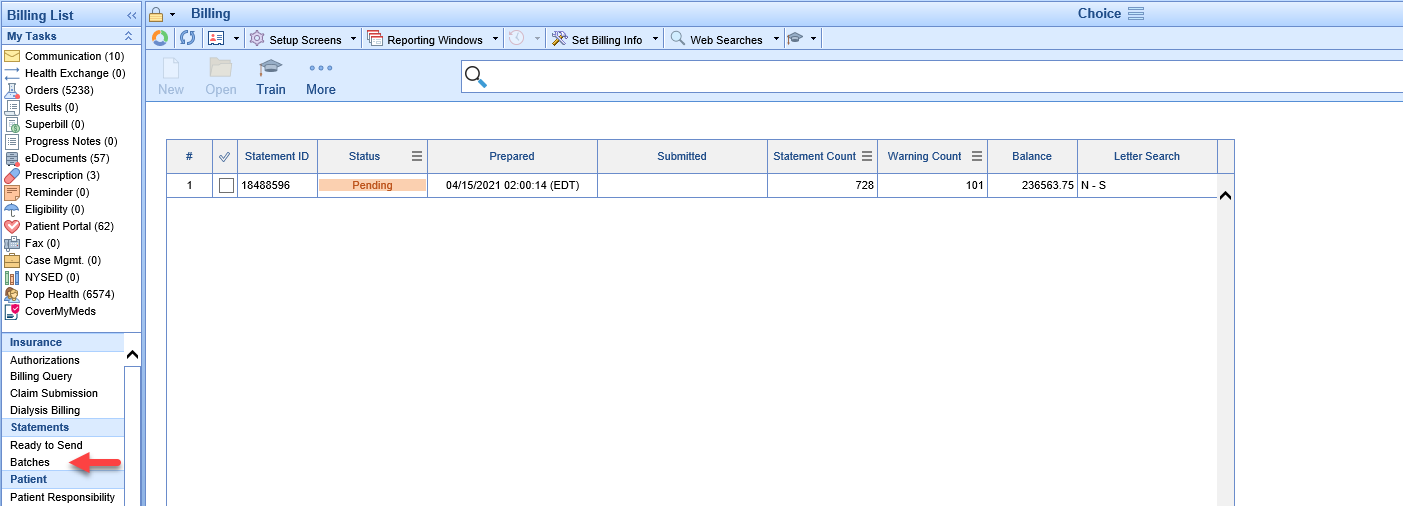
- Double Click on the Pending Batch to open Batch Details
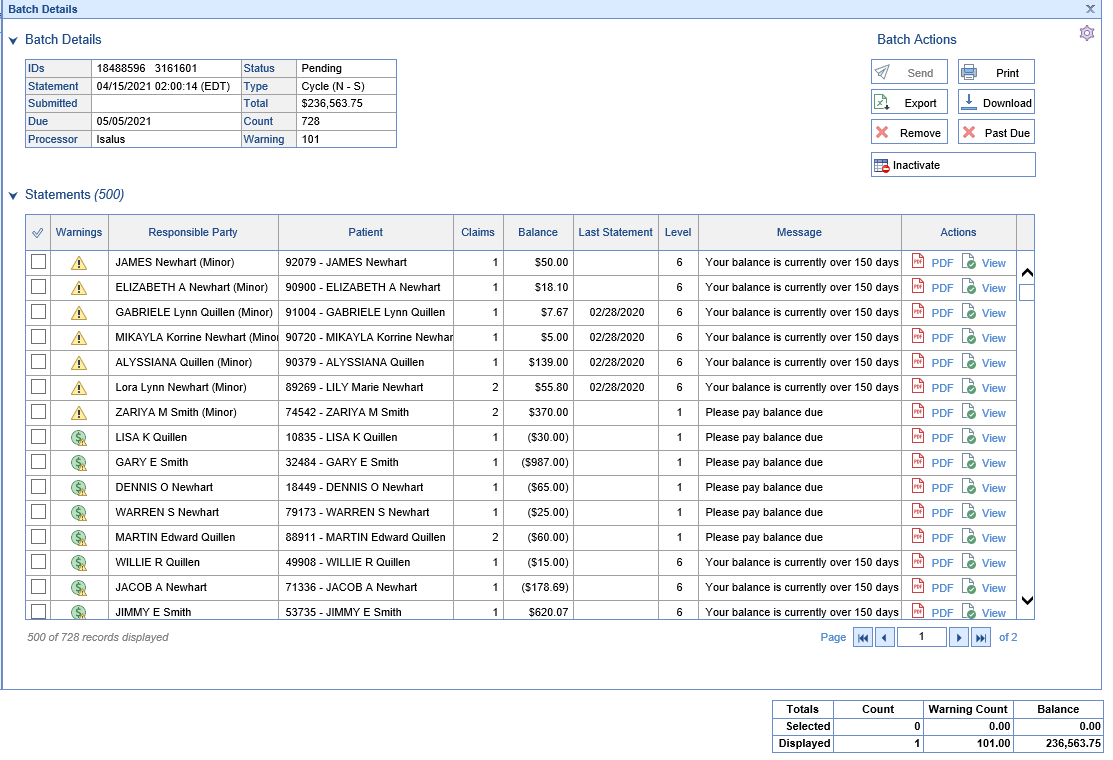
- Double Click the first row to open Statement Details for the first statement with a warning
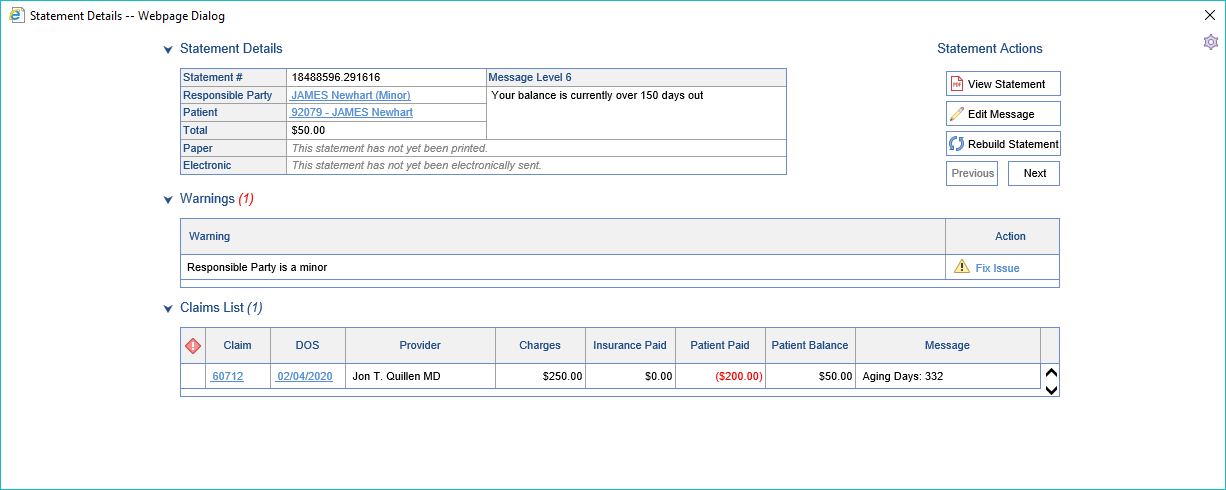
- You may now:
- Fix the necessary Warning(s)/Issue(s) - How to Fix Statement Warnings

- Click the Ignore Warnings button to Ignore remaining, unfixed warnings and send the statement out as-is

- Fix the necessary Warning(s)/Issue(s) - How to Fix Statement Warnings
- Click the Next button to open the next Statement with a Warning/Issue
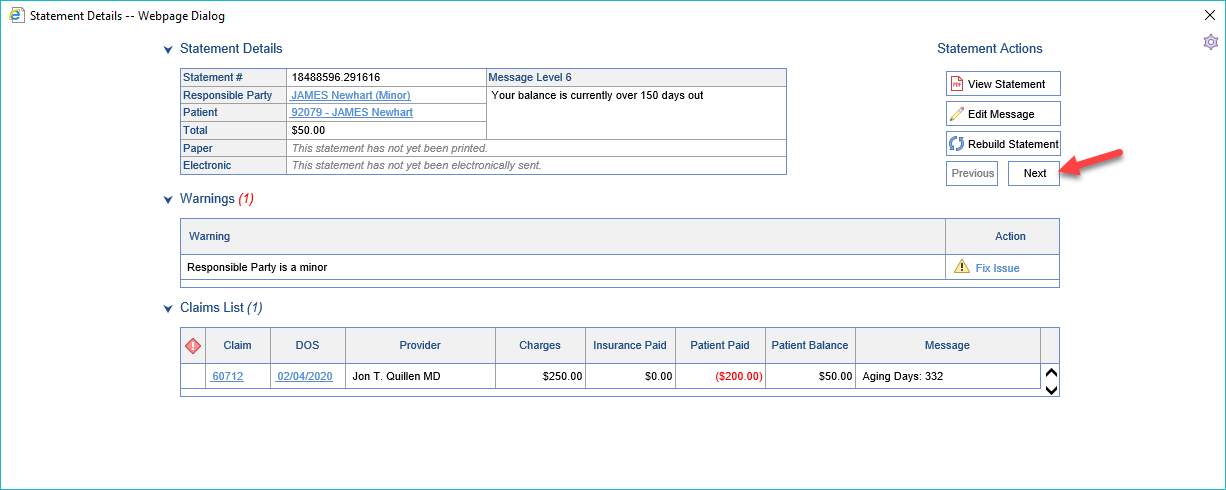
- Continue until all Warnings/Issues are corrected and close the final Statement Details Screen
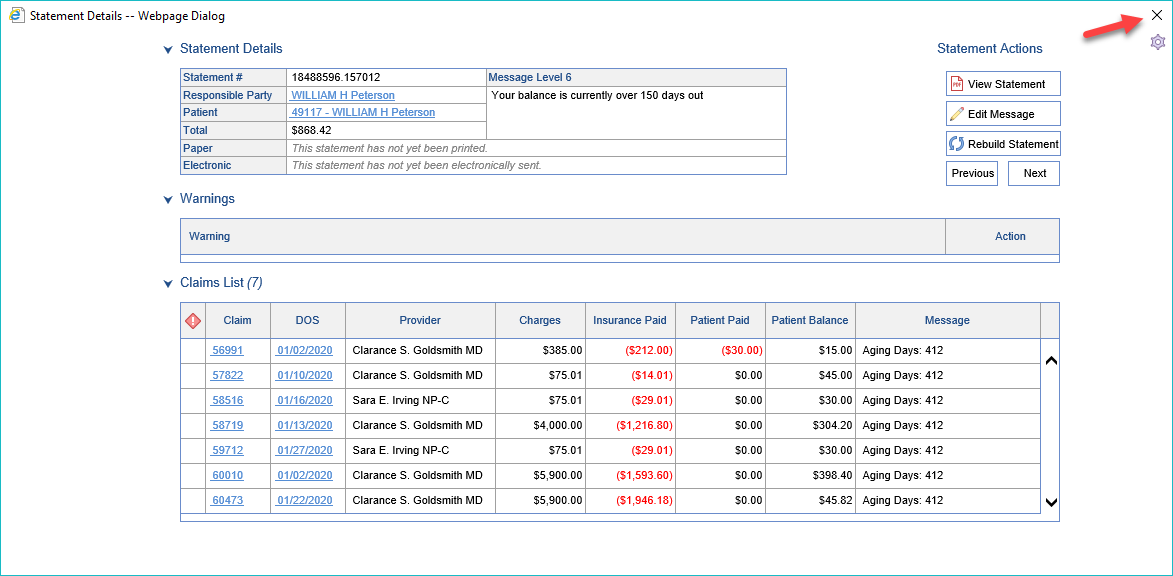
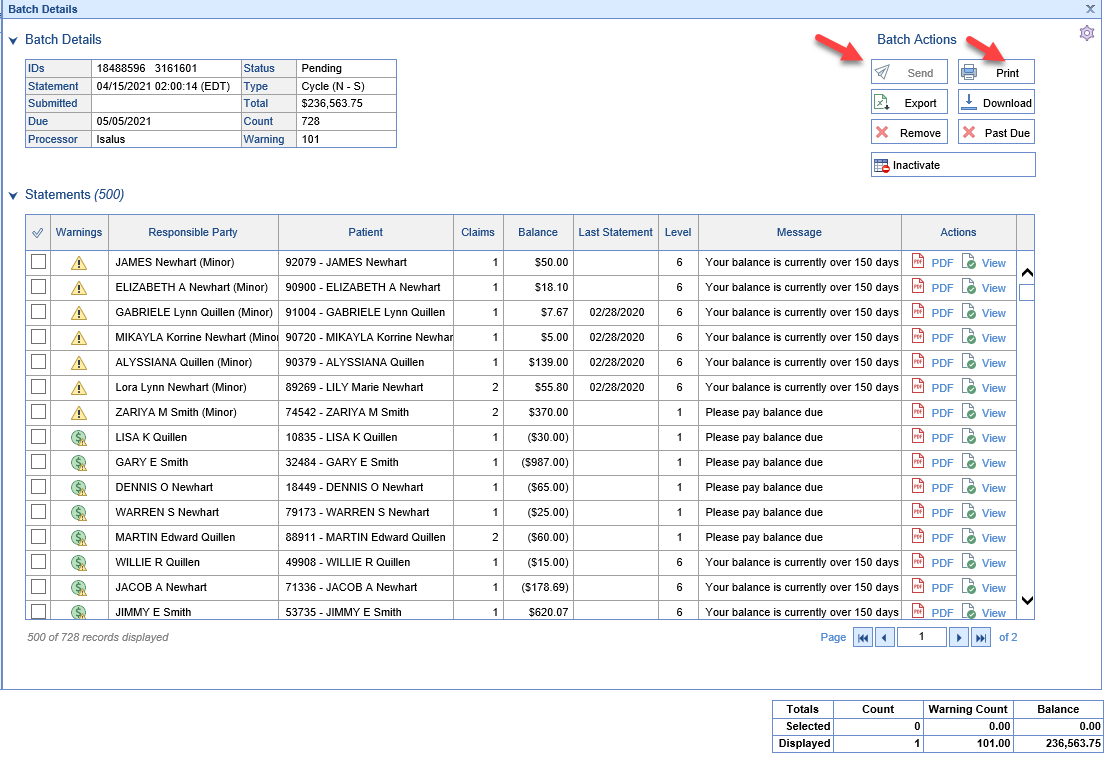
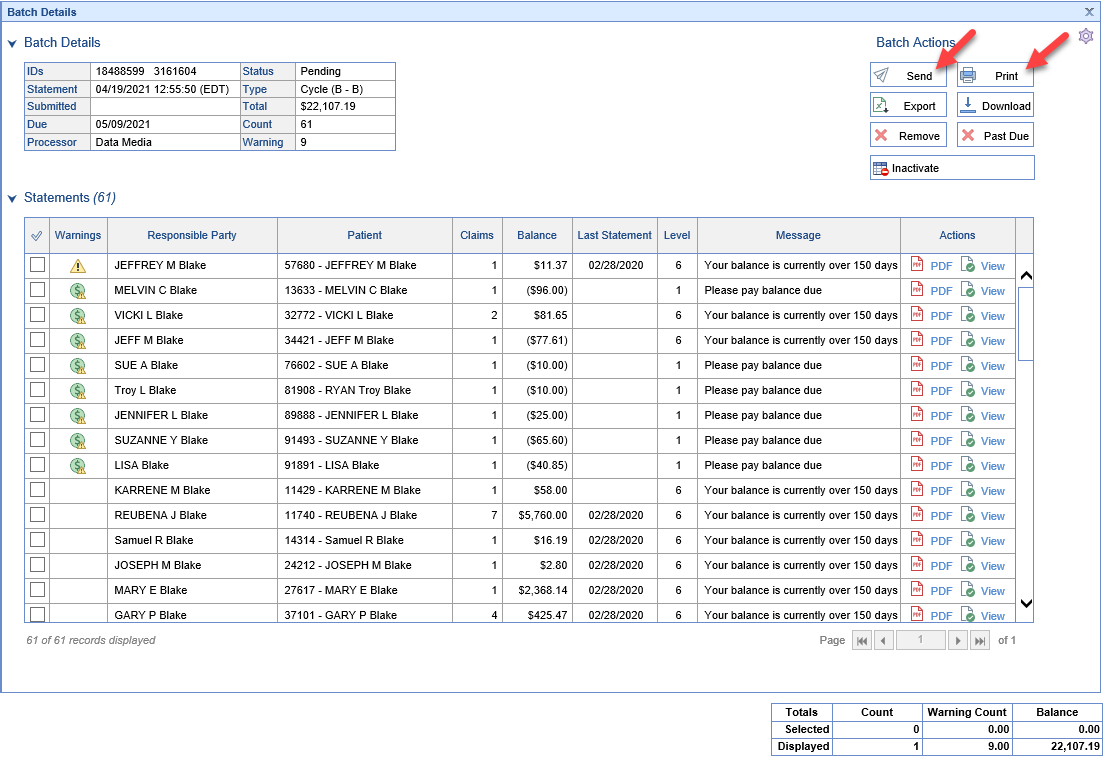
- Submit the batch using the Send or Print buttons according to your preferred Submission method

Statement Batches can be manually created and sent using Statement Cycles or by searching and selecting responsible parties on the Ready to Send screen.

Workflow
Batches are built manually, on demand by a user. Users will need to work the warnings/issues from the Batch Details Screen after the batch has been built. Optionally users can choose to review Warnings on the Ready to Send Screen prior to the building the statement batch instead.
Using Statement Cycles
- Open the Ready to Send screen under Statements in the Billing Portal

- Click the New button at the top of the screen to open the Prepare Batch Screen
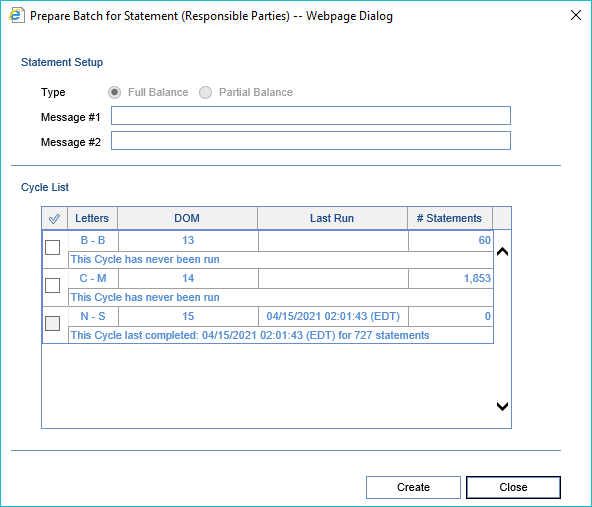
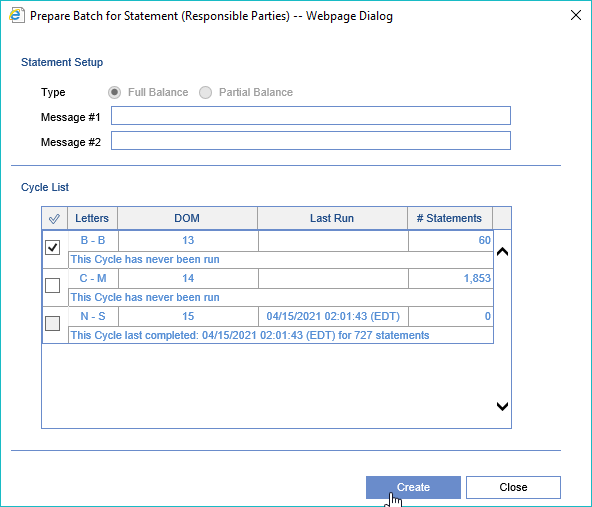
- Select the Cycles to be processed and click Create
- Open the Batches screen under Statements in the Billing Portal
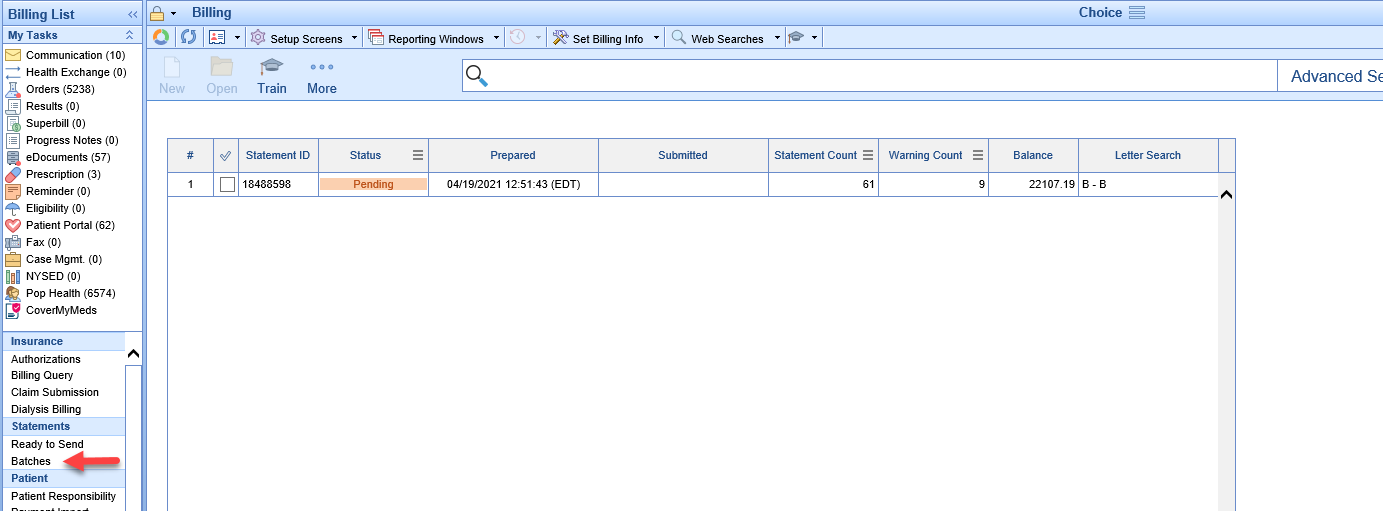
- Double Click on the Pending Batch to open Batch Details
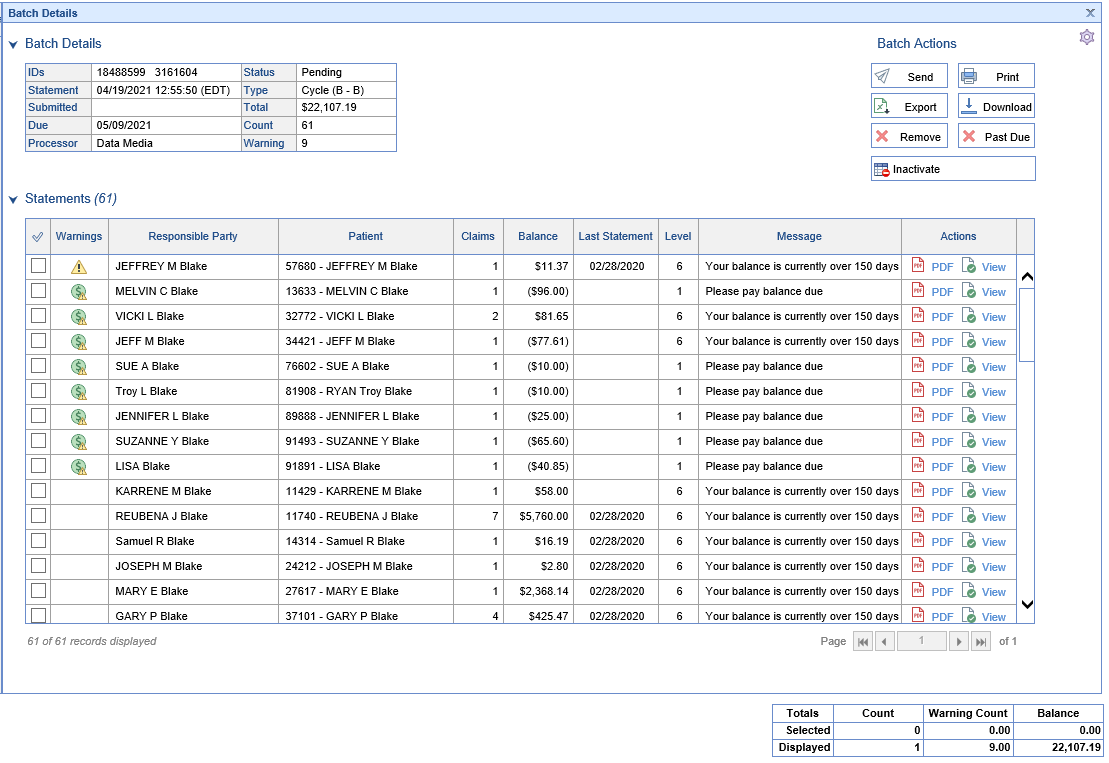
- Double Click on the first row to open Statement Details for the first statement with a warning
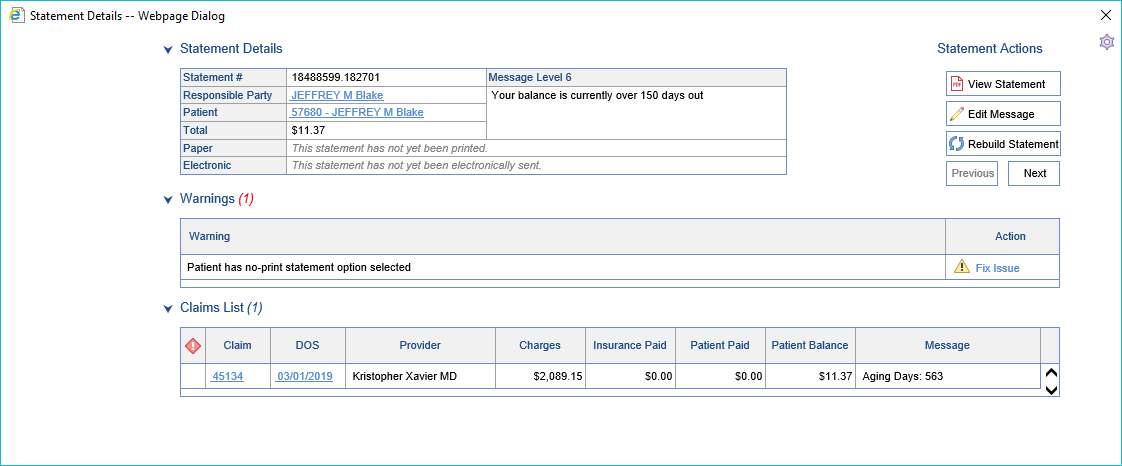
- You may now:
- Fix the necessary Warning(s)/Issue(s) - How to Fix Statement Warnings

- Click the Ignore Warnings button to Ignore remaining, unfixed warnings and send the statement out as-is

- Fix the necessary Warning(s)/Issue(s) - How to Fix Statement Warnings
- Click the Next button to open the next Statement with a Warning/Issue
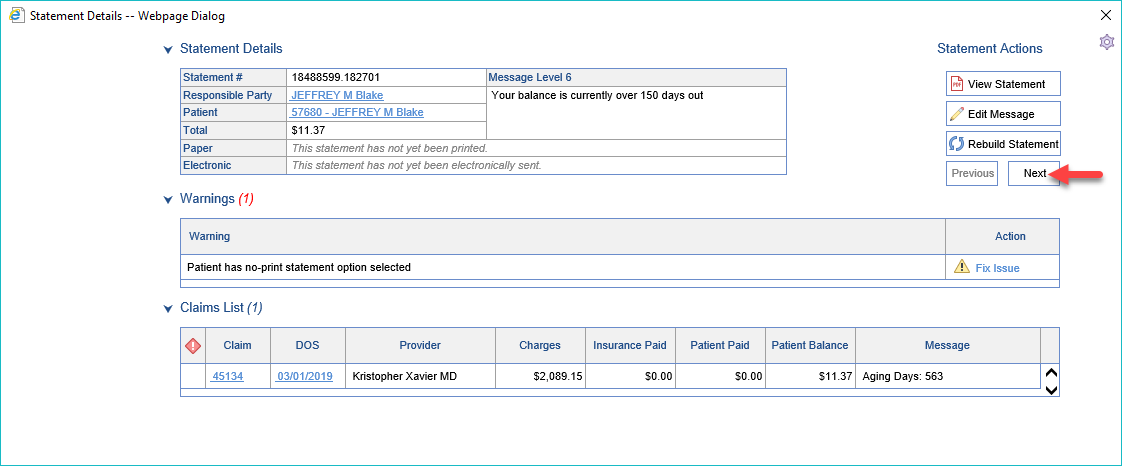
- Continue until all Warnings/Issues are corrected and close the final Statement Details Screen
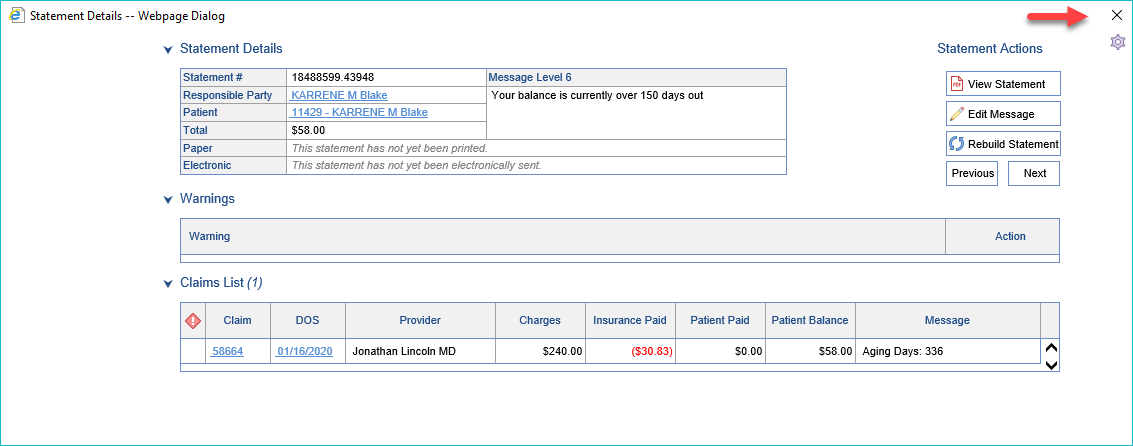
- Submit the batch using the Send button or use the Print or Download button according to your preferred Submission method
There are many use cases where a practice will need to quickly print a statement for a patient. The practice may want this statement to apply to their statement level or they may not. In addition the practice may have a need to print only selected claims. We support all of this through On-Demand Statements in the Ready to Send screen.
Workflow
- In the Billing Portal, under Statements, Click to open the Ready to Send screen
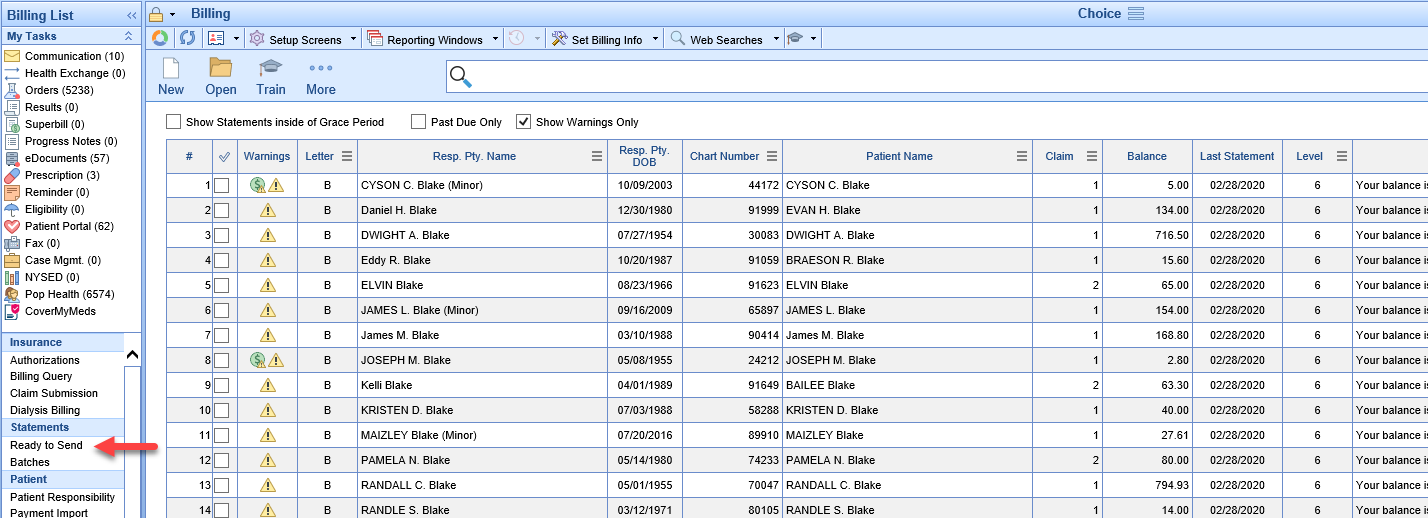
- Using the Search Bar at the top or the Advanced Search, Uncheck the box for Show Warnings Only and Search for your patient

- Double Click the detail row to open Statement Details for the patient

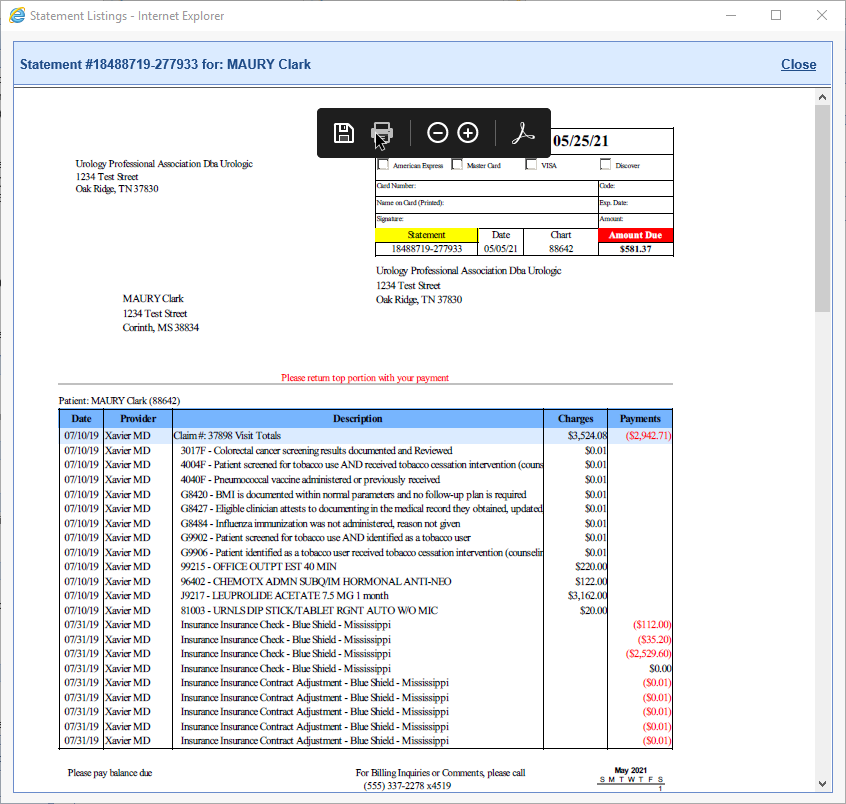
If you need a Quick Statement that will not be counted as an official statement
- Select the claims that you want on the statement or leave them un-selected for all

- Click the Quick Statement button

- Print the Statement using your browser's PDF controls
If the statement will count as batched statement advancing the statement level:
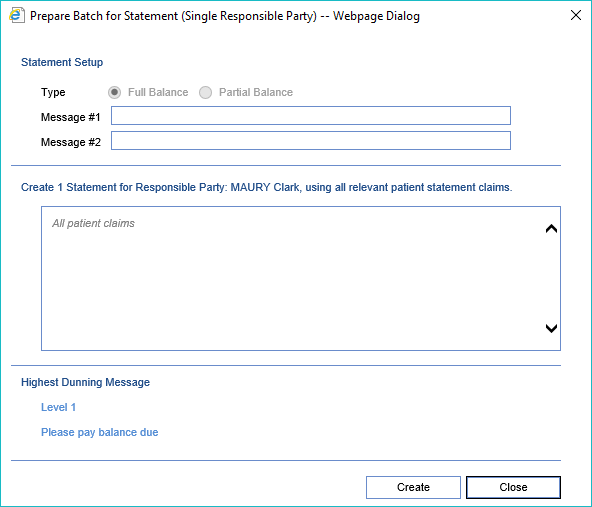
- Click the Create Batch button

- Enter any custom messages and click Create
- Open the Batches screen under Statements in the Billing Portal
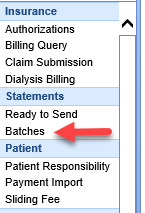
- Double Click on the Pending Batch to open Batch Details

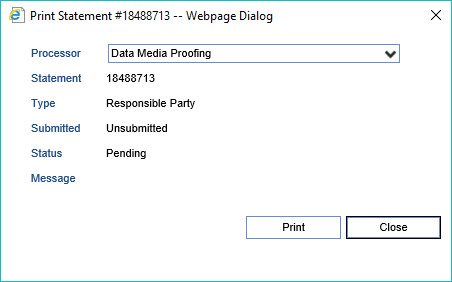
- Open the Print Statement screen using the Print button

- Click the Print button
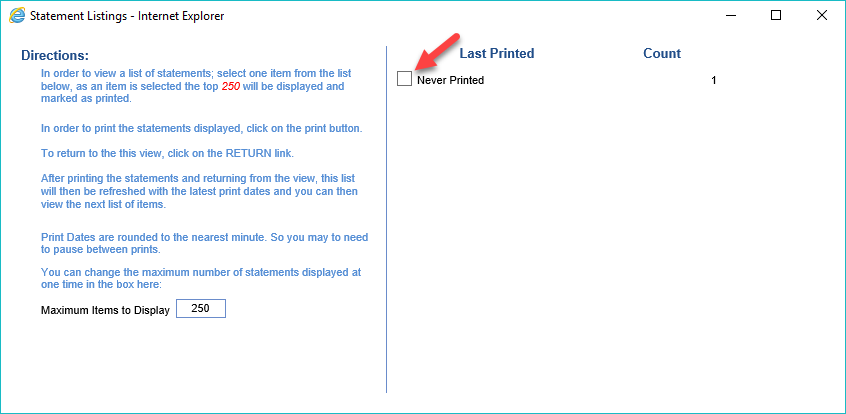
- Click the check box for Never Printed to open the Statement View
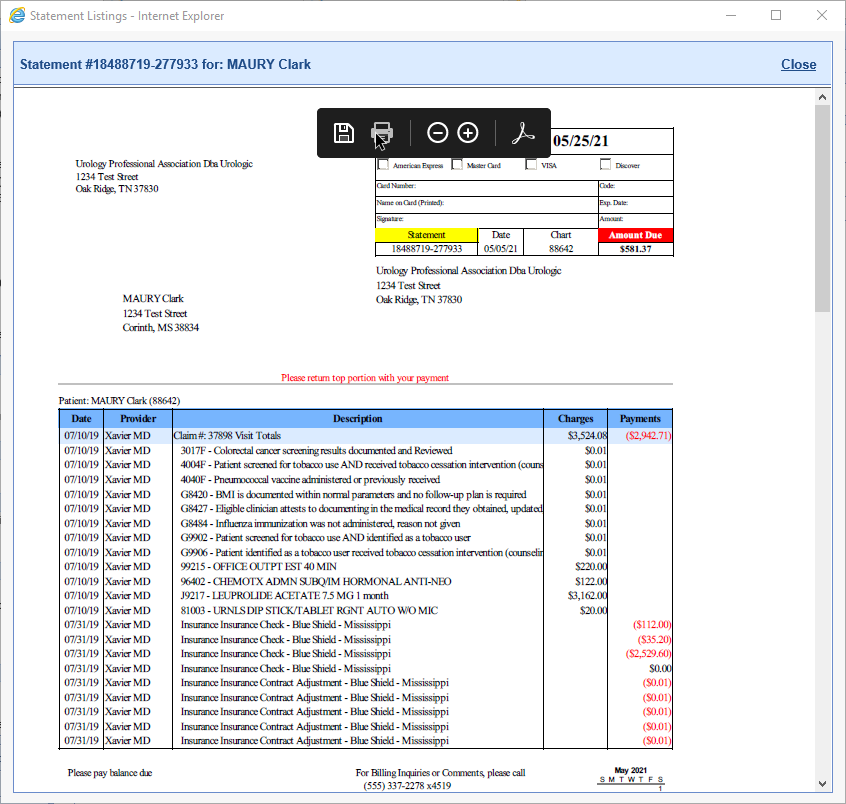
- Print the Statement
- Click the Return icon
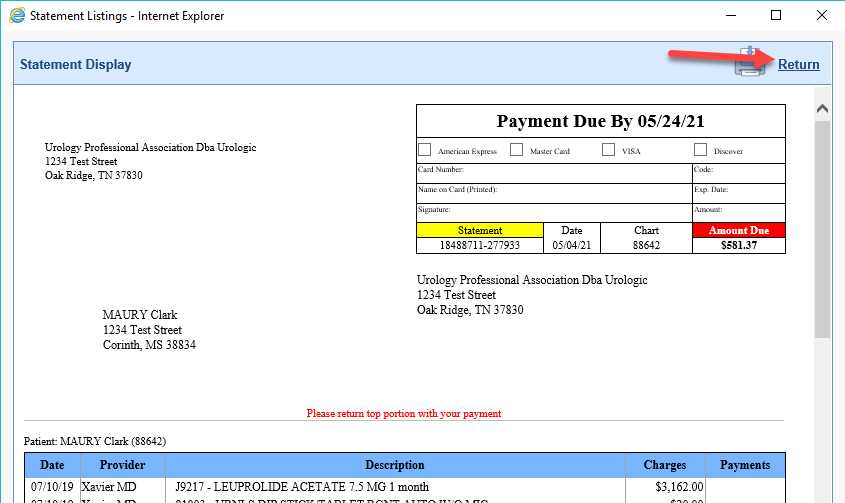
Some practices may chose to print statements in their office and then mail them out themselves. This process has been designed so that practices that can print large batches of statements in smaller pieces so as to not tie up the computer or the printer any longer than is absolutely necessary.
Workflow
- In the Billing Portal, under Statements, Click to open the Batches screen
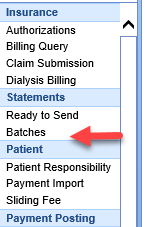
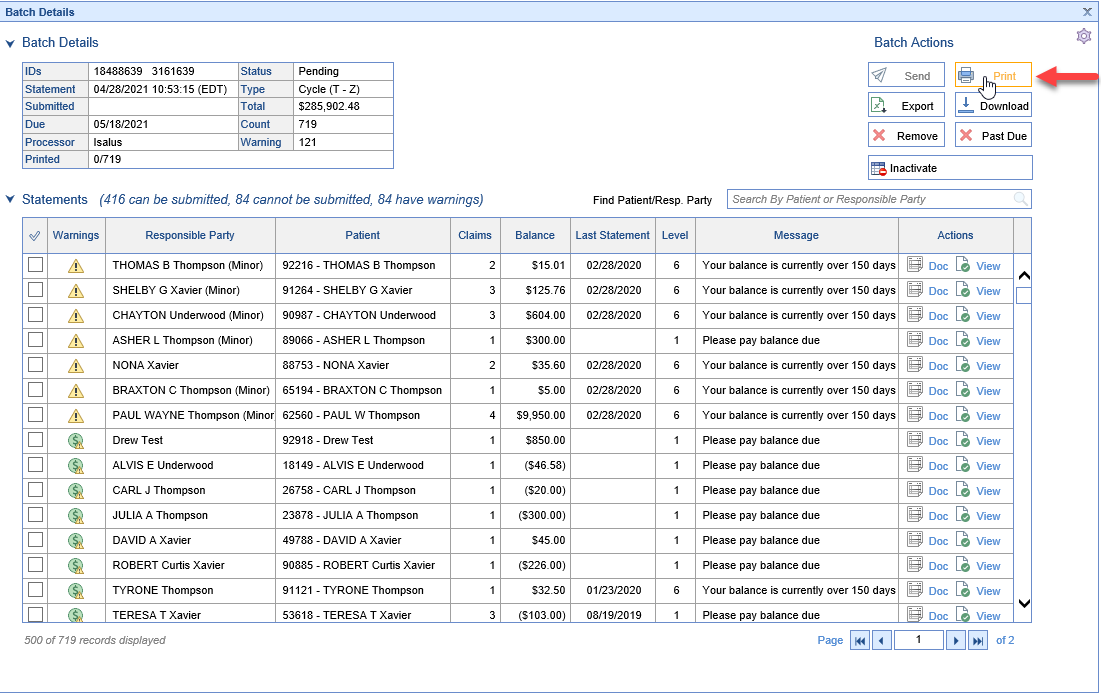
- Double click on the Batch that is to be printed to open Batch Details

- Inside Batch Details, click the Print / Re-Print button to open the Print Statement dialog box
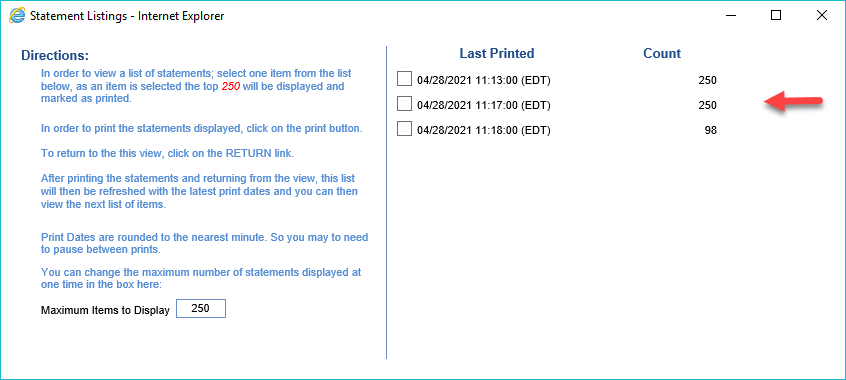
- On the Print Statement window click the Print button (This process will prepare you batch for printing and open the Statement Listings Screen)
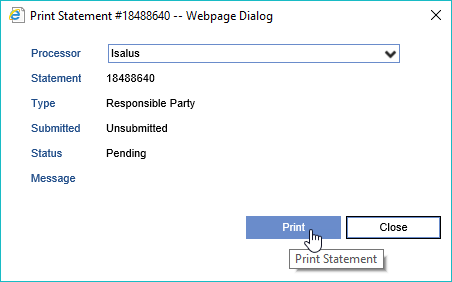
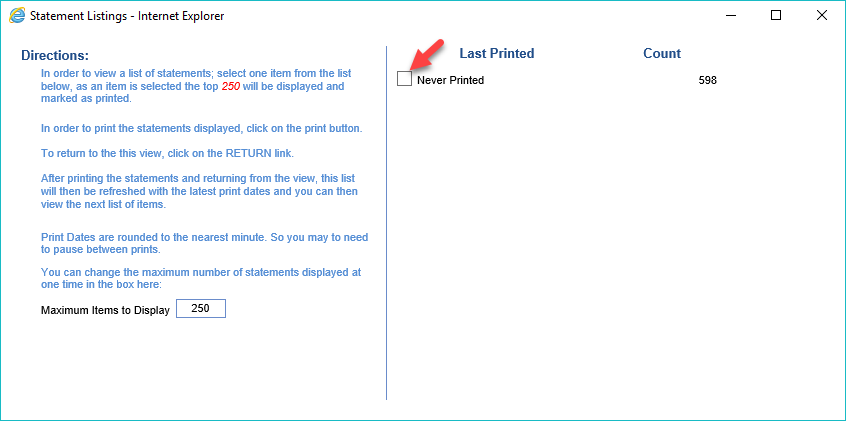
- Click the check box for Never Printed to open the first 250 statements to be printed
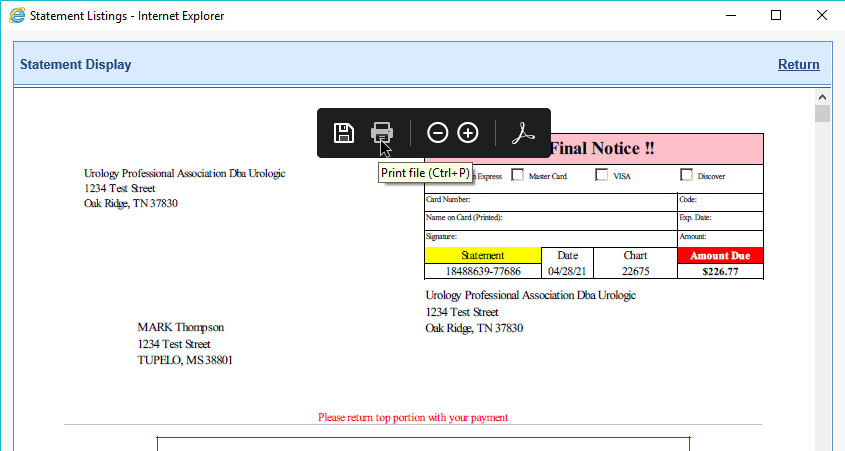
- Use your browser's PDF controls to Print your statements
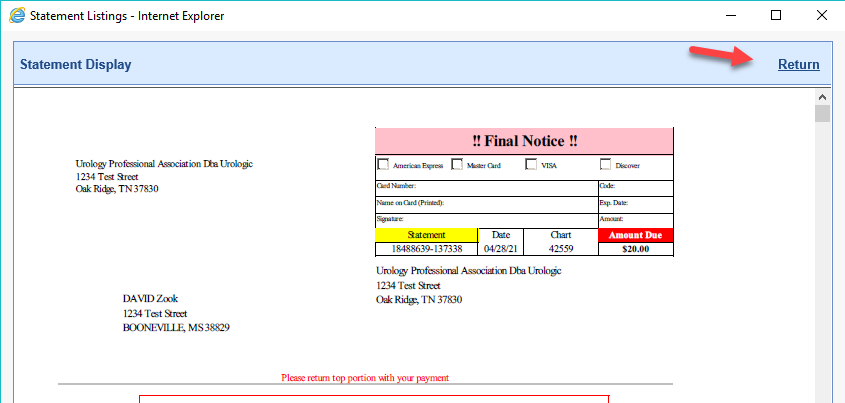
- Click the Return icon to Return to the Statement Listings screen
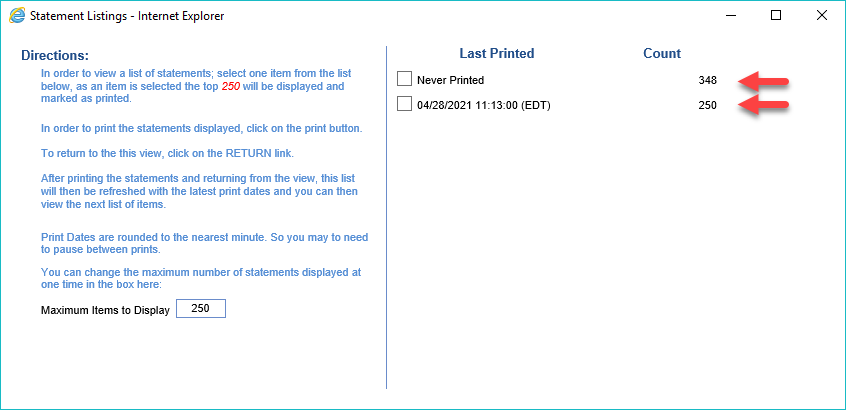
- You will see that the Never Printed amount is reduced and there is now a printed line as well
- Continue steps 5 through 7 until all statements have been printed
Some practices may chose to use a non-integrated third party print vendor. This process has been designed so that practices can download statement batches to their computer to be sent to any print vendor the practice may be partnered with.
Workflow
- In the Billing Portal, under Statements, Click to open the Batches screen

- Double click on the Batch that is to be downloaded to open Batch Details

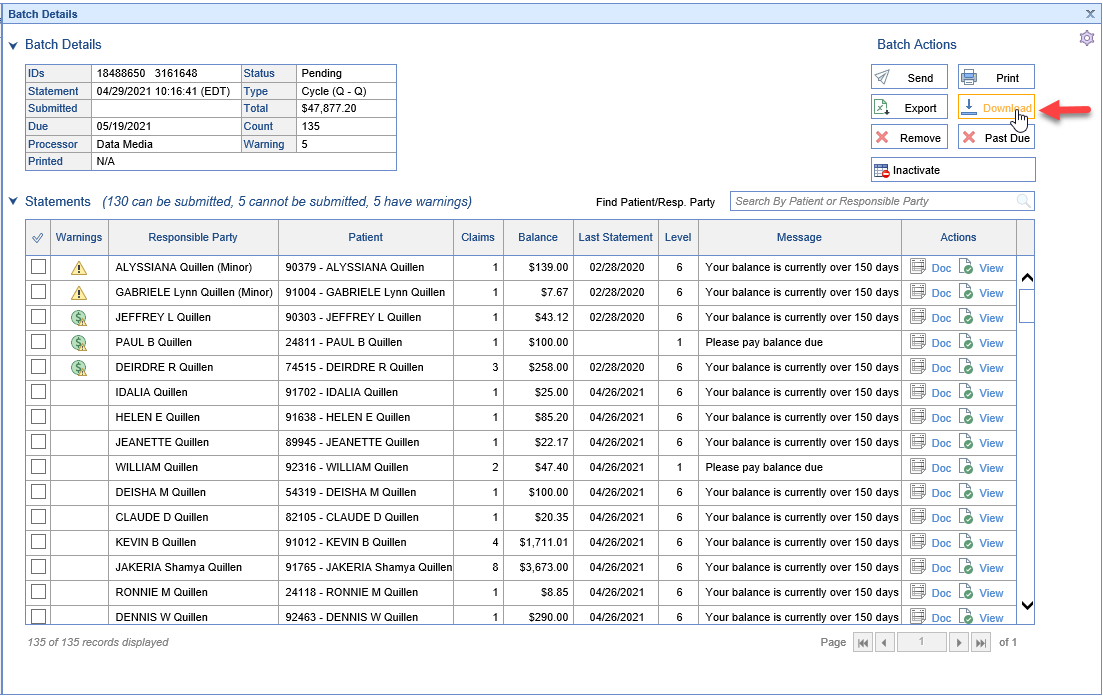
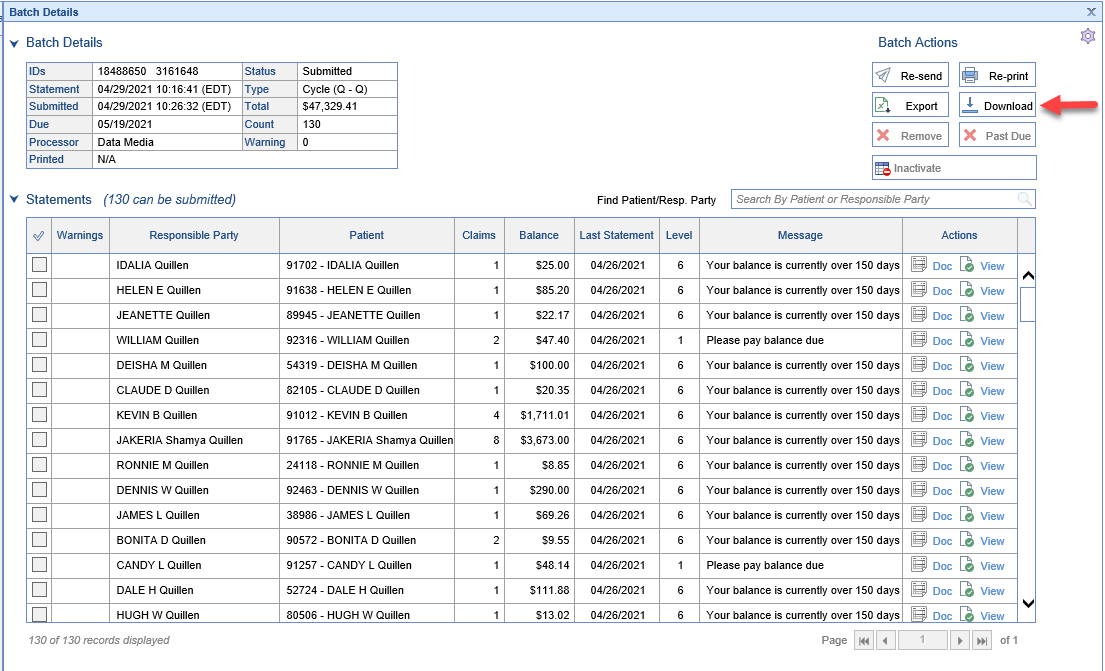
- Inside Batch Details, click the Download button to open the Download Statement dialog box
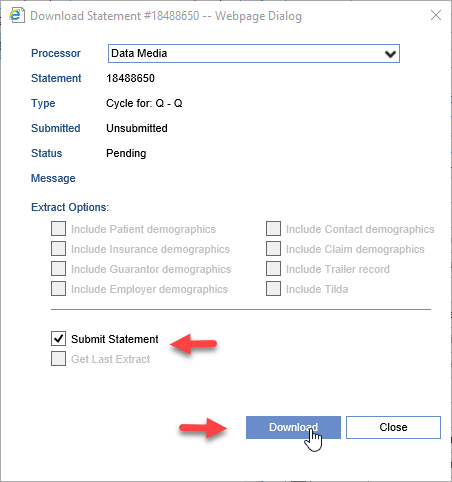
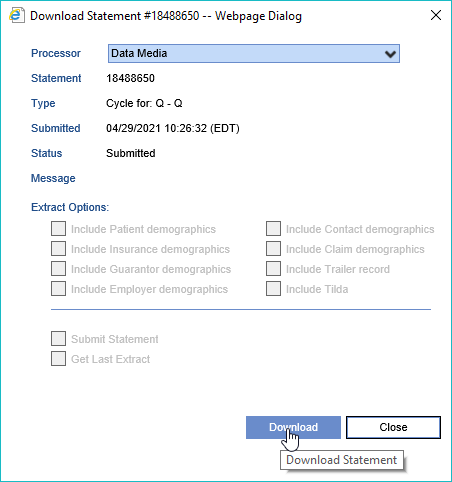
- On the Download Statement window, if you wish for the Download to mark the Batch as submitted then leave the Submit Statement Checkbox selected. Click the Download button.
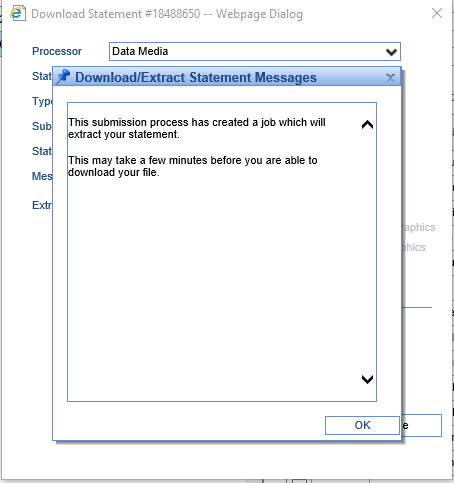
- This will create a job that runs in the background to prepare and create your download file. Click OK.
- Close the Download Statement Screen to return to Batch Details
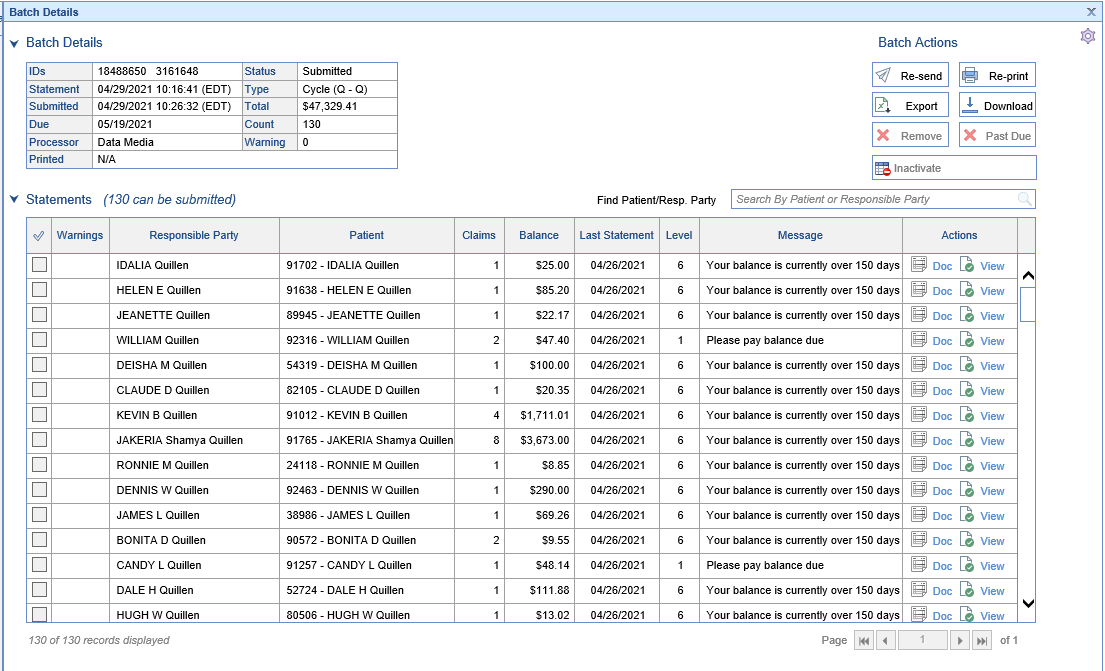
- After a few minutes have passed the Download button will no longer be inactive. Click the Download button again to open the Download Statement Screen
- Click Download
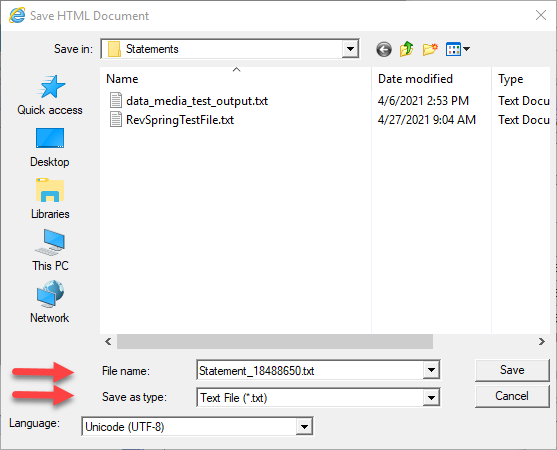
- Change your Save as type to Text File (*.txt), name your file, and click Save
Some practices may chose to export a list of statements that are to be included in a statement batch. This process has been designed so that the data will automatically open in Excel displaying all of the fields that are shown in the Batch Details screen.
Workflow
- In the Billing Portal, under Statements, Click to open the Batches screen

- Double click on the Batch that is to be printed to open Batch Details

- Inside Batch Details, click the Export button to send the statement list to Excel
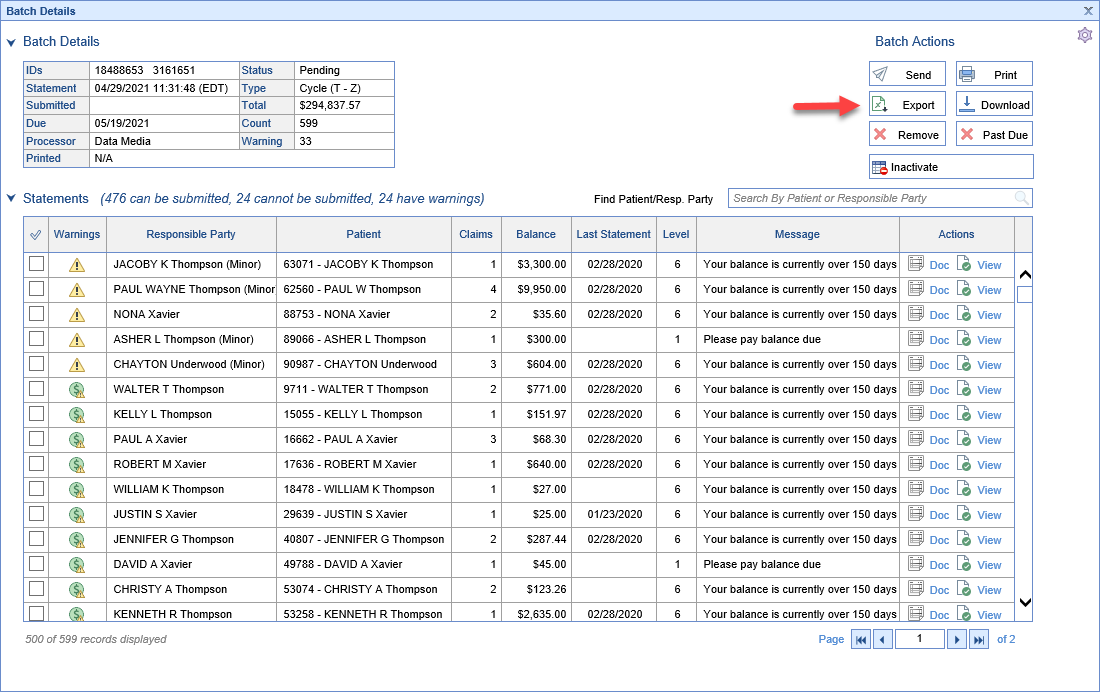
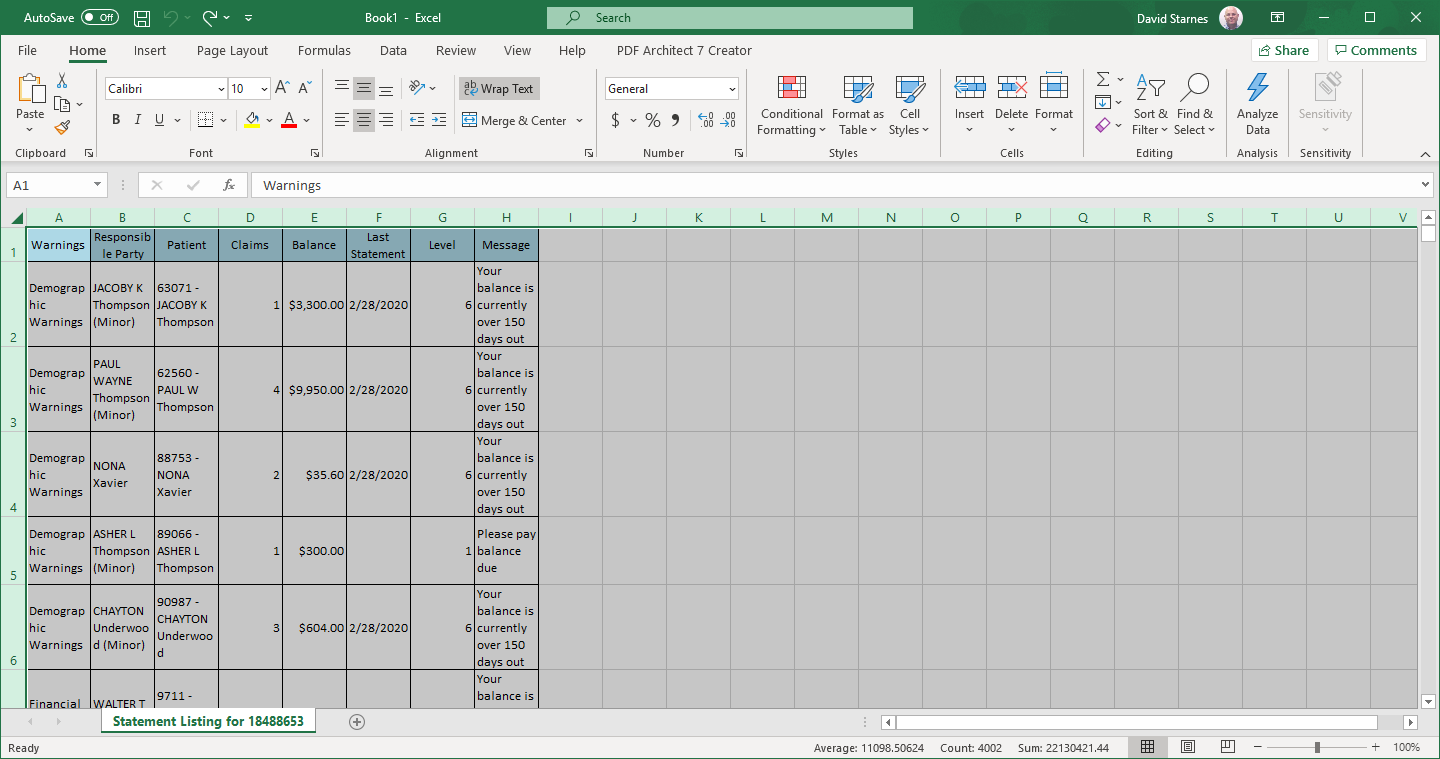
- Open Excel from your Taskbar to view the exported data
