A Requisition, the PDF containing the details of an order that has been placed, can be generated from either the My Task - Orders section or from the history section of Order Entry. This article describes the steps to print/transmit requisitions for one or more orders using Order Entry.
Steps to Complete
- After Placing an Order in the Order Entry Chart Tab.
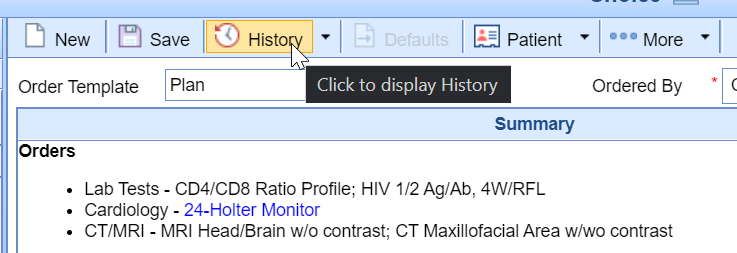
- Navigate to the History in the toolbar
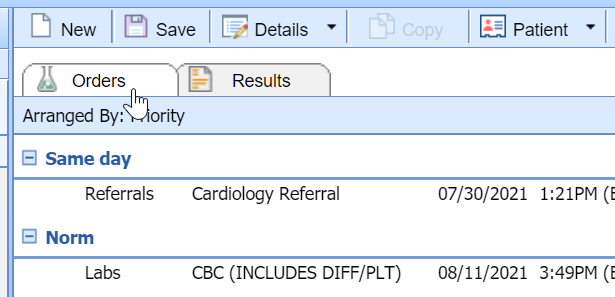
- Ensure you are on the Orders Tab
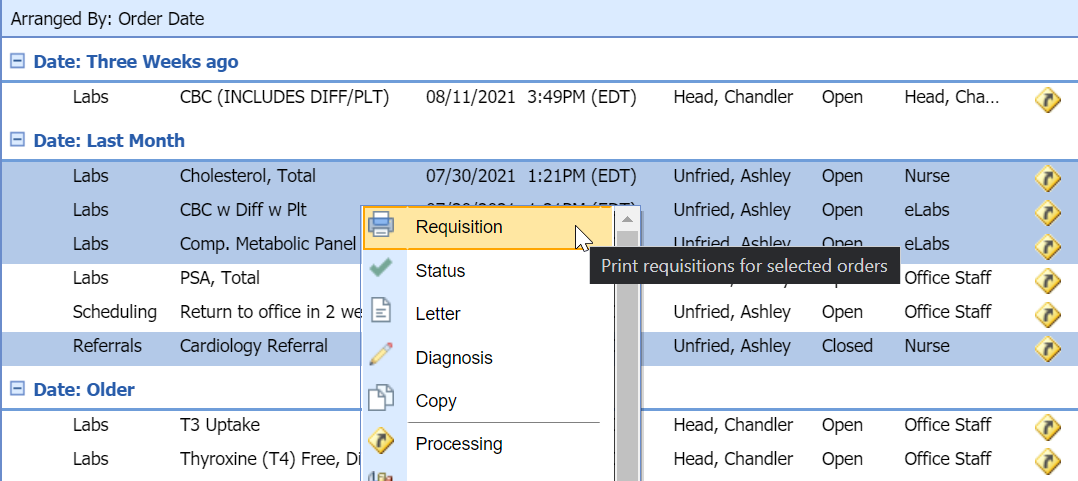
- From the list, you can either select and right-click over a single order or select multiple orders at once by using SHIFT+Click and/or CTRL+Click. Select Requisition
- The Create Requisitions screen will display the groupings for the order you are going to print and errors that may need to be resolved first.
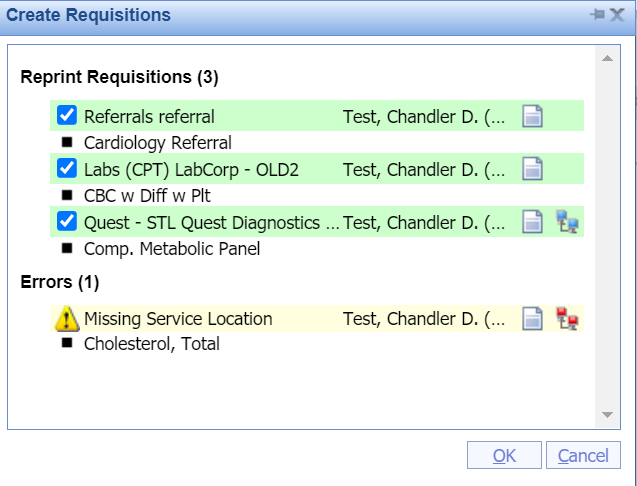
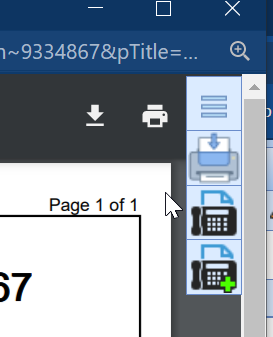
- After selecting OK, the PDFs will be generated and you will be able to Fax the form, Add it to the Patient's Print/Fax Queue, or Print the requisition. If you have an Interface, this may transmit the order to the facility depending on the type of interface.
You may wish to arrange the list to better find the appropriate orders. This can be done by selecting Arranged By. This would allow you to sort this list in the following ways:

- Priority | Each order has a priority assigned by default, it can be changed when placing the order or afterward.
- Type | Allows you to sort by the order type. Things such as labs, referrals, radiology, surgeries, etc.
- Order | Sort by the individual order item descriptions.
- Order Date | The date the order was placed.
- Order By | This field is set while placing an order and cannot be modified after the order has been placed.
- Appointment Date | An appointment date & time can be set for the order and sorted in the list.
- Processor | The user or user group the order is assigned to.
To change an order's processor you can complete this while placing the order, in the Order Entry - History, or My Task - Orders. This article explains the steps to complete this in the Order Entry - History chart tab. There are two ways to complete this task within Order Entry - History.
Steps to Complete (Right Click Menu)
- After an order has been placed, navigate to the History of the Order Entry chart tab within the patient's chart.

- From the list, you can either select and right-click over a single order or select multiple orders at once by using SHIFT+Click and/or CTRL+Click.
- Right-click over the selected order(s), Select Status
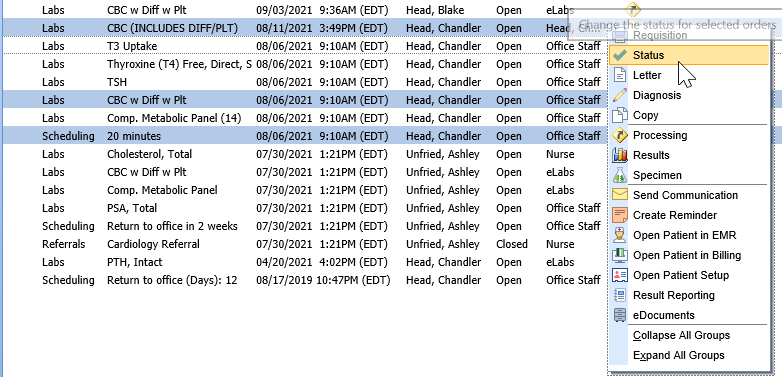
- From here, use the select list to change the Processor. You may also change the status of the selected order(s) from this screen.
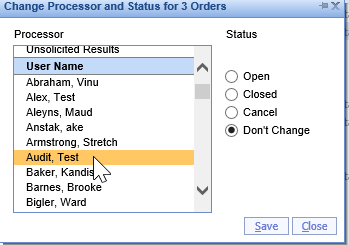
- Save

Steps to Complete (Processing Window)
- After an order has been placed, navigate to the History of the Order Entry chart tab within the patient's chart.

- From here, locate the order.
- Select the Processing Window icon from the list.

- Within the processing window, select Processor
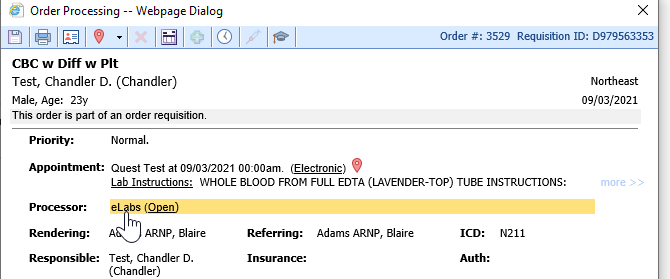
- This will open a separate window where the processor can be changed via a Search Field
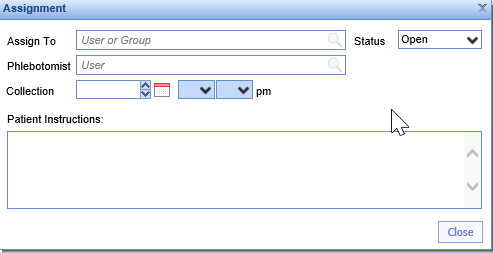
- Save

The order status is used to determine the visibility of the order in the My Task - Orders, Open Orders list. There are three options for order status: Open, Closed, Cancelled. This article will describe the two ways to change the status of an order item within the Order Entry - History screen.
Steps to Complete (Right Click Menu)
- After an order has been placed, navigate to the History of the Order Entry chart tab within the patient's chart.

- From the list, you can either select and right-click over a single order or select multiple orders at once by using SHIFT+Click and/or CTRL+Click.
- Right-click over the selected order(s), Select Status

- From here, use the radio buttons to change the status. You may also change the status of the selected order(s) from this screen.

- Save

Steps to Complete (Processing Window)
- After an order has been placed, navigate to the History of the Order Entry chart tab within the patient's chart.

- From here, locate the order.
- Select the Processing Window icon from the list.

- Within the processing window, select Processor

- This will open a separate window where the Status can be changed via the dropdown.

- Save


