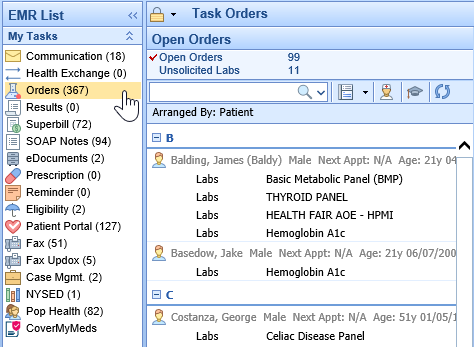
The My Tasks Orders section is used to process orders placed by the providers or ancillary staff. The primary purpose of this section is to manage the list of orders assigned to you and/or your assigned user groups, also known as the Processor. This list can be arranged based on the needs of each user. From the My Task Orders you can Add Order Fulfillment Details, Print Requisitions, Input Authorization Details, change the status of an order and Search for Additional Orders.

Select an Order in the My Task List
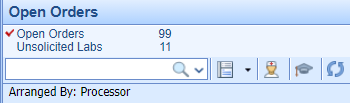
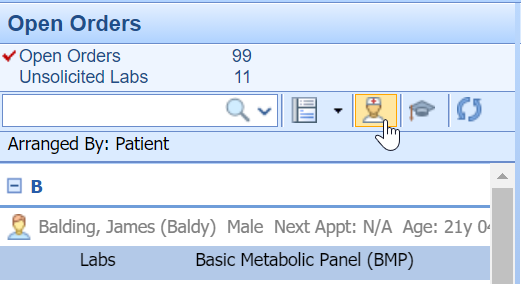
Within the My Tasks - Orders they will be listed beneath the "Open Orders" heading. The Open Orders count displays Open orders in which your user is the Processor or a part of the Processor Group for that order.

Steps to Complete
- Navigate to My Tasks - Orders

- Select Open Orders
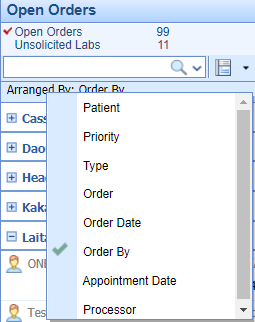
- If you have not already done so, set the Arranged By. This will group orders for a more efficient workflow, i.e. if you will be processing orders for a particular provider, you can arrange by "Ordered by"
- Find the order in the displayed list. Click on the item and the details will be displayed in the viewing pane.


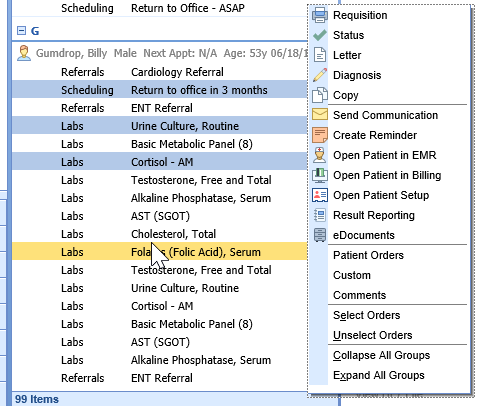
Select Multiple Orders
From the list, you can either select and right-click over a single order or select multiple orders at once by using SHIFT+Click and/or CTRL+Click.
Print a Requisition from My Task Orders
A Requisition, the PDF containing the details of an order that has been placed, can be generated from either the My Task - Orders section or from the history section of Order Entry. This article describes the steps to print/transmit requisitions for one or more orders using the My Tasks List.
Steps to Complete
- After Placing an Order in the Order Entry Chart Tab.
- Navigate to My Task - Orders

- From the list of Open Orders, you can either select and right-click over a single order or select multiple orders at once by using SHIFT+Click and/or CTRL+Click. Select Requisition (More Info On Selecting Orders)

- The Create Requisitions screen will display the groupings for the order you are going to print and errors that may need to be resolved first.
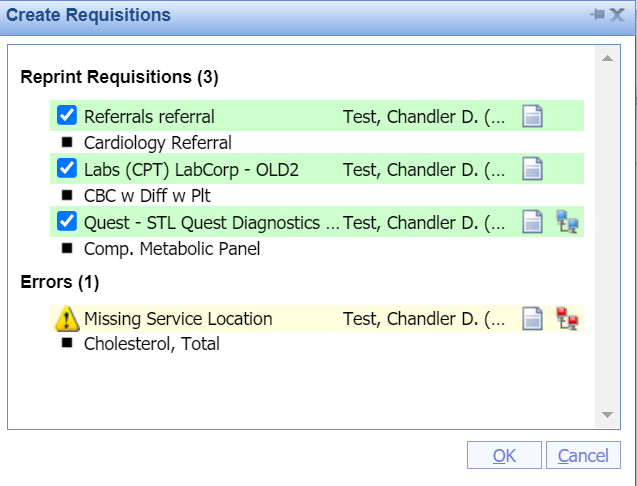
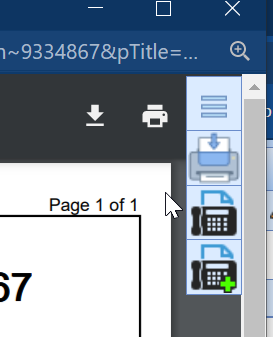
- After selecting OK, the PDFs will be generated and you will be able to Fax the form, Add it to the Patient's Print/Fax Queue, or Print the requisition. If you have an Interface, this may transmit the order to the facility depending on the type of interface.


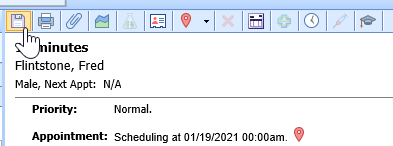
Open Patient in the EMR from My Task Orders
When processing orders via the My Task list, you may need to reference clinical information about the patient. You can open a patient's chart in the EMR from this section with the click of a button. This article describes these steps.
Steps to Complete
- Navigate to My Task - Orders
- Select an Order
- Once a single order has been selected, Open Patient in the EMR from the icon in the toolbar.

Complete an Advanced Search for Orders
The My Task - Orders list will display all open orders assigned to your user as the processor and/or your assigned user group. In the event, you would like to search for orders outside of your queue you may perform an Advanced Search to return a list of orders that meet specific criteria.

Steps to Complete
- Navigate to the My Task - Orders
- Using the Search Field Dropdown, Select Advanced Search
- Using the available criteria:
- Order #
- Chart #
- Requisition #
- Results
- Reviewed
- Order Name
- Type
- Electronic (Electronic Orders are those that have a connected interface)
- Order Date - From/To
- Reviewed Date - From/To
- Route
- Status
- Created By
- Processor
- Reviewed By
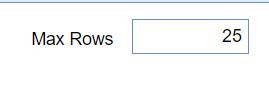
- Set your Max Rows to ensure your return the comprehensive list of results.
- Once you enter your search criteria, select the Magnifying Glass icon from the toolbar.


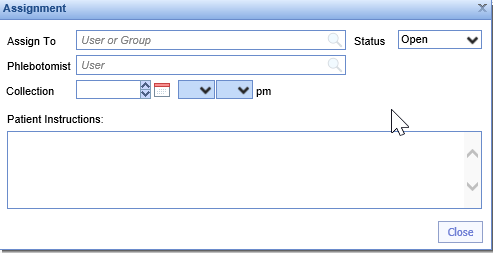
Complete Order Fulfillment Details via My Task - Orders
Depending on your practice's workflow, the Order Fulfillment template may be completed in the My Task Orders section by the processor as opposed to the individual who placed the order in Order Entry. This article will describe how to add and edit the details of order fulfillment on an open order.
Steps to Complete
- Navigate to My Task Orders
- Select an Order
- If in the order you see the following, select Add to pull up the fulfillment template. If there is no option to add details, then there is no order fulfillment template tied to the selected order item.
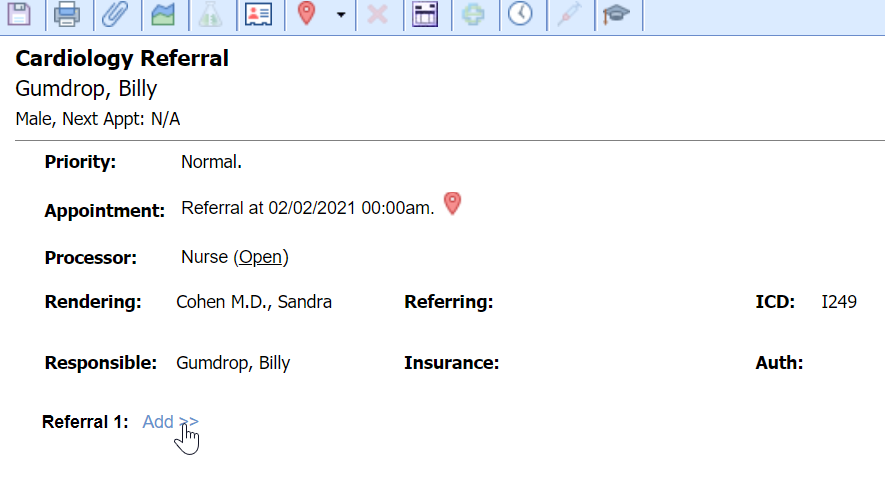
- Once the template is displayed add/edit the details and select Close.
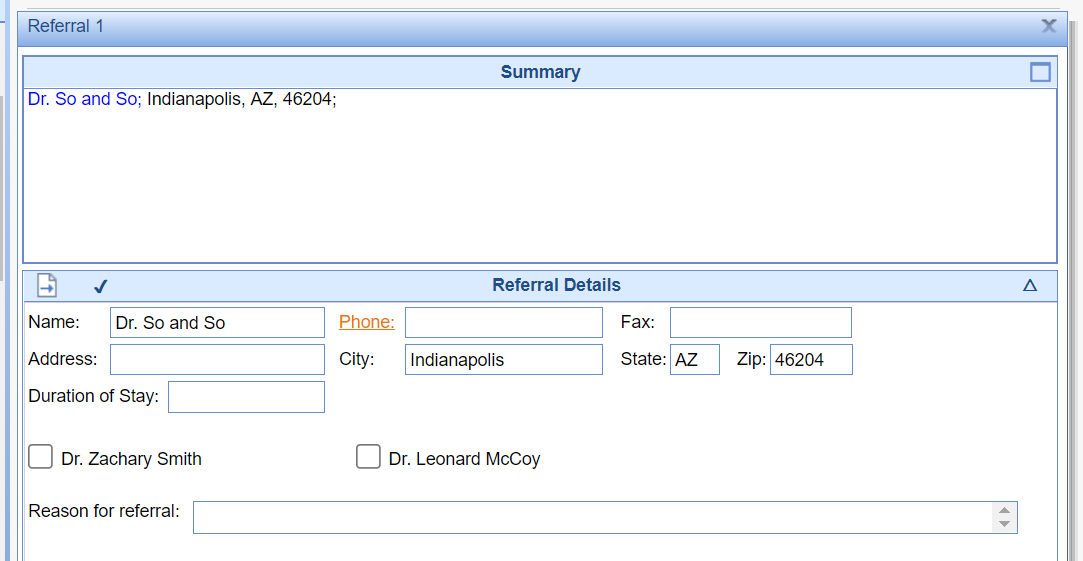
- Select Save


Change the Processor on an order via My Task - Orders
To change an order's processor you can complete this while placing the order, in the Order Entry - History, or My Task - Orders. This article explains the steps to complete this in the Order Entry - History chart tab. There are two ways to complete this task within Order Entry - History.
Steps to Complete (Right Click Menu)
- Navigate to the Open Orders within the My Task - Orders.
- From the list, you can either select and right-click over a single order or select multiple orders at once by using SHIFT+Click and/or CTRL+Click.
- Right-click over the selected order(s), Select Status
- From here, use the select list to change the Processor. You may also change the status of the selected order(s) from this screen.

- Save


Steps to Complete (Processing Window)
- Navigate to the Open Orders within the My Task - Orders.

- From here, locate and select the order.
- Within the processing window, select Processor
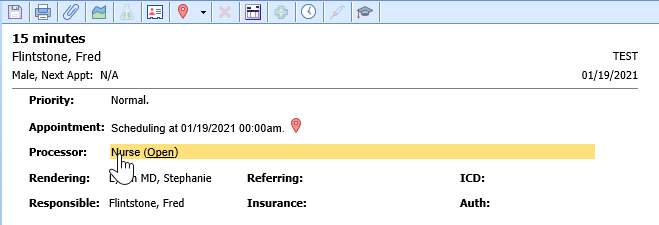
- This will open a separate window where the processor can be changed via a Search Field
- Save


Change the Status of an Order via My Task - Orders
The order status is used to determine the visibility of the order in the My Task - Orders, Open Orders list. There are three options for order status: Open, Closed, Cancelled. This article will describe the two ways to change the status of an order item within My Task - Orders.
Steps to Complete (Right Click Menu)
- Navigate to the Open Orders within the My Task - Orders.

- From the list, you can either select and right-click over a single order or select multiple orders at once by using SHIFT+Click and/or CTRL+Click.
- Right-click over the selected order(s), Select Status

- From here, use the radio buttons to change the Status to Open, Closed, or Cancel.

- Save


