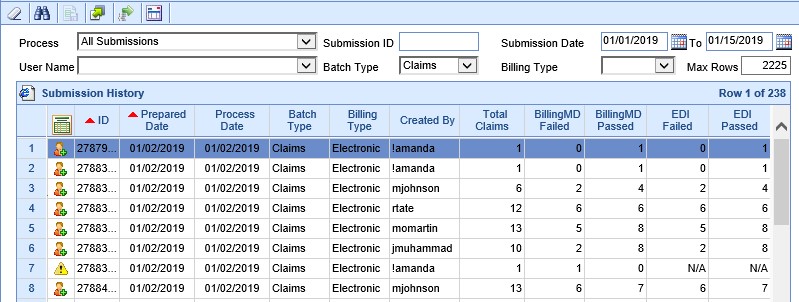
The Claim Submission History screen will show previously submitted claim and statement batches, and whether or not they have been picked up by the clearinghouse or statement vendor.
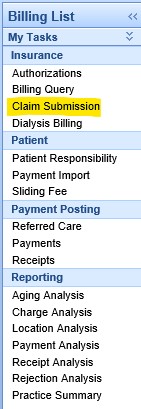
- From within the Billing Module, select Claim Submission from the Navigation Pane.


- Click on the History button on the toolbar to change from Submission Summary to Submission History.

- Enter a date range in the Submission Date fields. If you want to narrow down the search, you can select either the Batch Type (claims, extract, statements) or Billing Type (paper or electronic). You may want to increase the Max Rows prior to searching. Click the Binoculars icon to search.

- A list of batches (based on your search criteria) will be displayed. If any of the fields read N/A, the batch has not yet been picked up by the clearinghouse or statement vendor.

- Each of the icons on the left mean a different thing:

Awaiting payer response to claim submission 
Payer has responded to claim submission 
HCFA Forms have been printed 
Submission was in error 
Statements have been sent (electronically to statement vendor) 
Statements have been printed - Click the Pad/Pencil icon to switch back to the Submission Summary screen to view unsubmitted batches.


How to Change a CPT Code on a Claim and Submit the Corrected Claim
1.Go To Billing Portal.
2.Click on Billing Query.
3.Search for the Claim you wish to edit.
4.Double click on the claim to edit.
5.The claim will open, Right click on the service line and CPT code you wish to change.
6.Click Delete.
7.Click Yes.
8.Type in the CPT code you want to be in the claim.
9.Click Save.
10. You may resend the claim now if it has not already been billed> Follow to next steps below to send corrected claim:
11. If you need to resend a corrected claim.
Then click on add information on the lower left of the claim entry screen.
12. Click on Numbers, Codes, and Identifiers.
13. Put in resubmission Code of 7
14. And add the claim number as depicted below.
15. Now you can send a corrected claim following claim submission steps.
Follow the manual claim submission process to get an EDI Extract.
*NOTE: Please make sure that you are turning off the auto claim submission.
Step one:
After you have processed your batch, locate it in the Claim Submission History.
Once you have found your batch in the submission history, follow the instructions below to obtain the EDI extract.
*NOTE: Best practice is to reach out to the payor directly to determine the appropriate headers and footers required for submission in the file. Note also the risk of duplicate ERA and ERA created deposits once Change Healthcare recovers.
Step two:
Locate the batch.

Click on the batch to open.

Click on Process

Make sure you check the box for Print EDI input file

Click OK.
This box will open. Please note to make sure you click the box to add the header.


7. Click on export.

8. Save the file to a folder.

9. Now you have the file available for import to upload to another site. Open up the site and import the file.


