The Intake has the ability to be assigned to patients based on their scheduled appointment type. Automatically assigning these forms can save your front desk staff and intake coordinators time by removing the need to send packets and identifying patients programmatically. This feature will initially be configured during your implementation phase or by support request. Staff with the ability to modify appointment types will be able to change this as your practice evolves.
Patients to Complete Forms Before Appointment through Intake Link
Depending on the content of paperwork to complete or practice preference, intakes can be completed using an Intake Link received either via Text or Email as long as the corresponding company setting is enabled.
Patients to Complete Forms Before Appointment through MML
Depending on your practice, you may want to have patients complete their forms before arriving for their visit. As long as you have provided a My Medical Locker account they can be notified of forms they need to complete and fill them out either on a home computer or mobile device.

Within the patient's account, they will see the above. Patients can fill out new forms by selecting View Forms. They may view previously completed forms as well.
Steps to Complete
- Connect patient to My Medical Locker account.
- Schedule an appointment that has an intake assigned to it by default.
- Patients will log in to their MML account and fill out the assigned form.
Patients to Complete Form In the Office
Dependent on practice workflow and patient census, you may have patients who are unable to complete forms on their own. In these cases, patients will typically complete forms with a practice-provided iPad. For the appointment types that already have forms assigned to them, this expedites the process. When an appointment is scheduled, the form will be sitting in the individual patient chart or in the Intake Schedule.

Steps to Complete
- Connect patient to My Medical Locker account.
- Schedule an appointment that has an intake assigned to it by default.
- When the forms are ready to be started they will be available in one of the assignment locations.
- Staff will then Initiate the Intake on the iPad
You may want to manually assign your patient forms. Many practices use the intelligent intake to gather signatures from patients relating to consents, ask specific questionnaires before seeing the provider, or even post-visit forms. In these scenarios, you may find it difficult to determine an automated assignment based on appointment types. Below you will find the steps to assign an intake from the iScheduler using the different assignment locations available.
Assignment Locations
Intake Schedule
Can view multiple resources and patients at once.

Quick Pay Window
Limits the view of intakes to be assigned to one specific patient.

Intake Assignment from iScheduler
Assign specific intakes for due dates as opposed to appointments.
View historic intakes to a specific patient.

Intake Assignment from EMR
Assign specific forms in the clinic for a specific appointment or date.

Intake Schedule
You may want to manually assign your patient forms. Many practices use the intelligent intake to gather signatures from patients relating to consents, ask specific questionnaires before seeing the provider, or even post-visit forms. In these scenarios, you may find it difficult to determine an automated assignment based on appointment types.

Steps to Complete
- Once the Intelligent Intake has been added to your practice, the Intake Schedule will be available from the toolbar in iScheduler.
- The intake schedule will default to whichever resource is loaded in the schedule, this will display all patient appointments and give visual representations of what is to be completed for each patient.
Intake Schedule Icons Connect - Indicates the patient does not have an account for MML or Temporary connection
New - Represents a form that is already assigned and is ready to be initiated.
Assign Intake - This shows that the patient already has an account but an intake has not been assigned automatically and allows you to select from the available intake forms for your practice. - To manually assign an intake you must connect the patient to an account first by selecting Connect and following the My Medical Locker Admin window.
- Once the patient is connected you will either see the New or Assign Intake.
NOTE: If you are attempting to manually select an intake this can only be done from Assign Intake. - When you select Assign Intake you will be prompted with the available intakes to your practice.
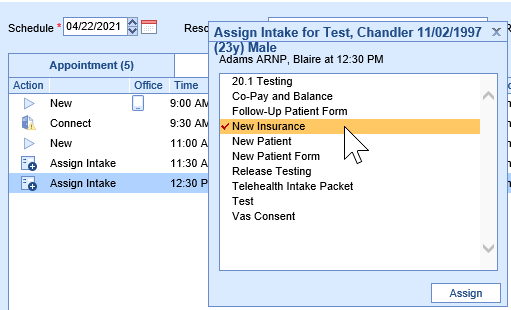
- Once you have selected the appropriate intake, select Assign. Once this is done the icon will change to the play button with the "New" status.
- Select New, and initiate the form on the iPad.
Quick Pay Window (Check-In / Check-Out)
During busy clinics, the intake schedule may be difficult to locate a specific patient on the list. To account for this, a staff member can see a patient's specific intake status, assign forms, and review completed information from the Quick Pay screen. This helps staff who check in patients initiate their forms without leaving the screen. Similar to the intake schedule the same icons will be used:
Intake Schedule Icons Connect - Indicates the patient does not have an account for MML or Temporary connection
New - Represents a form that is already assigned and is ready to be initiated.
Assign Intake - This shows that the patient already has an account but an intake has not been assigned automatically and allows you to select from the available intake forms for your practice.
Steps to Complete
- When you are checking in a patient (depending on practice settings) the following screen is displayed. The focus should be brought to the Intake Assign button shown below.
NOTE: To get to Quick Pay manually, right-click on the patient appointment in iScheduler and select Quick Pay from the listed options.
- After selecting Intake Assign the intake schedule for the specific patient will be displayed.

- To manually assign an intake you must connect the patient to an account first by selecting Connect and following the My Medical Locker Admin window.
- Once the patient is connected you will either see the New or Assign Intake.
NOTE: If you are attempting to manually select an intake this can only be done from Assign Intake. - When you select Assign Intake you will be prompted with the available intakes to your practice.

- Once you have selected the appropriate intake, select Assign. Once this is done the icon will change to the play button with the "New" status.
- Select New (play button icon), and initiate the form on the iPad.
Intake Assignment
The final location of intake assignments can be found in the patient setup drop-down, this is typically completed from the EMR but is also available from iScheduler for staff members searching for patients in the top right as opposed to having them on the schedule. This is the least common location intakes are assigned from due to their unaffiliated nature to a scheduled appointment. The main difference between this screen and the other two previous assignment screens is the ability to provide forms to a patient with a specific date in mind and not a scheduled appointment.

See the above screenshot and notice the option within the drop-down, titled "Intake Assignment". Once selected the following will be displayed:

Steps to Complete
- From the above Intake Assignment Window, select New in the bottom left-hand corner.
- You will be prompted with the following:

- From here, you will choose from the list of available forms for the intake to be assigned to the patient. You will also need to decide when these forms are to be completed:
- Assign intake by appointment
- Select the Appointment button.
- From the list of appointments select one of the current or future visits > Save
- Assign intake by the due date
- Select the Due Date button.
- Use the date control or type the desired due date > Save
- Assign intake by appointment
- After saving the new intake for the patient they can either fill this out in the office or at home by logging into their MML account.
- If they are filling the forms out in the office you will need to select the intake from the "Active List"
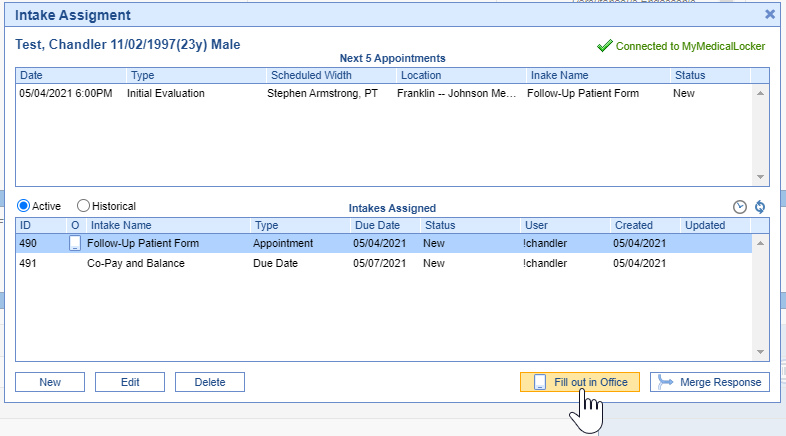
- After this item is highlighted, select Fill Out In Office
- You will then need to initiate the form on the iPad.
Intake Assignment from EMR
The only location intake assignments can be assigned from in the EMR is the patient setup drop-down. This is the least common location intakes are assigned from due to their unaffiliated nature to a scheduled appointment. The main difference between this screen and the other two previous assignment screens is the ability to provide forms to a patient with a specific date in mind and not a scheduled appointment. This is ideal for assigning consent forms and questionnaires to the patient.

See the above screenshot and notice option within the drop-down, titled "Intake Assignment". Once selected the following will be displayed:

Steps to Complete
- From the Intake Assignment window, select New in the bottom left-hand corner.
- You will be prompted with the following:

- From here, you will choose from the list of available forms for the intake to be assigned to the patient. You will also need to decide when these forms are to be completed:
- Assign intake by appointment
- Select the Appointment button.
- From the list of appointments select one of the current or future visits > Save
- Assign intake by the due date
- Select the Due Date button.
- Use the date control or type the desired due date > Save
- Assign intake by appointment
- After saving the new intake for the patient they can either fill this out in the office or at home by logging into their MML account.
- If they are filling the forms out in the office you will need to select the intake from the "Active List"
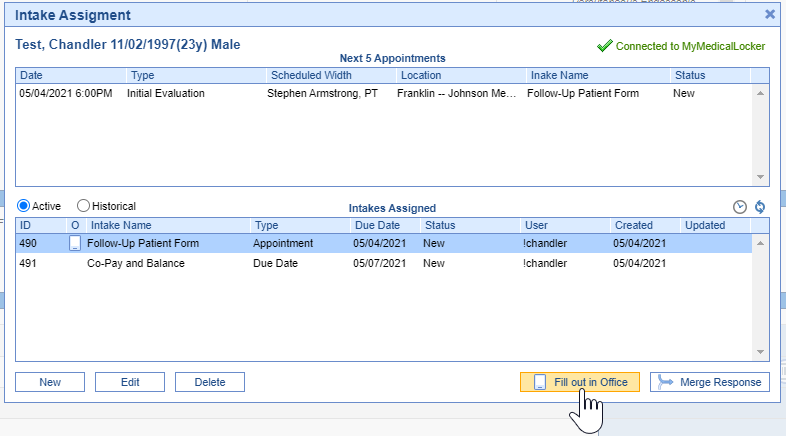
- After this item is highlighted, select Fill Out In Office
- You will then need to initiate the form on the iPad.
Generate a code for an Intake
Once you have assigned an intake or are trying to start an automatically assigned intake, you will need to generate a code for the iPad. iPad Setup.pdf must be completed prior to this.
You will only need to complete this for patients who are needing to use a practice-supplied iPad. If your patients fill out paperwork prior to their appointments or use their mobile devices. They will log in to My Medical Locker to complete.
Steps To Complete
- After the intake has been assigned and you are ready to start the form on the iPad you will need to generate a code specific to that intake.
- Both the Quick Pay and Intake Schedule generate codes in the same way:
Intake Schedule
Quick Pay
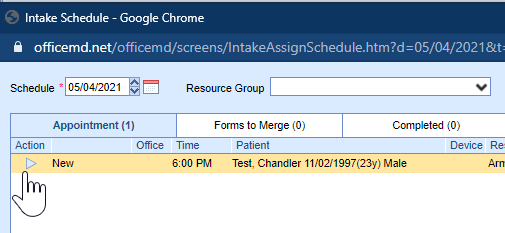
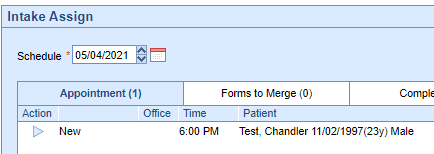
- Select the Play icon
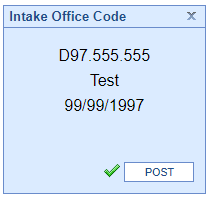
- This will prompt a window with a code to enter in the iPad:
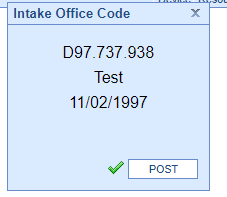
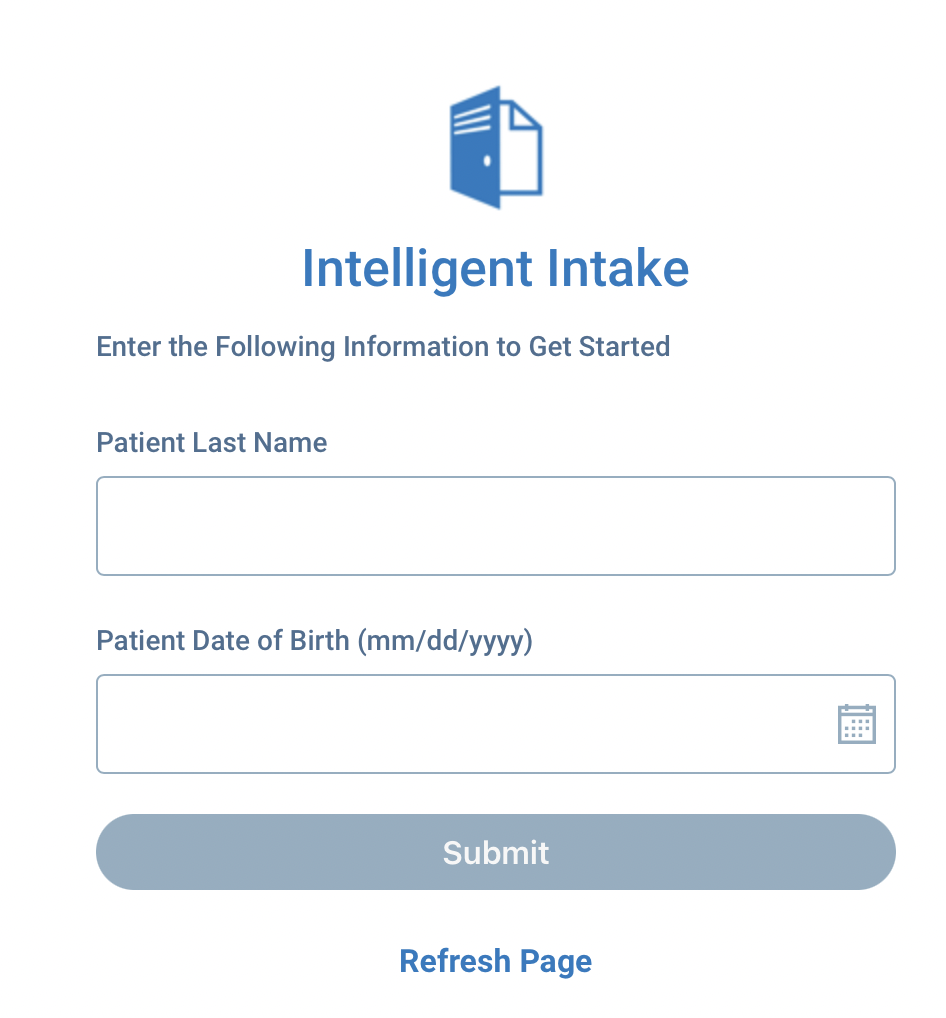
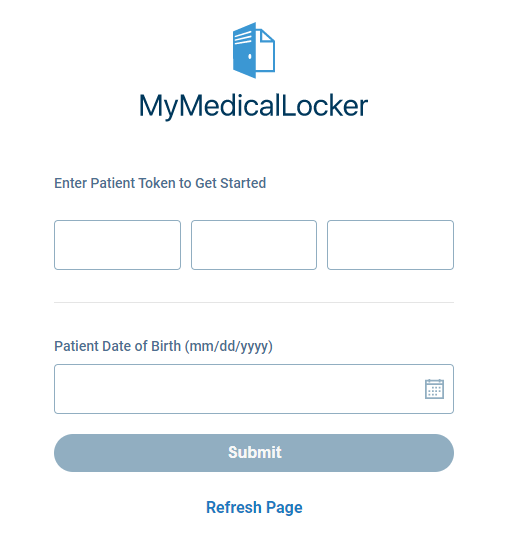
- On the iPad, enter the code into the available fields followed by the patient DOB.
Generate a code for an Intake
Once you have assigned an intake or are trying to start an automatically assigned intake, you will need to generate a code for the iPad. iPad Setup.pdf must be completed prior to this.
You will only need to complete this for patients who are needing to use a practice-supplied iPad. If your patients fill out paperwork prior to their appointments or use their mobile devices. They will log in to My Medical Locker to complete.
Steps To Complete
- After the intake has been assigned and you are ready to start the form on the iPad you will need to generate a code specific to that intake.
- The Intake Assignment window from iScheduler or EMR generate codes in the same way:
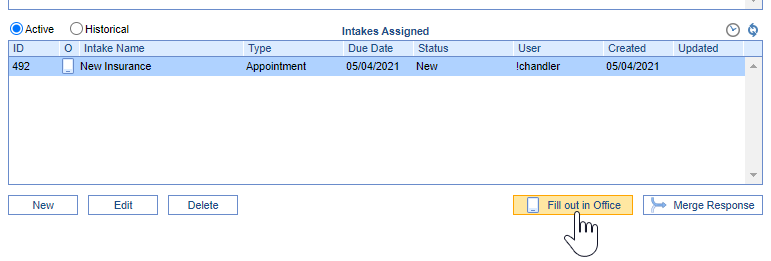
- Select the assigned intake to highlight the item.
- Select Fill out in Office
- This will prompt a window with a code to enter in the iPad:

- On the iPad, enter the code into the available fields followed by the patient DOB.

Generate an Intake Link
Once you have assigned an intake you will need to send the patient an Intake Link if you intend for the patient to complete this on a mobile device or at home on a computer.
Pre-Requisite
- Company Setting: Intake Send Links = Yes/True
Steps To Complete
- After the intake has been assigned and you are ready to send a link to the patient that is specific to the form you intend for them to complete
- The Intake Assignment window from iScheduler or EMR generates links in the same way:

- Select the assigned intake to highlight the item.
- Select Send Intake Link
- This will prompt a window with a selection for which contact to send the link to:
- Patient Phone
- Patient Email

- The patient will receive a link in the message and confirm their Last Name and DOB followed by a 2FA
