The Telehealth feature built directly into the application allows a provider to seamlessly conduct a telehealth session with their patient without leaving the patient's chart. Completing a visit will even allow key details from the visit to be automatically incorporated into the note for that day.
To use the iSALUS Telehealth platform, there are a few things that you will want to do before your very first visit.
Step 1: Download Google Chrome
AnywhereCare Telehealth requires that you have Google Chrome installed on your computer. If you do not already have this, follow these steps to install Chrome on your computer:
- Visit the following webpage: https://www.google.com/chrome/browser/desktop/index.html
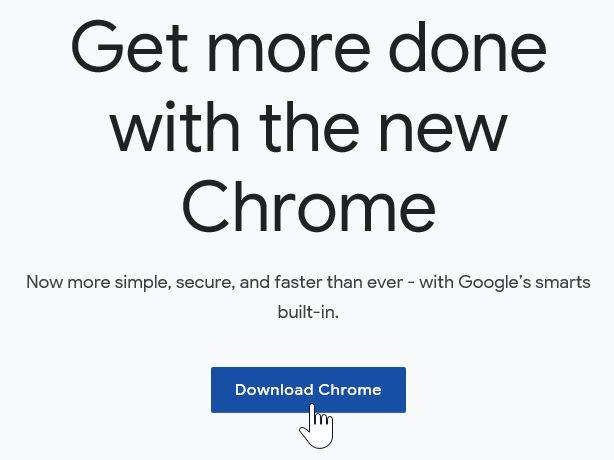
- Click on the Download Chrome button
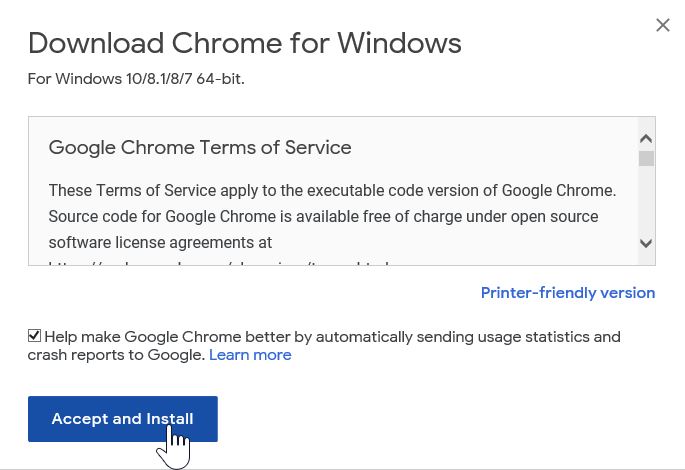
- Click the Accept and Install button
- Select the Yes button on the next prompt. Chrome will not install on your computer. The Chrome browser should launch upon completion.
Step 2: Create the User/Provider Connection
Prior to launching the AnywhereCare Telehealth feature, the user launching the Telehealth Visit must be connected to a provider that has a Telehealth License. See the User/Provider Connection for instructions on linking users to providers.
Step 3: Add a Telemedicine Appointment Type
This step is not required, but will likely help in your workflow
If you would like to be able to schedule a visit and designate it as a Telemedicine visit, it may be helpful to have an Appointment Type to designate this. Be sure to set the 'Telemedicine' flag on the appointment type setup window.
See the Appointment Type Setup for instructions on adding new types.
Step 4: Assign the Telemedicine Appointment Type to Resources Hosting Telemedicine Visits
This step is only necessary if you completed step 3
If you did add an appointment type, this new appointment type will need to be linked to the resource. This can be completed in the Resource Setup window.
Step 5: Adding Telehealth to your Timeline for Quick Review of Past Sessions
This is done from the Summary Chart tab within a patient's chart, and will be made visible for all patients
Right click in the section depicted below on your timeline and choose 'Setup'. Select 'Telehealth' under Timeline and then save using the floppy disk icon. This will add a new row to your timeline showing previous Telehealth encounters and the session details.

Telehealth appointments are not required to host Telehealth visits. If your practice workflow desires an appointment for a Telehealth visit, follow these steps to schedule a Telehealth appointment:
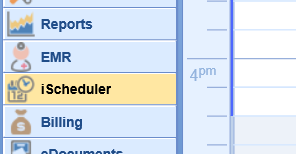
- Click on the iScheduler link in the lower left-hand corner of the screen.
- Select the Resource or Group schedule on the left-hand side of the screen
- Search for and select the patient from the search box in the upper right-hand corner.
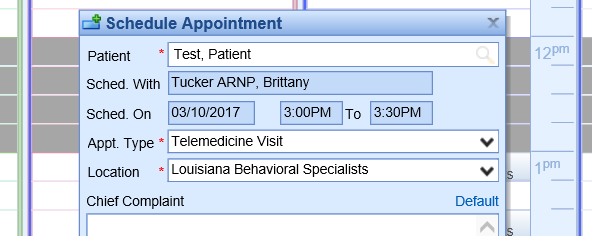
- Click on the calendar where you would like to add the visit.
- Select the appropriate appointment type
- Click OK
If you do not currently have a Telehealth/Telemedicine Appointment type, the steps to create one are here.
When ready, the provider will initiate the Telehealth session by sending a text message or an e-mail to the patient through the Telehealth application. Once the patient receives the message, they will download the AnywhereCare™ application from the iPhone App Store or the Android Google Play Store if they do not already have it installed, then launch the application. The provider is then notified the patient is ready. Follow these steps to initiate a Telehealth session with a patient:
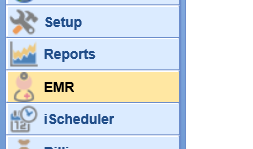
- Click on the EMR link in the lower left-hand corner of the screen.
- Select the patient from the Office Schedule or search for the patient in the upper right-hand corner to load their chart.
- Expand the Patient Photograph section in the upper right-hand corner if it is not already expanded.
- Click Start Telehealth Visit button
 to launch the Telehealth portal.
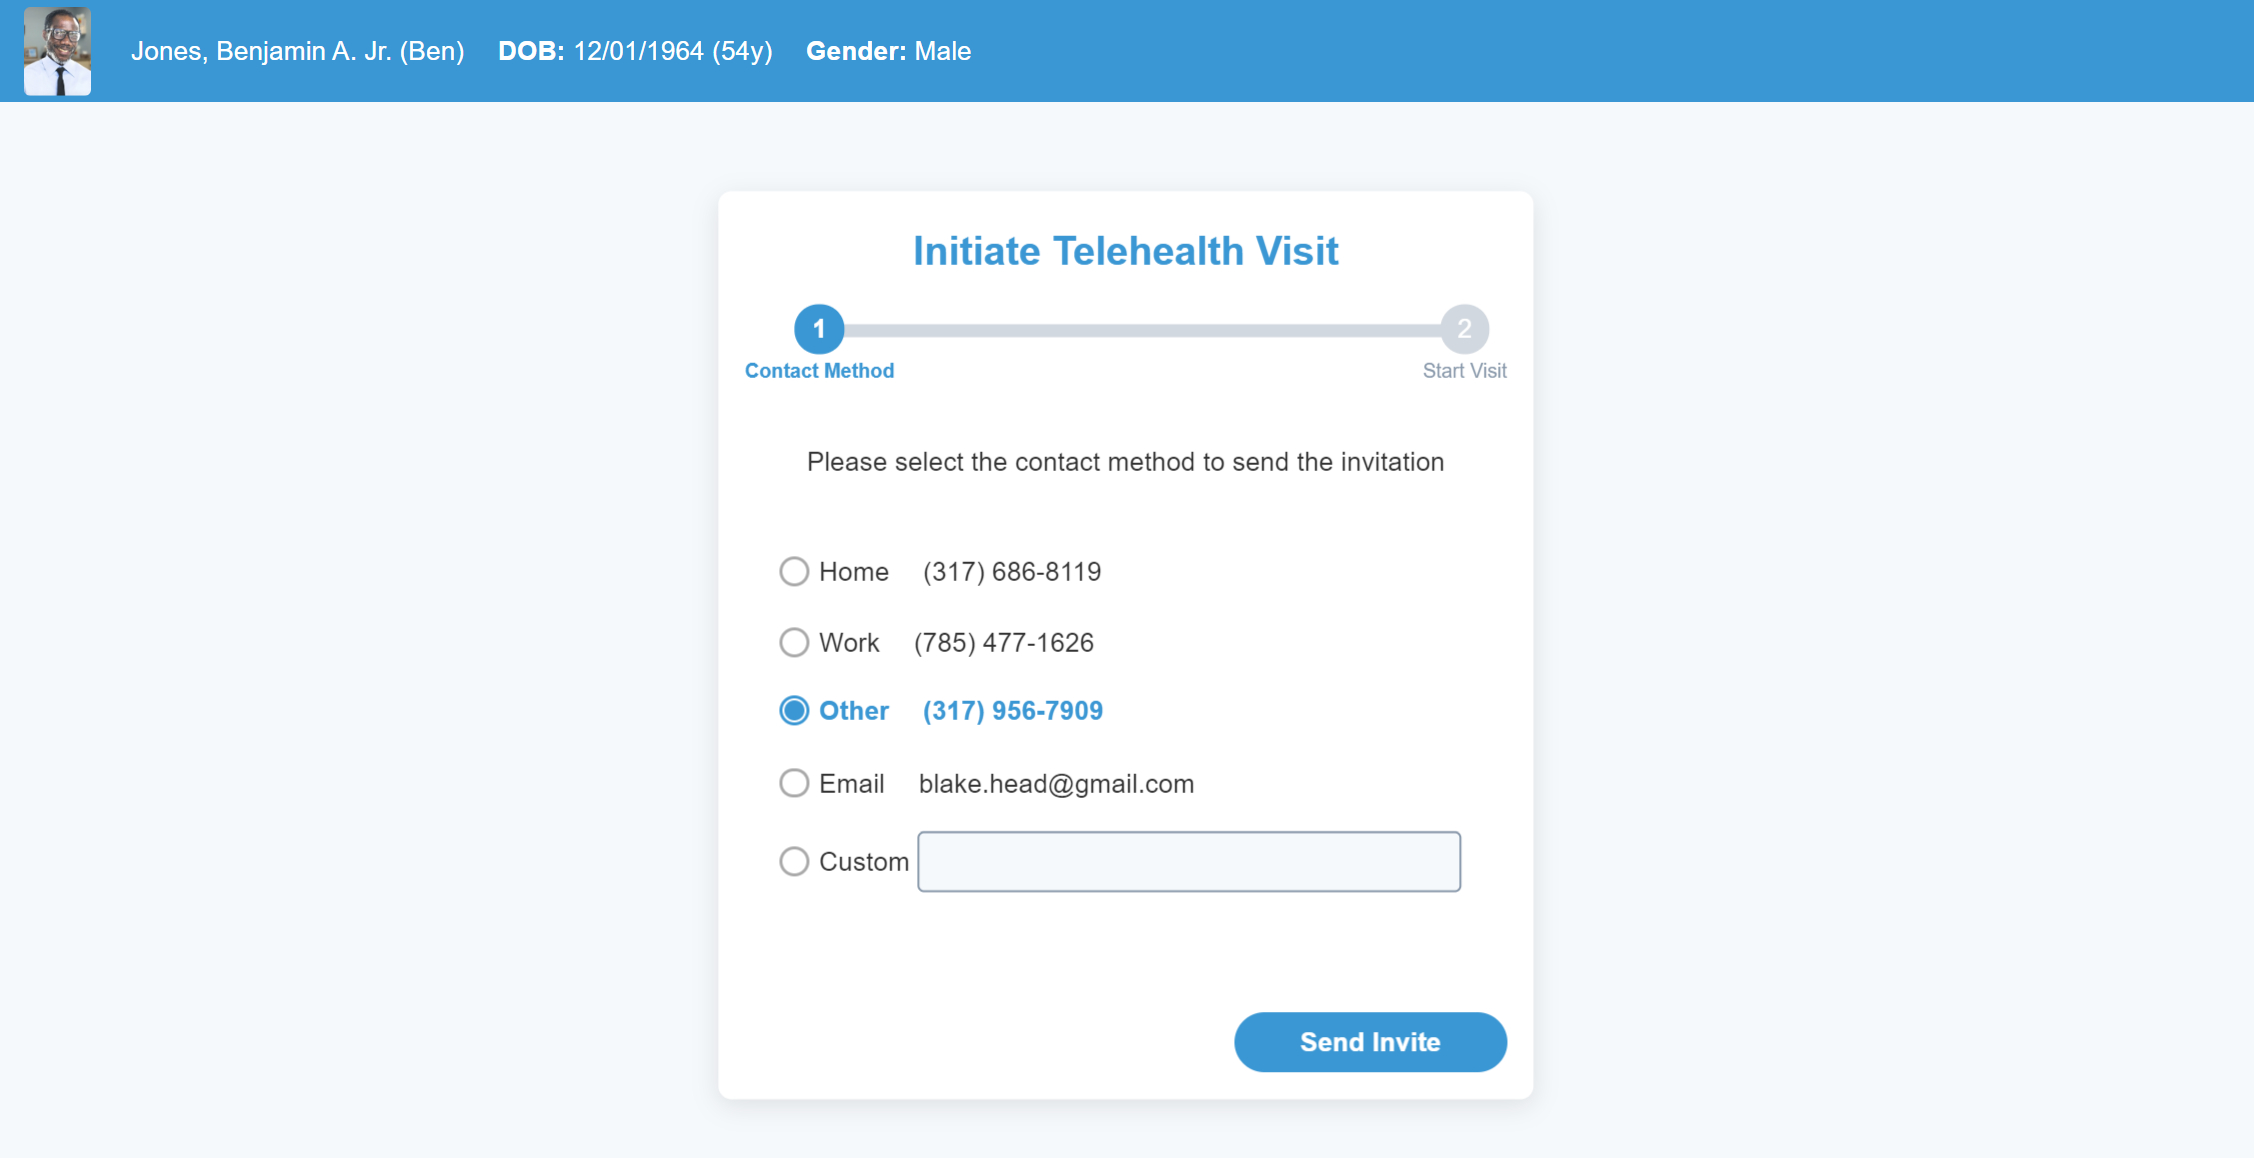
 - Choose the contact method that you would like to send the text/e-mail message to.
- You can click the custom button to manually enter a number/e-mail.
- Click Send Invite to send the message
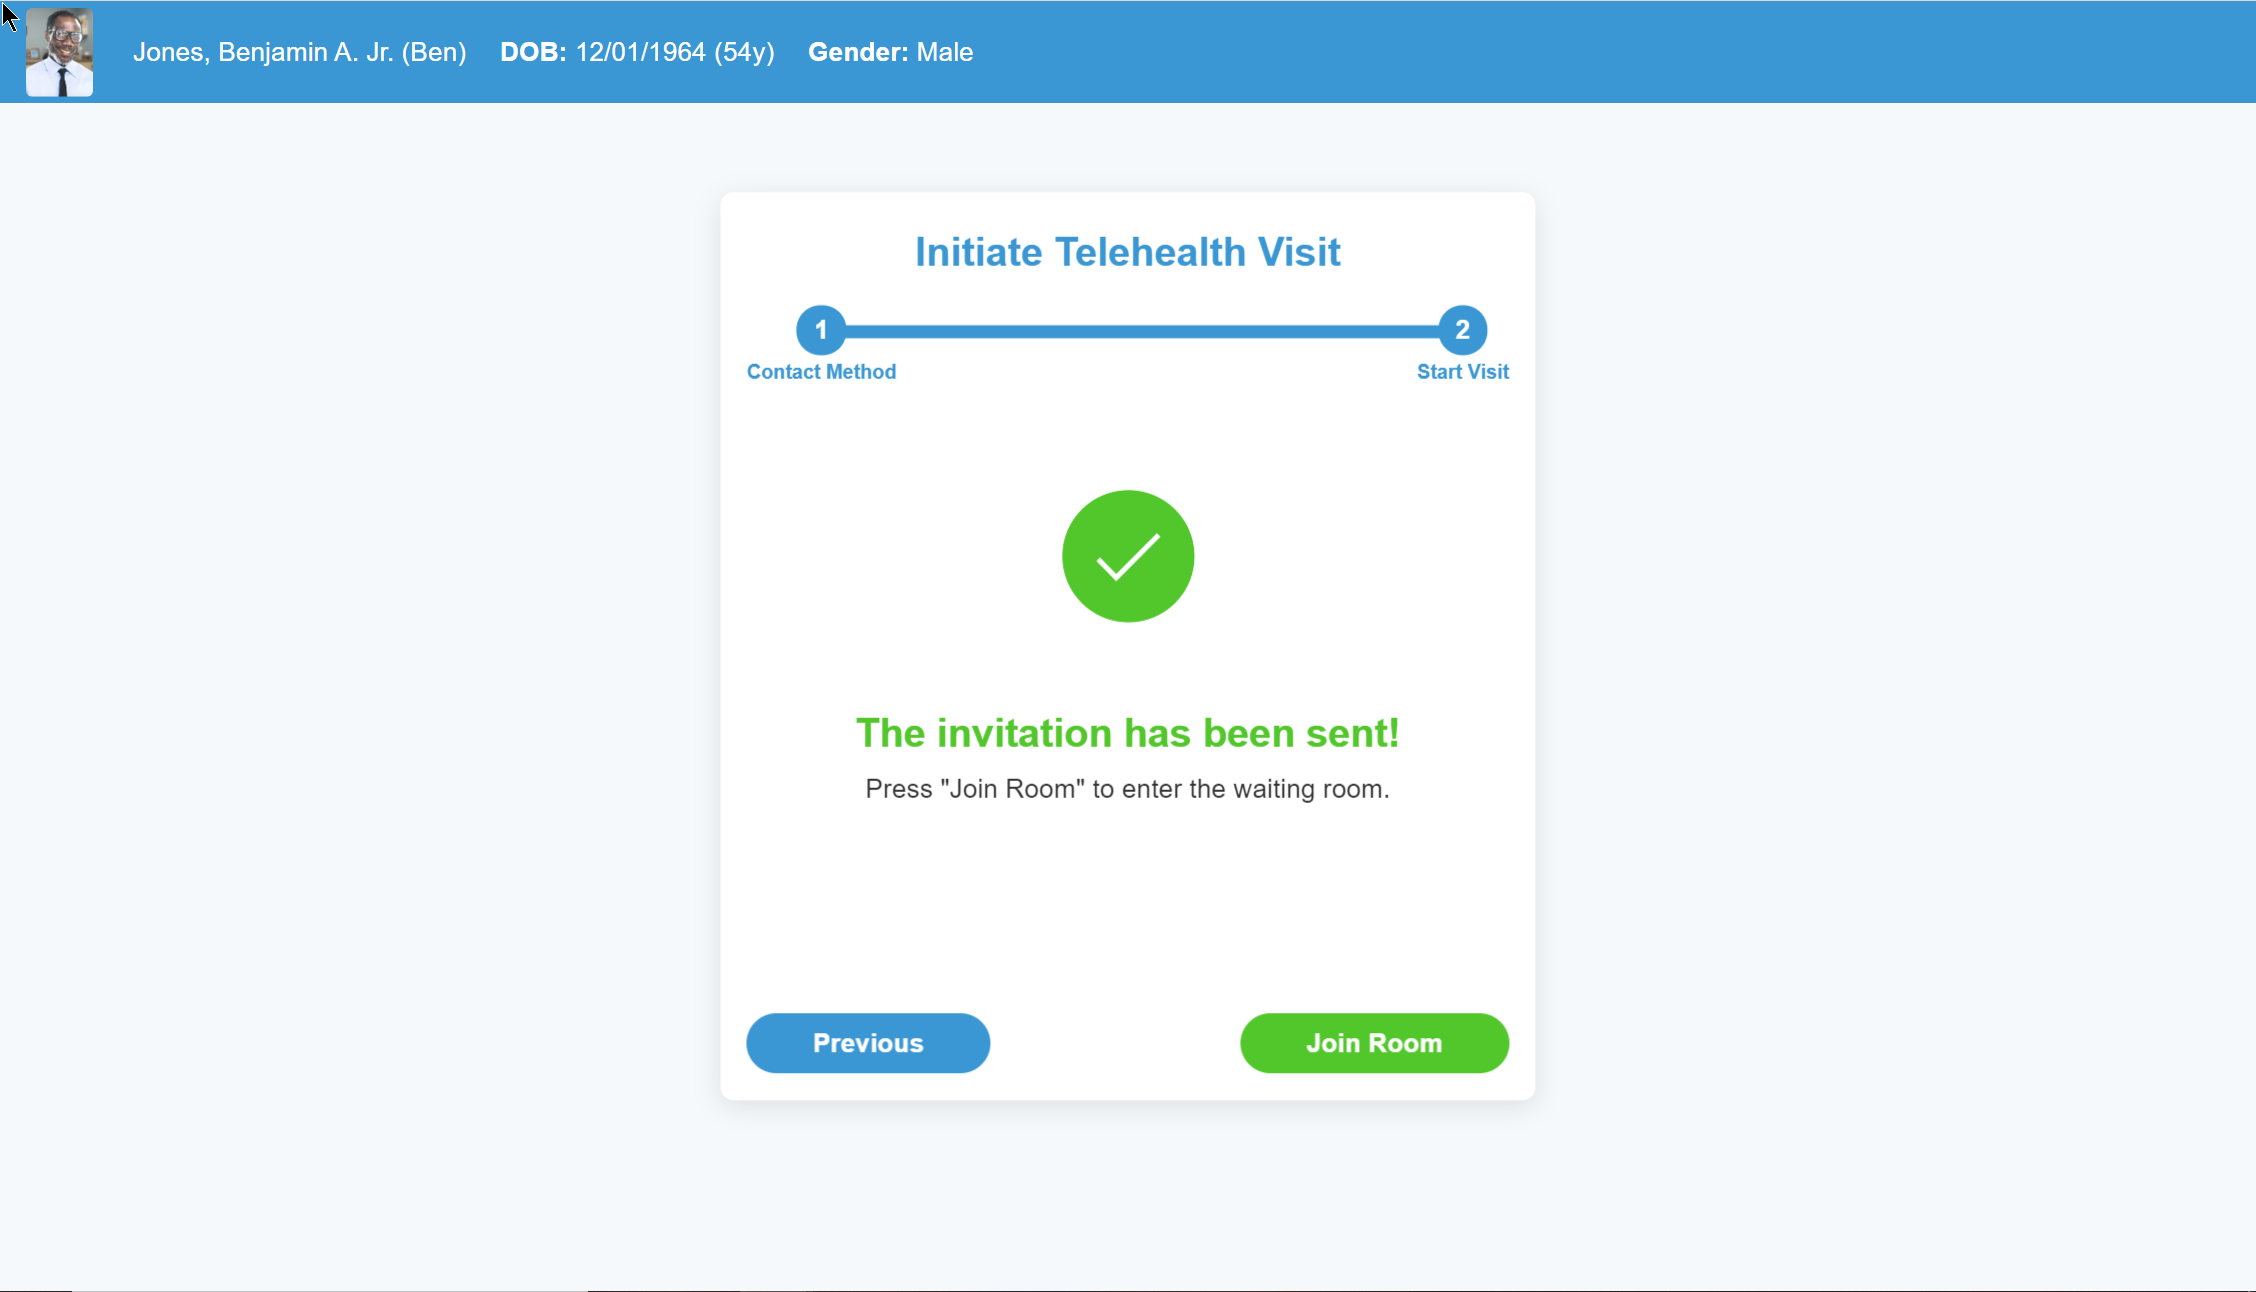
- When ready, click Join Room
- Be sure that you can see yourself correctly in the screen before beginning the visit.
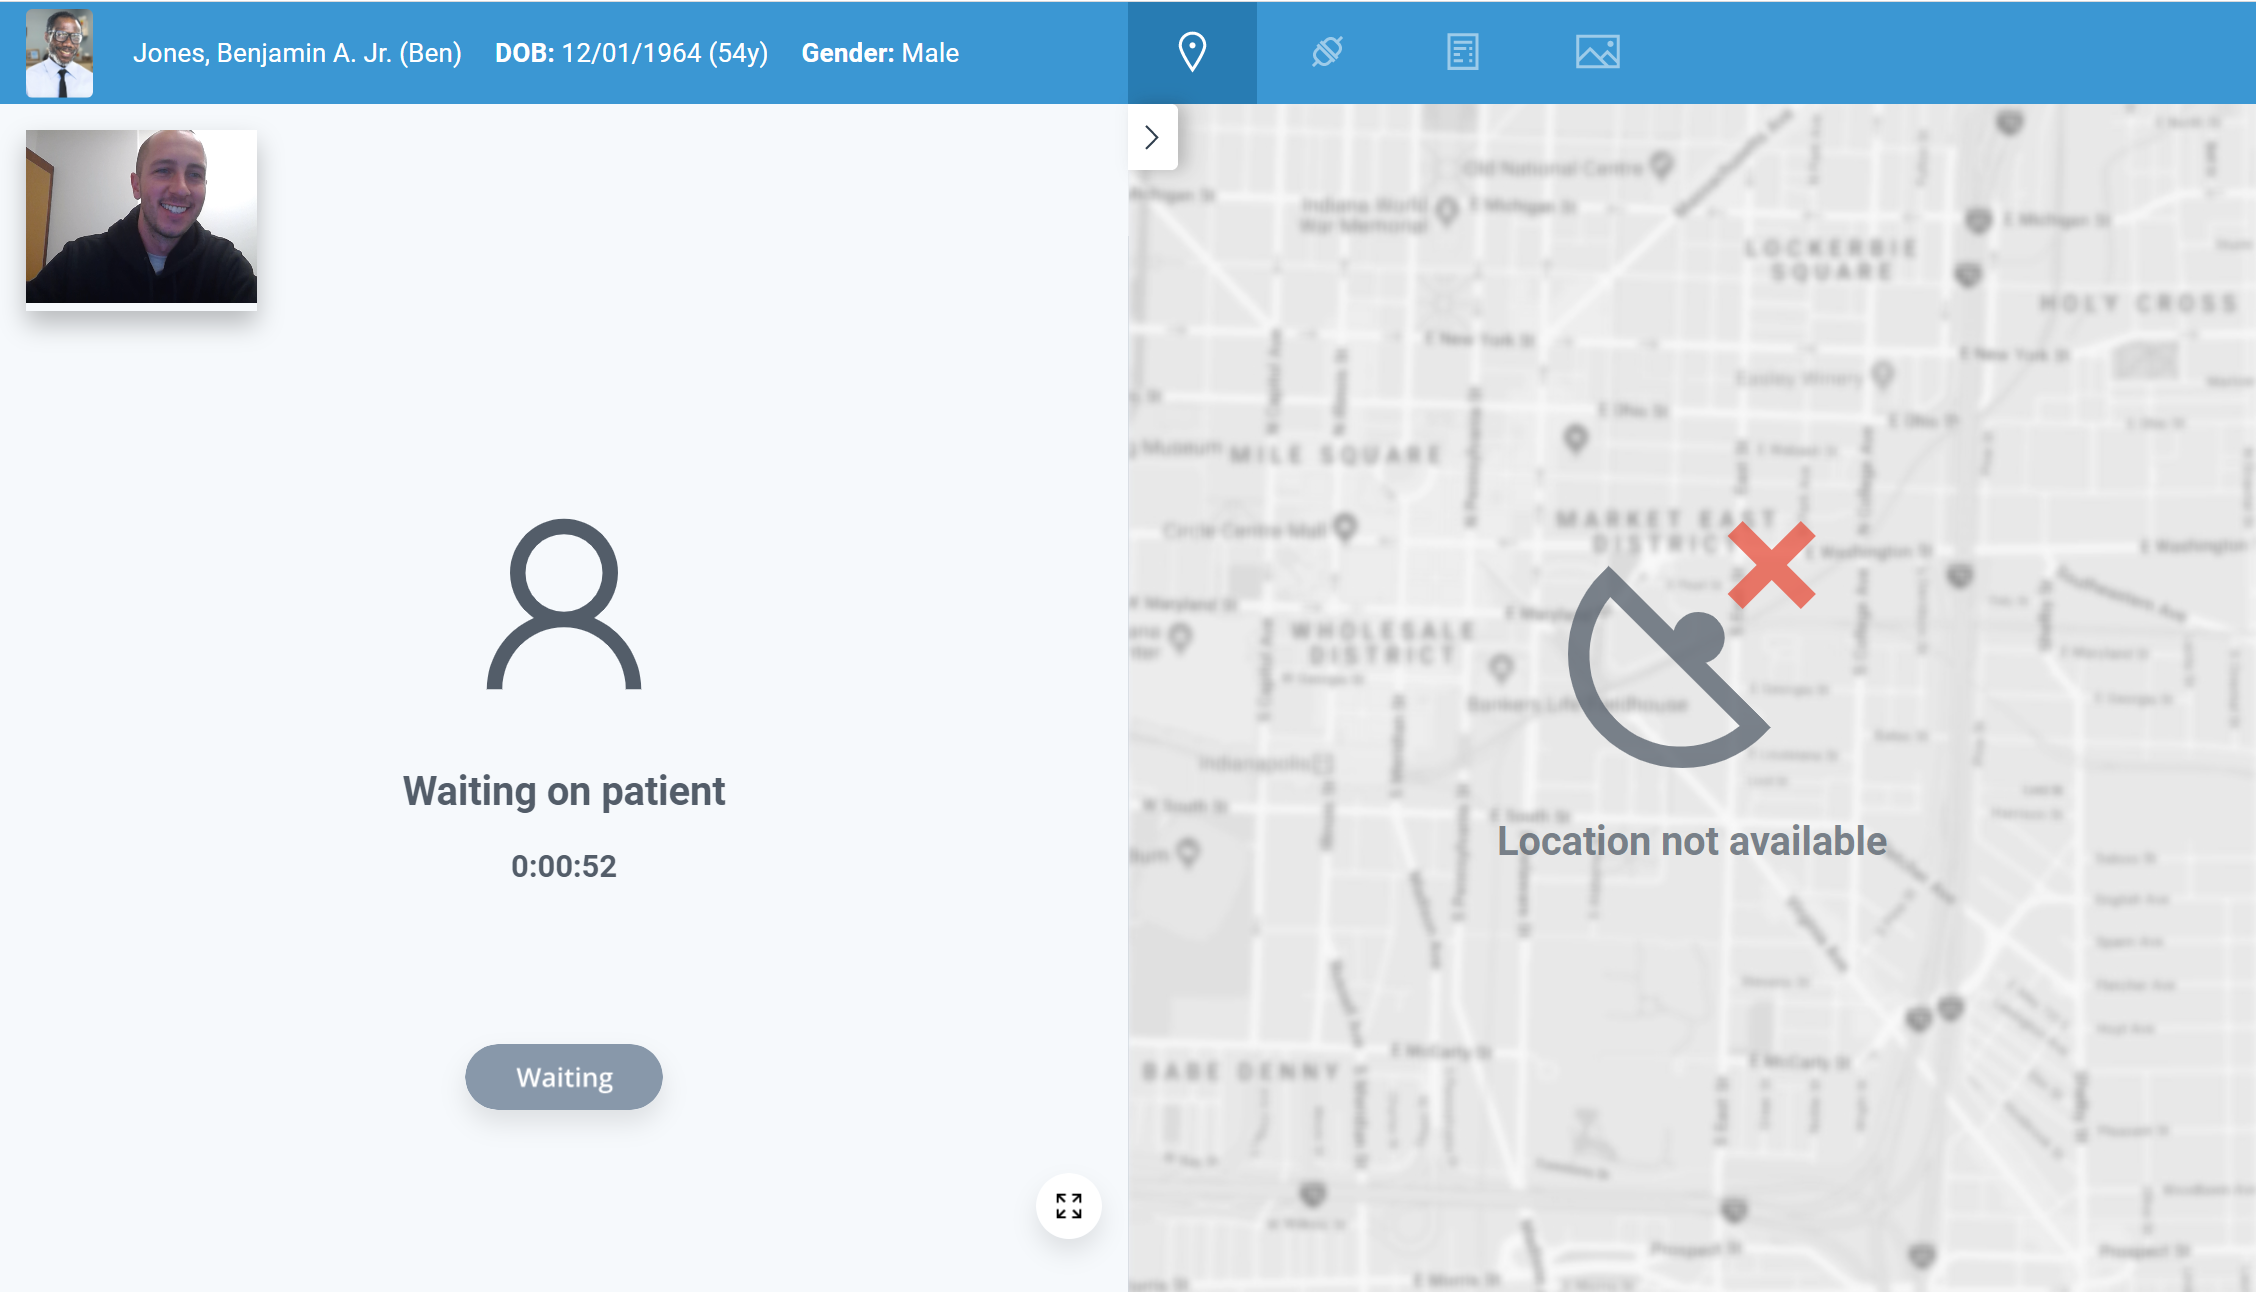
- When the timer box turns green, and you are ready, click the Start Visit button to begin the session.
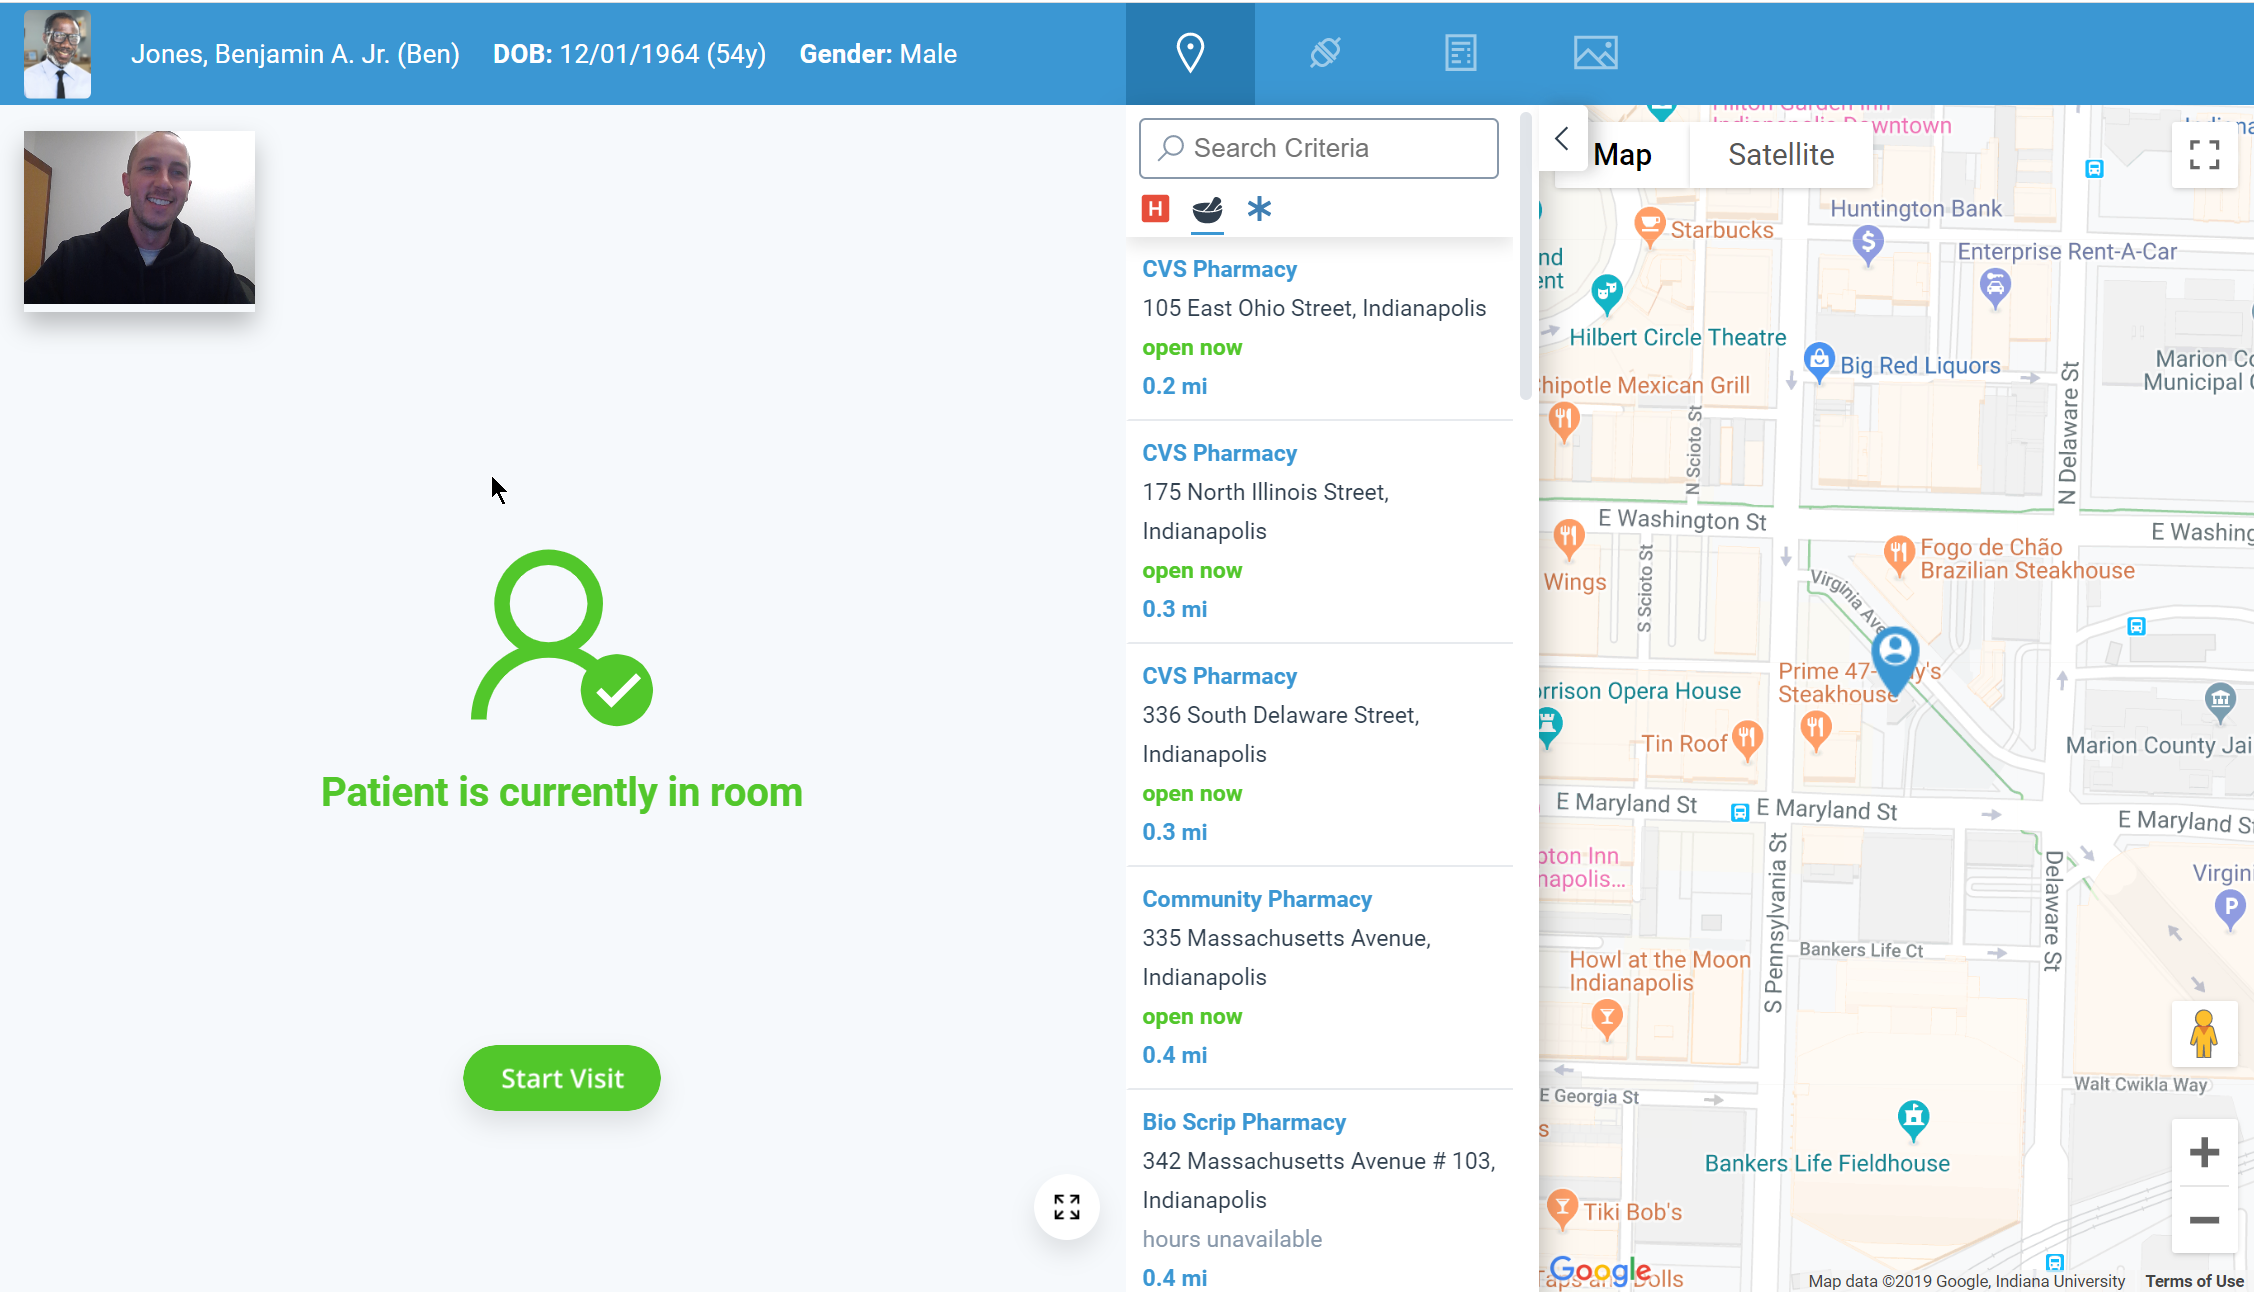
To toggle between your front and back camera, click on your image in the upper left hand corner.
Be sure to allow Google Chrome access to your camera and microphone (you will be prompted the first time).
After the session has begun, you will be in a two-way audio and video session with the patient. You will have access to see the patient’s location and see information about their device. You will also be able to capture photos of the patient and see critical details about the visit. This is all happening on a separate screen so that you can document in the EMR without interruption.
Location Details
- The patient’s location will be shown on the right-hand side of the screen if they have allowed the application to use their location.
- By default, nearby pharmacies for the patient will be displayed. You can click any location to see more details. You will also be able to send Google Driving directions to the patient for that location.
- You can toggle locations to show nearby Immediate Care Centers and Hospitals.
- You can also search locations nearby the patient as well.

Connection Details
- AnywhereCare Version: The AnywhereCare Version number will be visible to ensure the most up to date application is being used.
- Battery: The patient’s Battery Strength will display.
- Microphone: The application will detect if the patient's microphone is on or off.
- Device: he application will detect the type of device the patient is using.
- Operating System: The patient’s device operating system will be displayed.
- Permissions: This will determine if the patient has granted AnywhereCare access to your camera, location, and microphone.

Session Details
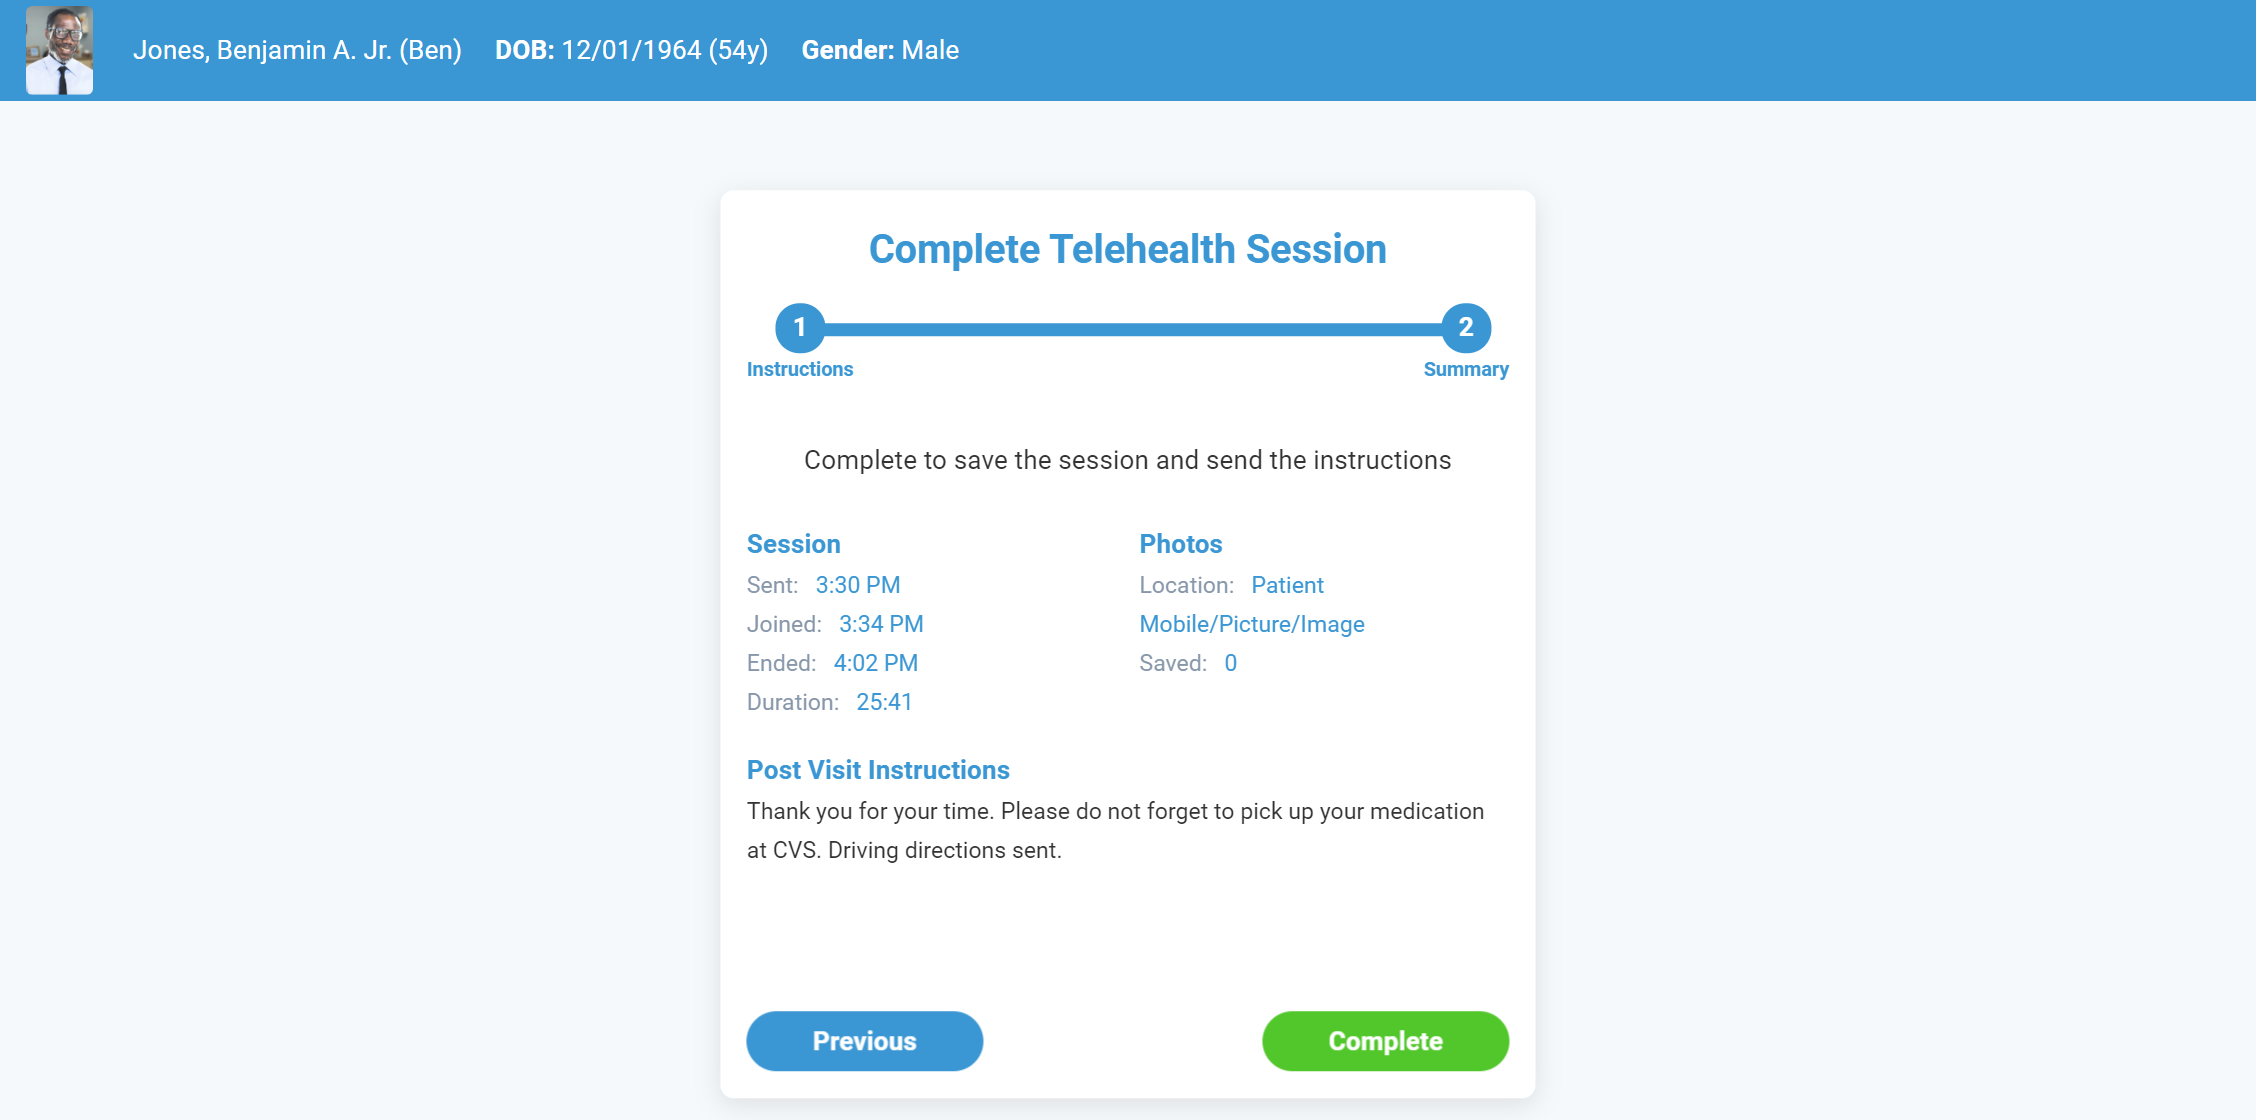
- Sent: The is the date/time that the invite was initially sent to the patient to join.
- Joined: This is the date/time that the patient joined the room.
- Initiated: This is the date/time that the provider began the visit.
- Duration: This is the total time elapsed from when the invite was sent to when the session was completed.
- Photos - Location: This is the location of where the photos that were taken will be stored in the EMR.
- Photos - Saved: This is the total number of photos taken during the session.

Photo Gallery
This will display a photo gallery of saved images that were captured during the session. Photos can be captured by clicking the Screenshot button.
Once you are ready to end the session, you will click the “Complete” button. This will end the session for the patient and will provide you the opportunity to provide post-visit instructions to the patient.
- Click the End button
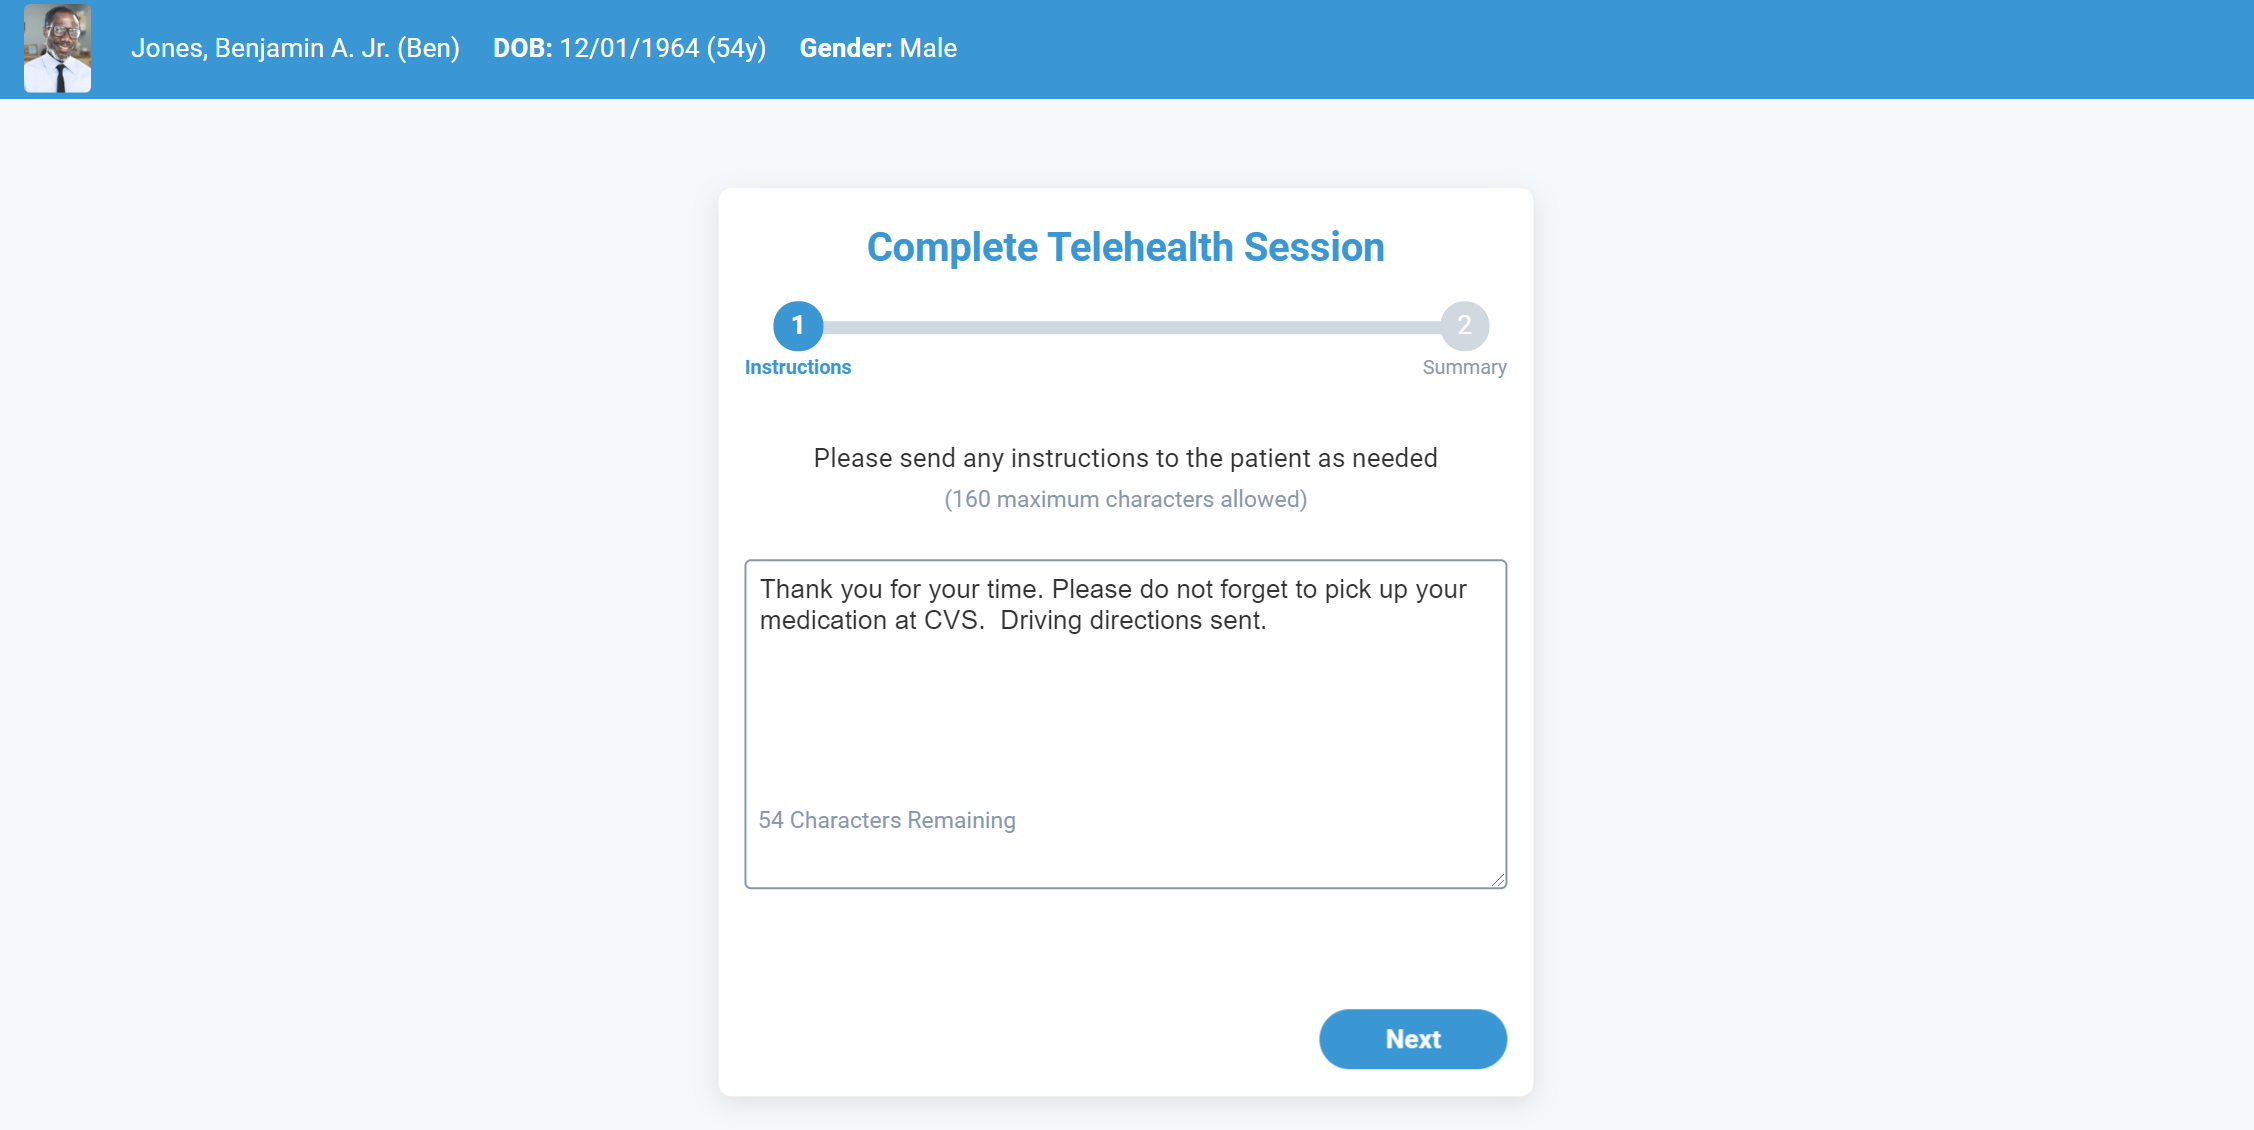
- Add any necessary follow-up instructions. These instructions will be delivered to the patient via text or email.
- Click Next.
- Review the session summary. Click Complete to finalize the visit.
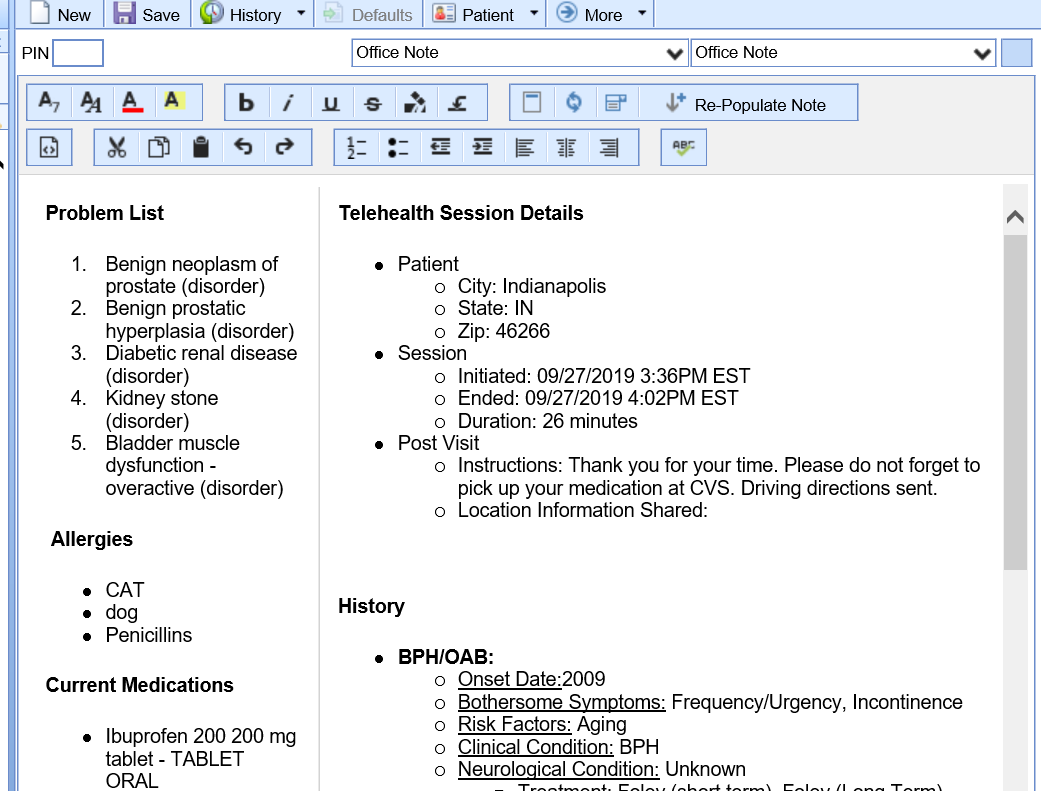
 5. If you choose to complete a SOAP Note at this point, the summarized information shown above will be added to the note automatically when it is populated.
From the patient experience, joining a Telehealth visit is quick and simple:
The patient will join the link from a text or email from the provider starting a telehealth visit.
The patient will tap directly on the link to join the visit from the mobile device.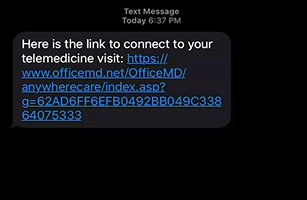
NOTE: If the patient has not downloaded the AnywhereCare App, this prompt will be shown to have the patient open the App Store or Google Play Store to download the app, then will launch the session once downloaded.
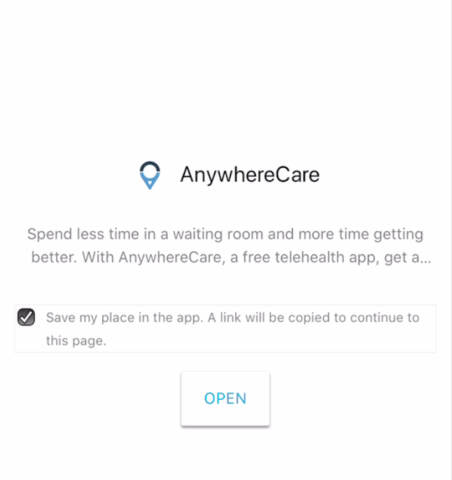
The patient will be prompted to enable Camera, Microphone, and Location access when first opening the App. These MUST be turned on and allowed by the patient: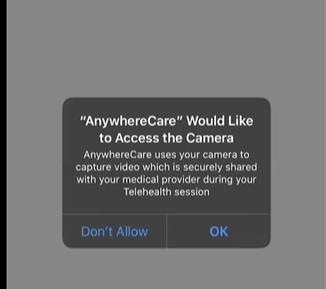
- The patient will be prompted to accept and agree to a telehealth-specific consent.
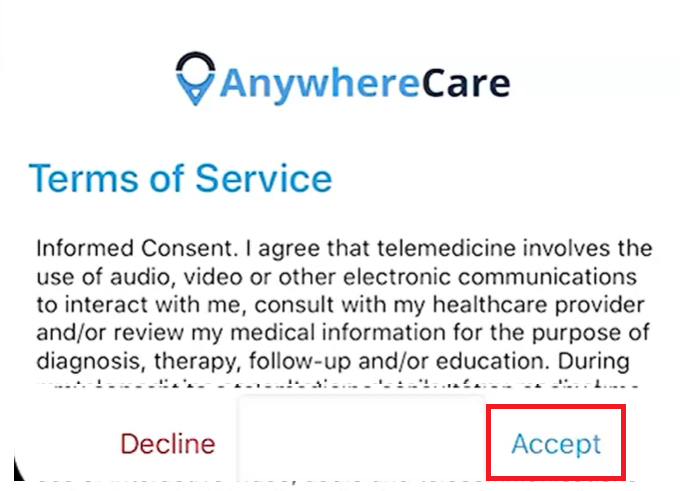
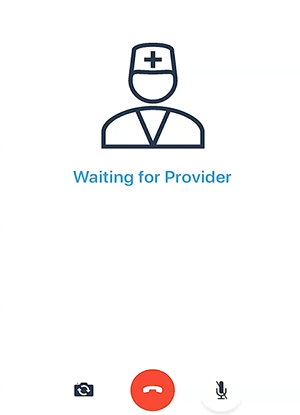
- The patient has now joined the visit and is ready for the provider.
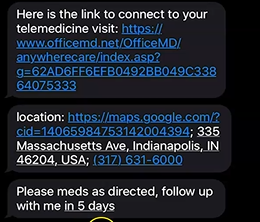
- At the end of the telehealth visit, if the provider has sent a location to the patient or any follow-up instructions; these will come in via text or email.
Telehealth or Telemedicine is a new process for many ChoiceEMR users. Along with providers using this functionality, staff will need to know how to bill for these visits as well.
Q. What codes are eligible to be billed as Telehealth visits?
A. Office/Outpatient Visits, 99201-99215; Behavioral Health/Psychotherapy Visits, 90791-90792, 90832-90838, and 90845-90847 (Full list available at CMS.)
Q. Do I need to set up a special Service Location for Telehealth visits? (Updated 4/9/2020)
A. Medicare and many other payers have decided that telehealth claims should be billed with a provider's usual place of service, such as POS 11 - Office. However, your State Medicaid may still require the location POS 02 - Telehealth. It is good to have a separate Service Location for these claims/payers.
Q. Are any modifiers required with these visit codes? (Updated 4/9/2020)
A. Effective 4/1/2020, Medicare is requesting a -95 modifier, or a -GT modifier for Medicare Advantage plans. Commercial payers may require a -95 modifier, or a -GQ modifier, depending on the payer. State Medicaid plans may have their own requirements, so it is important to check with your local plan.
Q. Do I need to set up special Procedure Codes for Telehealth visits? (Updated 4/9/2020)
A. There are two options available with the Choice platform: 1) Create custom Procedure Codes; 2) Use Fee Grouping to allow your usual codes to function as Telehealth codes. When creating these codes, you may want to include a Default Modifier.
Q. Do I need to set up a special Superbill, or a new blue bar on our existing Superbill?
A. It is not required, but many practices find it easier for their provider to select the appropriate codes under a new blue bar on the Superbill.
Q. Can a Telehealth visit be billed from the Superbill in the EMR?
A. Yes. Once the Service Location and the Procedure Codes are set up, then a provider can easily bill a Telehealth visit from the Superbill.
Additional Reference: Medicare Telemedicine Health Care Provider Fact Sheet - CMS
On March 30, 2020, CMS provided new guidance regarding Telehealth billing. Many other payers have issued specific guidance as well to assist providers during the COVID-19 public health emergency. In addition, CMS has published a Clinician Letter which summarizes many of these changes.
Carol Hoppe, CPC, CCS-P, CPC-I, President and CEO of MedLucid Solutions, has provided iSalus Healthcare with tools which may assist providers in making billing choices. These Telehealth Billing Decision Trees may be very helpful for users of the Choice products.
Telemedicine Decision Tree NEW - Indiana 4-28-2020.pdf provides information regarding Medicare, Commercial Payers, and Indiana Medicaid.
Telemedicine Decision Tree NEW FQHC 4-28-2020.pdf provides information regarding FQHC-RHC Medicare, Commercial Payers, and Indiana Medicaid. As of July 1, 2020, per CMS, the CG modifier will need to be added when appropriate.
Telemedicine Decision Tree NEW - Other States 4-28-2020.pdf provides information regarding Medicare and Commercial Payers, but does NOT include any specific Medicaid information.
NOTE: On these documents, any important updates are highlighted in yellow.
Carol Hoppe is a dynamic speaker who has been in healthcare for more than 25 years. She has worked with many different specialty and primary care physicians over the years. She has extensive hands-on practice experience working in transcription, billing, collections, medical office management and consulting services. Carol provides billing, coding, and compliance audits and education for physicians and staff. Carol previously worked as a consultant, instructor, and Director of Billing, Coding and Credentialing for a 500+ physician/hospital system in Indianapolis before starting her own consulting business in 2011.
Creating a Bluebar Within The Superbill for Telehealth
- Setup Portal.

- Superbill Templates.

- Choose the superbill you wish to Modify.

- Double click to Open the Superbill Template
- Click the Plus Sign to add a new bluebar.
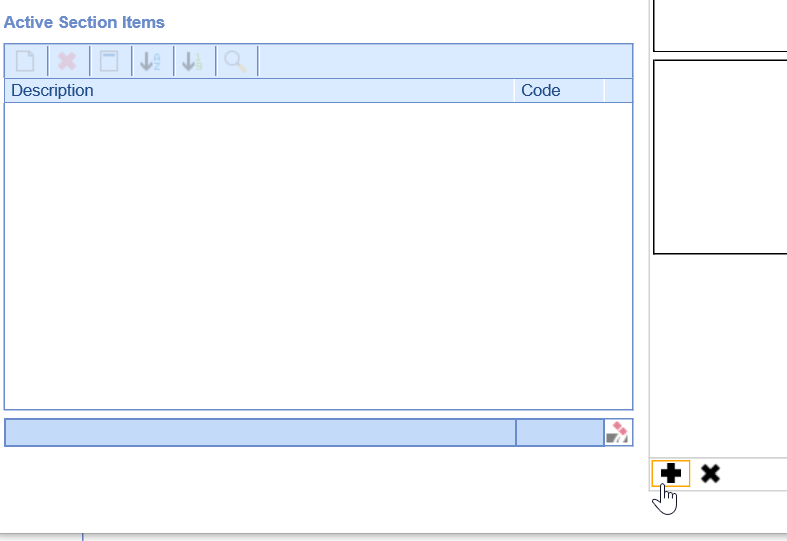
- Name the BlueBar Telehealth

- Add in the codes you wish to have in this blue bar by clicking on the blank sheet of paper.

- Type in the Codes you wish to display press tab.

- Click Save.

10. Now the telehealth Bluebar is in the superbill.

- Click the Setup button, and then select Locations under Basic Setup.
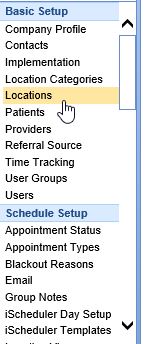
- In the Service Location Search window, click the New Location button at the bottom of the screen.
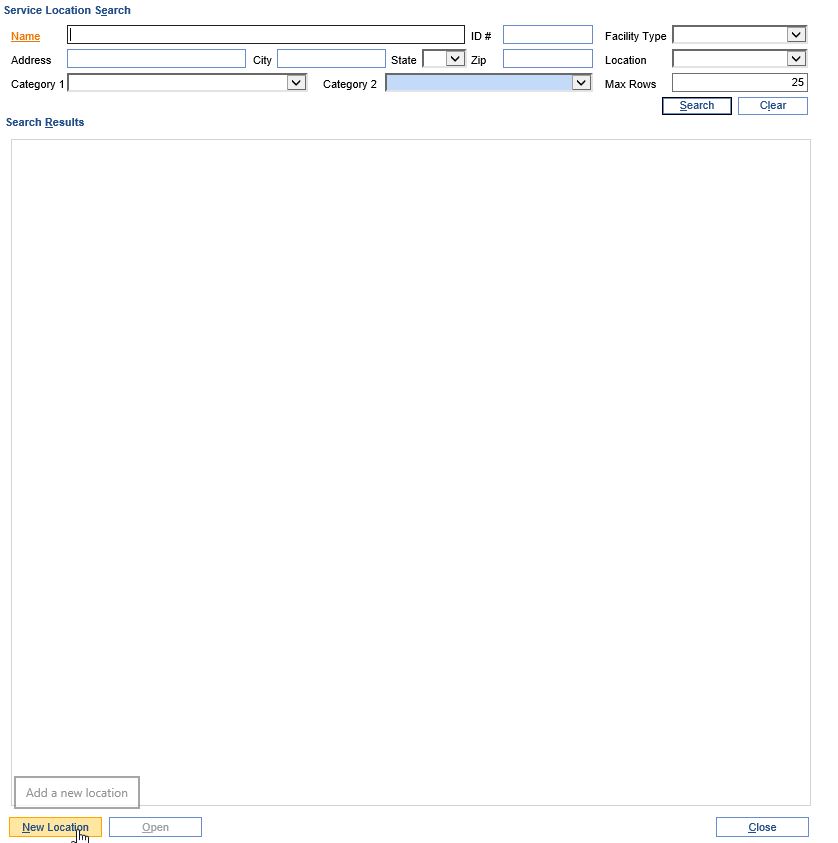
- In the Service Location Setup, complete the following sections:
* Service Location
The Billable box must be checked, and the Facility Type must be Facility to be selected from the Superbill.
*Address and Contact Information
It is suggested that you use your primary practice street address for the Address.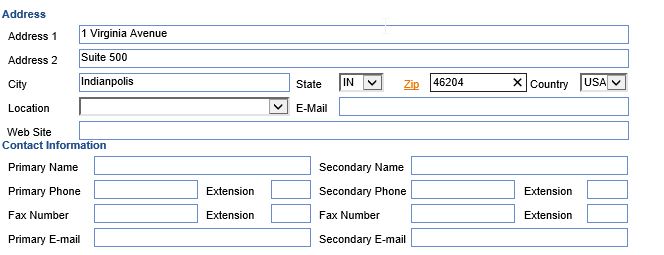
- Press OK when completed.

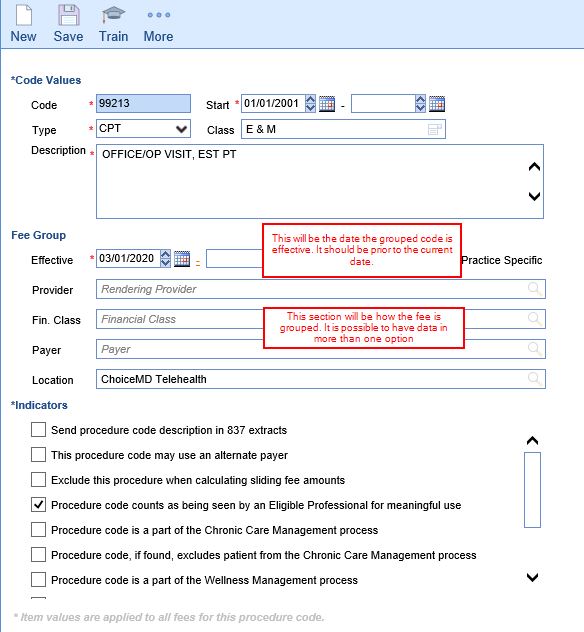
One way to set up a telehealth-specific procedure code is to create a Fee Group. A Fee Group in the Choice platform is a fee different than the "base" code. Once a Fee Group is added, the application will automatically use this fee on the claim for any patient who meets the selected criteria. For commercial telehealth claims, you will create a Fee Group by Service Location.
- Go to Setup: Procedure Codes.


- Click the magnifying glass on the right to search for the existing code to be updated, and select it.
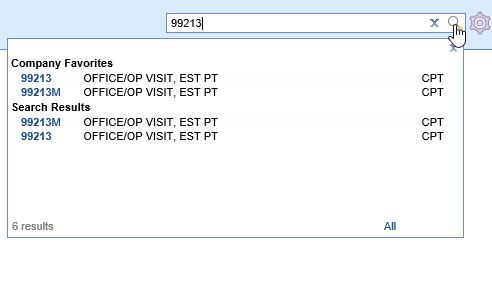
- Click the New button on the toolbar. A window will open. The existing code being updated will be in the box; click Next.
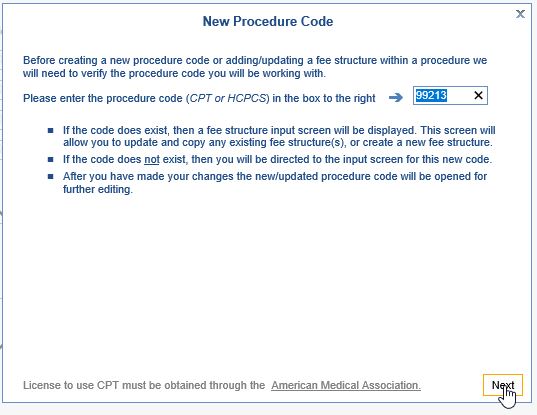
- The second screen will display the existing fee groups and allowed amount. Click New Fee to continue.
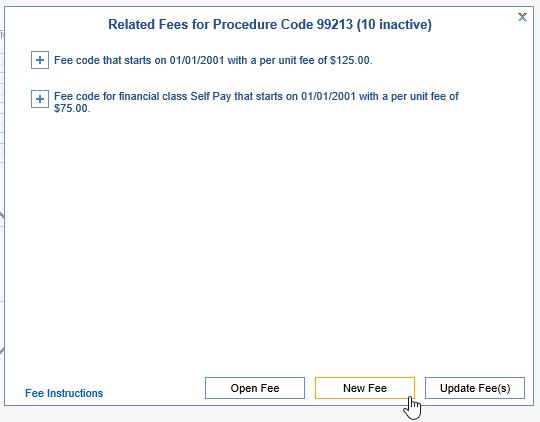
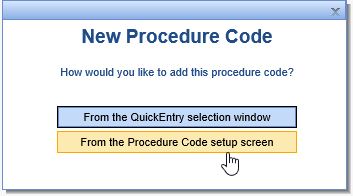
- A box will pop up asking you to choose how you would like to add the code: From the QuickEntry selection window, or From the Procedure Code setup screen. In this circumstance, the Procedure Code setup screen is easiest.
- Enter the Effective Start Date, and the Fee Group selection(s). If this is for commercial payers, you only need to enter grouping information in the Location.
- Save

- The new fee will be visible on the Code Summary page.
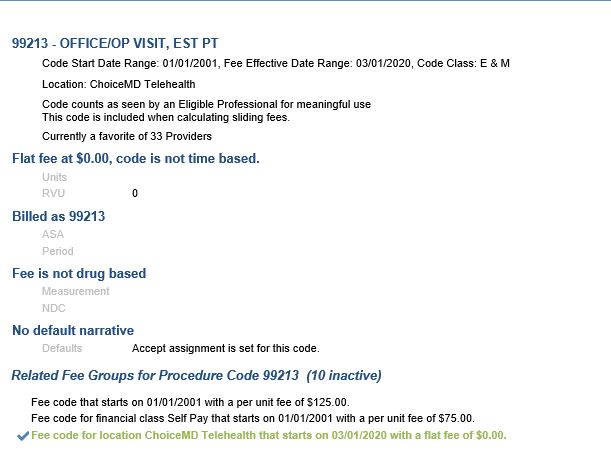
- On the left, select the Fees tab.
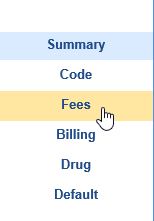
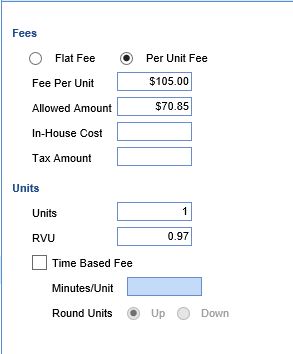
- Enter in all the appropriate information; usually will be the same as the base code, then Save. Complete the Billing tab if necessary to designate that the code can only be used once per day.

- Next, on the left, select the Default tab.
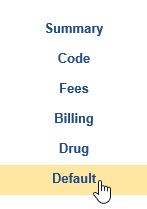
- On the Default tab, add the appropriate Default Modifier (95 for commercial payers, GT for Medicare), and Save.

- Repeat as needed for each code requiring the modifier.
- If you have different fees for different payers/financial classes, repeat these steps, adding a payer/financial class as one of your fee grouping options, in addition to the Service Location.
One way to set up a telehealth-specific procedure code is to create a Custom Procedure Code. A Custom (or "Dummy") Code is a code which does not follow the standard structure for a CPT/HCPCS Code, but can be billed as one. This makes an easily identifiable code on a Superbill/Claim.
- Go to Setup: Procedure Codes.


- Click the New button on the toolbar. A window will open. Enter the Custom Code; click Next. For example, the code could be 99213TH, 9921302, etc.
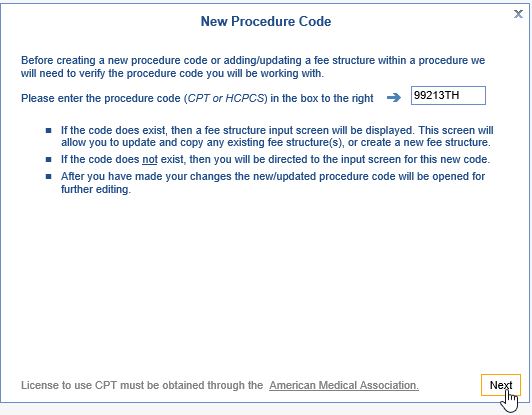
- A box will pop up asking you to choose how you would like to add the code: From the QuickEntry selection window, or From the Procedure Code setup screen. This guide is using the QuickEntry selection window
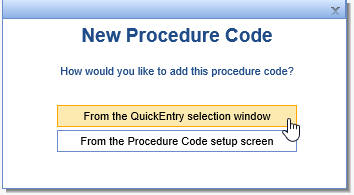
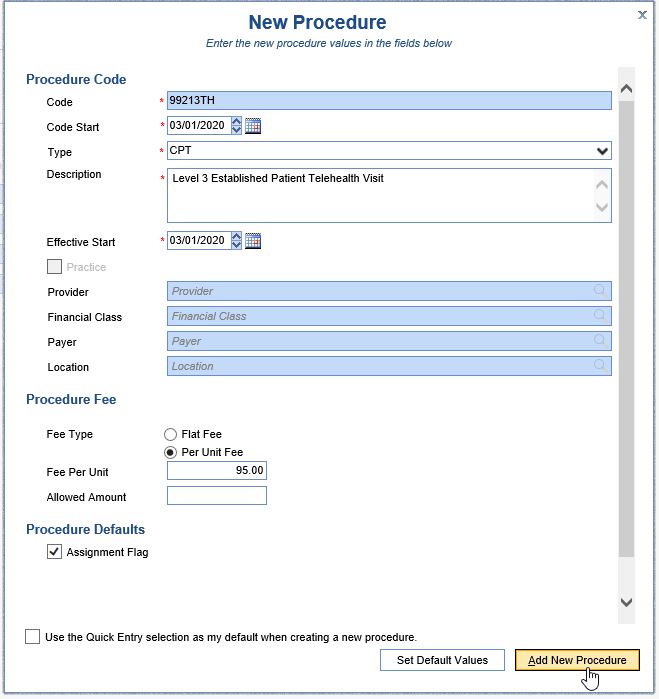
- Enter the Code Start Date, Code Type, and Code Description. Select a Code Class if appropriate. Under Procedure Fee, select a Procedure Fee Type, and enter the Fee Per Unit.
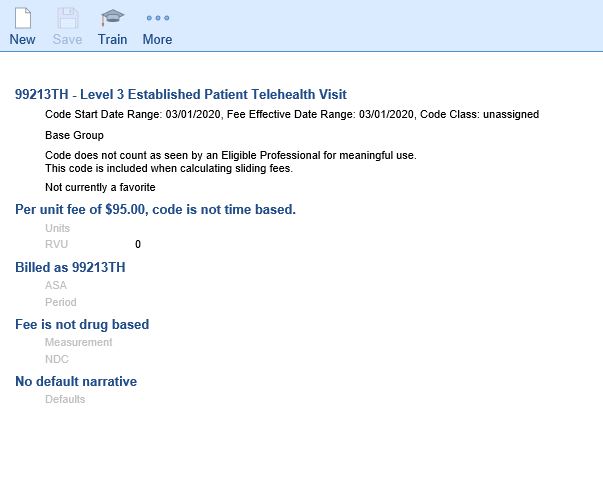
- The window will return to the new fee's Code Summary page.
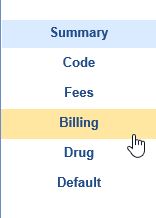
- On the left, select the Billing tab.
- Remove the custom identifier, and select the code which should be sent/printed on a claim to the payer(s).

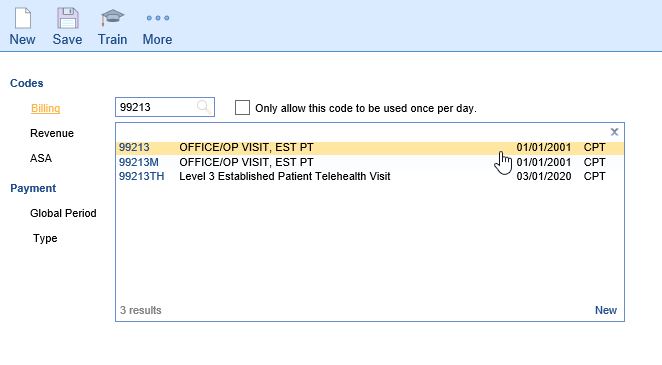
- Save.

- To pre-load any Modifier(s), select the Default tab.

- On the Default tab, add a Default Modifier, if appropriate, and Save.

- Repeat as needed for each code to be added.
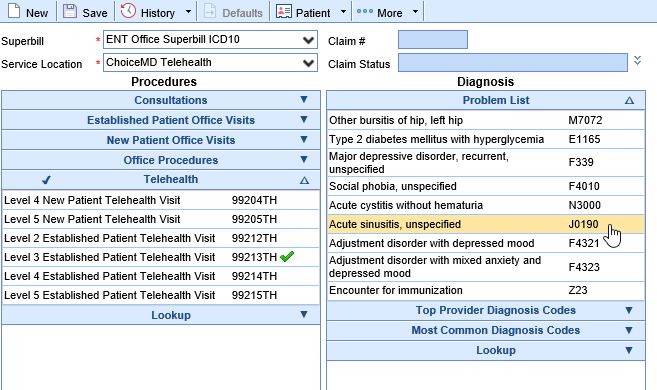
During/after a Telehealth visit, a Superbill should be created to document the visit, using the following steps:
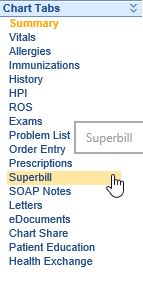
- Go to the Superbill tab in the patient's chart.
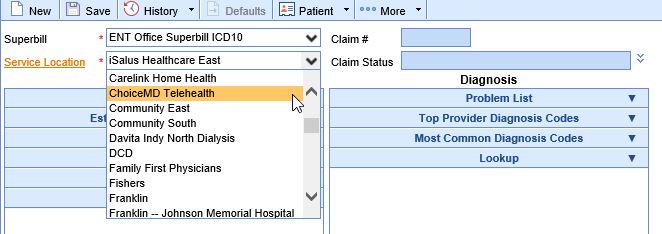
- Select the Telehealth Service Location from the drop down menu.
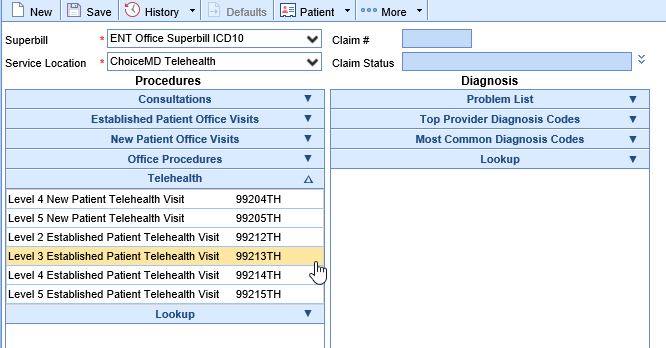
- If there is a Telehealth blue bar, open that section of the Superbill. (If there is not, go to the appropriate visit code blue bar instead.) Select the appropriate available code.
- Select the appropriate Diagnosis from the Superbill.
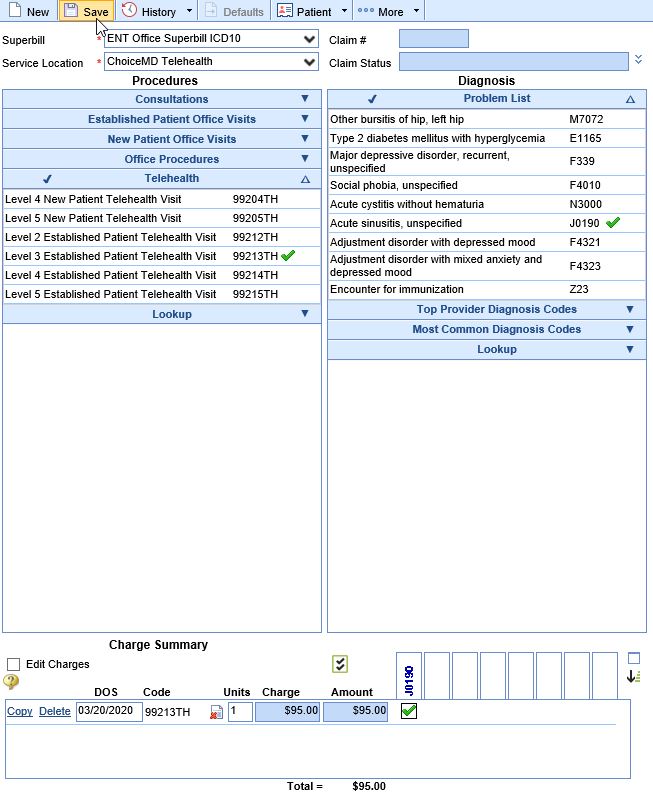
- If a modifier needs to be added to one or more procedures, click the icon that looks like a piece of paper with a red X:

- Type in the appropriate modifier or select one of the used modifiers and click the green arrow to push it over to the appropriate spot. Click OK.

- After a modifier has been added, the piece of paper icon will show with a green plus sign to signify that there is a modifier being used.

- Save the Superbill.
Telehealth Preferred Contact - Alert Setup
How to setup a Telehealth preferred contact Alert:
The message will open up automatically when the patient's chart is open. |   |


 to launch the Telehealth portal.


 5. If you choose to complete a SOAP Note at this point, the summarized information shown above will be added to the note automatically when it is populated.


