The Lost to Follow-up report assists a practice in identifying patients who have received particular kinds of services and meet certain problem list criteria, and who don't currently have further appointments scheduled.
- Go to the Reports section, then under EMR select Connect.
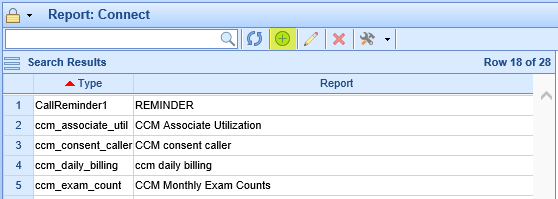
- Click the icon with a plus sign in the toolbar to create a new Connect report entry.

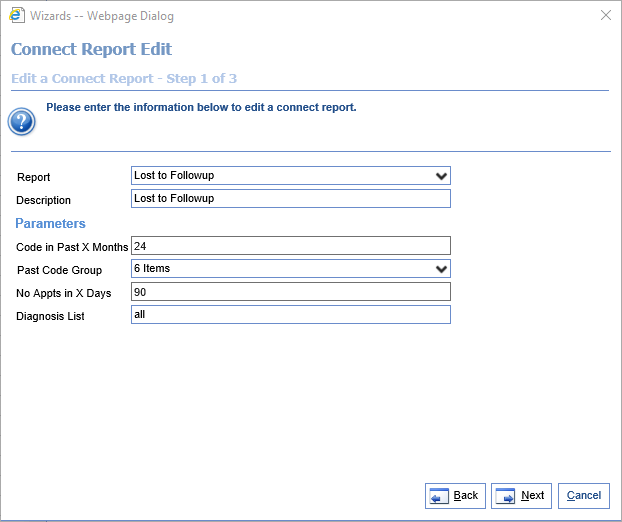
- When asked to select the Report, scroll under the Patient header and find Lost to Follow-up. Then fill out the parameter list as follows:

- Code in Past X Months: The patient has a qualifying procedure (i.e., one that's in one of the selected Past Code Groups) with a service date in the last X months, where X is the number entered. If the user types '24' in the first parameter and selects 'E& M' in the second, the report will look at patients who have an E & M code billed with a service date in the last two years.
- Past Code Group: A multi-select of code groups, this allows a user to find only patients who have had only codes in specific code groups billed in the past X months.
- No Appts in X Days: The patients returned also don't have appointments scheduled in the next X days, where X is the number entered in this parameter. The report attempts to find patients who the practice may need to follow up with to schedule additional appointments.
- Diagnosis List: This allows users to put in a diagnosis list to filter patients on. If a user enters a diagnosis list (i.e., "N184, N185"), the report will only return patients who have one of the entered codes in their current problem list. If a user instead enters "all," the report will not filter against patient diagnoses.
- Select the desired fields for the report to show, or simply select 'All.' Then hit 'Finish,' then 'Close,' to complete adding the report. The available fields are as follows:
- Account: The chart number from the patient's account.
- First Name: The first name of the patient.
- Middle Name: The middle name of the patient.
- Last Name: The last name of the patient.
- Nickname: The nickname of the patient.
- Last Seen: The last service date for which the patient has a code in the code group(s) selected.
- DOB: The patient's date of birth.
- Gender: The gender code of the patient.
- SSN: The social security number of the patient.
- Address 1: The first line of the patient's address.
- Address 2: The second line of the patient's address.
- City: The city from the patient's address.
- State: The state from the patient's address.
- Zip: The zip code from the patient's address.
- Home Phone: The patient's primary "Home Phone" number.
- Work Phone: The patient's primary "Work Phone" number.
- Other Phone: The patient's primary "Other Phone" number.
- Provider: The default provider from the patient's account.
- Provider NPI: The NPI of the default provider from the patient's account.
- Problem List: A comma-delimited list of the patient's current problem list.
To run this report, perform the following steps:
- If you just created the Lost to Follow-up Connect report, click the refresh icon on the toolbar:

- Select the created report in the list.
- Click the drop-down next to the hammer and wrench icon on the toolbar. Then click Run Report.

- You should see the results on your screen. If desired, you can click the Excel icon at the top to export these results:


