The Office Schedule can be configured in the EMR to display a list of appointments for a specific resource or a group of resources. This allows a user the ability to navigate through a schedule without leaving the EMR portal.
Navigating to the Office Schedule
- From the EMR Portal, the Office Schedule will be displayed on the far, left-hand side under the calendar
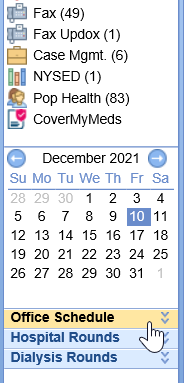

Note: Applicable practices/users may also have access to the Hospital Rounds and Dialysis Rounds schedule.
Setting up the Office Schedule
- Select the Office Schedule bluebar to reveal the settings within the Office Schedule
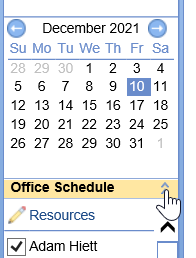
- Using the Pencil icon, select the resources that you wish to display in the Office Schedule settings

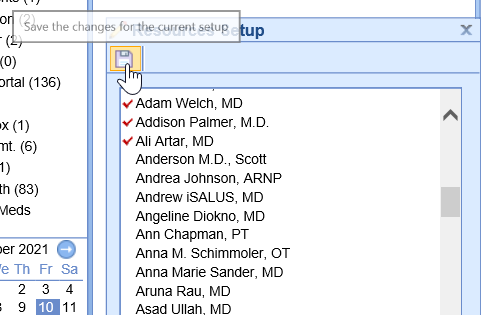
- Select the resources you wish to include in your Office Schedule and select Save
- Resources may be selected or deselected to display their schedule within the Office Schedule panel
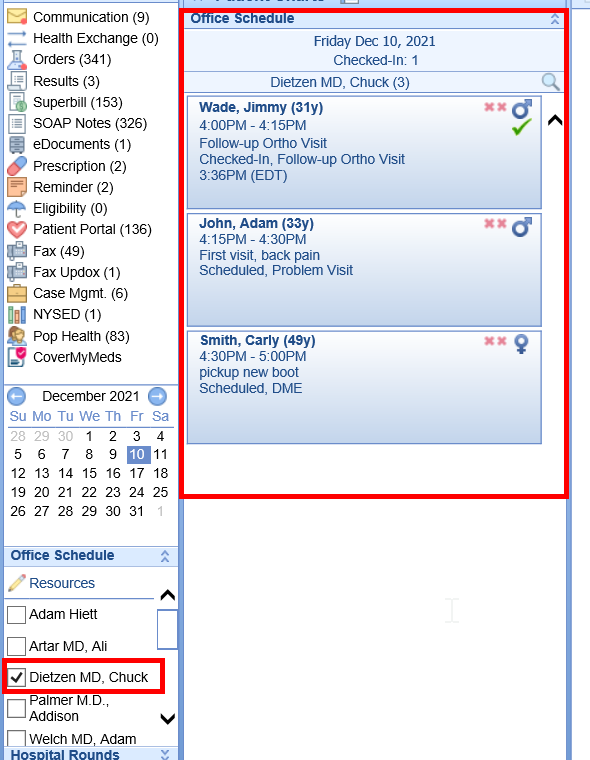


Schedule Display Settings
| Setting Name | Description |
Disp. Chief Complaint | Displays the chief complaint for the scheduled appointment |
Disp. Appointment Status | Displays the appointment status |
Disp. Room Status | Displays the Room Assignment and Status |
Only Checked-In | Displays on actively checked-in patients |
Time Checked-In | Displays the time the appointment was checked-in |
Superbill/SOAP Status | Displays the Sign-Off status of the Superbill and SOAP Note Note: First icon represents Superbill, second icon represents SOAP Note. Red X's represent incomplete and green checkmarks represent complete. Note: First icon represents Superbill, second icon represents SOAP Note. Red X's represent incomplete and green checkmarks represent complete. |
Auto Refresh | Refreshes the EMR Office Schedule every minute |
Intake Status | Displays the appointment intake status Note: First percentage represents the Total overall intake, Second percentage represents only the require fields. |
For even more control, review the EMR Primary Appointment Color settings. Users may also choose to include EMR Secondary Appointment Color settings.

