Once a patient has submitted their intake form, and you do not have auto-merge enabled, you will need to merge the completed information before it is added to the chart. This article will describe how to manually merge an intake using the Intake Schedule or Quick Pay assignment screen. These are used most commonly in cases where patients complete forms in the office. Changes to clinical information will be merged in either the reconciliation window or in the individual chart tab.
Although these screens are in different locations, their function remains the same. Whether you are in the QuickPay window or Intake Schedule, you notice 3 separate sections, Appointment, Forms to Merge, and Completed.
Tab Definitions
Appointment - Will display the list of all available appointments from the selected resource or specific patient.
Forms to Merge - Holds the completed intakes that need to be merged into the chart.
Completed - Shows the completed forms for a specific resource/patient on a specific day.


Steps to Merge
- After a patient completes their forms, in either window select the Forms to Merge.
- From here you will see the forms that have information to merge into the chart, select from the Action column, the Merge Icon.
- Once you select the icon you will see another window titled "Merge Intake Response into Chart"

- From here you can either individually select the values to merge or all at once by selecting the checkbox next to Field Name.
- When you have determined which values to merge, select from the bottom right Merge Into Chart.
- Mark as Completed
Once a patient has submitted their intake form, and you do not have auto-merge enabled, you will need to merge the completed information before it is added to the chart. This article will describe how to manually merge an intake using the Patient Portal section in the My Task List. This screen is used most commonly in cases where patients complete forms at home and there is an individual or group of staff members responsible for managing this list. Changes to clinical information will be merged in either the reconciliation window or in the individual chart tab.
Steps to Complete
- Providing you have appropriate access, you will notice a section in your My Tasks list titled, Patient Portal. Open this section.
NOTE: You may notice some additional items in the section unrelated to the intake but all information coming from My Medical Locker.

- Once you identify the correct Intake/Patient select the item, in this case, Intake Form.
- When opened you will see the practice management values to merge into the chart:

- From here you will select either the individual fields to merge or select them all at once by clicking on Field Name
- Once the fields are determined, select Import Patient Info.
- Mark as Reviewed
Unlike the practice management data being collected on the intake, not all fields will merge without being reviewed by a staff member. Specifically, the Allergy and Medication updates. Other fields can merge automatically based on your auto-merge setup. Below will describe the use of the reconciliation window, reviewing individual templates, and locating signed documents.|
Steps to Complete
- After the patient has submitted their forms, the Allergy & Medication changes will need to be reviewed before being brought into the chart. In the EMR open the patient's chart.
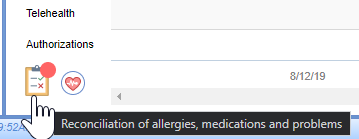
- In the bottom left-hand corner, you will notice the reconciliation window with a red badge. This indicates that there is data to be merged. Select the Clipboard Icon. You will be prompted with:
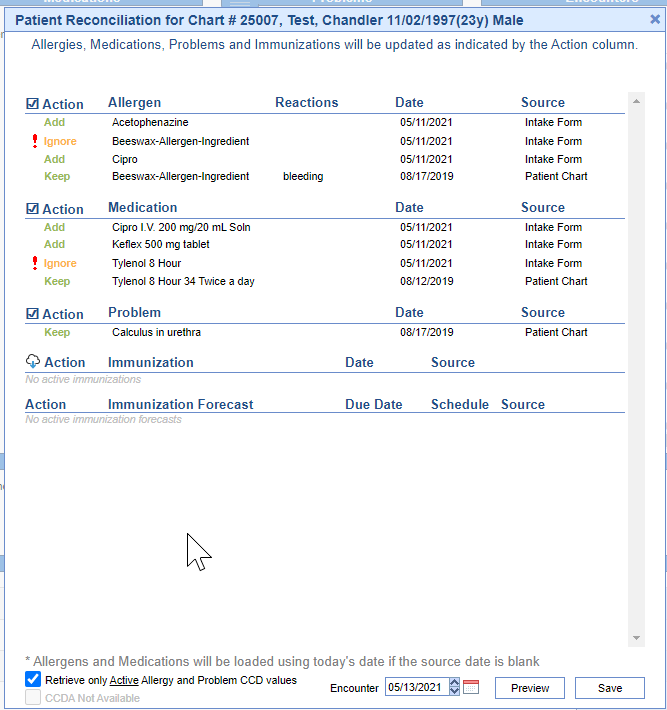
- From this screen, you will notice various statuses in the Action column. From here, review the listed allergens and medications. There are a few options you will have, but knowing the available statuses will be important:
Add
Chart Effect: Listed value will be added to the patient chart in the respective chart tab.
Reason: When patients fill out the intake and enter new values that did not exist in the chart initially.
Keep
Chart Effect: Listed value will remain in the patient chart as active.
Reason: The patient reviewed the value on the intake and did not remove it, indicating this is a current medication or active allergy. This indicates the existing value in a chart. You will notice in the window there is a matching value with a source of "Intake Form"
and status of ! Ignore.
! Ignore
Chart Effect: Listed value will be ignored due to an existing value. No change will be made.
Reason: The patient reviewed the value on the intake and did not remove it, indicating this is a current medication or active allergy. This indicates this is a duplicate of an existing value in the chart. You will notice in the window a matching value with a source of "Patient Chart" and status of Keep.
Inactivate
Chart Effect: Listed value will be removed/inactivated from the patient chart.
Reason: Will populate in this status if a patient attempts to remove an existing value from a chart. i.e, No longer taking a specific medication. - Once all values are reviewed, select Save from the bottom right of the reconciliation window.
Template data coming from the Intelligent Intake can be merged automatically based on your auto-merge setup or manually per template and chart tab. Below will describe how to merge individual template data. The example shown below will focus on the History chart tab, but the steps are the same for all template data.

Steps to Complete
- When merging template data from the intake you will know which chart tabs to merge by the blue dot shown next to the chart tab name (seen above).
- Navigate to the appropriate chart tab.
- When the screen loads you will be prompted to merge the values entered by the patient:
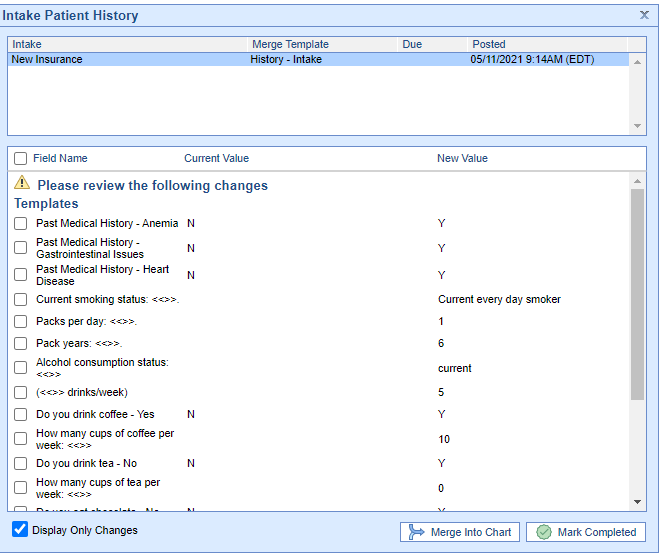
- From here select the check-box, Field Name, to select all values or select each value you would like to be merged into the chart individually.
- Once appropriate values have been selected, Merge Into Chart
- Mark Completed
To review the merged signature forms completed via intelligent intake, you can view them in the history of the letters for the patient. This can be done in either iScheduler or EMR. Below will describe how to review these forms in the Quick Pay window in iScheduler.
Steps to Complete
- From the iScheduler portal, select the patient from the opened resource. Depending on when you would like to review these letters you can complete this at check-in, check-out, or during the visit. All of which is done via Quick Pay.
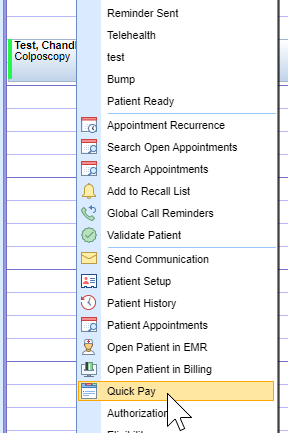
- To get to the Quick Pay window right-click over the appointment, and from the list, you can either go directly to this screen or be brought there automatically by changing the appointment status to checked-in or checked-out. Once opened select the Letters tab. The green push-pin indicates there have been new letters saved.

- If the form were completed on that day you will see a pop-up displaying the letters completed. If viewing this on a different day or your patient filled out forms ahead of time, you will want to view the forms by selecting the history.
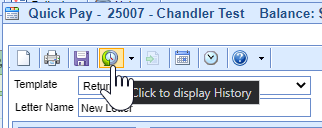
- From here you can see all historical letters for the patient including the forms that have been signed electronically. Double click on any letter to view.
To review the merged signature forms completed via intelligent intake, you can view them in the history of the letters for the patient. This can be done in either iScheduler or EMR. Below will describe how to review these forms in the Letters chart tab of the EMR.
Steps to Complete
- From the EMR, open the patient chart and Navigate to the Letters chart tab.
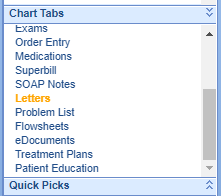
- From this screen, you will be prompted with "Current Letters". This will only display if the letter was signed on the same day you are trying to review it. Otherwise, you can select the history section of this chart tab:

- From here you can see all historical letters for the patient including the forms that have been signed electronically. Double click on any letter to view it.


