Reminding a patient of their upcoming appointment is one of the most crucial success factors for a medical practice. Our Automated Appointment Reminder integration ensures that this reminder takes place with no work needed by your staff. Our solution will deliver a reminder to your patient's in the way that both you and the the patient prefer - be that by phone, email, or text.
This integration will:
- Allow patients to select their preferred reminder method via the Intelligent Intake
- Allow a practice to setup business rules on when reminders are delivered to patients
- Automatically send out phone calls, text messages, and emails to patients
- Allow patients to electronically confirm or cancel appointments
- Automatically update the appointment status in the iScheduler
Sign-Up
The first step is to sign-up for Automated Appointment Reminders: https://isalushealthcare.com/services/
Configure Reminder Rules with Inphonite
Once you sign-up, you will be contacted by our Appointment Reminder partner, Inphonite. They will work with you to configure the solution. They will help customize the message, determine dates and times of reminders, etc...
Configure Reminder Rules with iSalus
Once you have setup the rules with Inphonite, the next step is to configure our application.
Products
In order to have a product activated, the practice must request this from iSalus by contacting our support team.
The support team will need to activate the following product:
- Global Call Reminders
Roles
The following screens need to be assigned to administrators:
- Practice - Global Call Reminders > Setup > Call Reminder Setup
The following screens need to be assigned to users that should update individual patient preferences:
- Practice - General > Setup > Patient Portal Miscellaneous
Screen
The following screen must be added to the Miscellaneous portal:
- Navigate to Setup > Patients
- Click the Gear icon
- Select Setup > Miscellaneous
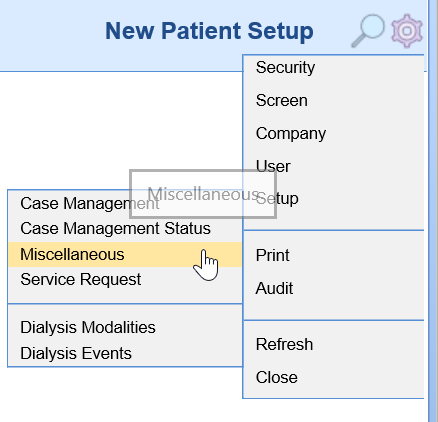
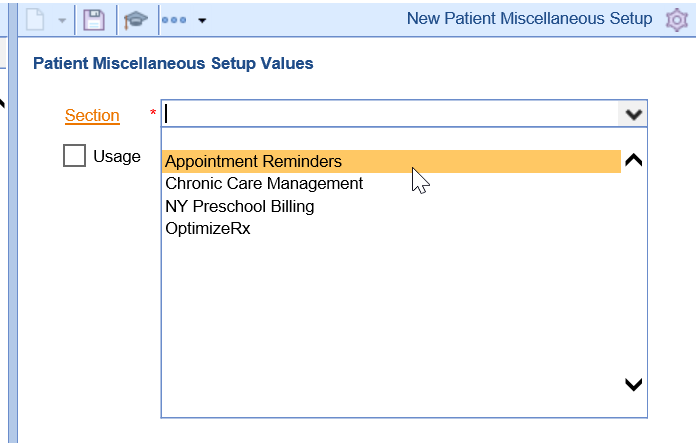
- Select Appointment Reminders from the Section dropdown
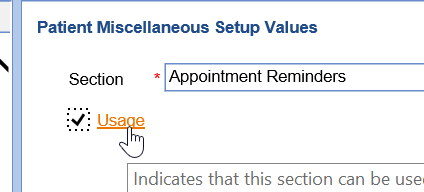
- Click the Usage checkbox
- Click Save
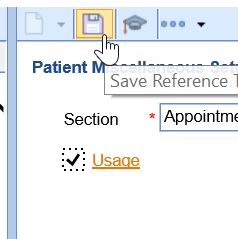
- The Appointment Reminders section should now be accessible in the Patient Setup screen under the Miscellaneous tab.
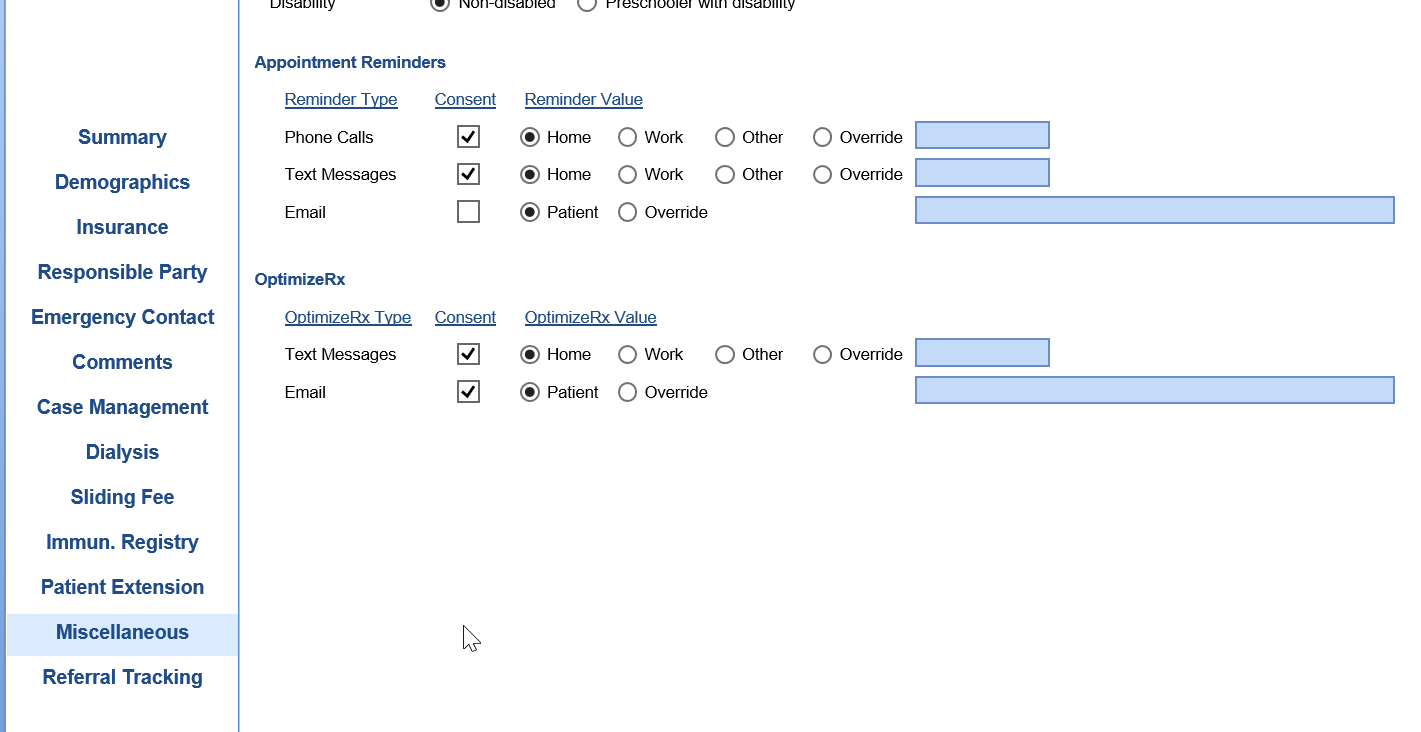
Company Settings
The following company settings can be configured:
- Company Setting: Automated Reminder Text Consent
- Company Setting: Automated Reminder Phone Consent
- Company Setting: Automated Reminder Email Consent
Pro Tip: Want to apply these new settings to all EXISTING patients? Ask iSalus to update this for you.
Call Reminder Rules Setup
The Automated Appointment Reminder integration allows you to configure exactly what types of appointments receive reminder, how many days in advance reminders are sent, and more.
- Navigate to Setup > Call Reminder
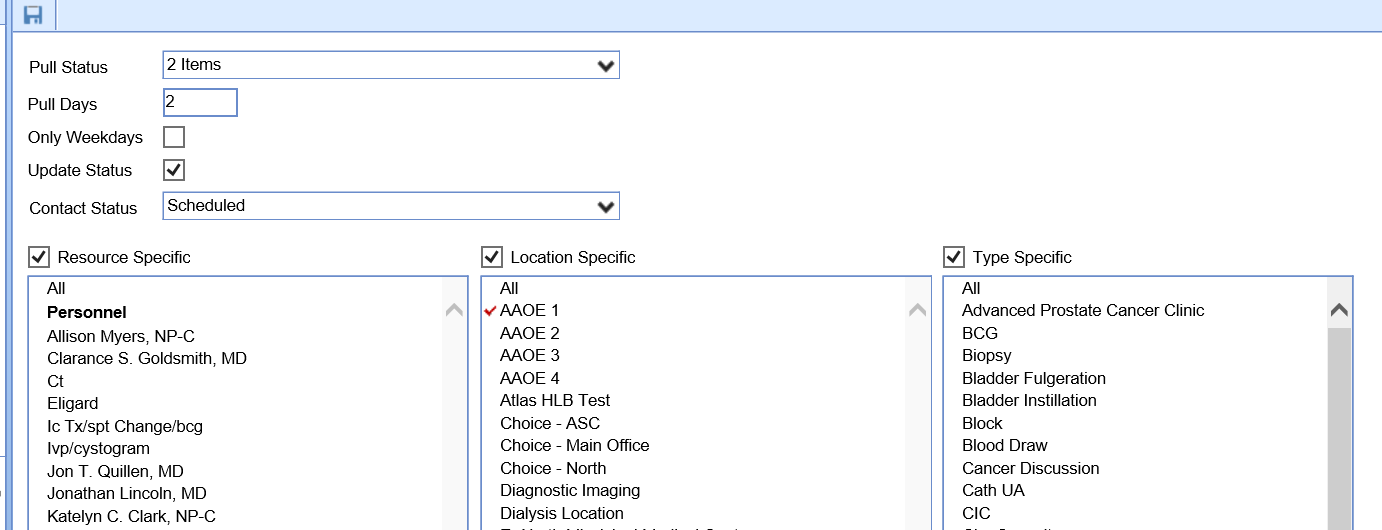
- Update the settings viewed on the screen to meet your desired preferences
- Click Save
Screen Options
- Pull Status: This is the list of appointment statuses that new reminders should be created for on a nightly basis.
- Pull Days: This will dictate how many days in advance of an appointment a patient receives a reminder. If you worked with Inphonite to configure your rules to contact the patient multiple times, this should line up with their very first reminder.
- Only Weekdays: This will indicate that patients should only be contacted on weekdays. Therefore, no reminder file will be created on the weekends.
- Update Status: This indicates that patient responses can update the appointment status for a patient. The application supports two types of patient initiated response:
- Confirmed: If a patient confirms and appointment via the reminder, the appointment status will be set to Confirmed.
- Cancelled: If a patient cancels a appointment via the reminder, the appointment status will be set to Cancelled. This can be turned off via Inphonite so that patients do not have this option.
- Contact Status: When a reminder is sent, the system will update the appointment status to the selected status. Many practices will create a status like "Reminder Sent" to indicate that the reminder was sent but has not yet been responded to.
- Resources: This will allow a practice to control which resources have appointment reminders delivered.
- Resource Specific: If this box is checked, you must determine which resources we should create a reminder for. If deselected, all patients on that resource's schedule will have a reminder generated (unless other rules dictate that they should not).
- Locations: This will allow a practice to control which service location have appointment reminders delivered.
- Location Specific: If this box is checked, you must determine which locations we should create a reminder for. If deselected, all patients scheduled at that location will have a reminder generated (unless other rules dictate that they should not).
- Type (Appointment Type): This will allow a practice to control which appointment types have appointment reminders delivered.
- Type Specific: If this box is checked, you must determine which appointment types we should create a reminder for. If deselected, all patients schedule with that appointment type will have a reminder generated (unless other rules dictate that they should not).
Once the Automated Appointment Reminder Integration has been configured for your practice, you will be able to start setting up patient's reminder preferences and adding patients to the schedule in the iScheduler. Once the patient is on the schedule, the automated process takes over and patients will receive reminders based on your pre-configured rules.
Set a patients Appointment Reminder Preference
Appointment Reminder preferences can be set in three different ways:
Option 1 - Intelligent Intake:
If your practice uses the Intelligent Intake feature, patient's may set these preferences themselves as part of your intake process.
Option 2 - Set on New Patient Creation:
If your practice has configured the necessary Company Settings, reminder preferences for a patient may be saved automatically after the patient is created.
Option 3 - Manually Set Patient Preference:
You can manually set the patients reminder preferences by following the below steps:
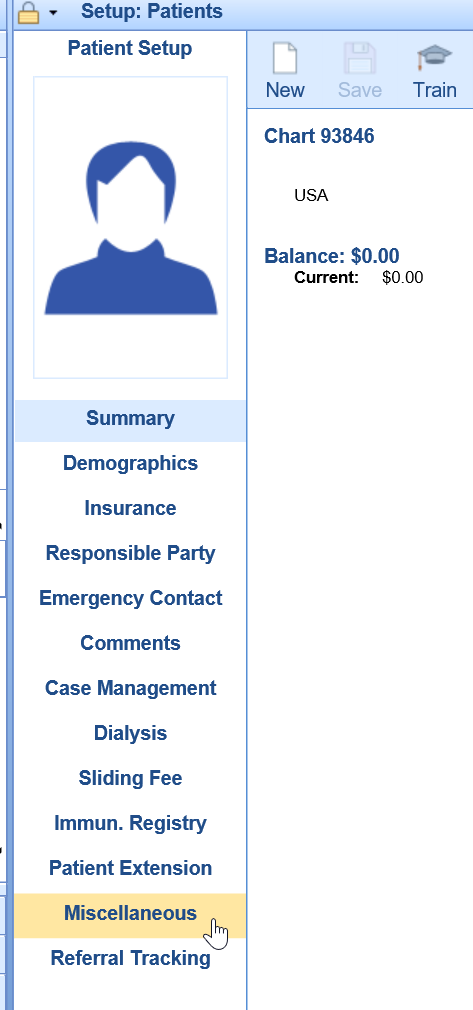
- Navigate to the Patient Setup screen (this can be accessed in many different ways)
- Select the Miscellaneous tab
- Update the Appointment Reminder preferences

- Click Save
Automated Appointment Reminder File Generation
On a nightly basis, an appointment reminder file will be generated according to your preferences and delivered to Inphonite.
Automated Appointment Reminders Sent to Patients
Inphonite will deliver reminders via text, email, and phone calls based on the information provided in the reminder file.
Appointment Status Updated based on Contact
Contact Status
Once an appointment reminder is sent to a patient, the status of the appointment will be updated based on the 'Contact Status' that was configured.
Confirmed Status
If a patient confirms their appointment via the reminder system, the status will be automatically updated to 'Confirmed'.

Cancelled Status
If a patient cancels their appointment via the reminder system, the status will be automatically updated to 'Cancelled'. Based on practice preferences, the appointment may no longer appear on the schedule.
Detailed Contact Information
Users can see a detailed view of the contact by following the below steps:
- Right click on the appointment and select Global Call Reminders
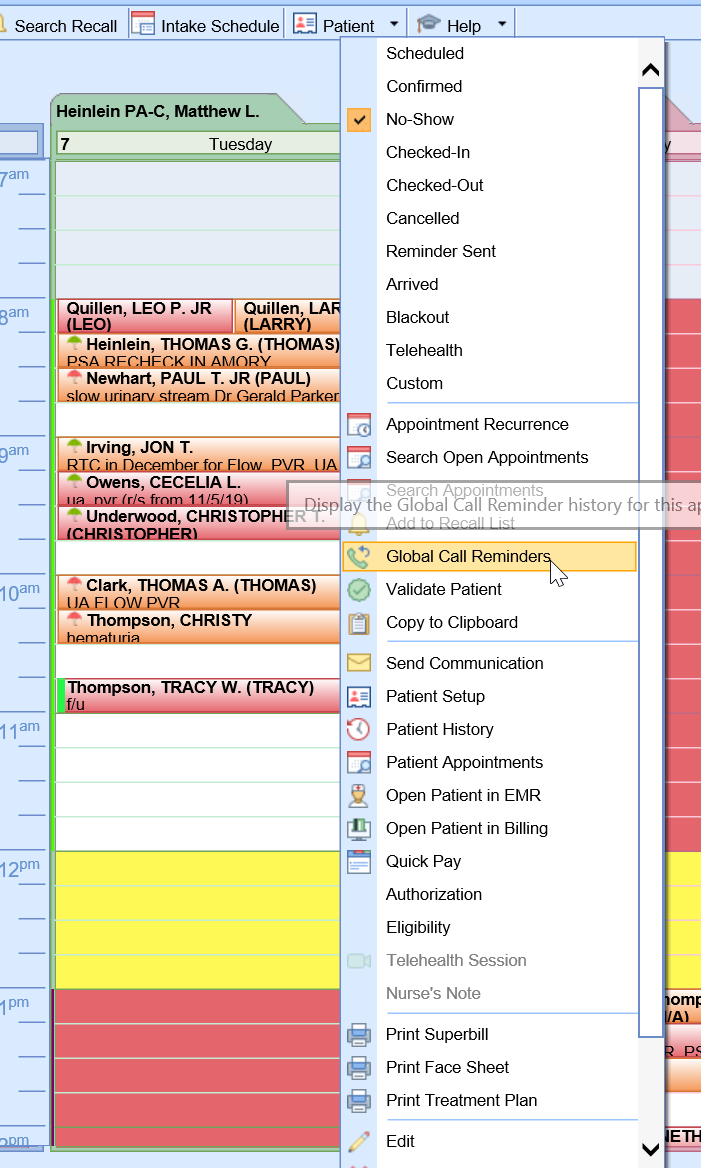
- The date, time, method, and results of the reminder will be displayed

The "Rescheduled" status allows a practice to create a new appointment for a patient when they need to move the date/time/location of their appointment. This status also alerts the reminder system and prevents the system from sending out incorrect or outdated appointment information.
When should we use the Rescheduled status?
The practice may determine that the rescheduled status should be used when the date, time, location, or resource needs to be changed for the patient's appointment. The practice may also determine that the patient will need to receive an appointment reminder for updated appointment information. The status change will also allow the practice to efficiently manage the patient's appointment history by reviewing past appointments in the "Rescheduled Status."
How to use the Rescheduled status
To reschedule an appointment, simply right click over the appointment and choose the "Rescheduled" status from the list of options

The user will be presented with the Cancel Comments window, where they are able to add any applicable comments for the reason to reschedule. Click OK.

The system will present the user with a trailing "copy" cursor where they are able to create a new appointment, using the original appointment details

Simply click and drop (or right click to assign to a placeholder) to create the newly rescheduled appointment

How to "hide" rescheduled appointments
If you wish to "hide" or make the rescheduled appointments disappear once they are rescheduled, the Company Setting: Display Rescheduled Appointments on the schedule, should be unchecked

The Recall List is designed to allow a practice to add patients to an ongoing list in order to manage a list of patients who need appointments scheduled. The Recall List can be used for many different reasons, however, the most common scenario is to add a patient to the Recall List when the selected provider either does not have any availability or the schedule is not available to schedule. See iScheduler Toolbar for more information on how to add patients to the Recall List.
Broadcast Messages are a way to send a generic message in mass to a list of unique patients, based on similar criteria from the Recall List. Broadcast Messages can be used for scenarios like advertising that it's time to schedule an appointment, or the schedules are open for future dates and patients should contact the practice to schedule an appointment.
The following steps will explain how to produce a list of patients that can ultimately be uploaded to Updox in order to configure a Broadcast Message.
Exporting the List
- Navigate to the Search Recall button in the iScheduler Toolbar

- Using the appropriate criteria, generate a list of patients

- Select specific patients, or choose the "Select All" to choose all patients displayed in the Search results
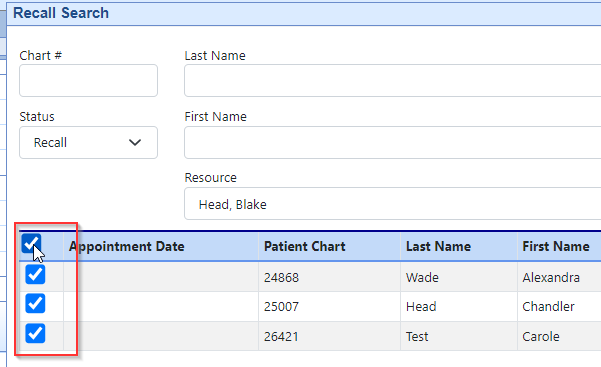
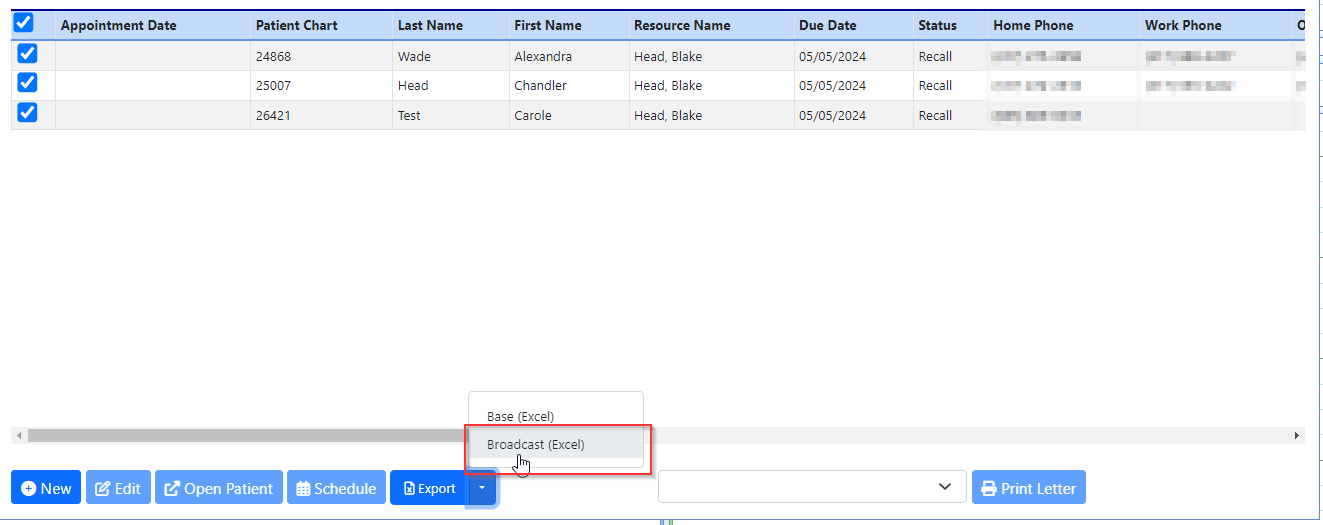
- Navigate to the Export tool and Choose "Broadcast (Excel)"
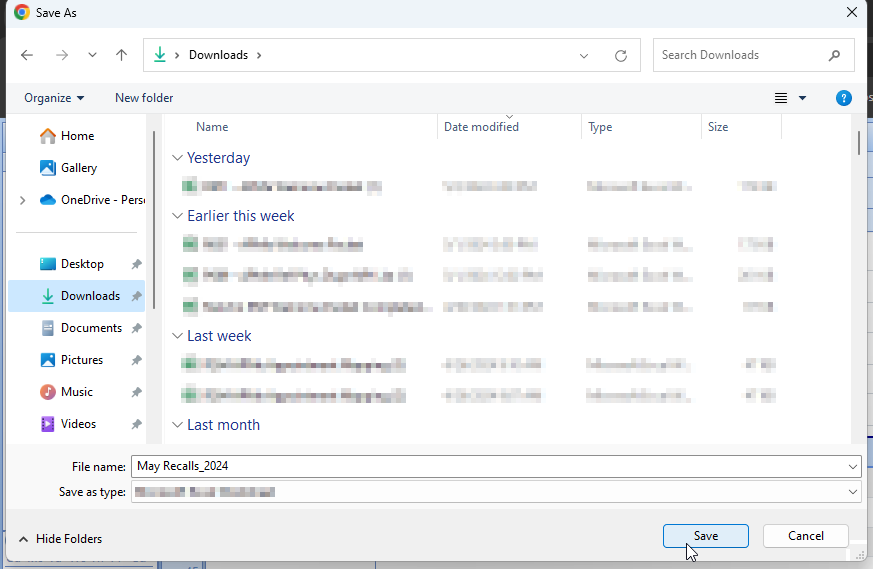
- Name the spreadsheet appropriately and save as a .CSV file type to an accessible place on your computer
Login to Updox
NOTE: Users must be provided a login to Updox in order to complete the next set of steps. Please contact Support@isalushealthcare.com for information regarding logins to Updox.
- Navigate to Updox Account Login
- Sign-in using credentials provided
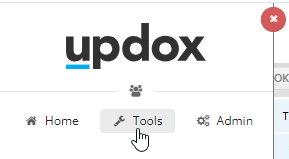
- Navigate to Menu > Tools
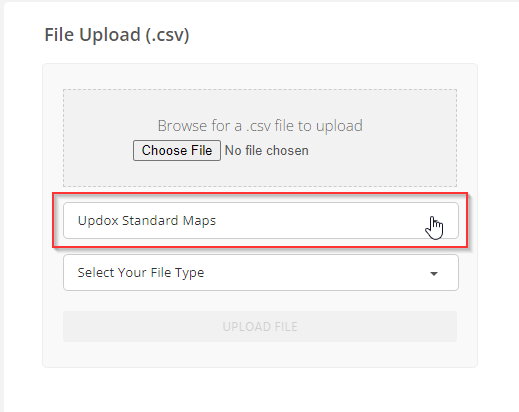
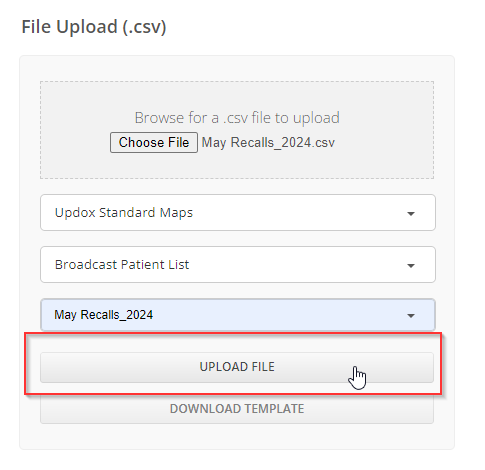
- Locate File Upload (.csv)
- Select Updox Standard Maps
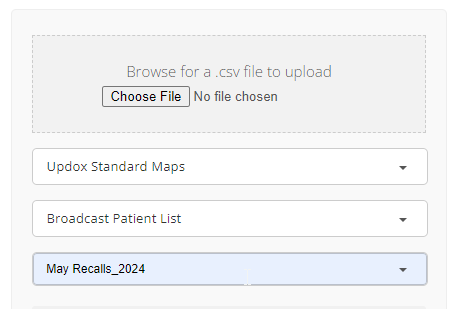
- Choose Broadcast Patient List

- Enter a name for the file
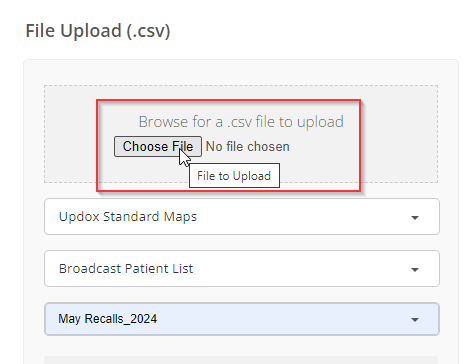
- Choose File from your computer and upload
- Choose Upload File Button
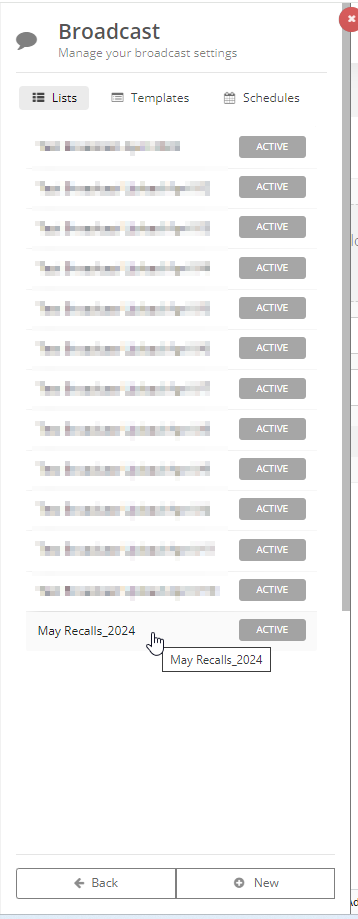
- Verify that your list has uploaded by navigating to Menu > Admin > Broadcast Configuration
Creating a Broadcast Message
The Updox Broadcast tool will allow you to send one-way messages to a list of patients from your uploaded Recall List.
Please read how to send a Broadcast Message from the Updox system here.
Creating a Broadcast Template
Broadcast templates are messaging templates with pre-set text to make sending common messages quick within Updox.
Please read how to create a Broadcast Template from the Updox system here.


