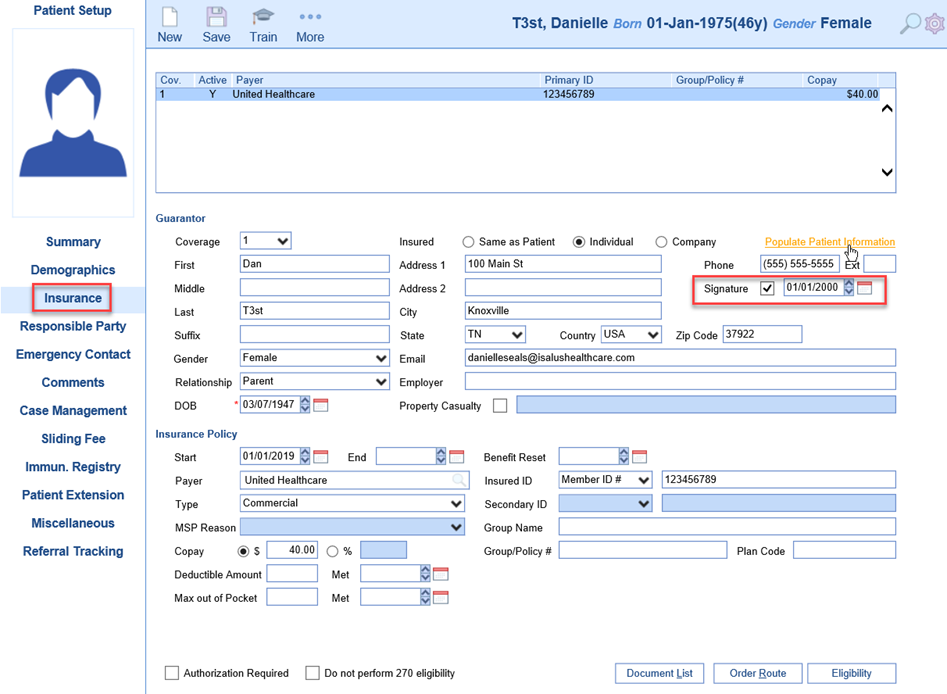
Adding Guarantor
When adding an insurance to a patient account, sometimes the Guarantor is someone other than the patient. There are a few fields necessary to set this up properly to prevent billing issues.
- From the Patient Setup screen, select the Insurance tab. Always select New to add a new insurance.
- Flip Coverage to appropriate designation depending on whether it is primary, secondary, or tertiary.
- Add start date, payer, Insured ID and any other necessary information.
- If Guarantor is the patient, select Same as Patient. If it is an individual other than the patient, select Individual.
- If Guarantor has the same demographic info as the patient, select Populate Patient Information. Edits can be made to fields if needed.
- By default, Signature will only prepopulate if Guarantor is the same as patient. When adding a different Guarantor, it is necessary to check the Signature box and add the date. Typically, this will be the same date the patient signed, or the policy start date. If the signature box is not checked, this will cause claims to fail.
- It is also critical to fill in the relationship to the Guarantor and the DOB.