
Payers are the insurance companies that are used to bill electronic and paper claims to for reimbursement of services provided. The Payer Search screen can be accessed by opening the Setup portal and clicking on Payers under Billing Setup. A user can then search for a payer and open the Payer Setup screen. The Payer Setup screen can be used to:
Edit Existing Payers
Configure Claim Submission settings
Set ERA override information for deposit posting
Payer Window Buttons
- New: Clicking the New button allows the user to Add a New Payer
- More: Clicking the More button gives the user the options to view Clearinghouse Payers, open the Advanced Search Screen, set Order Routes, configure Lab Bill Codes, set Payer ERA overrides, or Remove Unused Payers
- Search (Magnifying Glass): Clicking the Search button opens a search box to allow the user to search for and open a specific payer
Payer Setup Screen

Summary
The Payer Setup Screen opens to the Summary tab. The Summary allows you to see all of the settings quickly that have been configured on the other tabs. You can switch to the other tabs by clicking on the section of the summary you wish to go to or by clicking on the tab name on the left side.

Demographics
The Demographics tab allows the user to enter address information specific to the practice. In addition the financial class, reporting class, and active indicator are all found here as well.

Contacts
The Contacts tab allows the user to store a primary and secondary contact for the payer.

Submission
The Submission tab allows the user to customize settings that will be used in both electronic and paper claims. Here you enter the payer id for the clearinghouse, define how primary/secondary claims will be billed, set the Source of Pay, etc. In addition secondary identifiers can be turned on as deemed necessary by the payers. In the flags section the user will find several boxes that must be turned on for billing (Billable, Use NPI) as well as option to turn on Auto-Post ERAs for the payer.

Electronic (837)
The Electronic (837) tab allows the user to configure settings specific to electronic claims.

Paper (CMS)
The Paper (CMS) tab allows the user the configure settings specific to paper (printed) claims.

Authorization
The Authorization tab allows the user to set authorization requirements and set an Alternate Payer Name.

Eligibility
The Eligibility tab allows the user to disable eligibility checks, set a payer id to be used only for eligibility checks, and to set the NPI location by payer.
New Payers must be entered into the system as patients come in with insurance plans that may not already be in the system. The payers must be added to the database so that claims can be billed to the insurance companies.
Workflow
- Open the Setup portal and under the Billing Setup section select Payers.


- Click the New button on the toolbar to open the New Payer window. Choose the method for entering the new payer.
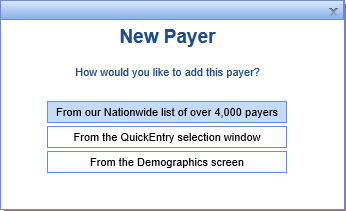
- From our Nationwide list of over 4,000 payers - This method will allow you to search for your payer and preload the demographics accordingly. For electronic payers this is the recommended method.
- Enter your search criteria and then pick the payer from the Search Results list
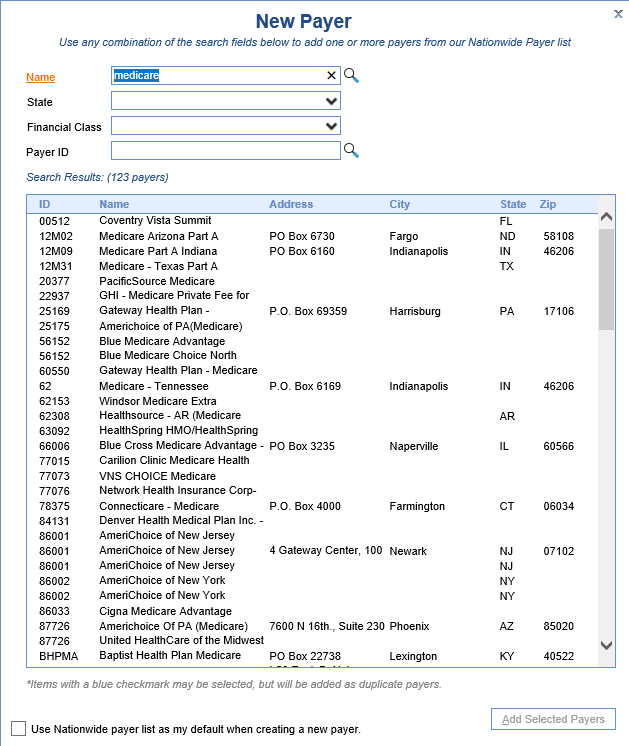
- Click Add Selected Payers at the bottom of the screen.
- Review each of the tabs and make changes as necessary.
- Enter your search criteria and then pick the payer from the Search Results list
- From the QuickEntry selection window.
- Enter the required fields marked with a red asterisk and then click Add New Payer.
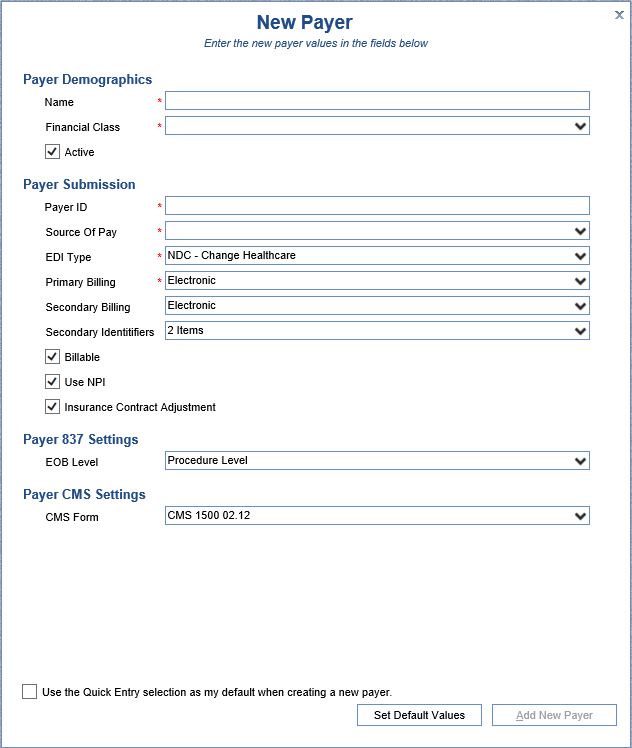
- Review each of the tabs and make changes as necessary.
- Enter the required fields marked with a red asterisk and then click Add New Payer.
- From the Demographics screen.
- Enter the required information at a minimum and then click the Save button at the top of the screen.
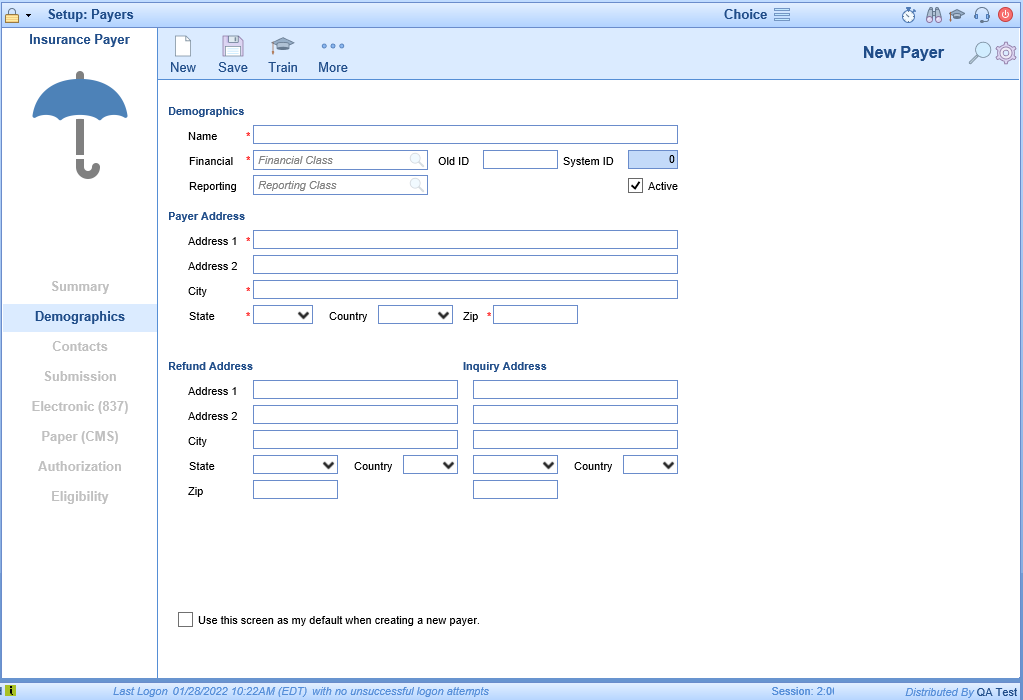
- Review each of the tabs and make changes as necessary.
- Enter the required information at a minimum and then click the Save button at the top of the screen.
- From our Nationwide list of over 4,000 payers - This method will allow you to search for your payer and preload the demographics accordingly. For electronic payers this is the recommended method.


The Payer ERA Amounts setup window is used to override the default settings found in ERA Adjustment Reasons Setup. These overrides will allow the the user to set specific rules for how the system is to function when it encounters a specific adjustment code for a specific payer.
Screen Layout and Definitions
Adjustment Reason Code List
The screen allows a user to change the workflow for each Adjustment Reason Code received. In the ERA, the Adjustment Reason Codes are provided in the 835 EDI FIle (Loop: 2110, Segment: CAS) by the payer. In the EOB, the Adjustment Reason Codes are usually listed procedure information.
In both the ERA and EOB, the Adjustment Reason Code is often paired with the Adjustment Group (CO, OA, PR, PI). You will notice that the system does allow for the Group to be specified. However, this is only necessary to configure if the code is treated differently because the group is included. For example, if a PR-22 and a PI-22 do the same thing, then you only need to setup the rules for a '22'.
Adjustment Reason Code Values
For each Adjustment Reason Code, the following can be specified:
- Group: An Adjustment Group can be added to an Adjustment Reason Code if it is necessary to treat the code differently because of the group.
- Denial Indicator: This flag indicates that this code/group combination is considered a denial reason. This will be utilized for reporting purposes.
Once the standard code details are configured, the Claim Status, Claim Level, and Payment types can also be configured. You will notice that you have the ability to modify these values for various Processing Levels.
- ERA Status: This is the Processing Level receiving on the ERA/EOB. In the ERA, the Processing Level is provided in the 835 EDI FIle (Loop: 2100, Segment: CLP02) by the payer. In the EOB, the Processing Level is usually listed with the information at the claim level.
- Claim Status: This value dictates that if the selected Adjustment Reason Code is received, the Claim Status will be overwritten and set to the value provided. If the 'Primary Claims' value is set, this will be treated as the Default for the other levels. If no value is set, the Claim Status will not be overwritten.
- Claim Level: This value dictates that if the selected Adjustment Reason Code is received, the Claim Level will be overwritten and set to the value provided. If the 'Primary Claims' value is set, this will be treated as the Default for the other levels. If no value is set, the Claim Level will not be overwritten.
- Payment Type: This value dictates which Payment Type is used for the corresponding Adjustment Amount provided with the Adjustment Reason Code. The 'Primary Claims' value must be set. This will be treated as the Default for all other other levels unless those levels are explicitly set. The Payment Type setup window will determine how that record affects the overall balance of the claim. Learn more here: Payment Type.

Workflow
- Open the Setup portal
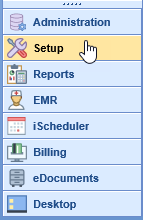
- Click on Payers under Billing Setup to open the Payer Search screen
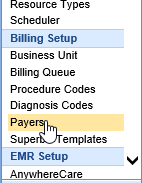
- Search for and open a specific Payer

- Click the More button and select Payer ERA Overrides
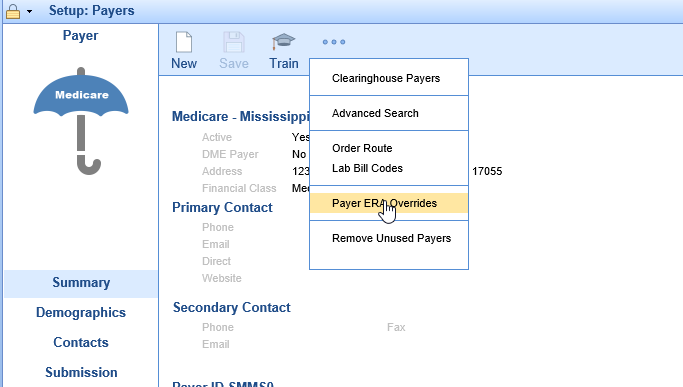
- Enter the Adjustment Number in the Reason field
- Set the Adjustment Group
- Check the Denial Indicator only if this code is viewed as a Denial code for this payer
- Enter the ERA Status This is the payment level that the rule will apply to
- Enter the Claim Status - This will be the claim status that is applied to the claim
- Enter the Claim Level - This will be the claim level that is applied to the claim
- Enter the Payment Type - This will be the payment type that is used to post the adjustment reason
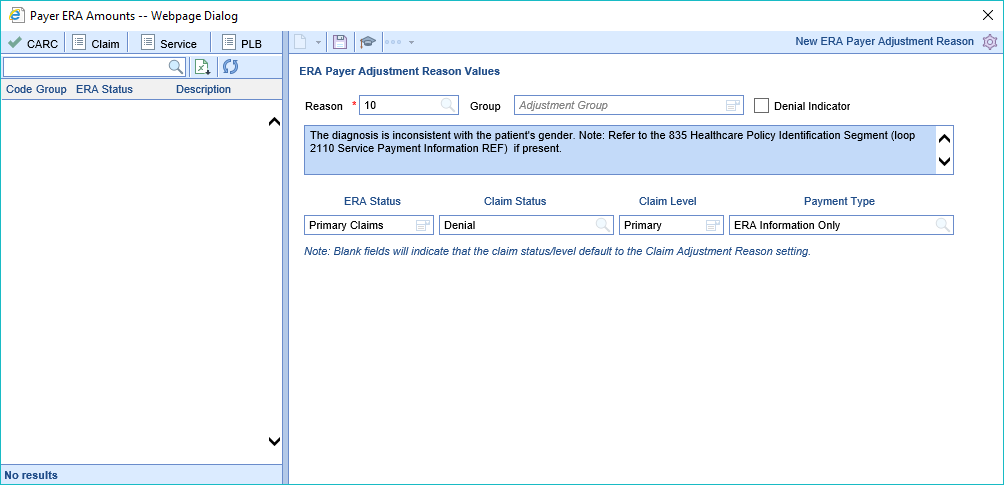
For Claim Status and Claim Level blank fields will indicate that the claim status/level default to the Claim Adjustment Reason setting.

Workflow
- Open the Setup portal

- Click on Payers under Billing Setup to open the Payer Search screen

- Search for and open a specific Payer

- Click on Submission from the tab list
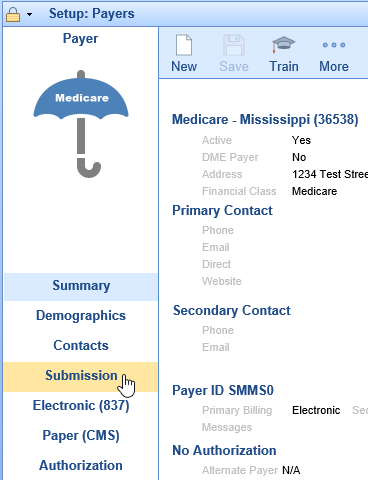
- Set the desired value in Auto Post Deposit to enable Auto Posting for the selected Pay
Valid values are: -1 = Do NOT auto-post, 0 = Auto-Post when ERA deposit is created, +n = Number of days (ie: 2 = two days, 3 = three days, 14 = fourteen days) to delay until ERA is auto-posted; the date being checked will be the Deposit Date.


