Request an Intelligent Intake Demonstration
Your first step towards implementing this in your practice is to see this in action by requesting a demonstration. Once submitted our team will reach out to you to coordinate a time. After the meeting, you will be asked to provide your current forms so that an estimation of effort can be made and the matching agreement. Once the contract is returned, we will begin the configuration process.
Work with Implementation to Configure Forms and Train Staff
Depending on the complexity, the implementation phase typically takes 1-2 weeks concluding with staff training for both Front Office and Clinical staff prior to go-live with your new feature. This time will also be used to train administration team member(s) on how to setup the intake values moving forward. The areas that require our help to modify are clinical templates and letters. Following the Implementation phase, these types of requests will be made through a template change request form.
Depending on how and when you want your patients to complete the forms you may need to acquire additional hardware for patients to use in the waiting room or clinic (for procedure consents).
You can find our hardware recommendations on the iSalus Healthcare website. The iPad Setup.pdf is required before they are ready to be used.
There are several security role settings that need to be added to the appropriate roles before your practice can implement the intelligent intake forms. They are as follows:
Setting Intelligent Intake Permissions - Role Setup
- Click on the Setup portal.

- Select Roles under Administrative Setup.
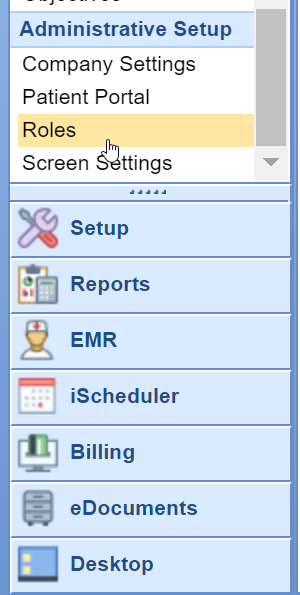
- Type Intake Assignment into the search box and hit the Magnifying Glass button.

- The Practice - Patient Intake - Setup - Intake Assignment role should return and be selected. Assign Write access to all roles.
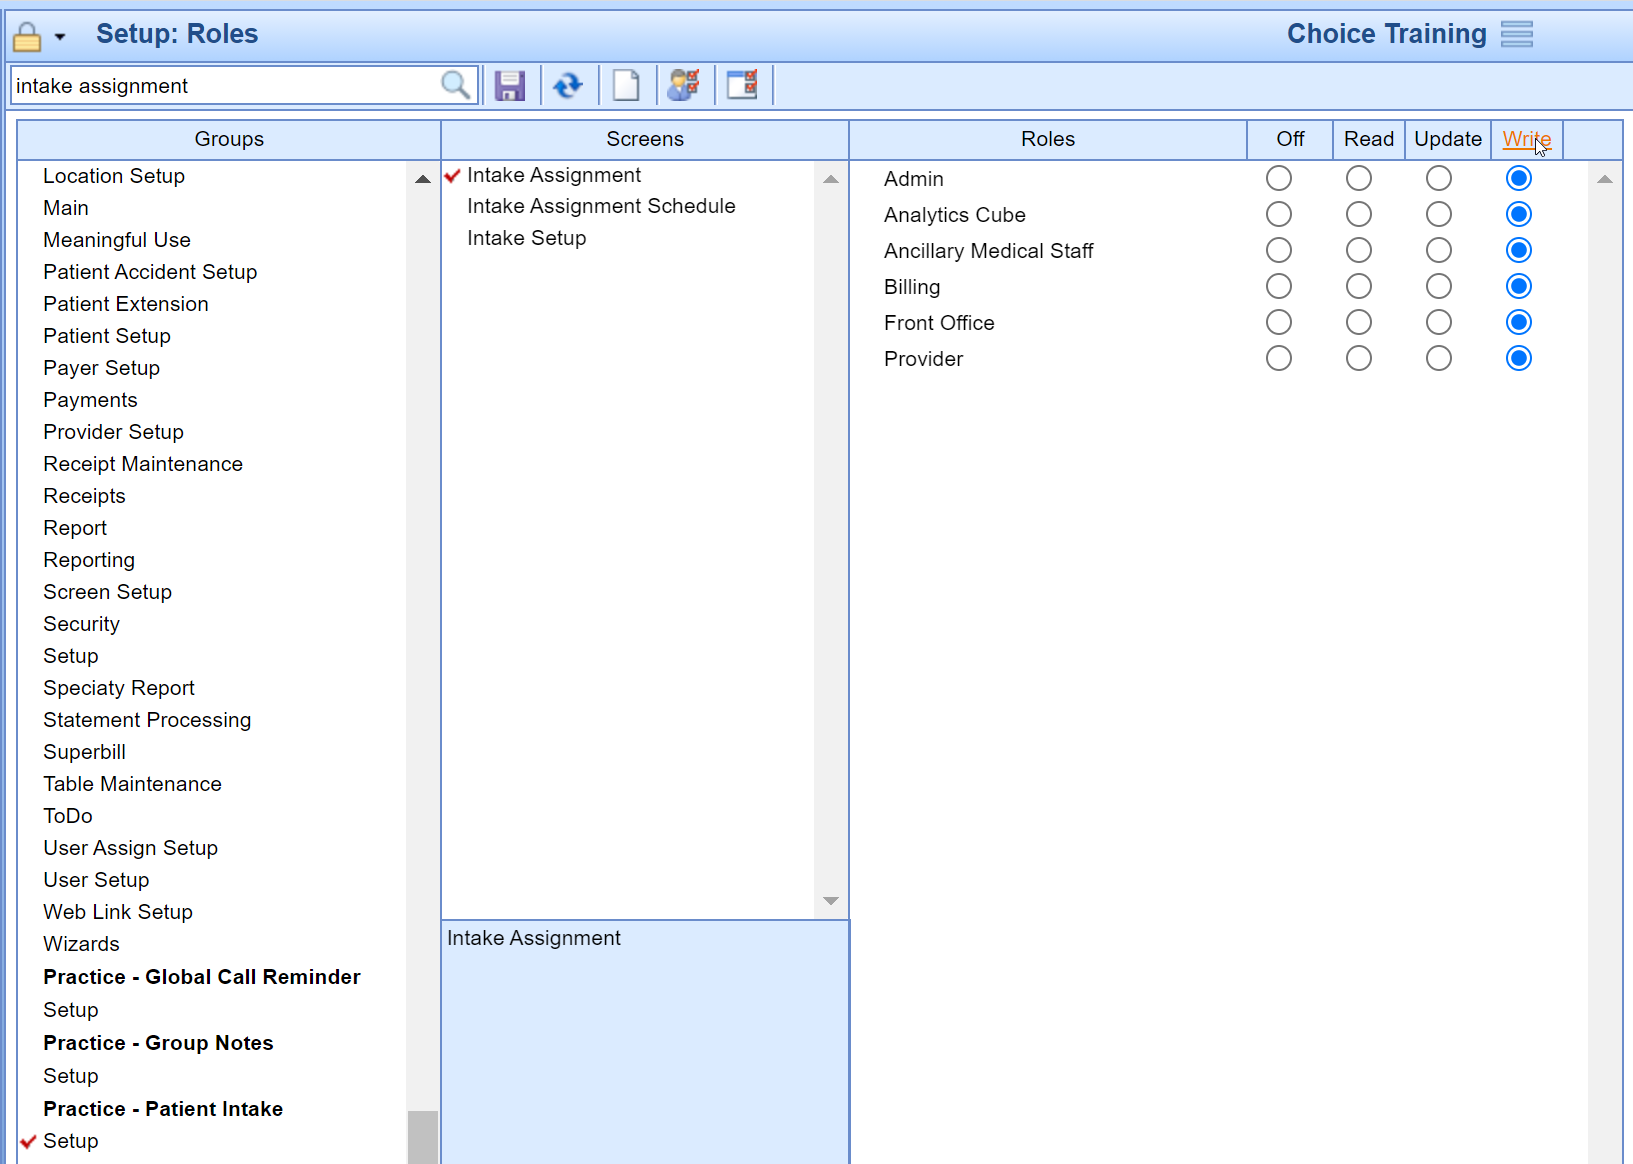
- Click on the Practice - Patient Intake - Setup - Intake Assignment Schedule Role screen. Assign Write access to the appropriate Admin, Front Office and Call Room Roles.

- Select the Practice - Patient Intake - Setup - Intake Setup Role screen. Assign Write access to the appropriate Admin and Intake Coordinator Roles.

- Type in Patient Portal into the search box and hit the Magnifying Glass button.
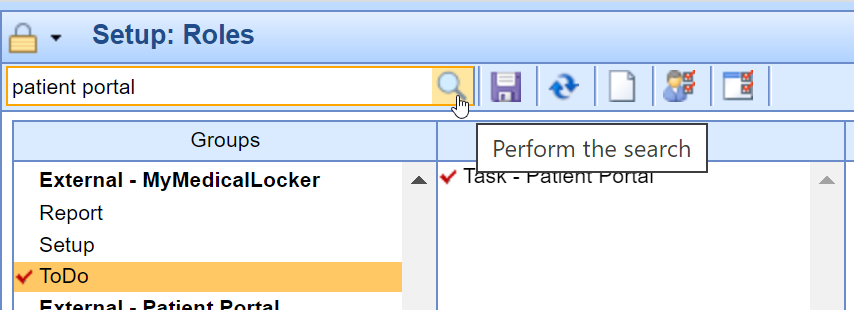
- The Task - Intelligent Intake role should be selected. All MML Patient Intake submissions are submitted to the Task Intake queue. Assign Write access to the appropriate role/s that should work this queue. Often, a new individual role is created to assign this security access. This allows the practice to individually select which users at the practice have access to the queue instead of all ancillary medical staff getting access.

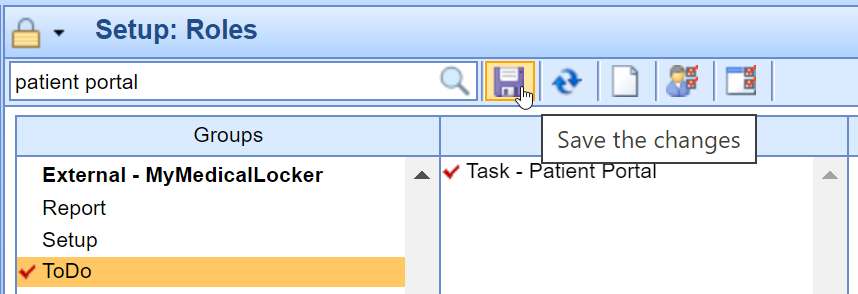
- Press the Save button to save your changes.
To setup or modify a new Letter/Signature Form and/or templates used during the Intelligent Intake process, please reach out to our support team through a template change request form.
Follow these steps to access the Intelligent Intake Setup screen and create a new or modify an existing intake form:
- Click on the Setup portal.

- Under the MML Setup section, select the Intake Setup option.

- The screen will load ready to create a new Intelligent Intake form.
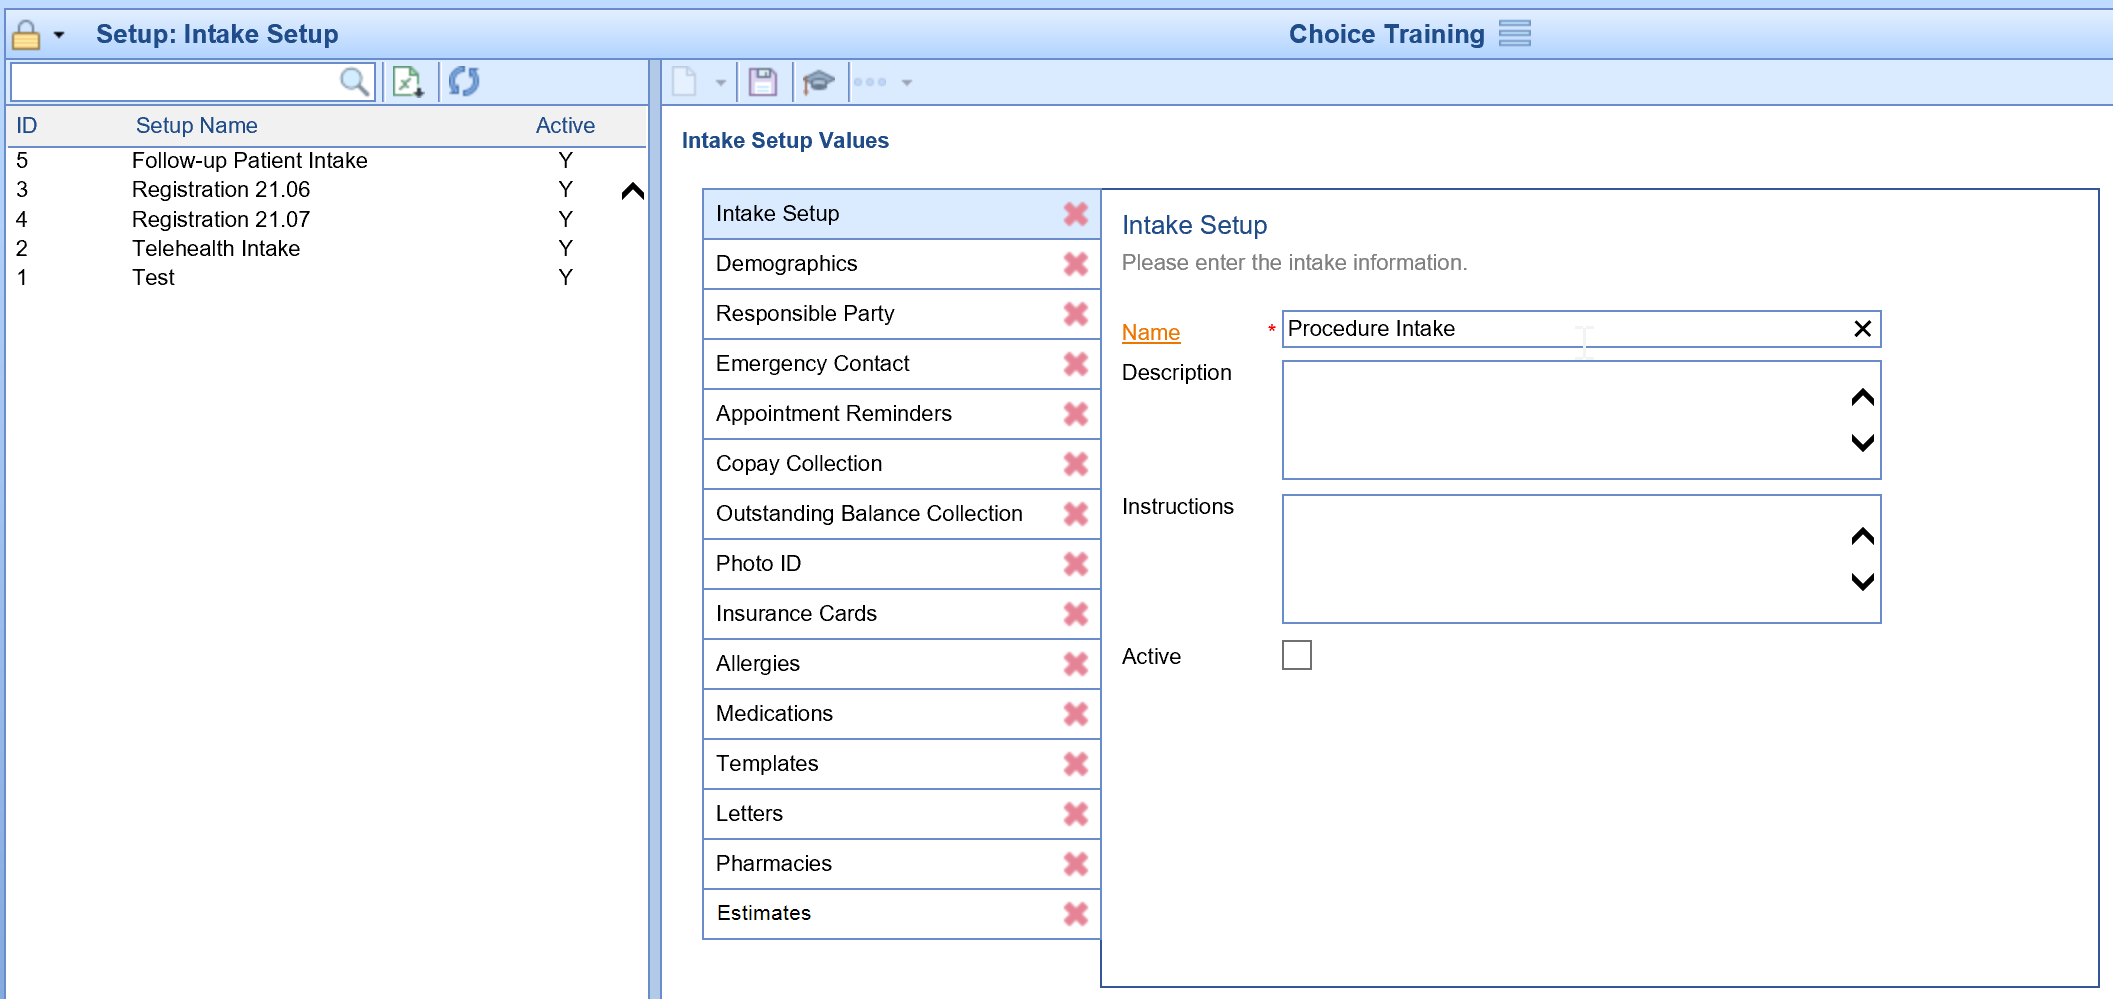
- To modify an existing intake form, click on the Intake form you wish to setup.
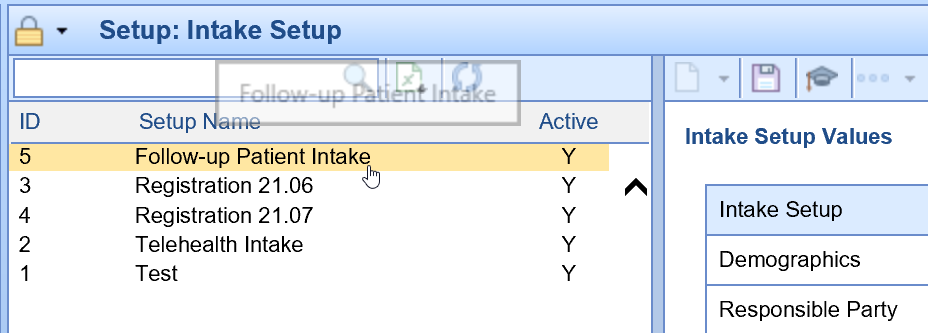
To create a new Intake form that can be assigned to patients and appointments, follow the steps below:
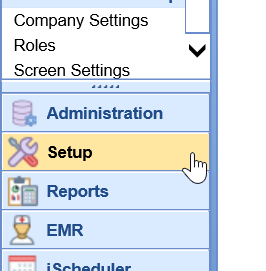
- Navigate to the Setup portal.
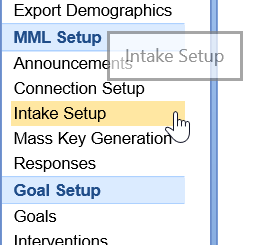
- Select Intelligent Intake from the list of setup screens.
- By default, the work area on the right will be blank. If it is not, click the New button.
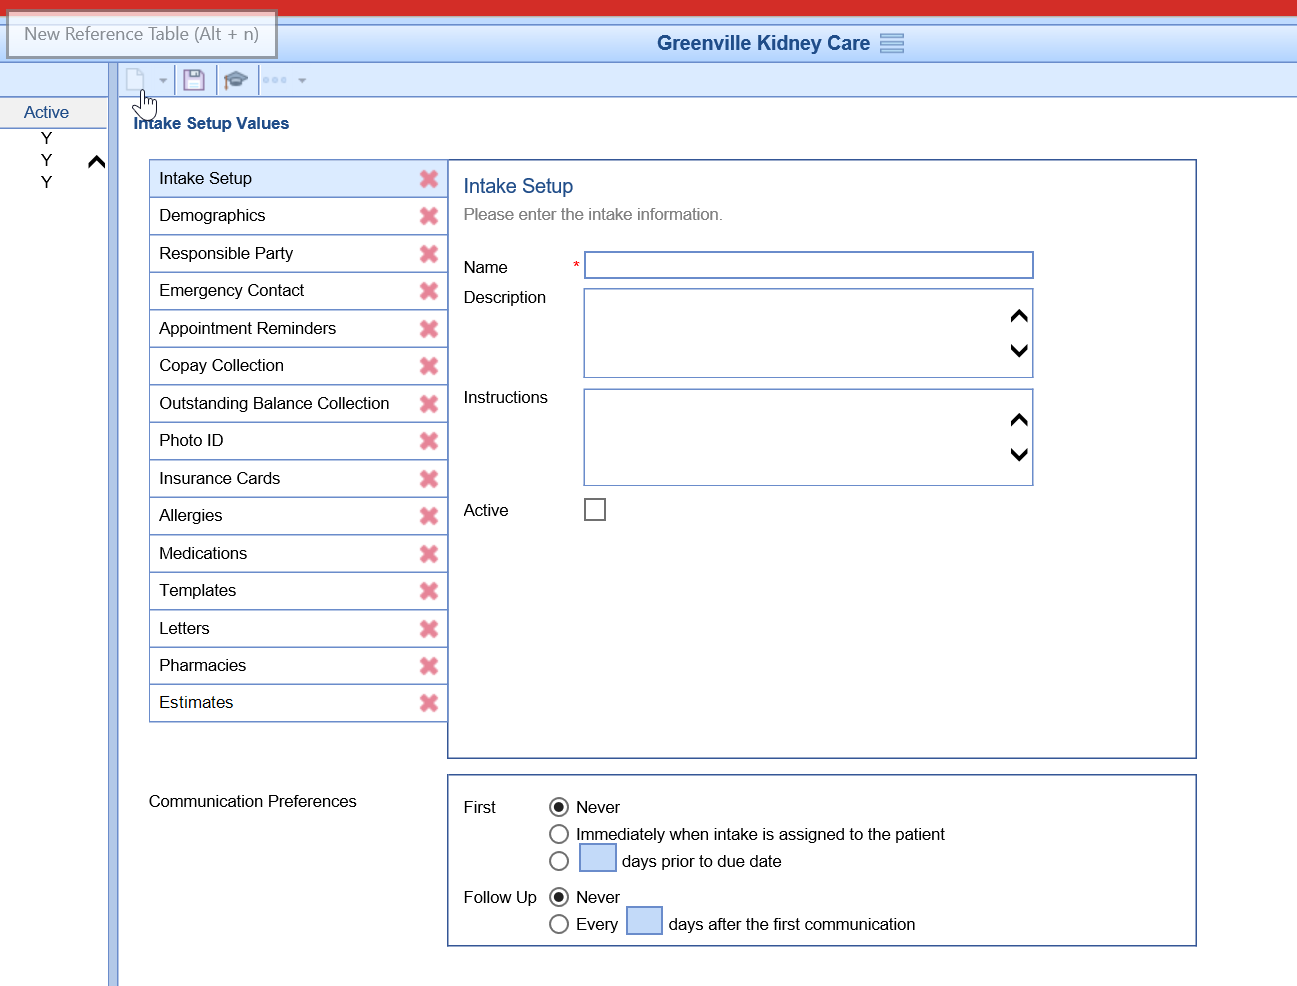
- Give the Intake form a Name, Description for when it's used, Instructions for the patient, and select the Active checkbox.
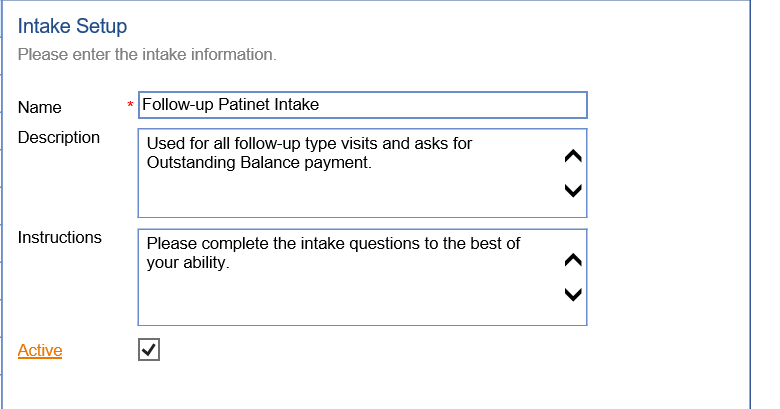
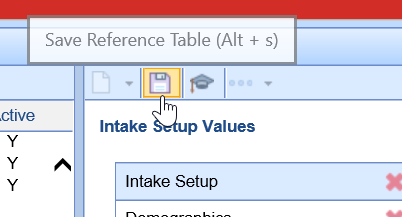
- Click the Save button to create the intake form.
- You are now ready to setup the intake form's fields.
Intake Setup Field Definitions
- Name: This is the name of the intake. This is seen by the patient when completing the intake. This is also seen by the practice staff when assigning the intake.
- Description: This is an internal description of this intake and is used to provide guidance to the staff on when/how this is used within your workflow.
- Instructions: These are instructions for the patient. They will show up when completing the intake.
- Active: The active indicator determines if this intake is available to assign to appointments and/or patients.
Follow these steps to setup a new Intelligent Intake form:
- Create a new Intelligent Intake form.
- Click on the Demographics section tab.
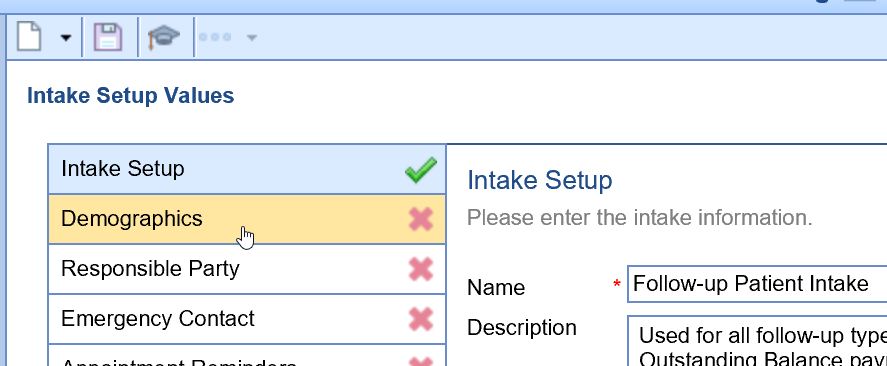
- Select the Yes option to request patient demographics for this intake form.

- Check the Auto Merge checkbox to automatically merge the demographic information captured in this intake form into the patient's chart. If you prefer to review the demographics captured on this intake before merging, keep the Auto Merge checkbox de-selected.

- Select the Active checkbox next to the demographic fields you wish to capture on this form. When you hover over the checkbox, the individual fields captured will display in a tooltip.
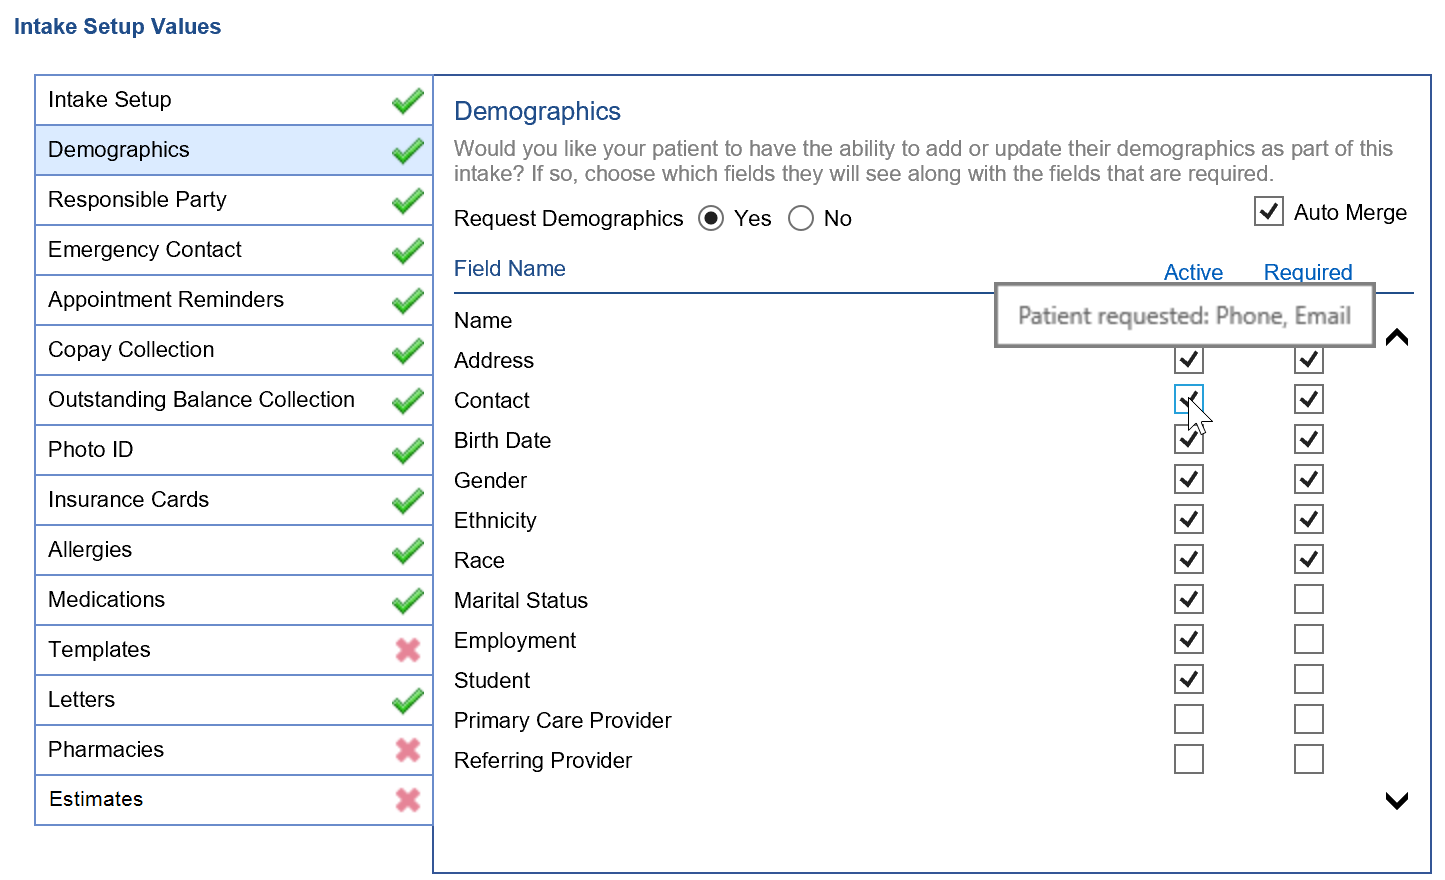
- Check the Required checkbox next to the demographic fields you wish to require on this form.
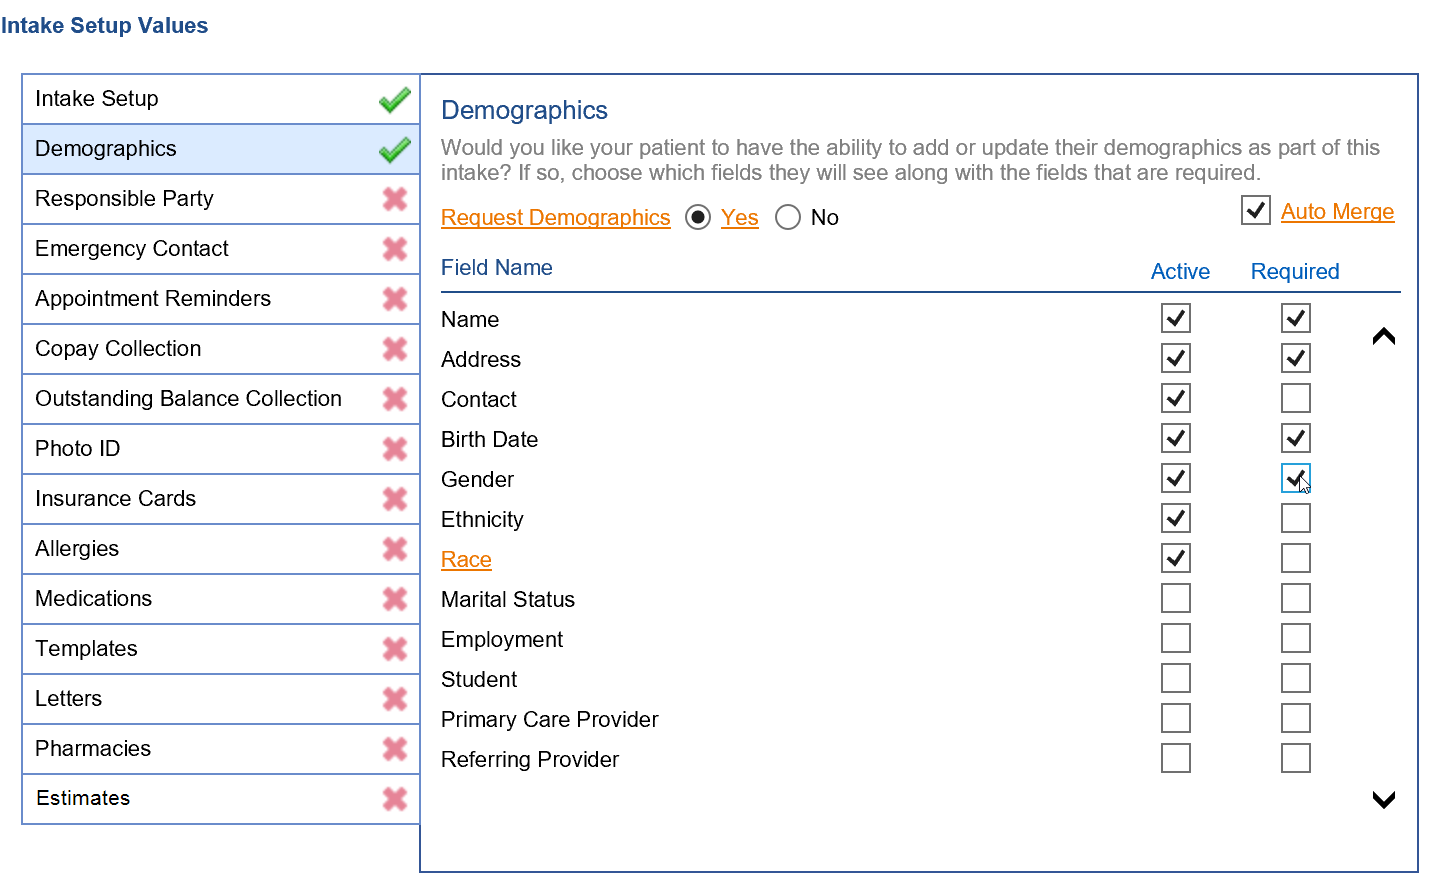
- Repeat steps 6-8 for the Responsible Party, Emergency Contact, Appointment Reminders, Allergies, Medications and Pharmacy sections.
- Click on the Copay Collection tab.
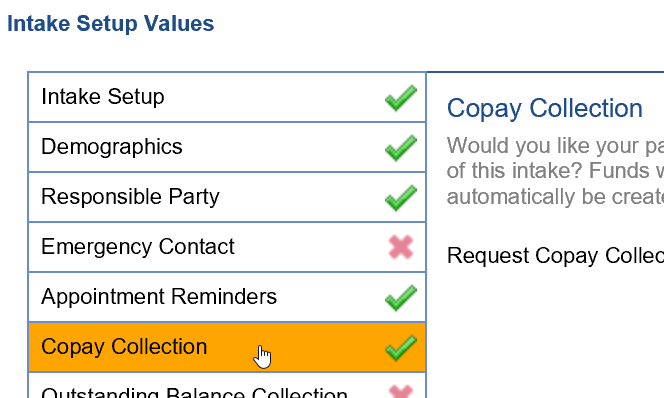
- Select the Yes option to give patients the ability to pay their copay on this form. This requires integrated credit card payment with our vendor PaySimple. See Overview of Credit Card Processing with PaySimple guide to learn more about setting this up.

- Click on the Outstanding Balance Collection tab.
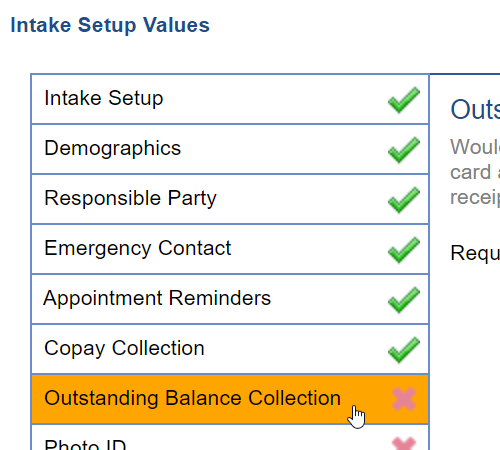
- Select the Yes option to give patients the ability to pay their outstanding balance on this form. This requires integrated credit card payment with our vendor PaySimple. See Overview of Credit Card Processing with PaySimple guide to learn more about setting this up.

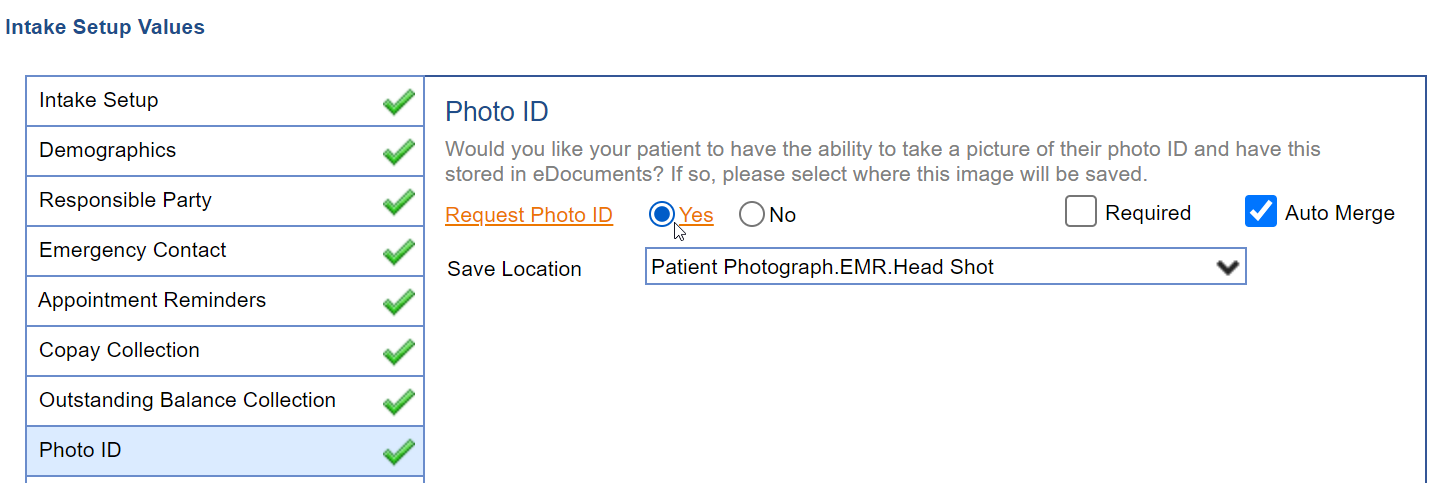
- Select the Photo ID tab. Select the Yes option to request the patient's photo ID. Check the Required checkbox to require the patient's Photo ID. Click on the Auto Merge checkbox to automatically merge the patient's shared photo into his/her chart.
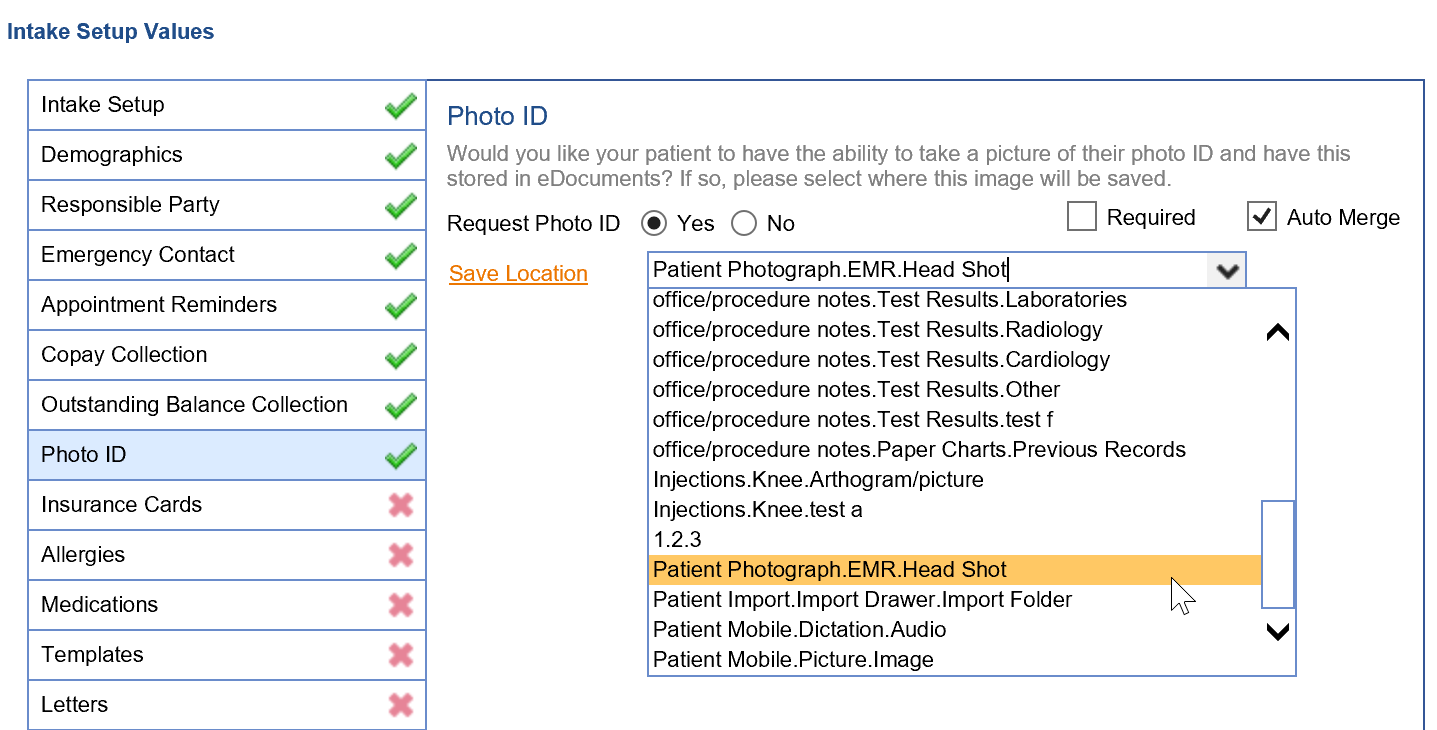
- Set the Save Location to the appropriate eDocuments folder the patient's photo ID should save to.
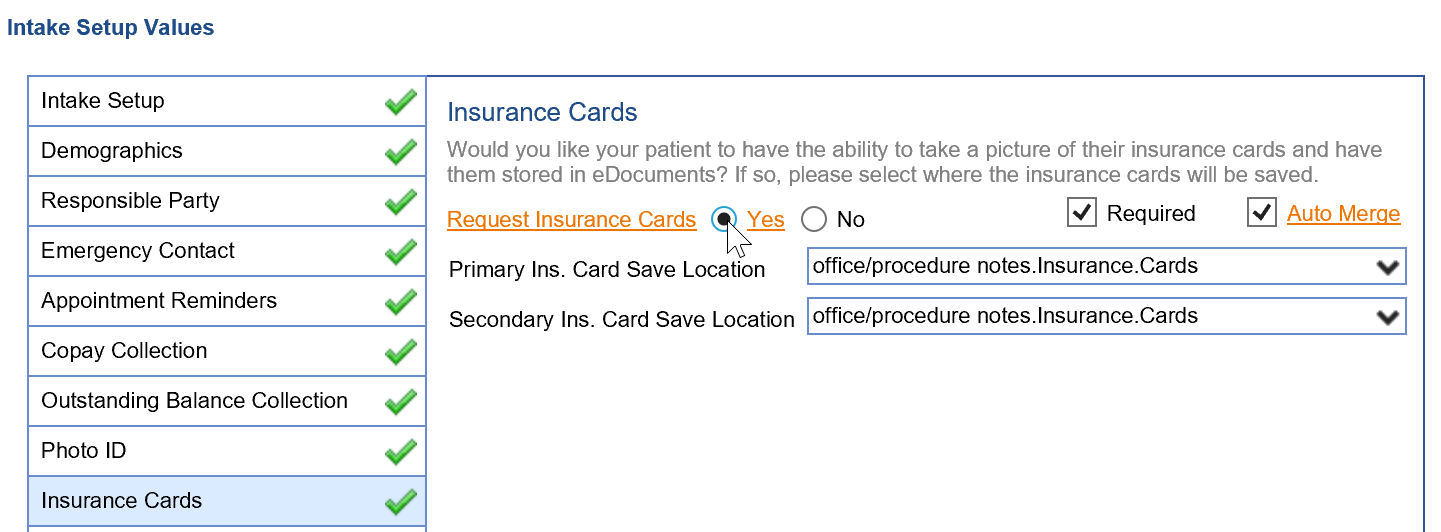
- Press the Insurance Cards tab. Select the Yes option to request the patient's insurance cards. Check the Required checkbox to require the patient's Insurance Cards. Click on the Auto Merge checkbox to automatically merge the patient's shared insurance cards into his/her chart.
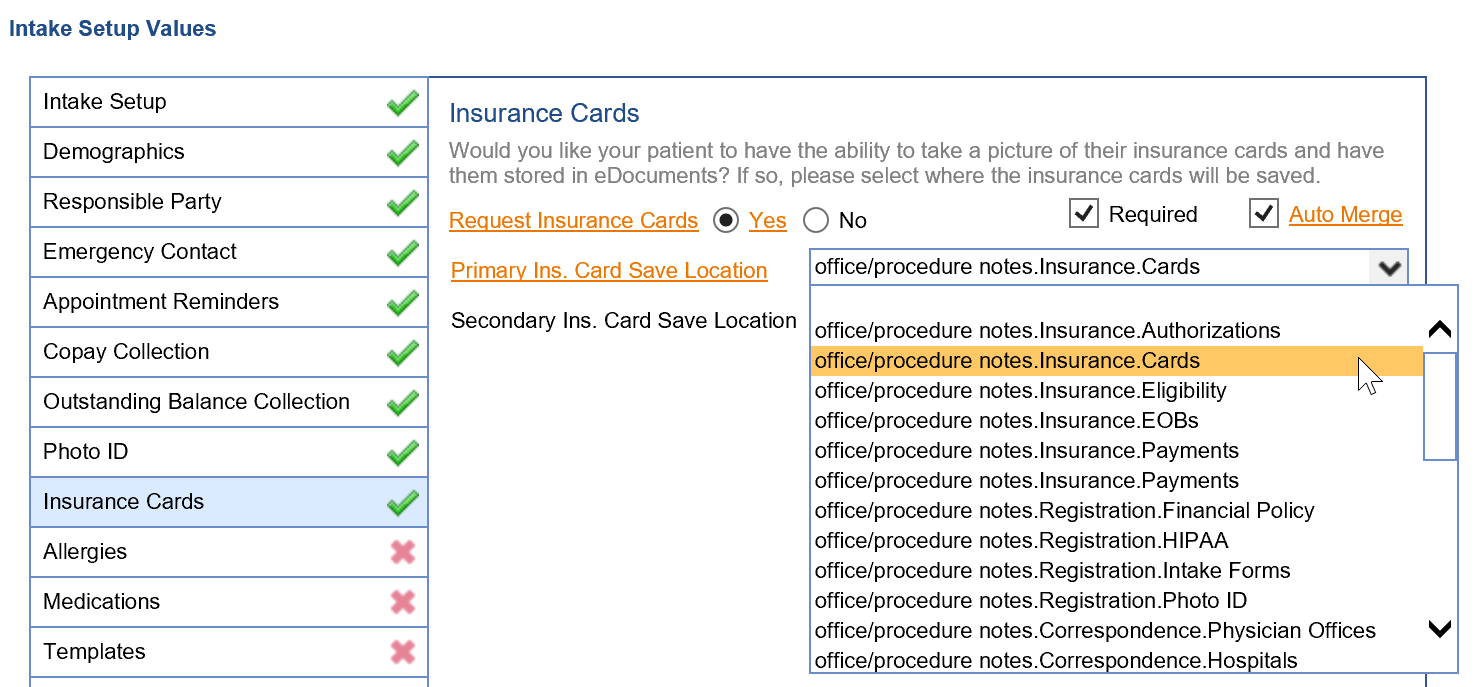
- Set the Primary Ins. Card Save Location and Secondary Ins. Card Save Location to the appropriate eDocuments folder the patient's insurance cards should save to.
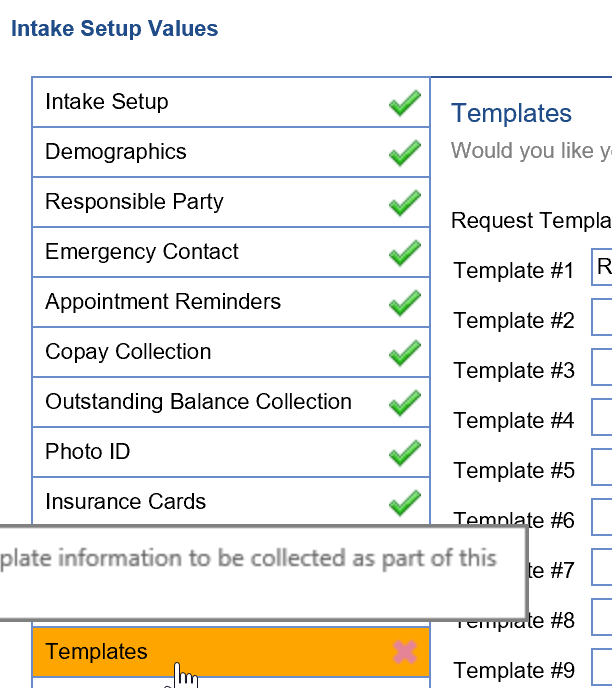
- Click on the Templates tab. This is where practices select which template/s patients need to fill out as part of this intake. Complete a Template Change Request Form to create additional Intake templates.
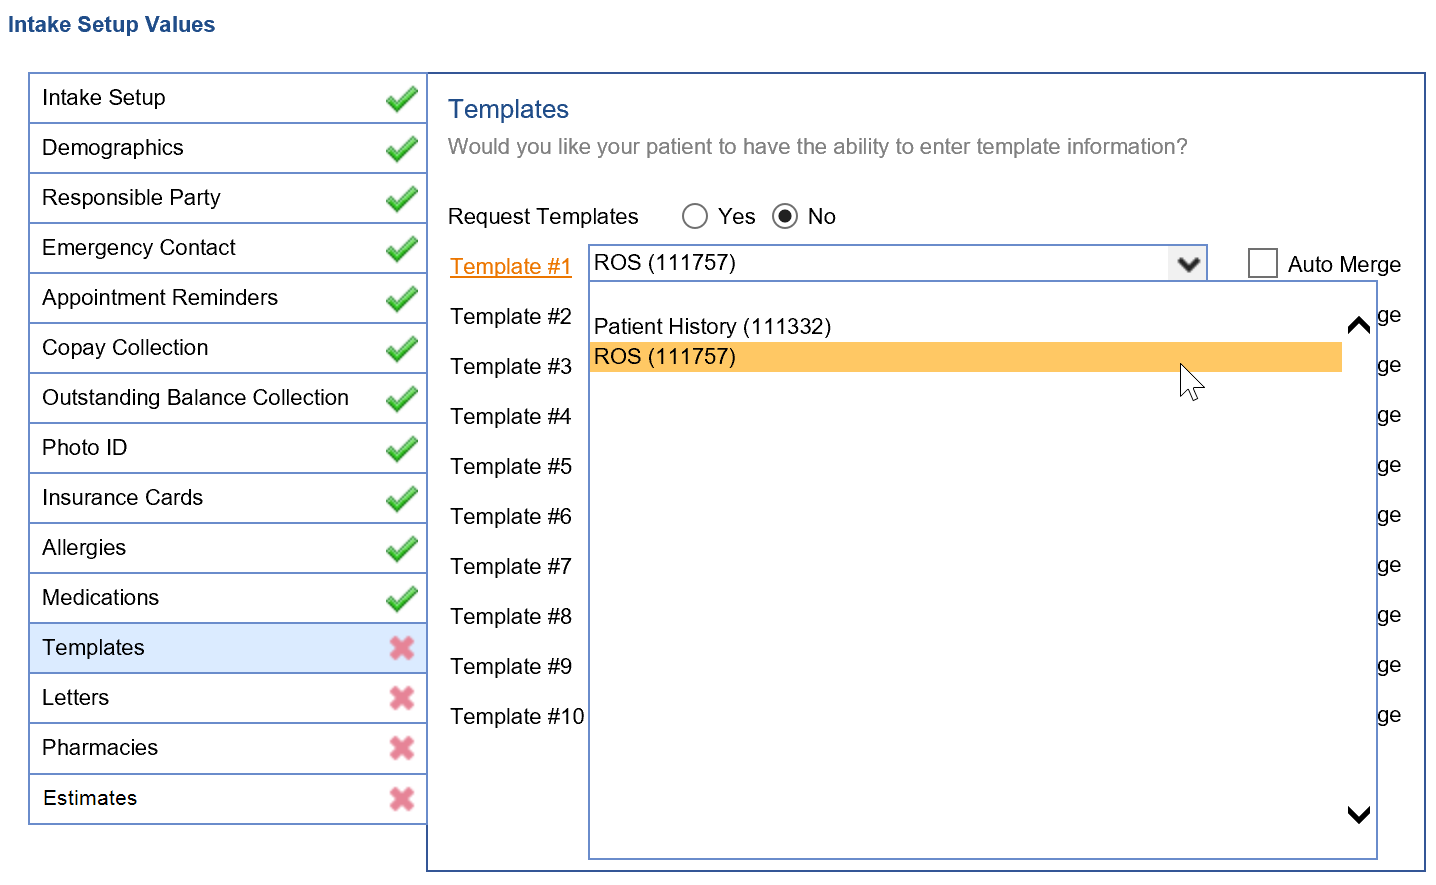
- Select the Template # 1 drop down to select which template/s are a part of this intake. Select the Auto Merge checkbox to automatically merge the collected template data into the patient's chart.
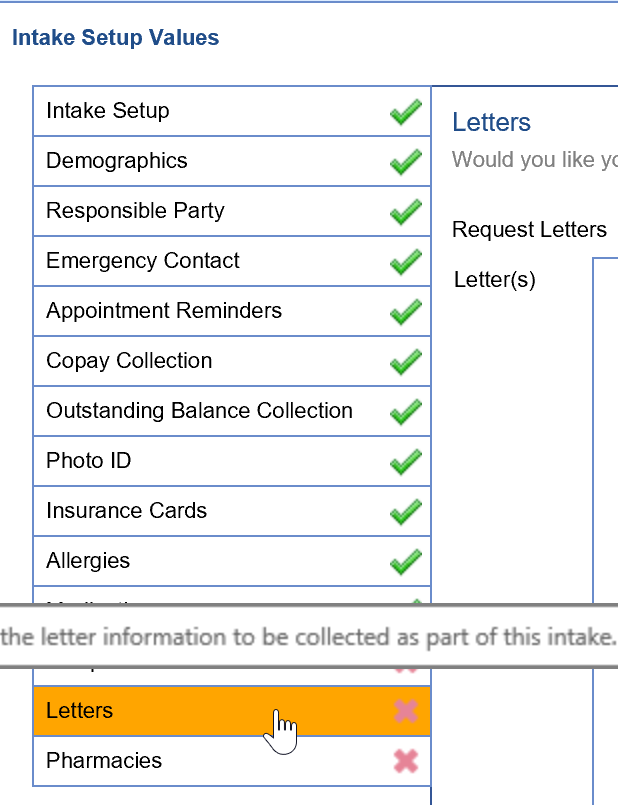
- Click on the Letters tab.
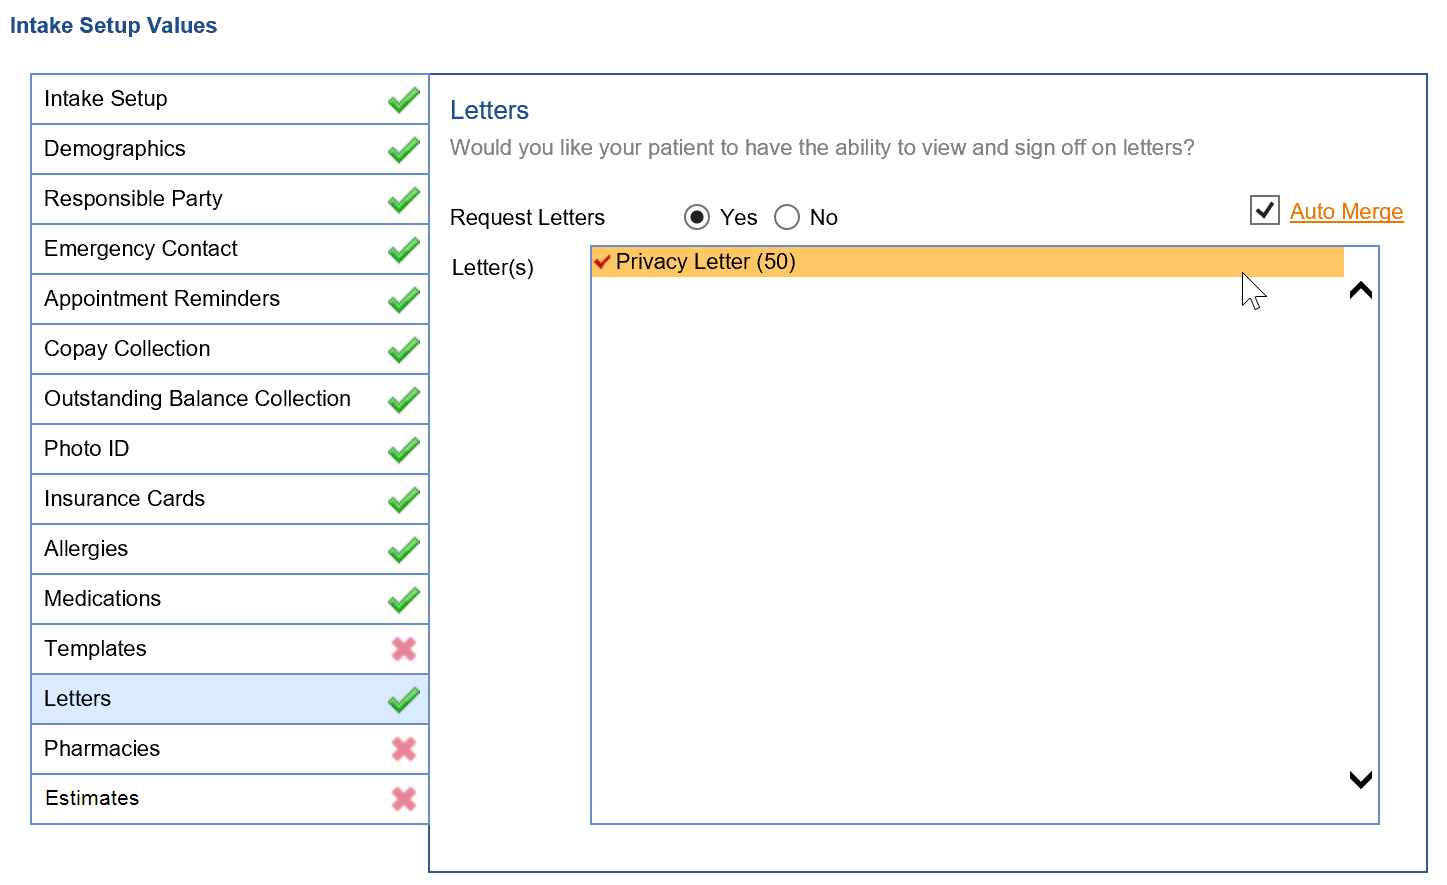
- Set the Request Letters option to Yes to capture patient letters. Then select which Letter(s) you wish to have signed for this intake. Click the Auto Merge checkbox to automatically merge the signed letters into the patient's chart. Complete a Template Change Request Form to create additional Intake Letters.
- Click on the Estimates tab.
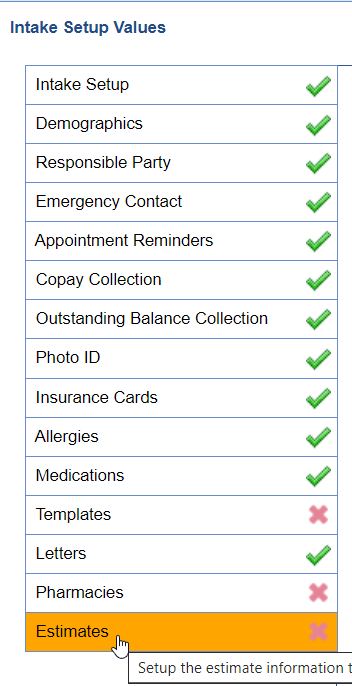
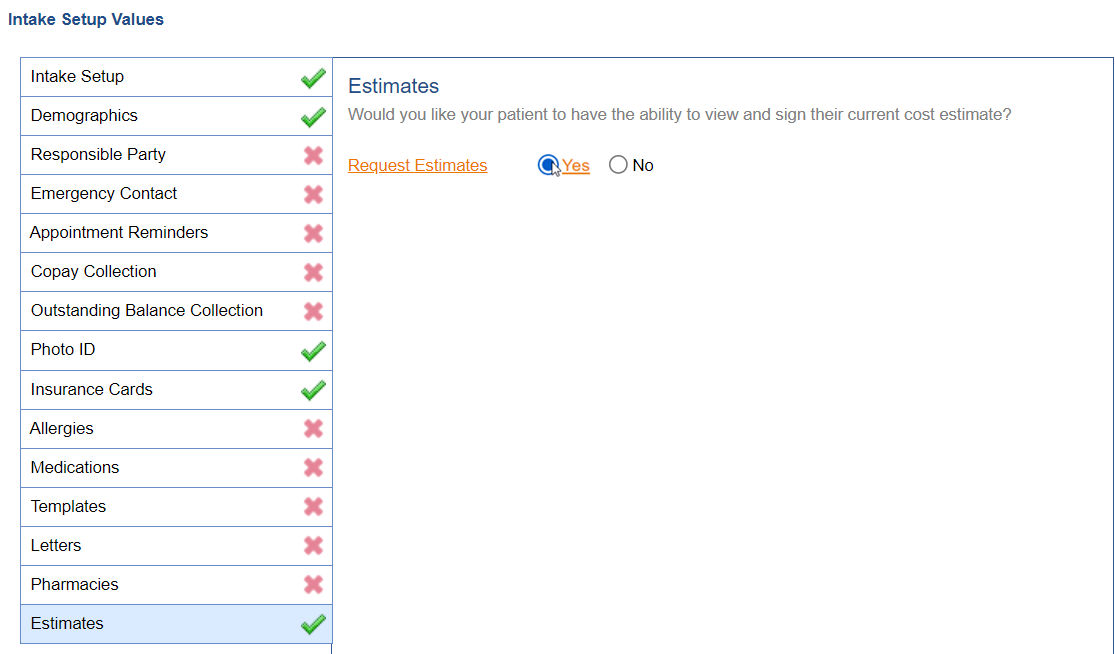
- Select the Yes option to give patients the ability to view their cost estimate(s). In order for the cost estimate(s) to be displayed within the intake the estimate(s) must be in an Accepted status. The patient will than be displayed the estimate that matches the intake appointment date of service. It will also allow the patient to electronically sign the estimate.
- Set the Communication Preferences for the Intake.
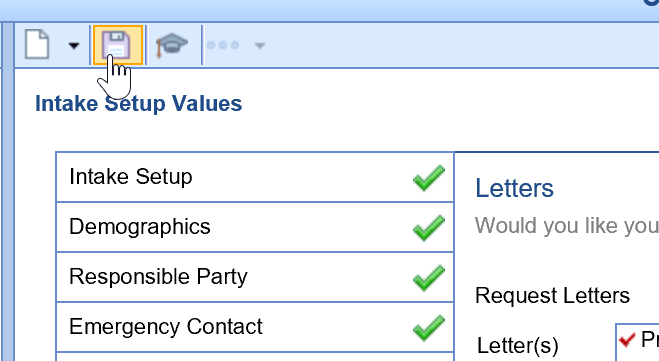
- Press the Save button to save the Intake you just created.
Practices can send patients their intake forms to complete prior to their appointment or specified due date for manually assigned intake forms. These notifications are sent to the patient's MyMedicalLocker account login email or mobile phone as a text message with a link to complete their intake form OR If using the Intake Link it can be sent to the patient's reminder preference.
Follow the steps below to setup/modify an Intake form's patient communication preferences:
- Click on the Setup portal.

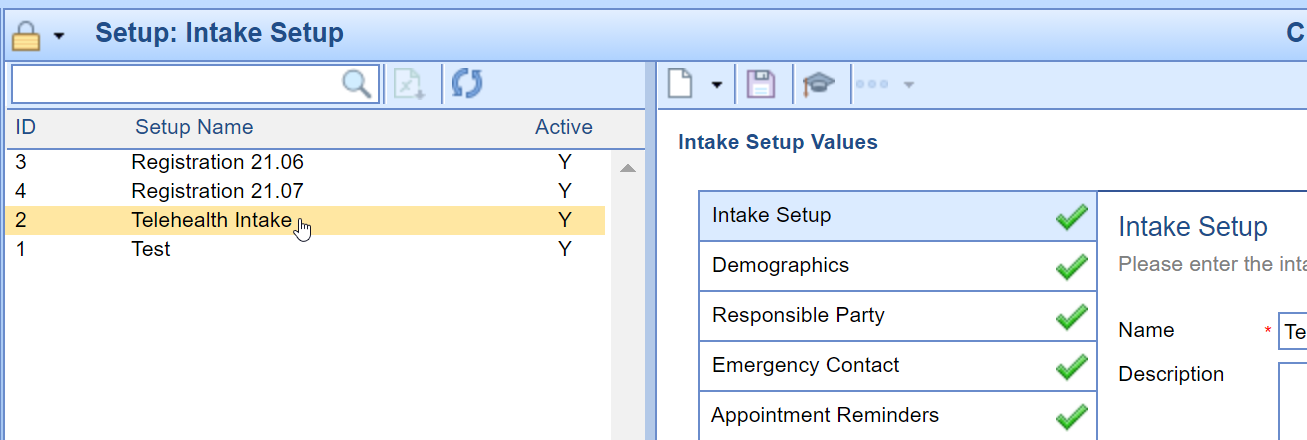
- Under the MML Setup section, select the Intake Setup option.

- Click on the Intake form you wish to setup the patient communication preferences for.
- The Communication Preferences display at the bottom of the Intake Setup Values screen. Choose one of the following options as the appropriate First Communication Preference the patient will receive for this Intake Form:
Never - the patient will not receive an email/text message link to complete his/her intake prior to their visit.
Immediately - the patient will receive an email/text message link to complete his/her intake when the intake form is assigned to the patient's appointment or manually assigned to the patient.
Prior to Due Date - the patient will receive an email/text message link to complete his/her intake the specified number of days prior to the intake's appointment date or manually assigned intake's due date.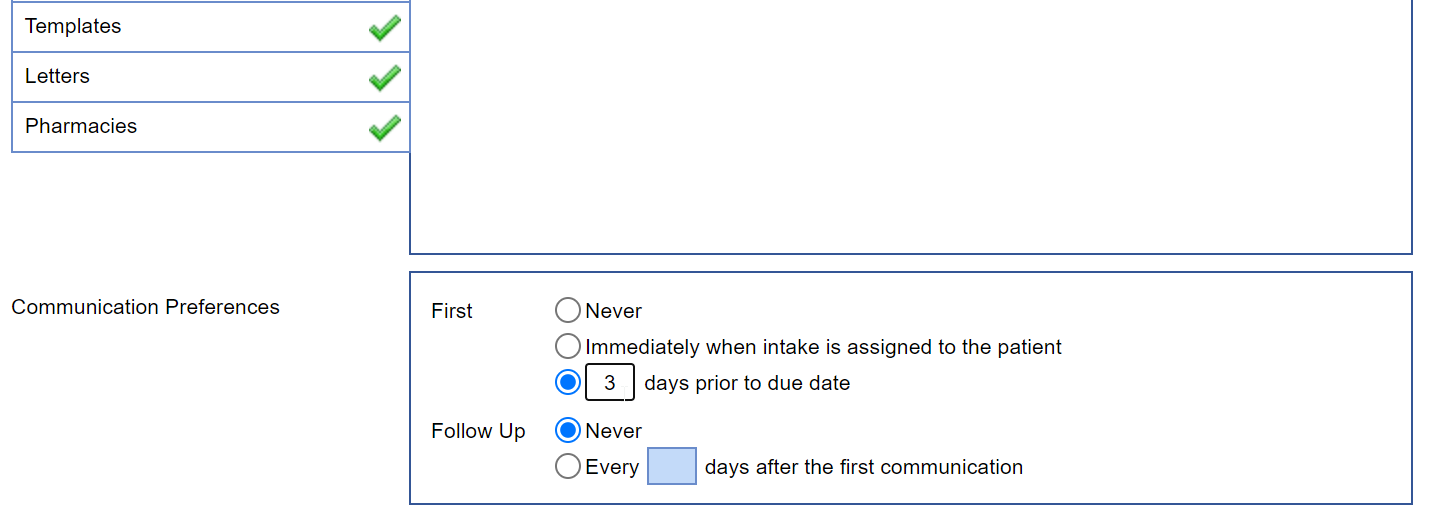
- Set the appropriate Follow-up Communication Preference as one of the following options:
Never - the patient will not receive a follow-up email or text message link to complete his/her intake prior to his/her appointment or manually assigned intake's due date.
Every x Days - the patient will receive a follow-up email or text message link to complete his/her intake every specified amount of days after the initial patient communication is sent out until the patient completes the form or the patient's appointment date or the manually assigned intake's due date occurs.
- Press the Save button.

The application can automatically assign patient intake forms based upon a patient's appointment type. Follow these steps to setup an Intelligent Intake form for an appointment type:
- Click on the Setup portal.

- Select Appointment Types under the Schedule Setup menu.
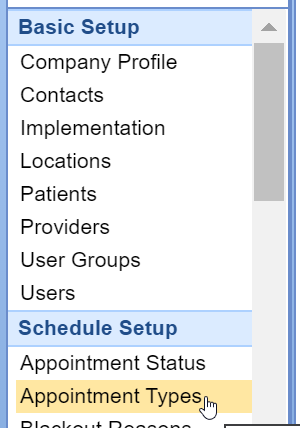
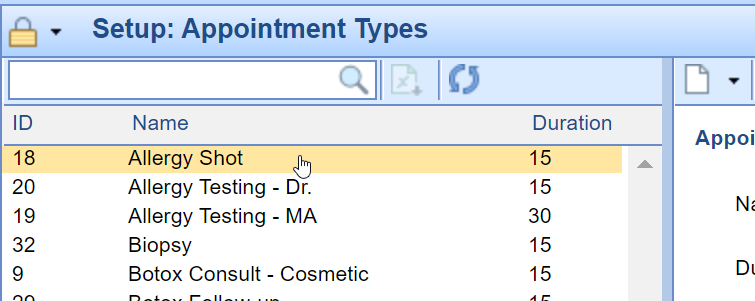
- Click on the Appointment Type to modify.
- Select the Magnifying Glass icon on the Intake field.

- Choose the appropriate Intake Form to assign to the Appointment Type.
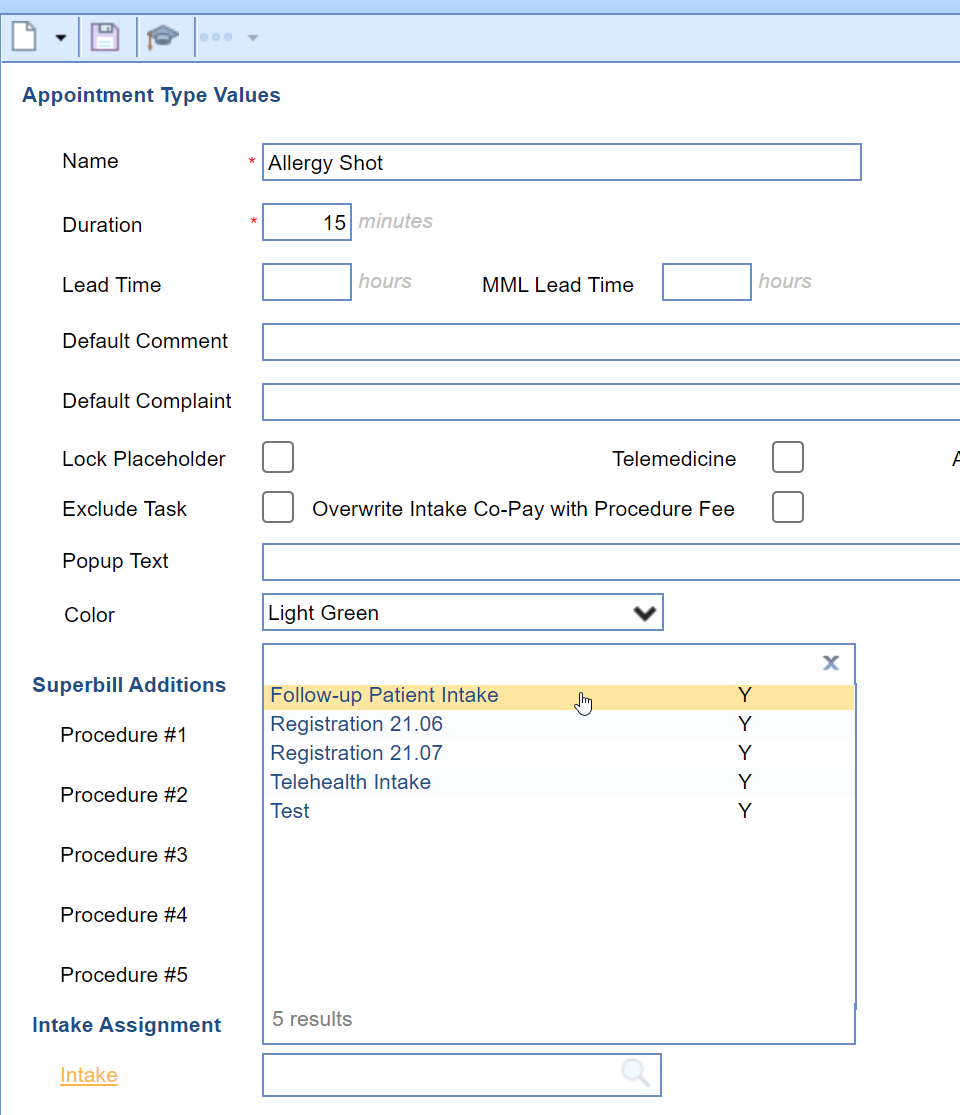
- Press the Save button.
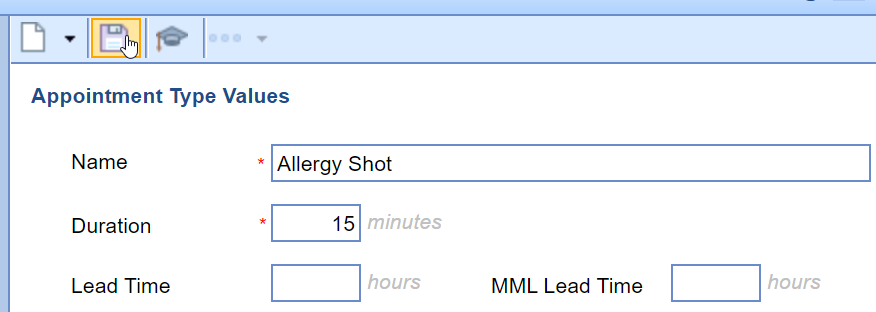
To inactivate an Intelligent Intake form no longer used by the practice, follow these steps:
- Click on the Setup portal.

- Under the MML Setup section, select the Intake Setup option.

- Click on the Intake form you wish to deactivate.

- De-select the Active checkbox in the Intake Setup Tab.
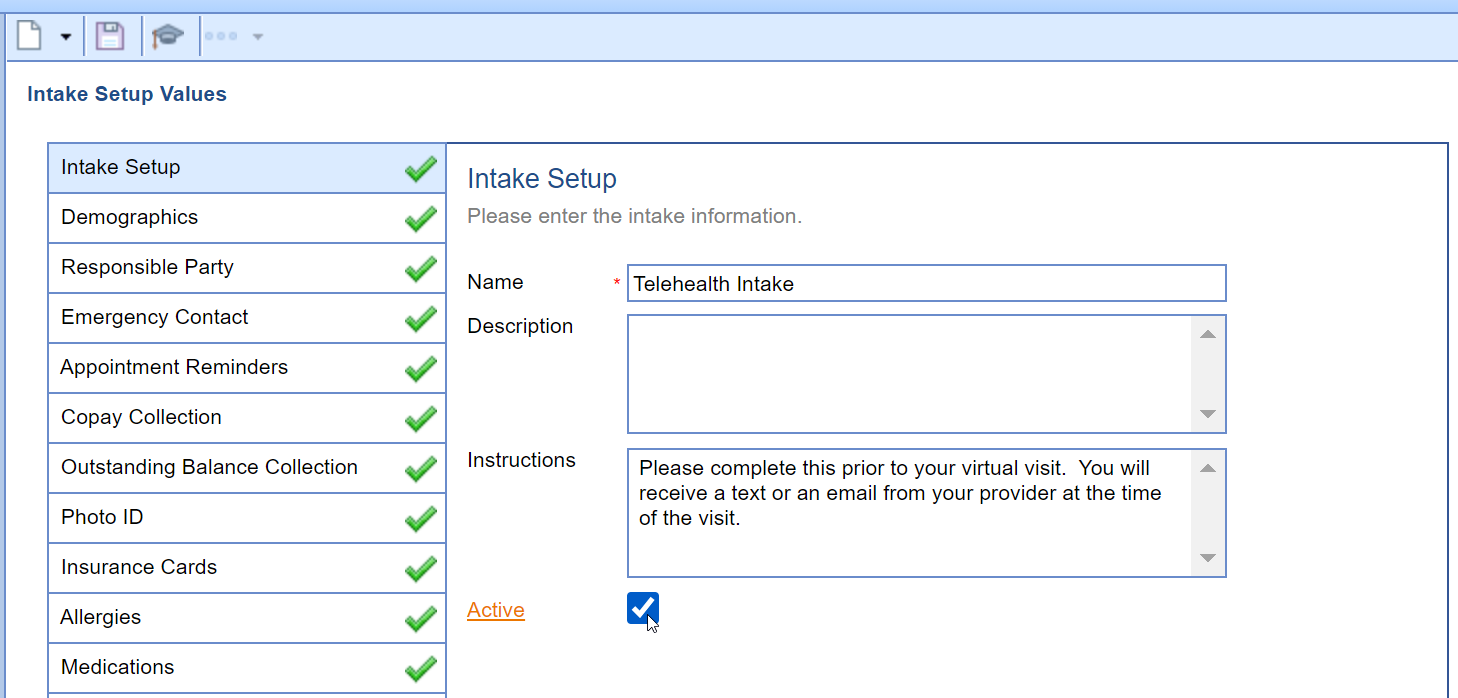
- Press the Save button.
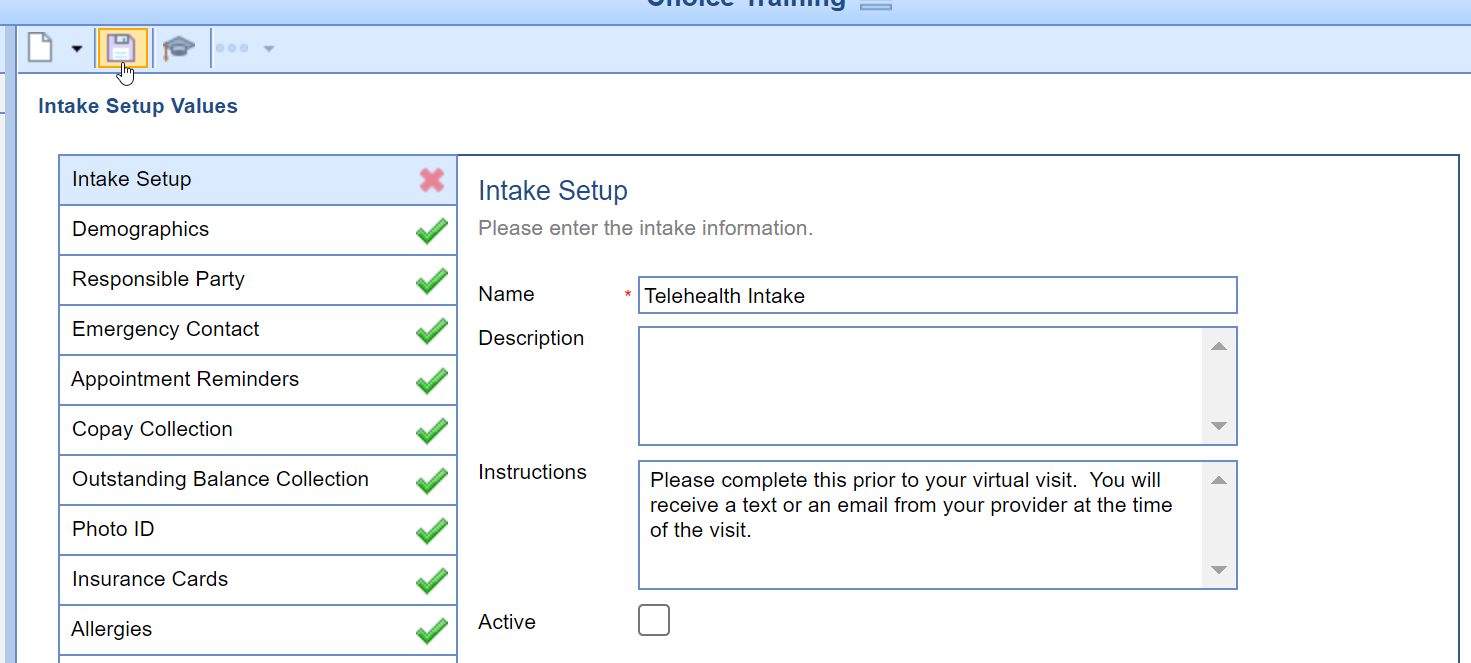
Follow these steps to remove or add a required field for an Intelligent Intake form:
- Access the Intelligent Intake Setup screen.
- Click on the Intake form you wish to add/remove required fields for.

- Select the Section Tab you wish to add/remove required field for.
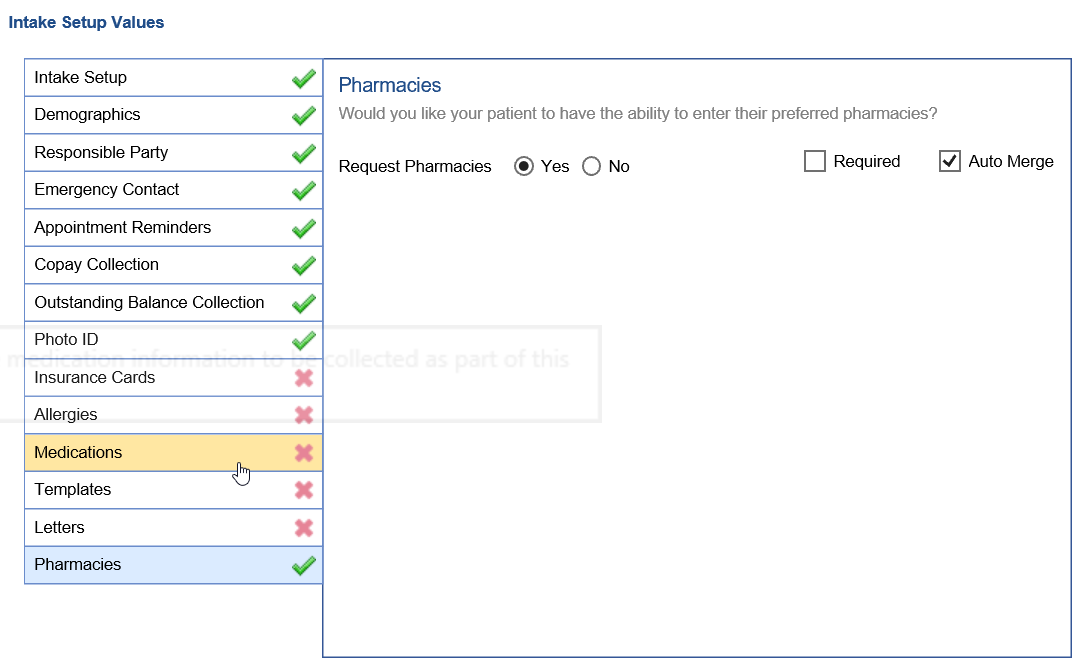
- Some of the required fields are at a section level, others are at the field level. In this first example for the Medications section, the requirement is at the section level. Make sure the Request section is set to Yes, otherwise this section will not display at all for the patient.
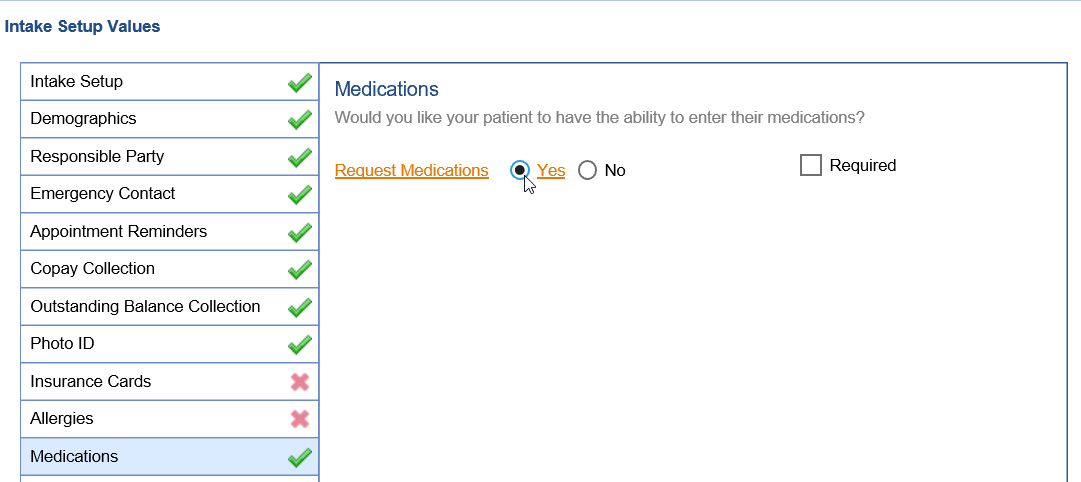
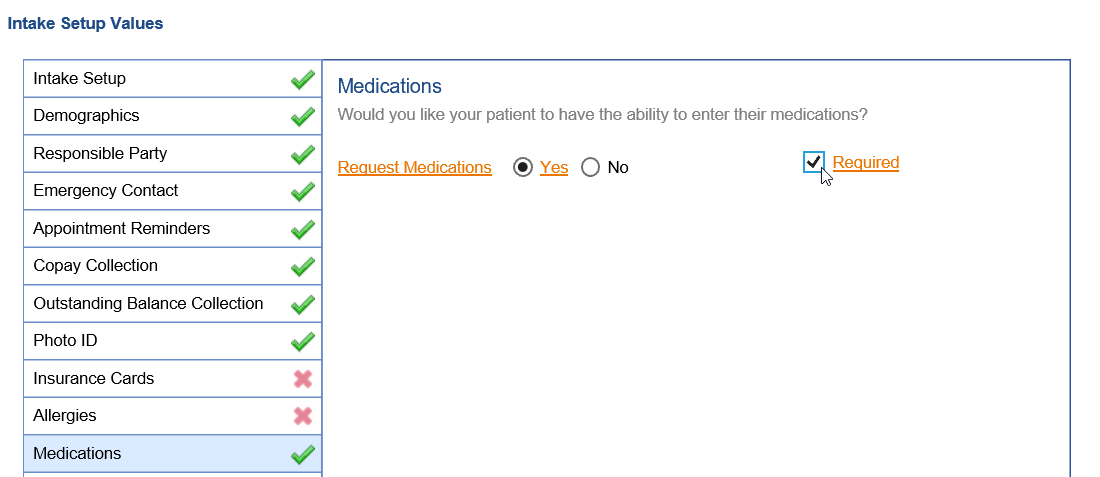
- Select the Required checkbox to require the section before completing the intake. De-select the Required checkbox to make the section optional for the patient to fill out.
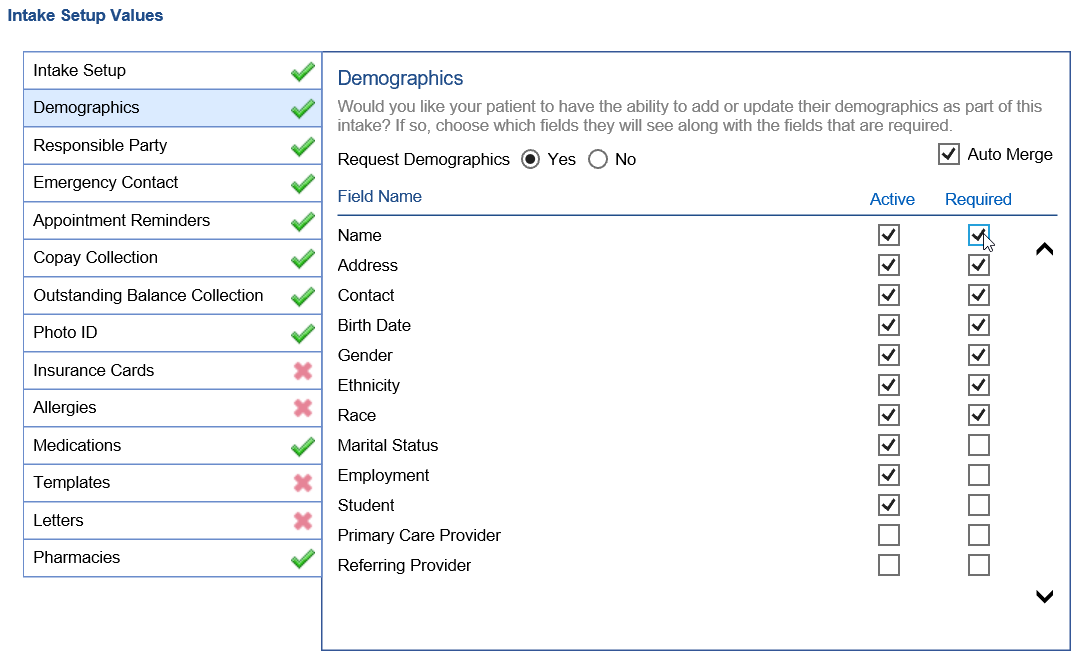
- Click on the Demographics tab. The demographics section has requirements at the field level instead of the section level.

- Again, make sure to set Request Demographics to Yes - this ensures the intake form requests demographics information.

- Next, set the Active checkbox to Yes next to each of the demographics fields you wish to capture. Select the Required checkbox to require the field. De-select the required checkbox to make the field optional.
- Press the Save button to save your changes.

Follow these steps to remove or add a field for an Intelligent Intake form:
- Access the Intelligent Intake Setup screen.
- Click on the Intake form you wish to add/remove fields for.

- Select the Section Tab you wish to add/remove field for.
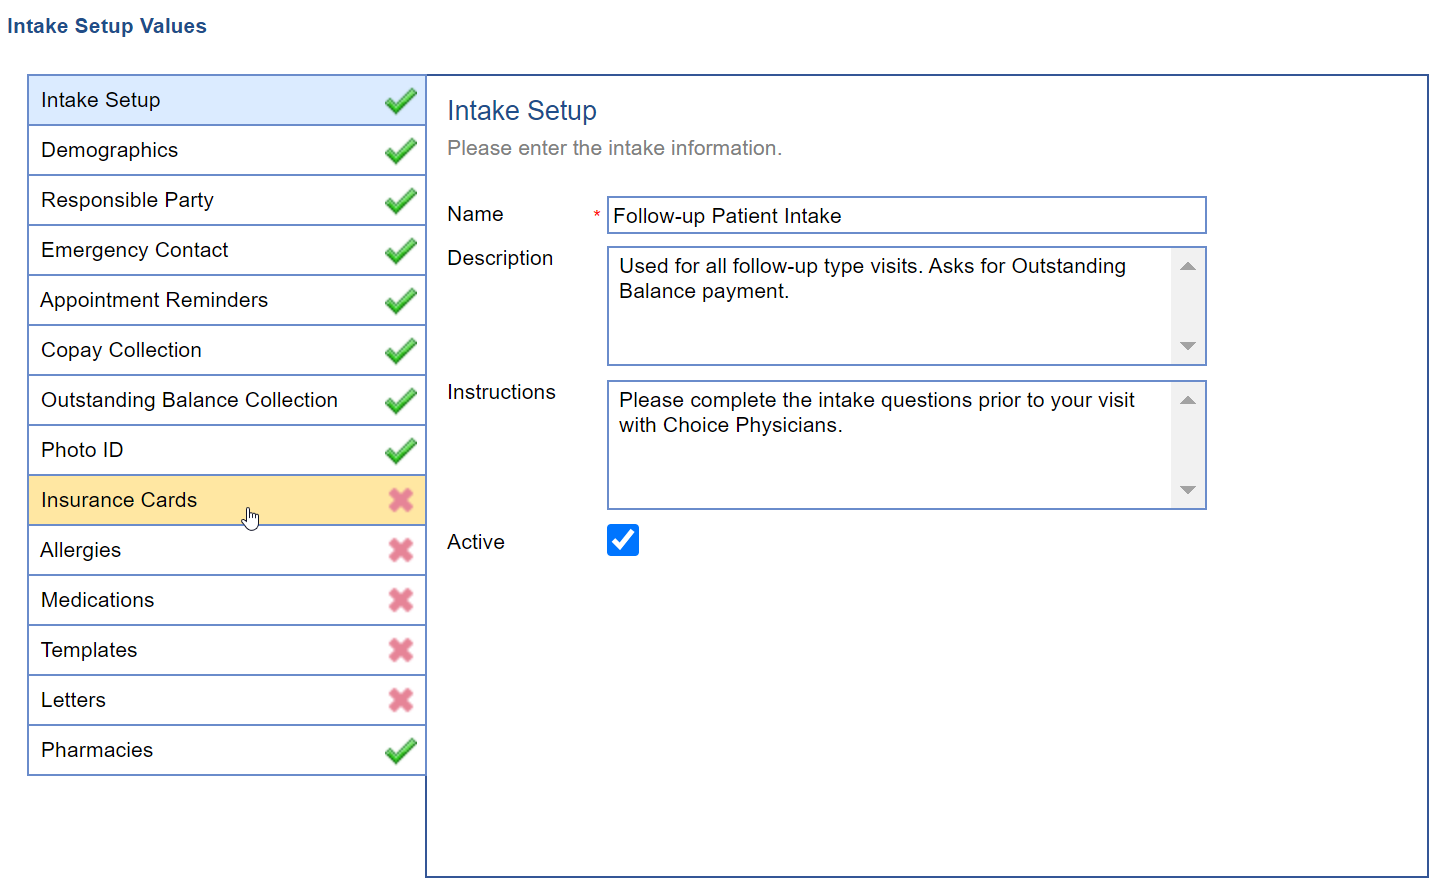
- First, make sure the section Request Insurance Cards is set to Yes to enable it or set to No to disable it.
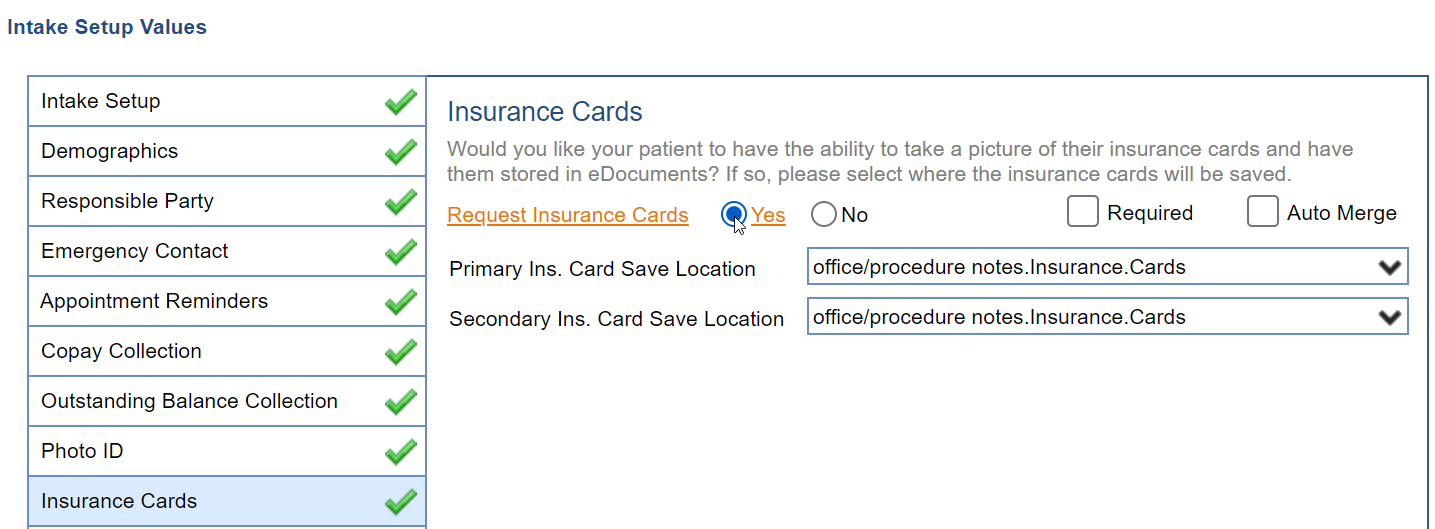
- Second, make sure to select the other appropriate values for the section:
Select the Required checkbox to require a patient provide his/her insurance cards.
Choose the Auto Merge checkbox to automatically merge the insurance cards captured into the patient's chart without requiring your staff to review them first.
Select the appropriate Primary and Secondary Insurance Card Save location to save the images in.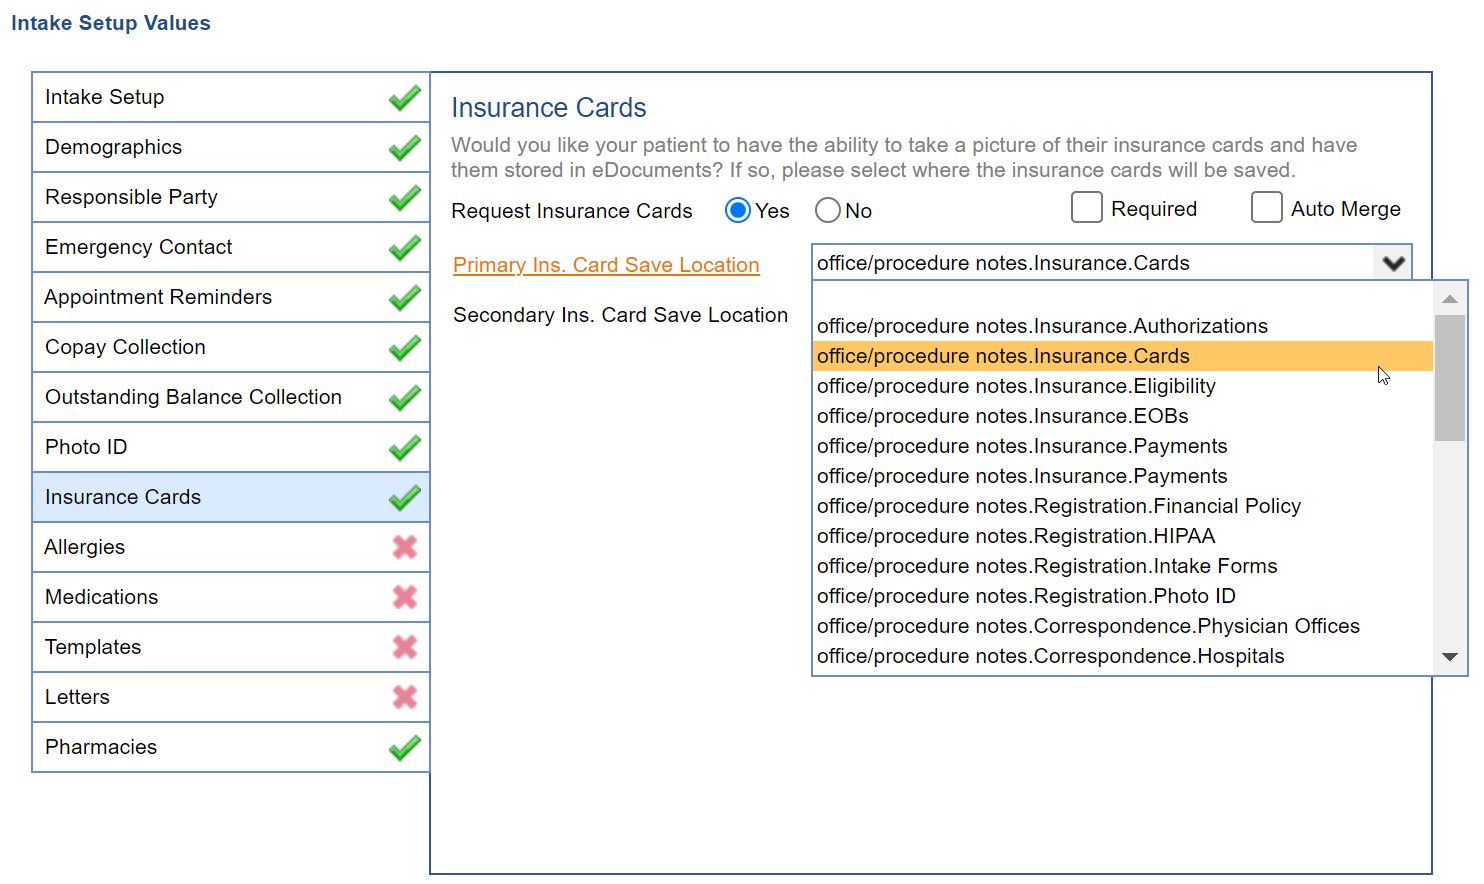
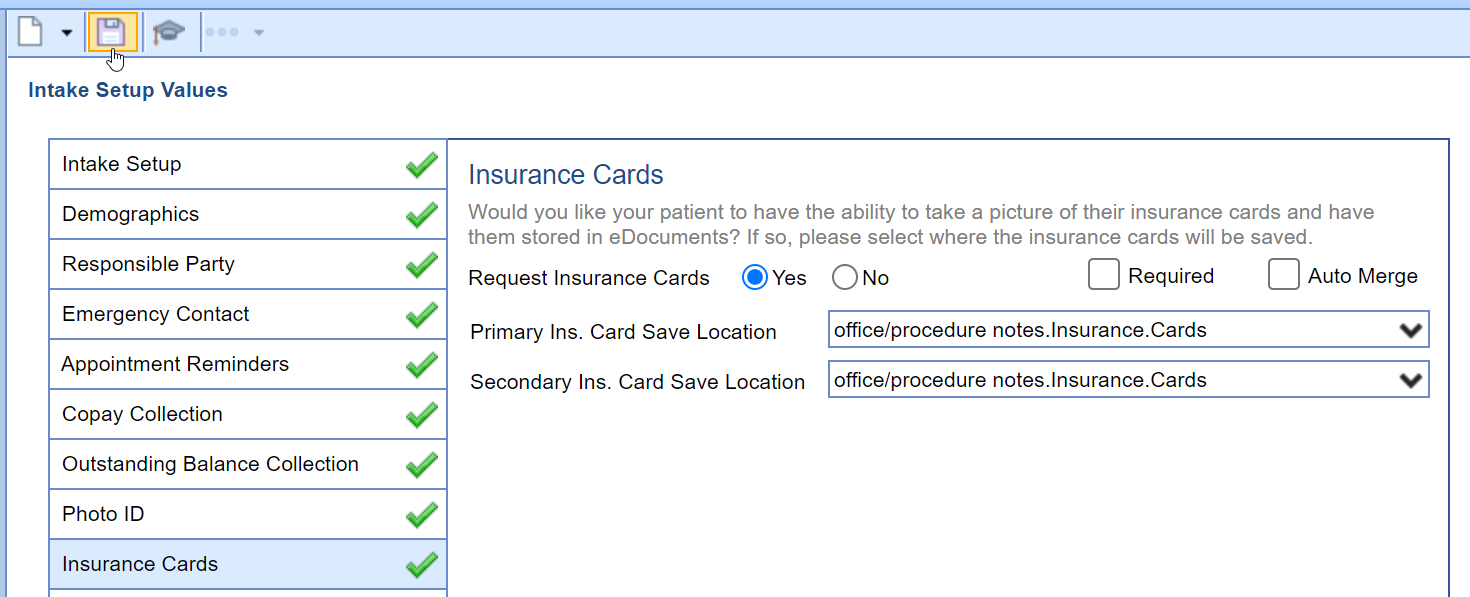
- Press the Save button to save your changes.
This article describes the functionality available for Template Demographics within the Intelligent Intake, a subset of these configurations can be made to EMR templates (read more). If you DO NOT have access to Setup > Templates, then you will either need to have your permissions changed via Roles OR reach out to Support with a Template Change Request Form (TCRF) to request these changes (recommended).
Executive Summary
Filter entire template categories from the patient's view within the Intelligent Intake based on Age, Gender, Diagnosis, and/or specific Payer or Financial Class affiliated with the patient's insurance.
Template Demographics Use
Template Demographics were introduced to allow providers to visually exclude the need to navigate Template Categories, "Blue Bars", only to be used for specific scenarios. This functionality was introduced for Intelligent Intake templates as well. Unlike the EMR's use of the feature, on the Intake side, the Template Categories are filtered out of the Intake Form. Meaning the entire Template Category is removed from the patient's view as opposed to a grey-colored section as seen in the EMR.
Real World Example
Age & Gender filters may be applied to questionnaires like the AUA-SI form. This questionnaire is only intended for male adults experiencing symptoms specific to urologic conditions.
Furthering that, it may be the case that you'd want all New Male Patients to complete the form prior to their first visit, but you may want to only ask this on return visits in cases where specific ICD-10 codes have been added to the patient's problem list during the initial encounter or thereafter. In this case, a copy of the existing Intake Template containing the questionnaire(s) can be made and a different Template Demographic created/applied to each Template Category within the two versions of the questionnaire(s) template.
Following the initial creation and assignment of the intake types, each of those templates would be assigned to their respective Intake Types, ex. The "New Patient Packet" Intake Type is assigned the Age/Gender template, and "Follow-Up Visits" is assigned the ICD-10 version.
Screen Definitions & Intelligent Intake Effect
Using the corresponding numbers shown in the above screenshot, reference the below definitions and their corresponding effect in the Intelligent Intake form.
Section 1: Toolbar & List
This section holds the buttons related to setting up new, deleting existing, and saving changes to different Template Demographic setups. You may select the existing setup to see the current configuration and where this is currently being used by referencing Section 3. Unlike the functionality described in Section 2, there are no Intake effects to describe in Section 1.
Save
The save button, floppy disk icon, will immediately apply the changes to the assigned templates and affiliated Intake Form(s) containing the Intake Template listed in Section 3. Namely, you will not need to reset the current window in order to assign an Intake Form containing the Template Demographic changes.
New
The new button, white paper icon, allows a user to create a new Template Demographic type.
Delete
The delete button, red X icon, is used to remove a Template Demographic type from the list, these changes will occur immediately and can not be undone. It is not recommended to delete these types so they can be referenced later. It is best practice to disassociate the associated templates and leave the Template Demographic item in the list.
Demographic Setup List
The list, directly below the toolbar in Section 1, contains all existing Template Demographic types. Selecting an item in the list will allow the user to view/modify the configuration.
Section 2: Configuration
This section holds the configuration options that affect both EMR & Intake Templates, this article describes the functionality of these configurations and their effect on the Intelligent Intake. In either case of EMR or Intake, multiple configurations within the same Template Demographic type will narrow the number of patients who are expected to complete the assigned Template Category (ex. Patient is 65 or older AND the patient is Male. As opposed to, the patient is 65 or older OR the patient is male).
Name
The name is an internal description for the Template Demographic type. This can be named at the user's discretion, but it is recommended that this adequately describes the purpose/use of the type. The Name will NOT be displayed anywhere outside of the setup screen and setup of the Template Categories.
Gender
Based on the gender of the patient (from Patient Setup > Demographics), the specific Template Category (Blue Bar) will be excluded from the Intake Form when the Intelligent Intake is loaded by a patient that falls outside of the selected criteria.
Options Available: Male, Female, Unknown
Age
Based on the age of the patient (calculated from DOB in Patient Setup > Demographics), the specific Template Category (Blue Bar) will be excluded from the Intake Form when the Intelligent Intake is loaded by a patient that falls outside of the selected criteria. The section will be enabled for patients that are within the range of the configured Template Demographic.
Options Available
The age range can accept a top and bottom limit for the age range, but neither is required. You may set up the Template Demographic to only look for patients 35+ years old without having to set a top limit.
Operators
>= Age | Greater than or equal to
> Age | Greater than
= Age | equals
Age <= | Less than or equal to
Age < | Less than
 [XX.1] [Operator.1] Age [Operator.2] [XX.2]
"Age is [Operator.1] [XX.1] year(s) old, and Age is [Operator.2] [XX.2] year(s) old"
ICD9 Codes (accepts ICD10)
The diagnosis configuration, titled 'ICD9 Codes', is not limited to ICD9 codes, ICD10 codes are also accepted in this field. All entries must be comma separated and should not include a period "." in the code. This list will be compared against the patient's problem list. Active problem list entries matching any of the codes will cause the section to display for the patient. Patients without matching ICD10s will have this Template Category excluded from the Intake Form.
Example Input: N183, N184, N185, N186
Section 3: Assigned Templates & Categories
The third section contains the list of currently assigned templates & the specific Template Category affiliated with the selected Template Demographic. This section contains a list with 3 components: Type, Template, and Category. This corresponds to Chart Tab, Template Name/Description, and Blue Bar Name/Description (respectively).
Assignment List
As described above, the list will contain all currently assigned Template Categories affiliated with the selected Template Demographic. This is simply a view of the list, no modifications are made here. Assignments to Template Demographics are done within the Template itself within the individual Template Category.

Section 4: Payers & Financial Class
Specific to Intelligent Intake templates, Primary Payer/Financial Class, and Secondary Payer/Financial Class filters can be configured in order to only have specified Template Categories included when either condition is met by the patient completing the Intake Form.

Notice the figure above, this screen should be viewed as 2 separate conditions that can be met in order to display the section to the patient. You have the option to configure the Primary Payer OR Primary Insurance Type the patient has on file. There are then corresponding options on the right-hand side for Secondary Insurance.
Using the above example, only patients who have either Medicaid or Medicare (payer financial classes) associated with their Primary Insurance OR have the "AARP Medicare Complete HMO" payer as their Secondary Insurance will display the assigned Template Category to the patient.
Primary / Secondary
Payer
The Payer dropdown allows the section of Active and Inactive payers. This condition will only be evaluated if the checkbox is selected.
Insurance Type
The Insurance Type dropdown contains a list of all financial classes available in the system. The condition will only be evaluated if the checkbox is selected.
Similar to the functions affiliated with Template Demographics for Intake Templates or EMR Templates, there are options available for limiting the template data expected to be completed by the patient. Unlike the Template Demographic filters that must be configured at the Template Category level, the Intake Template Filter described within this article affects the entire template's ability to be displayed to the patient based on the specific date filters applied to the entire Intake Template.
Executive Summary
Intelligent Intake Templates can be assigned to patients based on the last time the corresponding EMR Template was completed OR after a specified date. Making timing configurations may assist in reducing the time spent in the waiting room filling out paperwork, and mitigate patient frustration with completing repetitive information during follow-up visits.

Template Timing Use
Template Timing was introduced in order to better control what data is being requested from the patient within an Intelligent Intake form associated with follow-up visits. Specifically, this setting will affect the entire template's display within the Intake Form. In this scenario, it is best to use the Last Encounter Date option. However, there are additional use cases accounted for with the configuration option for a Specific Date. In either case, unless the condition is met, the entire Intake Template will be excluded from the patient's view within the Intelligent Intake.
Real Word Example
There are many possible use cases for the Intake Template Filter, the primary use of this filter will be the Last Encounter Date option. This will allow a practice to configure a specific Intake Template to only display in the event the corresponding template in the EMR, the mapped template, has not been completed and/or updated within the provided range.
In a scenario where a patient should only complete a questionnaire every 4 weeks, the Intake Template containing the questionnaire, the "PHQ-9" for example, could be configured to only be displayed if the last PHQ-9 template seen in the EMR had not been completed in over 4 weeks. Given this setup, if a patient had a weekly follow-up appointment, and that appointment type is associated with the "Follow-Up" Intake Form, the PHQ-9 would only be filled out by the patient every 4th visit.
The other configurable filter, Specific Date, may be used to assist in making planned changes to an Intake Form. For example, if there is a new template needed within the Intelligent Intake, and this template shouldn't be used until a future date, ex. 12/31/2024. An Intake Template Filter may be set up to only display the Intake Template after the specified date.
In practice, you may have a patient-facing form required to be gathered per the government. An Intake Template could be created on your behalf and configured with the Specific Date filter to only be available on the day the regulation goes into effect. This automation can help ensure you are prepared for these types of changes without having to remember to make them the day of.
Screen Definitions
Always (Default)
This option is the default for all Intake Templates. The template will ALWAYS display to the patient, however, there may be Template Demographics associated with the template as well that may affect the Template Categories displayed to the patient.
Last Encounter Date (Mapped Template) Older Than:
Based upon the corresponding template in the EMR, the most recent Encounter Date associated with a template within the chart would be evaluated before displaying the Intake Template to the patient. If the date falls OUTSIDE of the range, the Intake Template will be displayed.
Options: ## of {Days / Weeks / Months}
Encounter Date Explained
Encounter Date under the purview of EMR templates is what you see in the {Chart Tab} > History - Encounter Date column. For history templates, the encounter date is set to the date the template was saved on.

Specific Date
Similar to the Last Encounter Date option, the Specific Date configuration is used to only display the template to the patient if the condition is met. So, the template will display to the patient ON or AFTER the date entered in the setup screen. This evaluates if the Current Date >= Specific Date.
This article describes the functionality available for Intake Letter Filters within the Intelligent Intake. If you DO NOT have access to Setup > Letters, then you will either need to have your permissions changed via Roles OR reach out to Support with a Template Change Request Form (TCRF) to request these changes (recommended).
Executive Summary
Only display specific signature forms to patients based upon date and insurance rules. This filter assists in customizing the patient's experience of Intelligent Intake without being burdened with the unnecessary or redundant paperwork.
Letter Filter Use
Letter Filters were introduced to allow practices additional automation options for signature forms within the Intelligent Intake. Filters may be applied to include or exclude letters (signature forms) within the Intelligent Intake based on Date and/or Insurance configurations.
Example
An agreement specific to a payer or financial class may only be needed once a year. An Intake Letter can be configured with these constraints to ensure the patient with Medicare is only presented* with the document once every 12 months *Assumes the patient is assigned an Intake Form containing the configured letter
Screen Definitions
Letter Availability & Types
The checkboxes located at the top of the Advanced Letter Options are used to determine where the letter is available throughout the web application. None of these options affect the Intake Letter's display. However, it is important to note that often the letters without an assignment here are considered inactive.
Date Filters
Similar to the Intake Template Filter, timing rules may be applied to letters associated with the Intelligent Intake. These rules determine if the letter is presented to the patient within the assigned Intake Form.
Intake Sign Off
The intake sign-off button determines if the letter is able to be assigned to Intake Forms. This must be selected to configure the date filters described below.
Always
The Intake Letter will Always be displayed to the patient when filling out an Intake Form containing this letter.
Every ## Months
In cases where an Intake Letter only needs to be completed by a patient every so often, this configuration will accept the cadence in which the letter is displayed to the patient. Based on the most recent instance of that letter existing within the patient's chart, the configured range will be checked against that date. If the letter was not completed within the configured months, the Intake Letter will display within the assigned Intake Form.
After Specific Date
Often there are policies that come into effect after specific dates, this option allows an Intake Letter to remain hidden until the specified date. This configuration allows the practice to plan for new policies ahead of time and ensure the forms are presented to patients at the correct time.
Populate Signature on File
The signature on file option does not affect the Intake Letter's ability to be displayed within the intake, but it will set the Signature on File Date within Patient Setup once the Intake Form is submitted and merged into the chart.
Insurance Filters
Notice the figure above, this section of the screen should be viewed as 2 separate conditions that can be met in order to display the section to the patient. You have the option to configure the Primary Payer OR Primary Insurance Type the patient has on file. There are then corresponding options below for Secondary Insurance.
The two conditions are evaluated separately, if either condition is true the letter will be displayed to the patient.
Payer
The Payer dropdown allows the section of Active and Inactive payers. This condition will only be evaluated if the checkbox is selected.
Insurance Type
The Insurance Type dropdown contains a list of all financial classes available in the system. The condition will only be evaluated if the checkbox is selected.


