Follow these steps to clear your computer's Internet Explorer Cache/Temporary Internet Files:
- Navigate away from www.officemd.net (e.g. go to yahoo.com)
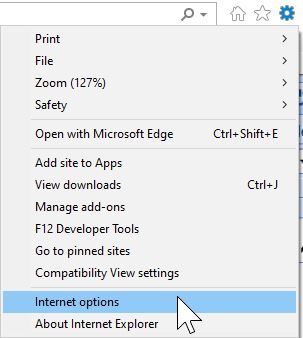
- Click on the Tools button

- Select Internet Options
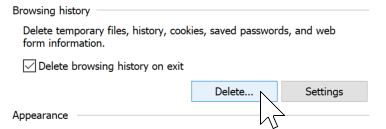
- Click on the Delete button under the Browsing History section
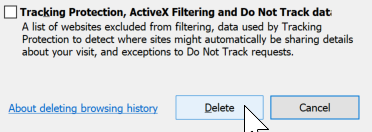
- Select the Cookies and website data

- Click the Delete button
- Close all Internet Explorer browsers and Login again
Practices connecting to iSalus Healthcare's EMR on a domain will want to use Group Policy described below.
These Group Policies will configure Internet Explorer on your end-users' computers so that they do not need to manually configure their PC's using the 'OfficeEMR Configuration' process upon login.
Overview
There are 2 key components to configure:
- IE Settings per logged in Windows User
- ActiveX Controls Installed and Registered on each individual computer.
The OfficeEMR Configuration File [setup.exe] found on the login page does both of these for a non-domain computer; however, for it to work on a domain, please download: iSalus EMR Group Policy Excel Spreadsheet.xlsx
The Settings for Internet Explorer ONLY APPLY to the Internet Explorer Trusted Sites Zone, not regular Internet Browsing.
iSalus EMR Group Policy Excel Spreadsheet Tab Description
Tab #1: MSI File
The first tab in the Excel file are the instructions to get the .msi file to have Group Policy deployed.
This just needs to happen at least once per PC so the files are there and the ActiveX Controls get registered in the Windows Registry on that computer for the whole PC regardless of how many individual Windows Domain users logon to that PC.
Tab # 2: Trusted Sites
The second tab in the Excel file are the URLs you want Group Policy to add into IE's Trusted Sites Zone.
Tab #3 and #4: GPO Settings
The Third and Fourth tabs give you all the GPO settings for LOCKED-DOWN Trusted Sites Zone AND Trusted Sites Zone.
For the Internet Explorer settings to be consistent on the domain controller, create the GPO for Locked-Down Trusted Sites Zone and Trusted Sites Zone and attach that GPO to the Organizational Unit (OU) those users are in to be run each time upon login to the domain. If not every domain user will run iSalus, it is recommended to create a separate OU for the iSalus users and attach this GPO Policy to it. Once confirmed, add any other needed GPOs for the user to maintain all of the domain functionality they need, if applicable.
Tab #5 and #6: Registry Settings
The fifth and sixth tab in the Excel file is an Extra Registry Setting to have Group Policy push out upon login of a Domain User.
This has to be pushed out each time the user logs into the domain so IE will stay consistent. This is a long time known issue of problems with domains and IE 11 not staying consistent with settings from very long ago. The support of IE 11 for now is only security updates and the program will work as is on Windows 10.
Tab #7: IE Page Setup
The sixth tab is used to describe the IE's Page Setup settings needed. This ensure no issues with printing.
Compare Policies
Once you are complete with your Group Policy Settings, it should resemble the PDF file below. Please refer to this for comparison: iSalus EMR Completed Group Policy PDF.pdf
iSalus Desktop Icon
The install of the .msi file will create an iSALUS icon on the desktop. It is recommended to set the iSALUS icon the configuration puts on the desktop to open with IE; therefore, not being affected by your set default browser in case it is different.
Set iSALUS icon to Open in IE all the time (regardless of the set default web browser on that computer):
- Right Click on the iSALUS icon and select Properties.
- Click on the General Tab up top.
- Click on Browse, then click on more Apps and select Internet Explorer
- Click OK.
- Click OK.
The configuration tool will allow a user to view eDocuments and sets the Choice platform to run appropriately on Internet Explorer.
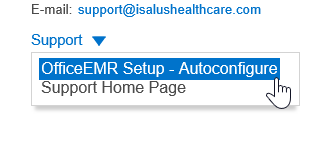
- From the Login page, www.officemd.net, click the blue dropdown arrow next to the Support icon.
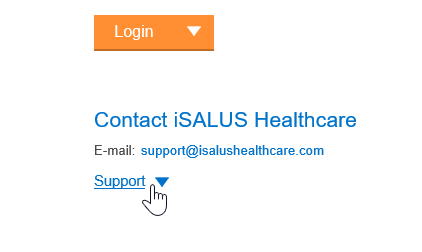
- Select the OfficeEMR Setup - Autoconfigure option.
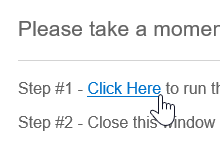
- From the setup page, click the Click Here icon to load the tool.
- You will receive a prompt to run the tool - click Run.

- From the first window prompt, choose Next.
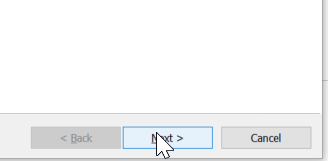
- If you are running this for the first time, click Next to complete.
If running this in a subsequent time, choose the Repair option and then Next.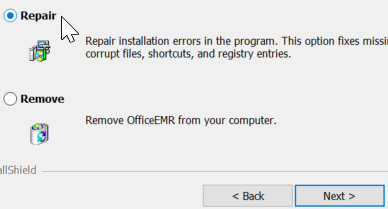
- Click Install to complete the configuration.
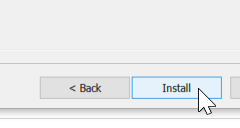
- Close out of all browser windows and log back in. The application has been configured.
iSalus supports the use of Topaz Signature Pads within OfficeEMR. There are some considerations to make before completing all steps in the Topaz Installation Guide as the steps will differ depending on the individual workstation using the pad.
Steps to Complete
Depending on the browser used by the staff member with the Signature pad, there is different software that will need to be installed.
Internet Explorer Setup
- Access the Installation Guide
- Complete steps 3.1 (1-4)
Google Chrome Setup
- Access the Installation Guide
- Complete steps 3.1 (1-4)
- Complete steps 3.2.1 (1-3)
After the above is complete you can test this by accessing a test patient's chart and signing a letter setup for signature consent. If you need to set up or create a letter for this, please create a support ticket.


